
MySecureShell Documentation
Release 1.33
Pierre Mavro & Sebastien Tardif
Dec 10, 2018


ii

MySecureShell Documentation, Release 1.33
Contents 1

MySecureShell Documentation, Release 1.33
2 Contents

CHAPTER 1
Introduction
1.1 What is MySecureShell?
MySecureShell is a solution which has been made to bring more features to sftp/scp protocol given by OpenSSH.
By default, OpenSSH brings a lot of liberty to connected users which imply to trust in your users. The goal of
MySecureShell is to offer the power and security of OpenSSH, with enhanced features (like ACL) to restrict
connected users.
MySecureShell was created because of the lack of file transfer features in OpenSSH. OpenSSH was not designed as a
file transfer solution, that’s why we made MySecureShell.
MySecureShell is not a patch for OpenSSH, it’s a shell for users. It has the advantage to:
• Avoid including security holes in OpenSSH
• No dependency on against an OpenSSH version
• No OpenSSH recompilation is required
So MySecureShell remains easy to install, secure and easy to configure.
1.2 Why SFTP and not FTP?
If you’re wondering why you should take MySecureShell as an SFTP server instead of a classical FTP, there are several
reasons:
1. You do not have to open some dedicated firewall ports for file transfers
2. You are using one of the most used and secure protocol (SSH)
3. You do not have to manage SSL certificates to guaranty the security
4. As easy to use as a classical FTP server
5. As many or more features that you can find on any classical FTP servers
6. Easy to install, configure, maintain and use
3

MySecureShell Documentation, Release 1.33
1.3 What are MySecureShell’s SFTP new features to OpenSSH
Is MySecureShell really add enhanced features to OpenSSH sftp? Yes! Here is a sample of features of what MySe-
cureShell is able to give:
• Bandwidth control
• Only authorized files and folders can be shown
• Advanced logging information
• ACL can be made with IP/Usernam/Groups/VirtualHost/. . .
• Confined environments (chroot, which is also available in the latests version of OpenSSH)
• Restrict users to have sftp only (shell access is disabled by default)
• And more. . .
1.4 Which Operating Systems are compatible with MySecureShell?
MySecureShell has been developed to work on several types of Operating Systems like Linux, Mac OS X, Solaris,
BSD and Windows (with Cygwin).
We unfortunately do not package MySecureShell for all platforms but we do our best to bring binary packages to most
used/common Operating System for production usage like:
• Linux (Debian/Ubuntu)
• Linux (RedHat/CentOS/Fedora)
• Mac OS X
If binary packages are not available for your system, we do our best to make them easily installable with scripts shell
and Makefiles.
4 Chapter 1. Introduction

CHAPTER 2
Quick Try
Before installing in production, you may want to try MySecureShell. In nowdays the most known and easy tools to
test new softwares are Vagrant and Docker.
We are providing both solutions, you can choose the easiest for you.
2.1 Docker
Topics
• Docker
– Install prequesites
– Run Dockerfile
– Boot the container
5

MySecureShell Documentation, Release 1.33
– Connect and test
Docker is an open platform for developers and sysadmins to build, ship, and run distributed applications. It only works
on Linux.
2.1.1 Install prequesites
How does it works? First of all, you need install Docker on your Linux host:
• Docker: easily create containers
2.1.2 Run Dockerfile
Once done, on your machine install the MySecureShell Dockerfile:
$ docker build -t mysecureshell \
https://raw.githubusercontent.com/mysecureshell/mysecureshell/master/deployment-tools/
˓→docker/Dockerfile
Here is the content of the Dockerfile:
FROM debian:stable
MAINTAINER Pierre Mavro <[email protected]>
##################
# User Quick Try #
##################
RUN echo 'deb http://mysecureshell.free.fr/repository/index.php/debian/7.1 testing
˓→main' \
> /etc/apt/sources.list.d/mysecureshell.list
RUN echo 'deb-src http://mysecureshell.free.fr/repository/index.php/debian/7.1
˓→testing main' \
>> /etc/apt/sources.list.d/mysecureshell.list
RUN gpg --keyserver hkp://pool.sks-keyservers.net --recv-keys E328F22B
RUN gpg --export E328F22B | apt-key add -
RUN apt-get update
RUN DEBIAN_FRONTEND=noninteractive apt-get -y -o Dpkg::Options::="--force-confdef" \
-o Dpkg::Options::="--force-confold" install mysecureshell whois procps openssh-
˓→server
RUN apt-get clean
RUN mkdir /var/run/sshd
RUN pass=$(mkpasswd -m sha-512 -s mssuser) && useradd -m -s /usr/bin/mysecureshell -p
˓→$pass mssuser
RUN echo 'root:root' | chpasswd
RUN chmod 4755 /usr/bin/mysecureshell
# Start SSHd
EXPOSE 22
CMD ["/usr/sbin/sshd", "-D"]
2.1.3 Boot the container
You can now launch the Docker container:
6 Chapter 2. Quick Try

MySecureShell Documentation, Release 1.33
$ docker run -d -p 22222:22 mysecureshell
2.1.4 Connect and test
MySecureShell is now ready to serve! From your host machine, you can connect with user mssuser and mssuser for
the password:
$ sftp -P 22222 [email protected]
[email protected]'s password:
Connected to 127.0.0.1.
sftp> ls
sftp> pwd
Remote working directory: /
In parallel, connect from your host machine to the Virtual Machine (root password is root):
$ ssh -p 22222 [email protected]
and see the current connected user with sftp-who command:
$ sftp-who
--- 1 / 10 clients ---
Global used bandwith : 0 bytes/s / 0 bytes/s
PID: 3389 Name: mssuser IP:
Home: /home/mssuser
Status: idle Path: /
File:
Connected: 2014/08/19 15:38:27 [since 10s]
Speed: Download: 0 bytes/s [5.00 kbytes/s] Upload: 0 bytes/s [unlimited]
Total: Download: 1398 bytes Upload: 141 bytes
You can see the connected user :-). You can try to upload files to see the result. Of course you can use graphical
clients. And if you want to play with the server configuration, look at /etc/ssh/sftp_config.
2.2 Vagrant
Topics
• Vagrant
– Install prequesites
– Add Vagrantfile
– Boot the Virtual Machine
2.2. Vagrant 7

MySecureShell Documentation, Release 1.33
– Connect and test
– Update configuration file
Vagrant is a solution to create and configure lightweight, reproducible, and portable development environments. It
uses a virtualization solution like VirtualBox. The advantage of this solution is it works on many Operating Systems
(Linux, Mac OS and Windows).
2.2.1 Install prequesites
How does it works? First of all, you need install those elements:
1. VirtualBox: the virtualization tool
2. Vagrant: easily deploy a MySecureShell testing environment
2.2.2 Add Vagrantfile
Once done, on your machine create a folder and add get the Vagrantfile:
$ mkdir mysecureshell
$ cd mysecureshell
$ wget --no-check-certificate https://github.com/deimosfr/mysecureshell/master/
˓→deployment-tools/vagrant/Vagrantfile
Here is the content of the Vagrantfile:
# -
*
- mode: ruby -
*
-
# vi: set ft=ruby :
# MySecureShell Team <https://github.com/mysecureshell/mysecureshell>
# Vagrantfile API/syntax version. Don't touch unless you know what you're doing!
VAGRANTFILE_API_VERSION = "2"
$install_mss = <<INSTALL
echo "deb http://mysecureshell.free.fr/repository/index.php/debian/7.1 testing main
deb-src http://mysecureshell.free.fr/repository/index.php/debian/7.1 testing main
" > /etc/apt/sources.list.d/mysecureshell.list
gpg --keyserver hkp://pool.sks-keyservers.net --recv-keys E328F22B
gpg --export E328F22B | apt-key add -
apt-get update
apt-get -y install mysecureshell
pass=$(mkpasswd -m sha-512 -s mssuser)
useradd -m -s /usr/bin/mysecureshell -p $pass mssuser
chmod 4755 /usr/bin/mysecureshell
INSTALL
$install_mss_dev = <<INSTALL
apt-get update
#install git
apt-get -y install git
#get the sources
if [ -f /vagrant/id_rsa ] ; then
git clone [email protected]:mysecureshell/mysecureshell.git
else
(continues on next page)
8 Chapter 2. Quick Try

MySecureShell Documentation, Release 1.33
(continued from previous page)
git clone https://github.com/mysecureshell/mysecureshell.git
fi
chown -Rf vagrant. mysecureshell
#install C dependencies
apt-get -y install libacl1-dev libgnutls-dev gcc make
#install packaging dependencies
apt-get -i install build-essential fakeroot lintian devscripts debhelper ubuntu-dev-
˓→tools cowbuilder
#install Sphinxdoc dependencies
apt-get -y install sphinx-doc sphinx-common python3-sphinx libjs-sphinxdoc python-pip
˓→\
texlive-latex-base texlive-latex-recommended texlive-latex-extra texlive-fonts-
˓→recommended
#install sphinxdoc theme
pip install sphinx_rtd_theme
INSTALL
Vagrant.configure(VAGRANTFILE_API_VERSION) do |config|
config.vm.box = "deimosfr/debian-wheezy"
config.vm.network "forwarded_port", guest: 22, host: 22222
config.vm.network "private_network", ip: "192.168.33.10"
config.vm.network "public_network"
config.vm.provider "virtualbox" do |v|
v.memory = 768
v.cpus = 2
end
config.vm.provision "shell", inline: $install_mss
# Uncomment if you want to install all dev dependancies (to contribute for example)
#config.vm.provision "shell", inline: $install_mss_dev
end
2.2.3 Boot the Virtual Machine
As you can see, several network interfaces are available for your tests and an installation part will install MySe-
cureShell with a dedicated user. You can now boot the Virtual Machine:
$ vagrant up
==> default: Forcing shutdown of VM...
==> default: Destroying VM and associated drives...
==> default: Running cleanup tasks for 'shell' provisioner...
Bringing machine 'default' up with 'virtualbox' provider...
==> default: Importing base box 'deimosfr/debian-wheezy'...
==> default: Matching MAC address for NAT networking...
...
==> default: Server is now online.
==> default: Starting SFTP Server:
==> default: MySecureShell is now online
2.2.4 Connect and test
MySecureShell is now ready to serve! From your host machine, you can connect with user mssuser and mssuser for
the password:
2.2. Vagrant 9

MySecureShell Documentation, Release 1.33
$ sftp [email protected]
[email protected]'s password:
Connected to 192.168.33.10.
sftp> ls
sftp> pwd
Remote working directory: /
In parallel, connect from your host machine to the Virtual Machine and see the current connected user with sftp-who
command:
$ vagrant ssh
$ sudo sftp-who
--- 1 / 10 clients ---
Global used bandwith : 0 bytes/s / 0 bytes/s
PID: 3389 Name: mssuser IP:
Home: /home/mssuser
Status: idle Path: /
File:
Connected: 2014/08/19 15:38:27 [since 10s]
Speed: Download: 0 bytes/s [5.00 kbytes/s] Upload: 0 bytes/s [unlimited]
Total: Download: 1398 bytes Upload: 141 bytes
You can see the connected user :-). You can try to upload files to see the result. Of course you can use graphical
clients. And if you want to play with the server configuration, look at /etc/ssh/sftp_config.
2.2.5 Update configuration file
First we recommend you to read the configuration part of the documentation. When you’re ready, you can connect on
the Virtual Machine:
$ vagrant ssh
Then you’re able to edit the configuration file (/etc/ssh/sftp_config).
10 Chapter 2. Quick Try

CHAPTER 3
Installation
There are several ways to install MySecureShell. The simplest solution is to use binary packaged version. However if
MySecureShell is not packaged for your Operating System or distribution, you can compile the source and use a shell
script installer.
Choose your operating system or select from sources if not listed:
3.1 CentOS/RedHat installation
Topics
• CentOS/RedHat installation
– Dedicated MySecureShell repository
*
CentOS 6
*
CentOS 5
3.1.1 Dedicated MySecureShell repository
If you want to use the latest version of MySecureShell, the simplest way is to use the official dedicated repository.
11

MySecureShell Documentation, Release 1.33
CentOS 6
First, add the repository lines in /etc/yum.repos.d/mysecureshell.repo:
> echo "[mysecureshell]
name=MySecureShell
baseurl=http://mysecureshell.free.fr/repository/index.php/centos/6.4/
enabled=1
gpgcheck=0" > /etc/yum.repos.d/mysecureshell.repo
You’re now ready to install MySecureShell:
> yum install mysecureshell
CentOS 5
First, add the repository lines in /etc/yum.repos.d/mysecureshell.repo:
> echo "[mysecureshell]
name=MySecureShell
baseurl=http://mysecureshell.free.fr/repository/index.php/centos/5.5/
enabled=1
gpgcheck=0" > /etc/yum.repos.d/mysecureshell.repo
You’re now ready to install MySecureShell:
> yum install mysecureshell
3.2 Debian installation
Topics
• Debian installation
– Dedicated MySecureShell repository
*
Debian 8 (Jessie)
*
Debian 7 (Wheezy)
*
Debian 6 (Squeeze)
12 Chapter 3. Installation
MySecureShell Documentation, Release 1.33
3.2.1 Dedicated MySecureShell repository
If you want to use the latest version of MySecureShell, the simplest way is to use the official dedicated repository.
Debian 8 (Jessie)
MySecureShell is available by default in Debian Jessie. To install it:
> apt-get update
> apt-get install mysecureshell
To enable all features, you’ll have to set a setuid on the mysecureshell binary:
> chmod 4755 /usr/bin/mysecureshell
Debian 7 (Wheezy)
First, add the repository lines in /etc/apt/sources.list.d/mysecureshell.list:
> echo "deb http://mysecureshell.free.fr/repository/index.php/debian/7.1 testing main
deb-src http://mysecureshell.free.fr/repository/index.php/debian/7.1 testing main" > /
˓→etc/apt/sources.list.d/mysecureshell.list
Then import the GPG repository key:
> gpg --keyserver hkp://pool.sks-keyservers.net --recv-keys E328F22B
> gpg --export E328F22B | apt-key add -
You’re now ready to install MySecureShell:
> apt-get update
> apt-get install mysecureshell
Debian 6 (Squeeze)
First, add the repository lines in /etc/apt/sources.list.d/mysecureshell.list:
> echo "deb http://mysecureshell.free.fr/repository/index.php/debian/6.0 testing main
deb-src http://mysecureshell.free.fr/repository/index.php/debian/6.0 testing main" > /
˓→etc/apt/sources.list.d/mysecureshell.list
Then import the GPG repository key:
> gpg --keyserver hkp://pool.sks-keyservers.net --recv-keys E328F22B
> gpg --export E328F22B | apt-key add -
You’re now ready to install MySecureShell:
> apt-get update
> apt-get install mysecureshell
3.2. Debian installation 13

MySecureShell Documentation, Release 1.33
3.3 Fedora installation
Topics
• Fedora installation
– Dedicated MySecureShell repository
*
Fedora 19
*
Fedora 17
3.3.1 Dedicated MySecureShell repository
If you want to use the latest version of MySecureShell, the simplest way is to use the official dedicated repository.
Fedora 19
First, add the repository lines in /etc/yum.repos.d/mysecureshell.repo:
> echo "[mysecureshell]
name=MySecureShell
baseurl=http://mysecureshell.free.fr/repository/index.php/fedora/19/
enabled=1
gpgcheck=0" > /etc/yum.repos.d/mysecureshell.repo
You’re now ready to install MySecureShell:
> yum install mysecureshell
Fedora 17
First, add the repository lines in /etc/yum.repos.d/mysecureshell.repo:
> echo "[mysecureshell]
name=MySecureShell
baseurl=http://mysecureshell.free.fr/repository/index.php/fedora/17/
enabled=1
gpgcheck=0" > /etc/yum.repos.d/mysecureshell.repo
You’re now ready to install MySecureShell:
> yum install mysecureshell
14 Chapter 3. Installation

MySecureShell Documentation, Release 1.33
3.4 Mac OS X installation
Topics
• Mac OS X installation
– Dedicated MySecureShell repository
3.4.1 Dedicated MySecureShell repository
If you want to use the latest version of MySecureShell, the simplest way is to use brew tool.
First, install brew:
> ruby -e "$(curl -fsSL https://raw.github.com/Homebrew/homebrew/go/install)"
You’re now ready to install MySecureShell:
> brew install mysecureshell
3.5 Ubuntu installation
Topics
• Ubuntu installation
– Dedicated MySecureShell repository
*
Ubuntu 12.04
*
Ubuntu 10.10
3.4. Mac OS X installation 15

MySecureShell Documentation, Release 1.33
3.5.1 Dedicated MySecureShell repository
If you want to use the latest version of MySecureShell, the simplest way is to use the official dedicated repository.
Ubuntu 12.04
First import the GPG repository key:
> apt-key adv --keyserver pool.sks-keyservers.net --recv-keys E328F22B
Then, add the MySecureShell repository lines:
> add-apt-repository 'deb http://mysecureshell.free.fr/repository/index.php/ubuntu/12.
˓→04 testing main'
You’re now ready to install MySecureShell:
> apt-get update
> apt-get install mysecureshell
Ubuntu 10.10
First import the GPG repository key:
> apt-key adv --keyserver pool.sks-keyservers.net --recv-keys E328F22B
Then, add the MySecureShell repository lines:
> add-apt-repository 'deb http://mysecureshell.free.fr/repository/index.php/ubuntu/10.
˓→10 testing main'
You’re now ready to install MySecureShell:
> apt-get update
> apt-get install mysecureshell
3.6 From sources installation
This method is generally used because you need need to build the latest version from VCS repository, need to make
pull request for patching purpose or because it is not packaged on your Operating System.
The first thing to do is to get the sources and you will need git for that:
$ git clone https://github.com/mysecureshell/mysecureshell
$ cd mysecureshell
Then prepare the sources with the configure command:
$ ./configure --with-logcolor=yes
If everyhtings went fine, you should have something like this:
16 Chapter 3. Installation
MySecureShell Documentation, Release 1.33
MySecureShell has been configured with the following options:
Log file: /var/log/sftp-server.log (color: yes)
User binaries: /usr/bin
Shutdown file: /etc/sftp.shut
Configuration file: /etc/ssh/sftp_config
Supported:
Remote Admin : yes
UTF-8 Encoding : yes
You can now launch the compilation:
$ make all
And finally install it (with root user):
> make install
3.6. From sources installation 17

MySecureShell Documentation, Release 1.33
18 Chapter 3. Installation

CHAPTER 4
Configuration
To configure MySecureShell, you need to edit the /etc/ssh/sftp_config file. By default MySecureShell comes with a
commented example configuration. This may not match all your needs and you will need to modify it to get it working
as expected.
Here are documentations to help you to quickly have an overview of the configuration files and a complete list with
examples:
4.1 Overview
Topics
• Overview
– Parent tags
– Child tags
– Deprecated tags
To configure MySecureShell, you need to edit the /etc/ssh/sftp_config file. By default MySecureShell comes with a
commented example configuration. This may not match all your needs and you will need to modify it to get it working
as expected.
The configuration is made with 2 importants kinds of tags:
• Parent tags (level 1): defining a global context
• Child tags (level 2): defining a specific option for the parent tag
Configuration files should looks like this:
19
MySecureShell Documentation, Release 1.33
<ParentTag [parameter]>
ChildTag value
</Parent>
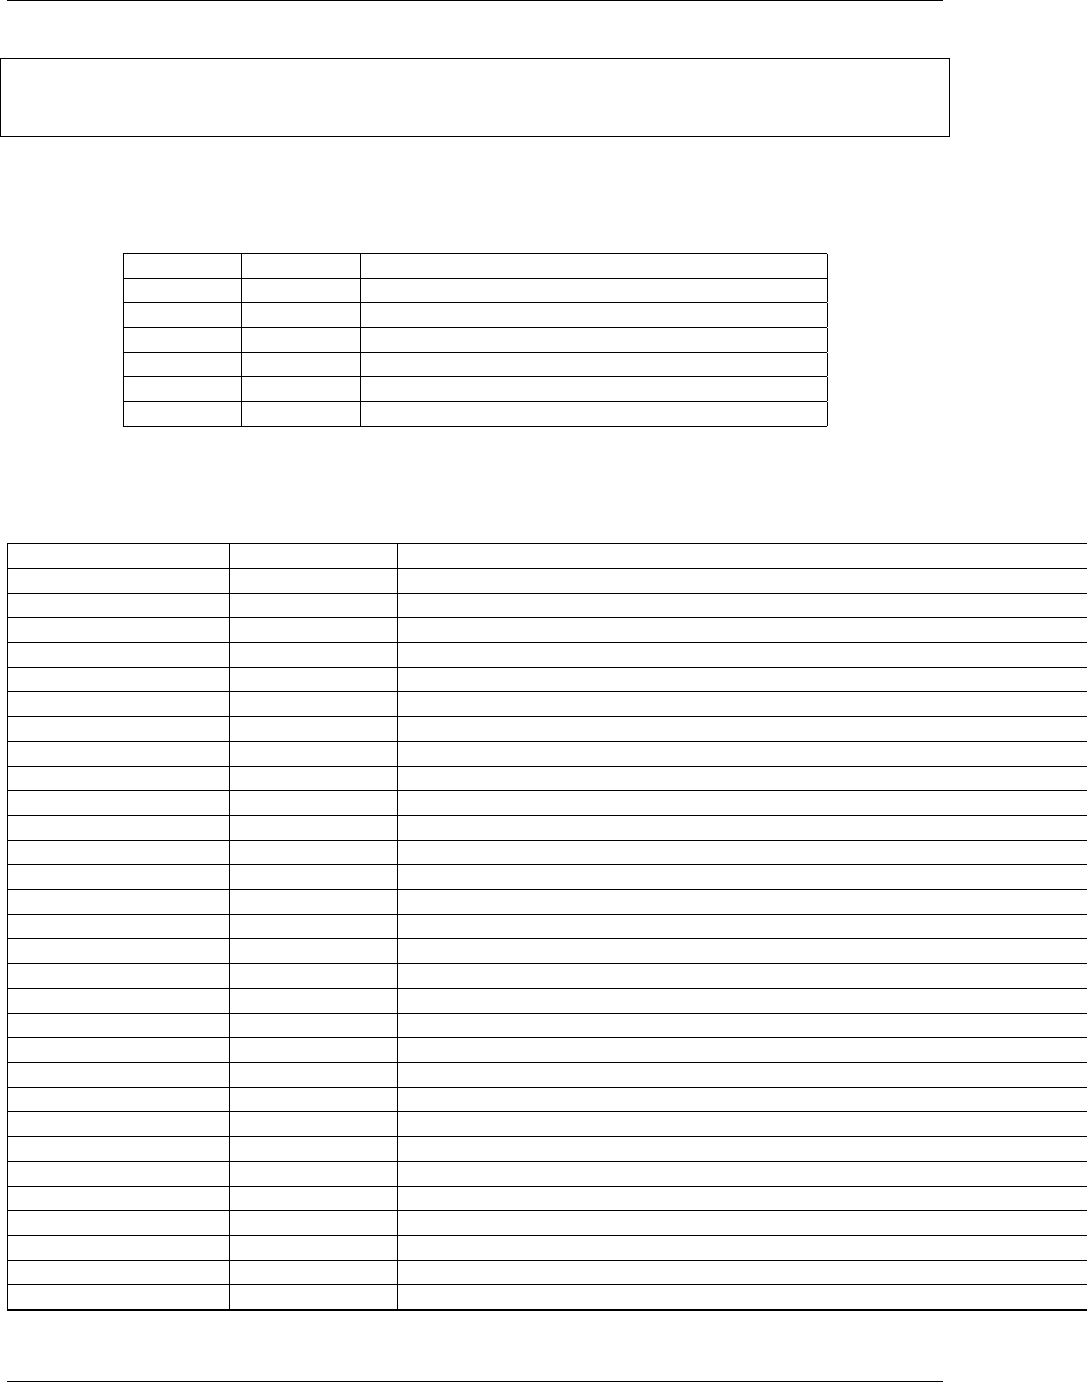
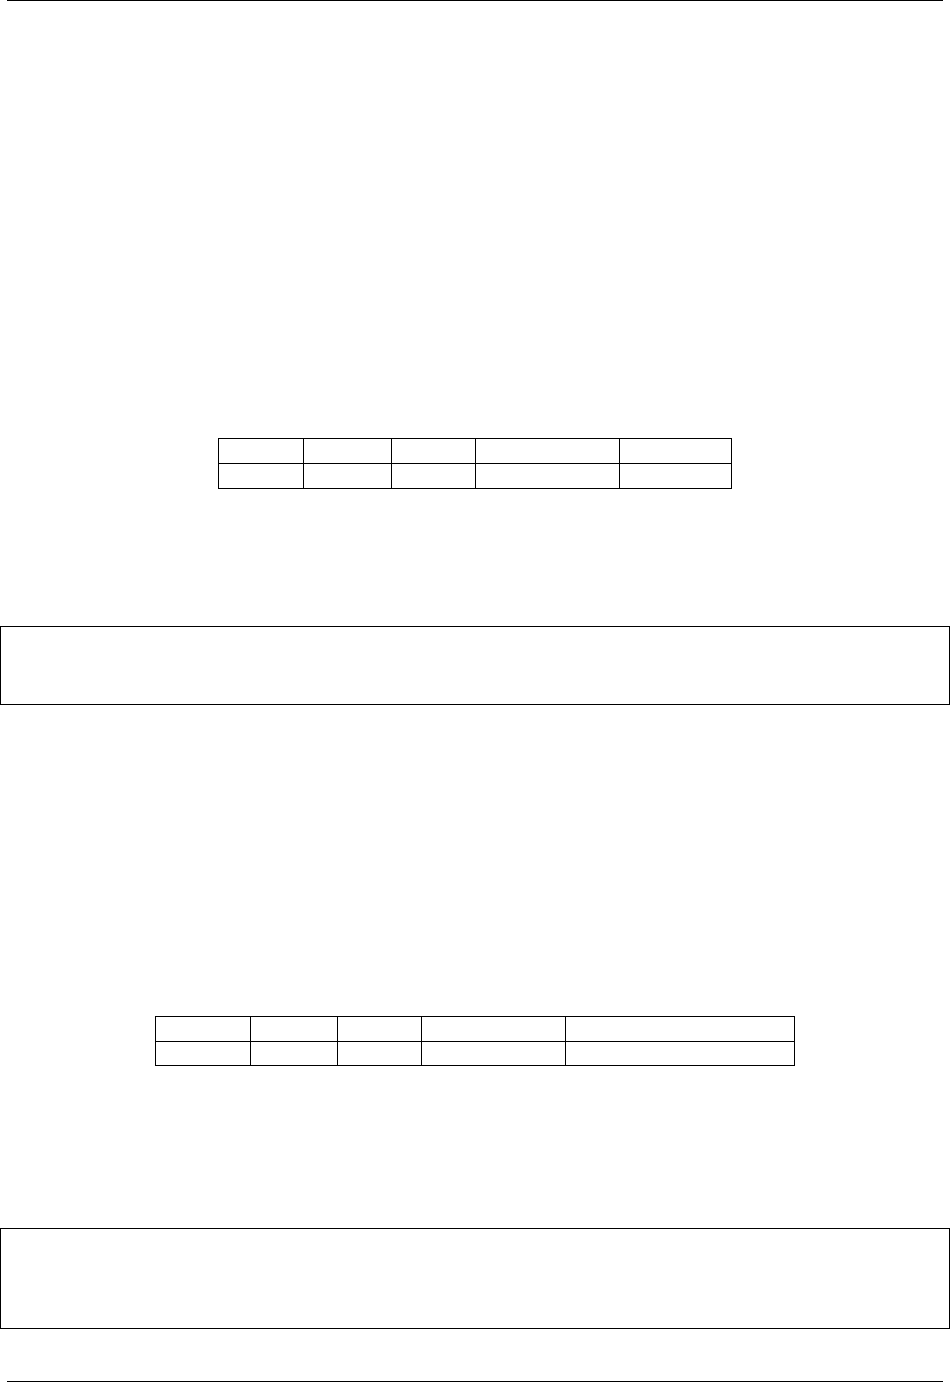
4.1.1 Parent tags
Tags Values Summary
Default None Default values will be applyed for all other parents tags
FileSpec filter name Allow to create filter on files
Group group name Allow a group
IpRange IP/CIDR Allow a set of range IP address
User user name Allow a user
VirtualHost FQDN Allow a VirtualHost
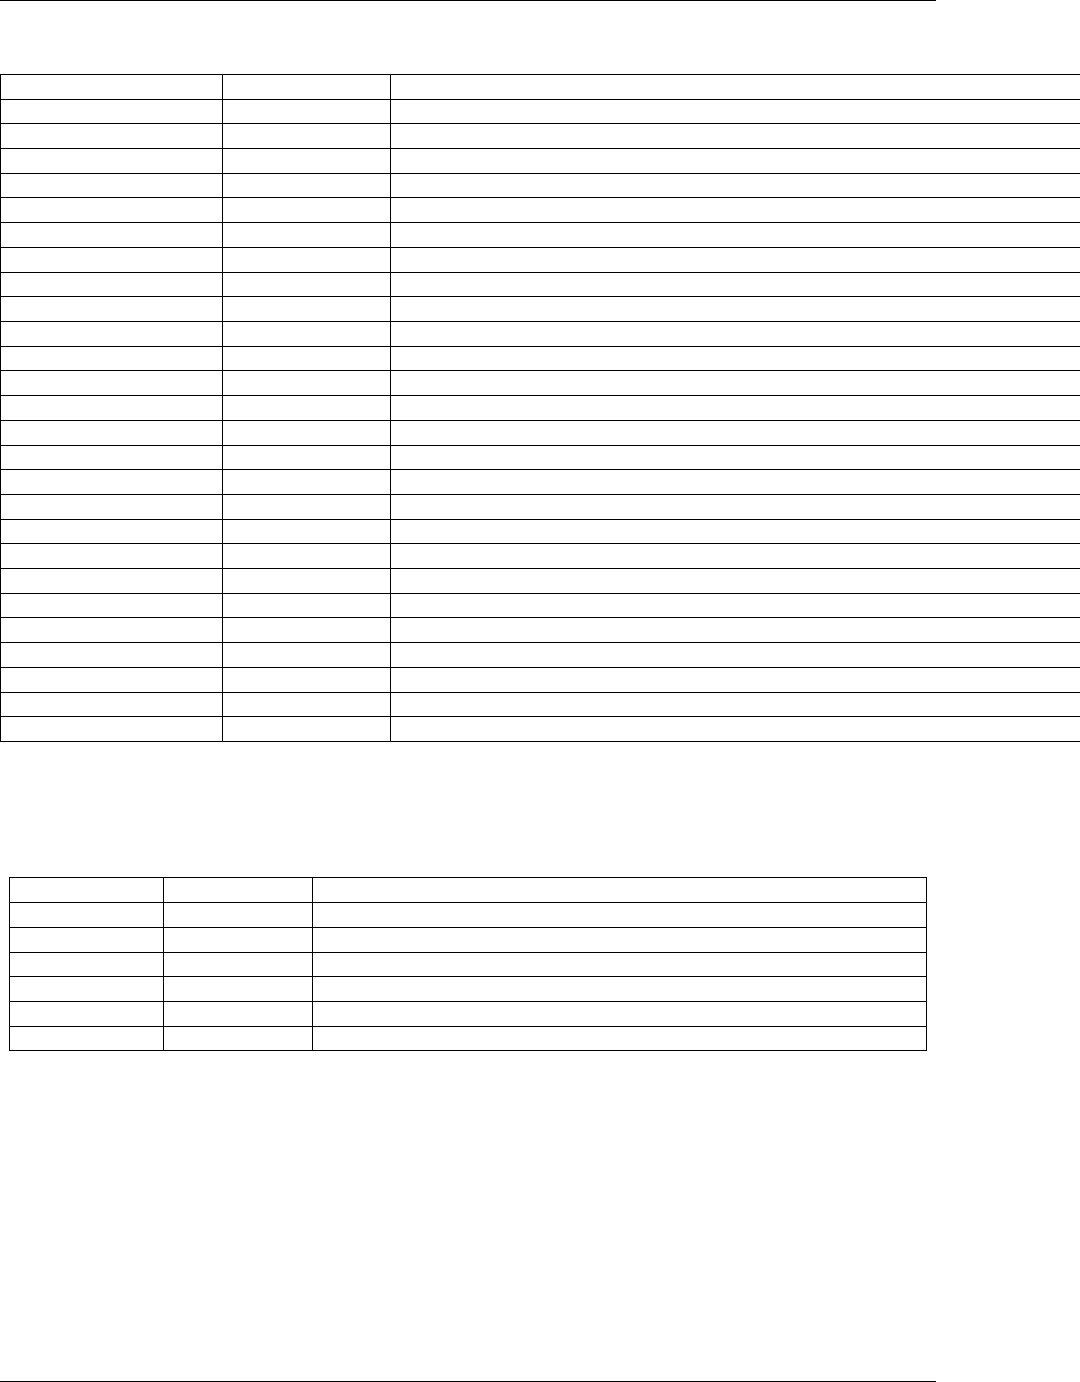
4.1.2 Child tags
Tags Values Summary
ByPassGlobalDownload false/true Bypassing GlobalDownload value
ByPassGlobalUpload false/true Bypassing GlobalUpload value
CanChangeRights false/true Allow to change rights on files and directories
CanChangeTime false/true Allow to change access and creation time on files and directories
Charset <charset> Enable special charset compatibility
ConnectionMaxLife <unix rights> Limit maximum connection time in seconds
CreateHome false/true Create home user’s directory if it doesn’t exist
DefaultRights <unix rights> Set default rights on new files and folders created
DirFakeGroup false/true Substitute shown group owner name of files and directories, by the name of the connected user
DirFakeMode xxxx Substitute shown rights of files and directories, by those ones
DirFakeUser false/true Substitute shown user owner name of files and directories, by the name of the connected user
DisableAccount false/true Quickly disable an account
DisableMakeDir false/true Disable new directories creation
DisableOverwrite false/true Disable file’s overwriting
DisableReadDir false/true Disable reading directories
DisableReadFile false/true Disable reading files
DisableRemoveDir false/true Disable removing directories
DisableRemoveFile false/true Disable removing files
DisableRename false/true Disable renaming files and directories
DisableSetAttribute false/true Disable changing attributes on files and directories
DisableSymLink false/true Disable creating symbolic link
DisableWriteFile false/true Disable writing files
Download <integer><units> Download bandwidth by connected user
ExpireDate <date> Expiration date
ForceGroup <groupname> Force group assignment for connected user
ForceRights <unix rights> Force rights assignment for connected user
ForceUser user Force user assignment for connected user
GlobalDownload <integer><units> Maximum allowed bandwidth in download for the server
GlobalUpload <integer><units> Maximum allowed bandwidth in upload for the server
HideNoAccess false/true Hide not allowed permissions files and directories
Continued on next page
20 Chapter 4. Configuration
MySecureShell Documentation, Release 1.33
Table 1 – continued from previous page
Tags Values Summary
Home <path> Change home of users.
IdleTimeOut <integer> Inactivity timeout before deconnection in seconds
IgnoreHidden false/true Show hidden files and directories (starting with a dot)
Include <path> Include another configuration file
IsAdmin false/true Allow to be administrator
IsSimpleAdmin false/true Allow to be administrator (less righs than IsAdmin tag)
LimitConnection <integer> Limit the number of simultaneous connections
LimitConnectionByIp <integer> Limit the number of simultaneous connections by IP
LimitConnectionByUser <integer> Limit the number of simultaneous connections by user
LogFile <path> Allows to change the file of log
LogLevel_ <integer> Allows to change the loglevel of log
LogSyslog false/true Write log to syslog
MaxOpenFilesForUser <integer> Limit maximum opening files simultaneously
MaxReadFilesForUser <integer> Limit maximum reading files simultaneously
MaxWriteFilesForUser <integer> Limit maximum writing files simultaneously
MaximumRights <unix rights> Set a maximum rights on new files and folders created (unix rights format)
MinimumRights <unix rights> Force minimum rights for new files and new directories (unix rights format)
ResolveIP false/true Resolve IP address from DNS
SftpProtocol <integer> Force the SFTP protocol version
Shell <path> Specify a Shell path to allow users to have a real shell
ShowLinksAsLinks false/true See symbolic links as true files or folders
StayAtHome false/true Restrict user to stay in its home directory and subdirectories
Upload x(units) Upload bandwidth by connected user
VirtualChroot false/true Chroot users in their Home directory
CallbackDownload <shell command> Call a command when download completes
CallbackUpload <shell command> Call a command when upload completes
4.1.3 Deprecated tags
Those tags are deprecated and don’t work anymore!
Tags Values Summary
CanRemoveDir false/true Allow to remove directories
CanRemoveFile false/true Allow to remove files
GMTTime <+/-><integer> Adjusts the clock of the log
HideFiles <regex> Hide files / directories that you want using a regular expression (regex)
PathAllowFilter <regex> Restricted access to files / directories using regular expression (regex)
PathDenyFilter <path> Do not authorize files/directories which match with the regular expression
4.1. Overview 21
MySecureShell Documentation, Release 1.33
4.2 Detailed description
4.2.1 Parent tags
Default
Synopsis
Default tag is mandatory to apply a default configuration to all others parents’ tags and. It is also used if you want to
apply a configuration for all of your users, even if you do not declare other parent tags.
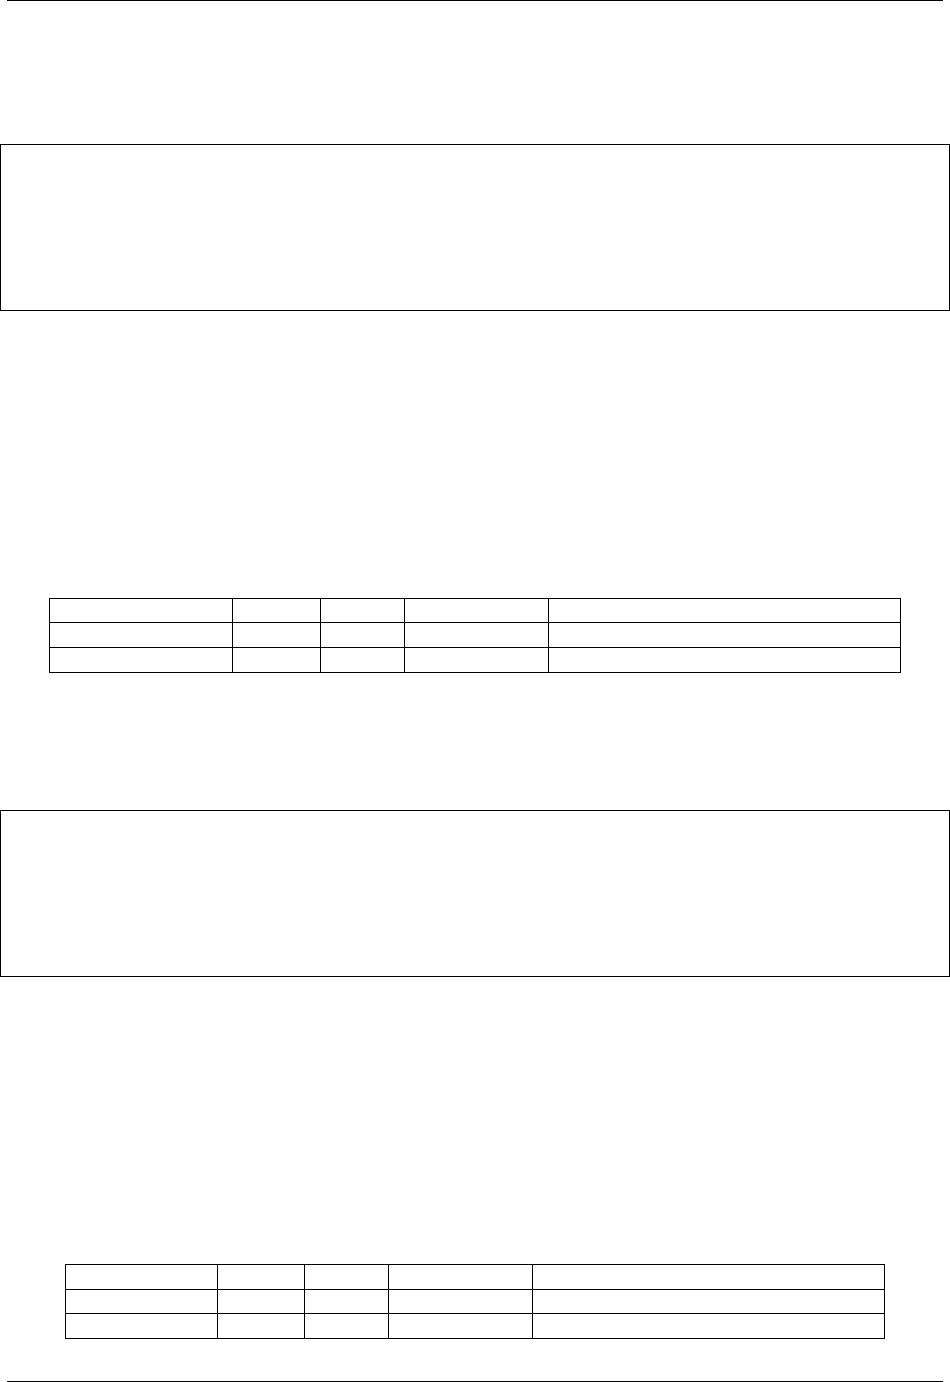
Options
Name Default Values Since version Context
Default null null 0.4 Mandatory
Examples
Here is a Default tag defined with an Upload limit set to 100k:
<Default>
Upload 100k
</Default>
FileSpec
Synopsis
FileSpec is made to create filters on files and directories. You need to create a parent rule with a dedicated and unique
name and apply it as a child tag in any other parent tag.
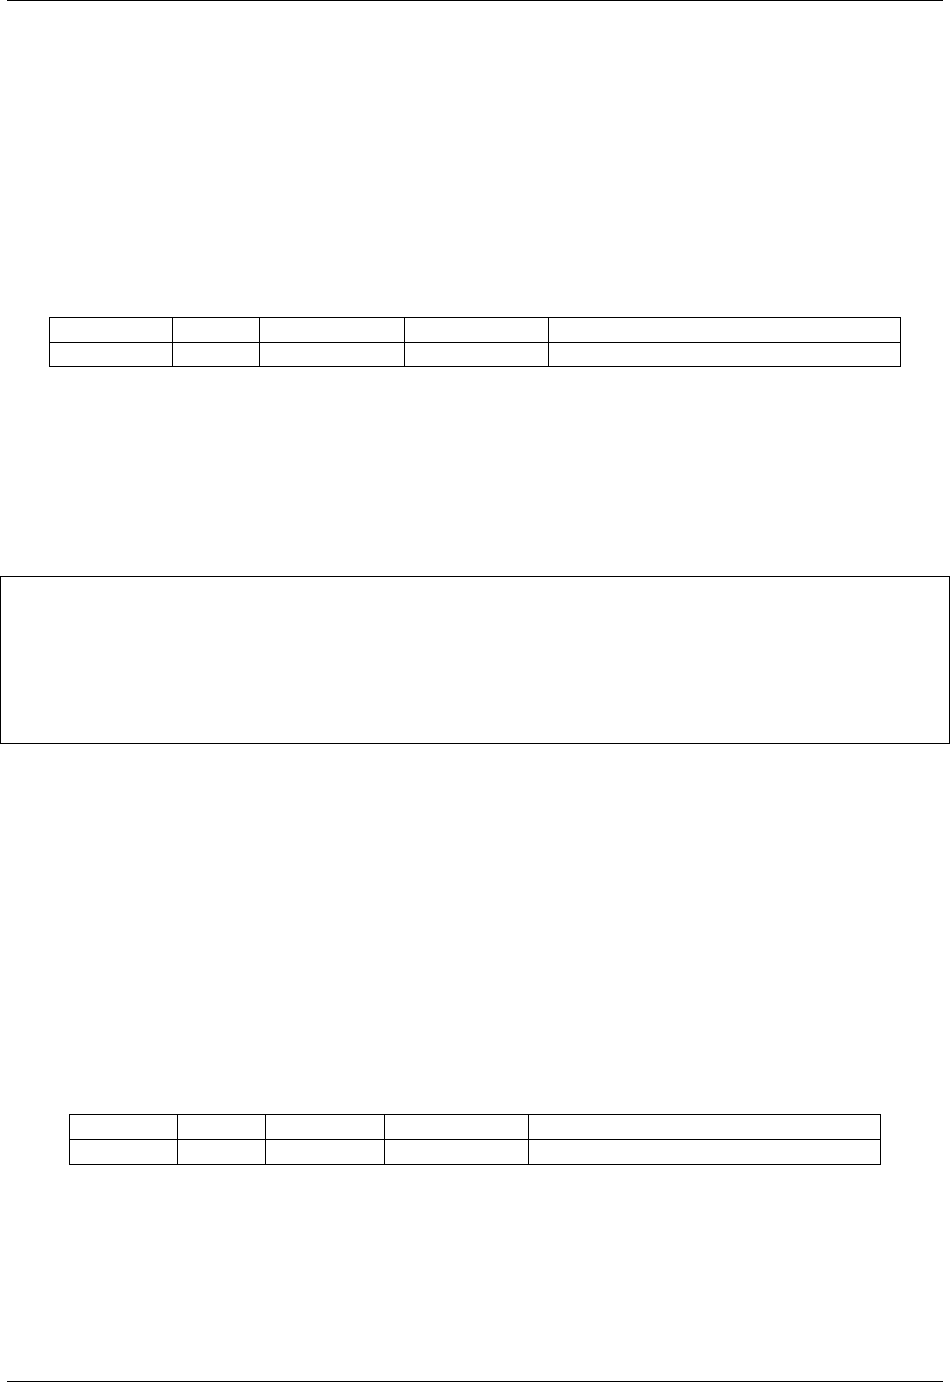
Options
Name Default Values Since version Context
FileSpec null name 1.30 Filters for any parent tags
Examples
In this example, we created a FileSpec called AllowedExtensions which deny accessing to files with .exe or .sh exten-
sions:
<FileSpec AllowedExtensions>
# Only check against filenames/folder names only
UseFullPath false
(continues on next page)
22 Chapter 4. Configuration

MySecureShell Documentation, Release 1.33
(continued from previous page)
# we can use multiple deny/allow directives for clarity
Order DenyAllow
Deny ".
*
.exe$"
Deny ".
*
.sh$"
Allow all
</FileSpec>
As the second example, we want to force users to only have access to data and home directories. For that we’re using
regex:
<FileSpec OnlyDataAndHome>
# Here, we check against the full absolute path
# instead of just the filename or foldername
UseFullPath true
# We define the order in which paths are evaluated
Order AllowDeny
# Allow any full path that starts with /data or /home
Allow "^/(data|home)"
Deny all
</FileSpec>
To finish, we want to apply those filters in the default configuration:
<Default>
ApplyFileSpec OnlyDataAndHome,AllowedExtensions
</Default>
As you seen, you can add with a separated comma multiple FileSpec filters at once.
Group
Synopsis
Group tag is made to add restrictions to a complet set of users defined by a UNIX group. This group has (like users)
to be available from your server (PAM, LDAP. . . ).
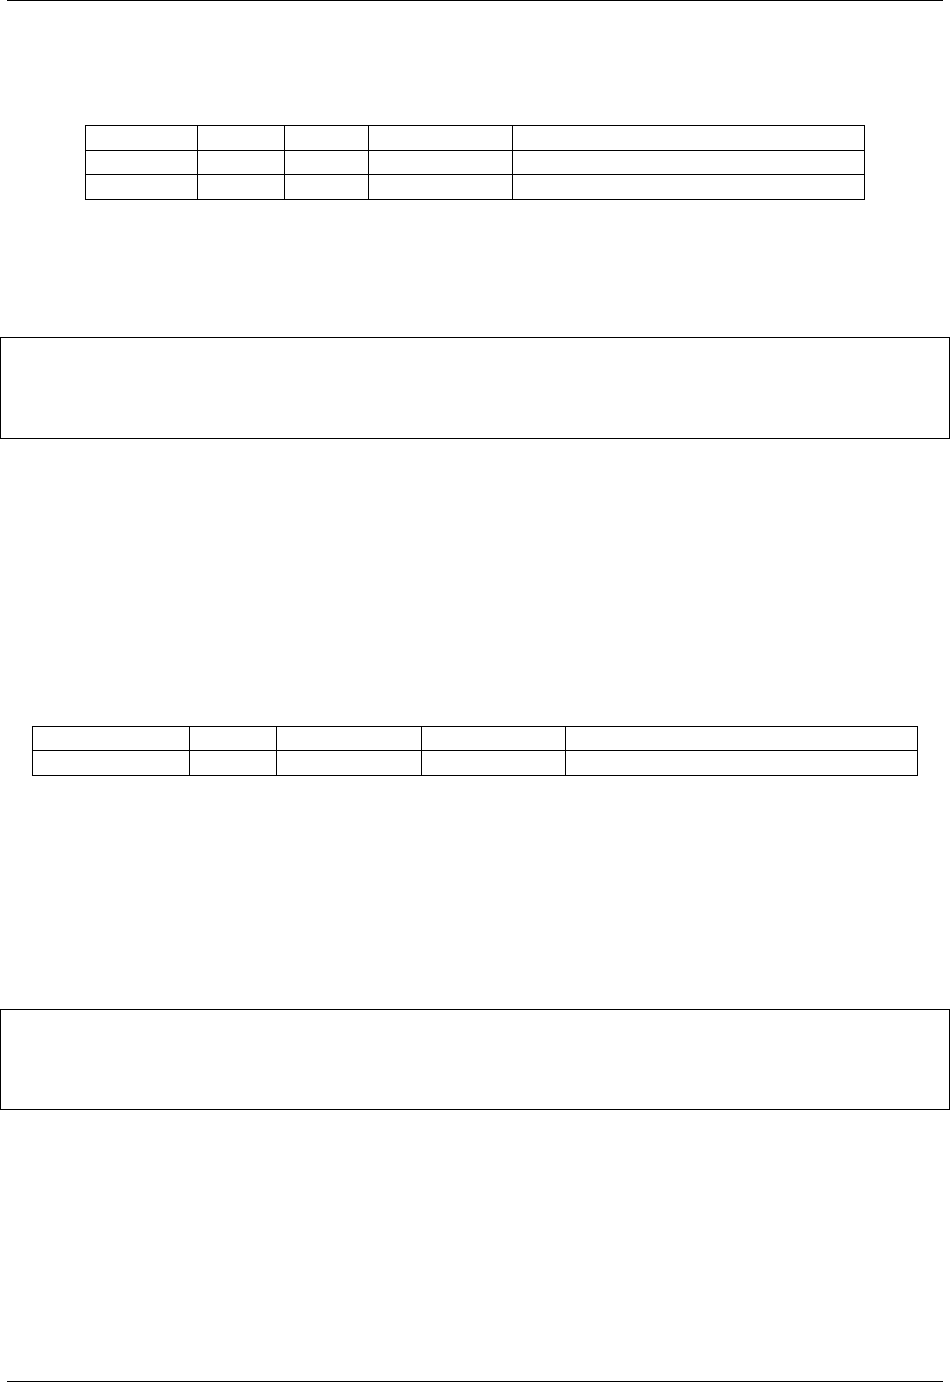
Options
Name Default Values Since version Context
Group null name 0.1 Override default settings
Examples
For example, you can have limited the download speed for all of your users. However, you need your administra-
torusers in the admins group, to have a better download bandwidth:
<Default>
home /home
(continues on next page)
4.2. Detailed description 23

MySecureShell Documentation, Release 1.33
(continued from previous page)
# max download speed for the server
GlobalDownload 200M
# max download speed for all parent tags
Download 5M
</Default>
<Group admins>
Download 10M
</Group>
Here all users, will have a maximum of 5M bandwidth and administrators in the admins groups will have up to 10M
bandwidth.
IpRange
Synopsis
With IpRange, you can define limitations to an IP address or a range of IP adresses.
Options
Name Default Values Since version Context
IpRange null IP/CIDR-IP/CIDR 0.4 Override default settings
IP/CIDR
Examples
In the first example, you may want to change download speed if users are coming from your local network, so you’re
adding your range of IPs:
<Default>
GlobalDownload 500M
Download 100M
</Default>
<IpRange 192.168.0.100/24-192.168.0.200/24>
Download 300M
</IpRange>
Here, my external users have 100M maximum download bandwith and my local users are limited to 300M. If you now
want to have a super user with unrestricted speed, you do it like that:
<IpRange 192.168.0.1/24>
Download 0
</IpRange>
This IP address won’t be limited and will have the maximum bandwidth.
24 Chapter 4. Configuration

MySecureShell Documentation, Release 1.33
User
Synopsis
User’s tag can only affects one user.
Options
Name Default Values Since version Context
User null name 0.1 Override default settings
Examples
In this example, you will see how to give to a user specific rights:
<Default>
Home /home/$USER
</Default>
<User admin>
Home /home/
</User>
You can see here all users will have their home in /home/$USER while admin user will have his home directory in
/home.
VirtualHost
Synopsis
Like web servers, you can define limitations depending on the virtualhost name you’re targetting.
Options
Name Default Values Since version Context
VirtualHost null name:port 0.6 Override default settings
Examples
In this example you will see how to change a home directory depending on the used VirtualHost:
<Default>
home /home
</Default>
<VirtualHost en.mysite.com:22>
home /home/en.mysite.com
(continues on next page)
4.2. Detailed description 25

MySecureShell Documentation, Release 1.33
(continued from previous page)
</VirtualHost>
<VirtualHost fr.mysite.com:22>
home /home/fr.mysite.com
</VirtualHost>
If you try to connect on fr.mysite.com, you will be redirected to /home/fr.mysite.com folder.
4.2.2 Child tags
ByPassGlobalDownload
Synopsis
This tag is made to override the GlobalDownload tag.
Options
Name Default Values Since version Context
ByPassGlobalDownload false false 0.5 Default,Group,IpRange,User,VirtualHost
true
Examples
In this example, the user admin won’t be limited by the GlobalDownload limitation set on the default tag:
<Default>
home /home
GlobalDownload 100k
</Default>
<User admin>
ByPassGlobalDownload true
</User>
Admin user will have full download speed here.
ByPassGlobalUpload
Synopsis
This tag is made to override the GlobalUpload tag.
26 Chapter 4. Configuration

MySecureShell Documentation, Release 1.33
Options
Name Default Values Since version Context
ByPassGlobalUpload false false 0.5 Default,Group,IpRange,User,VirtualHost
true
Examples
In this example, the user admin won’t be limited by the GlobalUpload limitation set on the default tag:
<Default>
home /home
GlobalUpload 100k
</Default>
<User admin>
ByPassGlobalUpload true
</User>
Admin user will have full upload speed.
CallbackDownload
Synopsis
This tag allows calling custom shell command on the server when user succesfully downloads a file. Working
directory is not changed. Usual environment variables can be used from the command, such as USER, HOME,
SSH_CONNECTION; path of the file is kept in LAST_FILE_PATH. Shell command result is written to log.
Options
Name Default Values Since version Context
CallbackDownload null shell cmd 2.1 Default,Group,IpRange,User,VirtualHost
Examples
Here, we use “env” system call to output environment variables in the log::
<Default> CallbackDownload “env”
</Default>
And this would call custom script::
<Default> CallbackDownload “/bin/my-script.sh $LAST_FILE_PATH”
</Default>
4.2. Detailed description 27

MySecureShell Documentation, Release 1.33
CallbackUpload
Synopsis
This tag allows calling custom shell command on the server when user succesfully uploads a file. Working di-
rectory is not changed. Usual environment variables can be used from the command, such as USER, HOME,
SSH_CONNECTION; path of the file is kept in LAST_FILE_PATH. Shell command result is written to log.
Options
Name Default Values Since version Context
CallbackUpload null shell cmd 2.1 Default,Group,IpRange,User,VirtualHost
Examples
Here, we use “env” system call to output environment variables in the log::
<Default> CallbackUpload “env”
</Default>
And this would call custom script::
<Default> CallbackUpload “/bin/my-script.sh $LAST_FILE_PATH”
</Default>
CanChangeRights
Synopsis
If enabled, a user or set of users, won’t be able to change permissions on files and directories.
Options
Name Default Values Since version Context
CanChangeRights true false 1.1 Default,Group,IpRange,User,VirtualHost
true
Examples
Here, only users in the admins group are able to make changes on files and directories:
<Default>
CanChangeRights false
</Default>
<Group admins>
(continues on next page)
28 Chapter 4. Configuration

MySecureShell Documentation, Release 1.33
(continued from previous page)
CanChangeRights true
</Group>
CanChangeTime
Synopsis
If enabled, a user or set of users, won’t be able to change timestamps on files and directories.
Options
Name Default Values Since version Context
CanChangeTime true false 1.1 Default,Group,IpRange,User,VirtualHost
true
Examples
Here, only users in the admins group are able to make changes on files and directories:
<Default>
CanChangeTime false
</Default>
<Group admins>
CanChangeTime true
</Group>
Charset
Synopsis
To enable special characters with accents or non latin characters, you have to define this tag.
4.2. Detailed description 29

MySecureShell Documentation, Release 1.33
Options
Name Default Values Since version Context
Charset null United States 0.8 Default
ISO-8859-1
ISO-8859-2
ISO-8859-3
ISO-8859-4
ISO-8859-5
ISO-8859-6
ISO-8859-7
ISO-8859-9
ISO-8859-13
ISO-8859-15
KOI8-R
KOI8-U/RU
UTF8
Examples
Here we’re going to change the charset to a common one:
<Default>
Charset "UTF8"
</Default>
Here, we’re using UTF8 charset.
ConnectionMaxLife
Synopsis
Limit the sessions’ connection time. By default the value is 0 which means unlimited, there is no deconnection at all,
but you can force users to be disconnected. The default unit value is second, but you can change it by adding a suffix
to the value (s: seconds, m: minutes, etc. . . ).
Options
Name Default Values Since version Context
ConnectionMaxLife 0 integer 0.61 Default,Group,IpRange,User,VirtualHost
Examples
Here is a basic example where the maximum connection time is 24h, the group admin is unlimited and managers
groups inherits of the default settings
30 Chapter 4. Configuration

MySecureShell Documentation, Release 1.33
<Default>
Home /home
ConnectionMaxLife 24h
</Default>
<Group admins>
ConnectionMaxLife 0
</User>
<Group managers>
Home /home/managers
</User>
CreateHome
Synopsis
Create user’s home directory if it doesn’t exists.
Options
Name Default Values Since version Context
CreateHome false false 1.20 Default,Group,IpRange,User,VirtualHost
true
Examples
In this example, we want home directory to be created for each users:
<Default>
Home /home
CreateHome true
</Default>
DefaultRights
Synopsis
Set default rights on new created (or uploaded) files and folders. You have to set UNIX numeric notation permissions
for files and folders.
Options
Name Default Values Since ver-
sion
Context
Default-
Rights
file and folder
rights
XXXX
YYYY
0.3 Default,Group,IpRange,User,VirtualHost
4.2. Detailed description 31

MySecureShell Documentation, Release 1.33
• XXXX: numeric files rights
• YYYY: numeric folders rights
Examples
In this example, default options are set to give full rights to any new files and folders (0777). But we want to be sure
that secret groups keeps their files and folders owned by themselfs:
<Default>
Home /home
DefaultRights 0777 0777
</Default>
<Group secret>
Home /home/secret
DefaultRights 0700 0700
</User>
DirFakeGroup
Synopsis
This tag fakes the group owner by visually changing the real group name of files and folders by the group of the
connected user. This can be used for security reasons when you don’t want connected users to see real permissions.
Options
Name Default Values Since version Context
DirFakeGroup false false 0.1 Default,Group,IpRange,User,VirtualHost
true
Examples
Here we want to hide all users the files and folders real groups, but not for the admin user:
<Default>
Home /home
DirFakeGroup true
</Default>
<User admin>
DirFakeGroup false
</User>
32 Chapter 4. Configuration

MySecureShell Documentation, Release 1.33
DirFakeMode
Synopsis
This tag fakes the global permissions by visually changing the real rights of files and folders by the defined ones. This
can be used for security reasons when you don’t want connected users to see real permissions.
Options
Name Default Values Since version Context
DirFakeMode false false 0.1 Default,Group,IpRange,User,VirtualHost
true
Examples
Here we want to hide all public users (by using the public group) the files and folders:
<Default>
Home /home
</Default>
<Group public>
DirFakeMode 0777
</Group>
DirFakeUser
Synopsis
This tag fakes the user owner by visually changing the real user name of files and folders by the user name of the
connected user. This can be used for security reasons when you don’t want connected users to see real permissions.
Options
Name Default Values Since version Context
DirFakeUser false false 0.1 Default,Group,IpRange,User,VirtualHost
true
Examples
Here we want to hide to all users, the files and folders real owner name, but not for the admin user:
<Default>
Home /home
DirFakeUser true
</Default>
(continues on next page)
4.2. Detailed description 33

MySecureShell Documentation, Release 1.33
(continued from previous page)
<User admin>
DirFakeUser false
</User>
DisableAccount
Synopsis
Here is an easy way to disable accounts for a user or a set of users. This can be useful if you need to disable accounts
quickly. Only new connections will be deny, current open ones won’t be automatically closed.
Options
Name Default Values Since version Context
DisableAccount false false 0.7 Default,Group,IpRange,User,VirtualHost
true
Examples
In this example, we disable a set of users by disabling the group accounts:
<Default>
Home /home
</Default>
<Group users>
DisableAccount false
</User>
DisableMakeDir
Synopsis
This tag, deny to the connected user to create folders.
Options
Name Default Values Since version Context
DisableMakeDir false false 1.20 Default,Group,IpRange,User,VirtualHost
true
34 Chapter 4. Configuration

MySecureShell Documentation, Release 1.33
Examples
In this example, we deny to users in the users group to create directories:
<Default>
Home /home
</Default>
<Group users>
DisableMakeDir true
</User>
DisableOverwrite
Synopsis
This tag, deny to the connected user to overwrite onto an existing file.
Options
Name Default Values Since version Context
DisableOverwrite false false 1.20 Default,Group,IpRange,User,VirtualHost
true
Examples
In this example, we deny to users in the users group to overwrite existing files:
<Default>
Home /home
</Default>
<Group users>
DisableOverwrite true
</User>
DisableReadDir
Synopsis
This tag, deny to the connected user to read folders content.
Options
Name Default Values Since version Context
DisableReadDir false false 1.20 Default,Group,IpRange,User,VirtualHost
true
4.2. Detailed description 35

MySecureShell Documentation, Release 1.33
Examples
In this example, we deny to users in the users group to read directories content:
<Default>
Home /home
</Default>
<Group users>
DisableReadDir true
</User>
DisableReadFile
Synopsis
This tag, deny to the connected user to read files content.
Options
Name Default Values Since version Context
DisableReadFile false false 1.20 Default,Group,IpRange,User,VirtualHost
true
Examples
In this example, we deny to users in the users group to read files content:
<Default>
Home /home
</Default>
<Group users>
DisableReadFile true
</User>
DisableRemoveDir
Synopsis
This tag, deny to the connected user to remove directories.
Options
Name Default Values Since version Context
DisableRemoveDir false false 1.20 Default,Group,IpRange,User,VirtualHost
true
36 Chapter 4. Configuration
MySecureShell Documentation, Release 1.33
Examples
In this example, we deny to users in the users group to remove directories:
<Default>
Home /home
</Default>
<Group users>
DisableRemoveDir true
</User>
DisableRemoveFile
Synopsis
This tag, deny to the connected user to remove files.
Options
Name Default Values Since version Context
DisableRemoveFile false false 1.20 Default,Group,IpRange,User,VirtualHost
true
Examples
In this example, we deny to users in the users group to remove files:
<Default>
Home /home
</Default>
<Group users>
DisableRemoveFile true
</User>
DisableRename
Synopsis
This tag, deny to the connected user to rename files or folders.
Options
Name Default Values Since version Context
DisableRename false false 1.20 Default,Group,IpRange,User,VirtualHost
true
4.2. Detailed description 37

MySecureShell Documentation, Release 1.33
Examples
In this example, we deny to users in the users group to rename files and folders:
<Default>
Home /home
</Default>
<Group users>
DisableRename true
</User>
DisableSetAttribute
Synopsis
This tag, deny to the connected user to change the current files or folders attributes.
Options
Name Default Values Since version Context
DisableSetAttribute false false 1.20 Default,Group,IpRange,User,VirtualHost
true
Examples
In this example, we deny to users in the users group to modify files and folders attributes:
<Default>
Home /home
</Default>
<Group users>
DisableSetAttribute true
</User>
DisableStatsFs
Synopsis
This tag, deny to the connected user to get volume informations.
Options
Examples
In this example, we deny to users in the users group to get volume informations:
38 Chapter 4. Configuration

MySecureShell Documentation, Release 1.33
<Default>
Home /home
</Default>
<Group users>
DisableStatsFs true
</User>
DisableSymLink
Synopsis
This tag, deny to the connected user to create symbolic links from files or folders.
Options
Name Default Values Since version Context
DisableSymLink false false 1.20 Default,Group,IpRange,User,VirtualHost
true
Examples
In this example, we deny to users in the users group to create symlinks:
<Default>
Home /home
</Default>
<Group users>
DisableSymLink true
</User>
DisableWriteFile
Synopsis
This tag, deny to the connected user to write files.
Options
Name Default Values Since version Context
DisableWriteFile false false 1.20 Default,Group,IpRange,User,VirtualHost
true
4.2. Detailed description 39

MySecureShell Documentation, Release 1.33
Examples
In this example, we deny to users in the users group to write files:
<Default>
Home /home
</Default>
<Group users>
DisableWriteFile true
</User>
Download
Synopsis
Download tag allows to limit the maximum download bandwidth per connected users.
Options
Name Default Values Since version Context
Download 0 (unlimited) integer 0.1 Default,Group,IpRange,User,VirtualHost
Examples
In this example, all users will be able to download up to a 100k maximum bandwith, while admin users will have 900k
at maximum:
<Default>
Home /home
Download 100k
</Default>
<User admin>
Home /home
Download 900k
</User>
ExpireDate
Synopsis
This tag permit to set an expiration date time on a parent tag, which means users won’t be allowed to connecte after
the defined date and time. The date and time should be in strftime format (man 3 strftime). You can test date format
using date command:
$ echo $(date '+%Y-%m-%d %H:%M:%S')
2014-08-15 15:21:19
40 Chapter 4. Configuration

MySecureShell Documentation, Release 1.33
Options
Name Default Values Since ver-
sion
Context
Expire-
Date
null (unlim-
ited)
%Y-%m-%d
%H:%M:%S
1.0 Default,Group,IpRange,User,VirtualHost
Examples
In this example, we want to set a group of users expiration:
<Default>
Home /home
</Default>
<Group users>
ExpireDate "2015-12-25 00:00:00"
</User>
The users group will expire on 25 december 2015 at midnight.
ForceGroup
Synopsis
You can force the group of the connected user. That mean when a user will connect, even if his group is not the desired
one, it will force this group to be used when a file or folder are created.
Options
Name Default Values Since version Context
ForceGroup null group name 1.20 Default,Group,IpRange,User,VirtualHost
Examples
In this example, we want to force the group sftp to be used by a user:
<Default>
Home /home
</Default>
<User username>
ForceGroup sftp
</User>
The sftp group will be used when the user username will create a file or a folder.
4.2. Detailed description 41
MySecureShell Documentation, Release 1.33
ForceRights
Synopsis
You can force the default permissions when a connected user create files and folders. That mean when a user will
connect, when files or folders are created, the default specified rights will be applyed.
Options
Name Default Values Since version Context
ForceRights null XXXX YYYY 1.20 Default,Group,IpRange,User,VirtualHost
• XXXX: numeric files rights
• YYYY: numeric folders rights
Examples
You can force files and folders permissions like this:
<Default>
Home /home
</Default>
<User username>
ForceRights 0640 0750
</User>
Here the user username will be forced to create 0640 files rights and 0750 folders rights.
ForceUser
Synopsis
You can force the usage of a username for the connected user. That mean when a user will connect, even if his
username is not the desired one, it will force this group to be used when a file or folder are created. This allows
multiple accounts to access the same account but each one with its own password.
Options
Name Default Values Since version Context
ForceUser null group name 1.20 Default,Group,IpRange,User,VirtualHost
Examples
In this example, we want to force the user sftp_user to be used by a username user:
42 Chapter 4. Configuration

MySecureShell Documentation, Release 1.33
<Default>
Home /home
</Default>
<User username>
ForceUser sftp_user
</User>
The sftp_user user will be used when the user username will create a file or a folder.
GlobalDownload
Synopsis
Global Download tag allows to limit the maximum download bandwidth for the overall server.
Options
Name Default Values Since version Context
GlobalDownload 0 (unlimited) integer 0.1 Default
Examples
In this example, all users will be able to download up to a 100k maximum bandwith and the total maximum bandwidth
allowed for the server is 1M:
<Default>
Home /home
GlobalDownload 1M
Download 100k
</Default>
GlobalUpload
Synopsis
Global Upload tag allows to limit the maximum upload bandwidth for the overall server.
Options
Name Default Values Since version Context
GlobalUpload 0 (unlimited) integer 0.1 Default
4.2. Detailed description 43

MySecureShell Documentation, Release 1.33
Examples
In this example, all users will be able to upload up to a 100k maximum bandwith and the total maximum upload
bandwidth allowed for the server is 1M:
<Default>
Home /home
GlobalUpload 1M
Upload 100k
</Default>
HideNoAccess
Synopsis
This tags hides files and folders denied from the connected user.
Options
Name Default Values Since version Context
HideNoAccess false false 0.3 Default,Group,IpRange,User,VirtualHost
true
Examples
If you want to automatically hide unauthorized files and folders:
<Default>
home /home
HideNoAccess true
</Default>
Home
Synopsis
This directive force the home directory of a connected user.
Options
Name Default Values Since version Context
Home $HOME home directory 0.1 Default,Group,IpRange,User,VirtualHost
44 Chapter 4. Configuration

MySecureShell Documentation, Release 1.33
Examples
You can define the default home directory or make a specific home directory like this:
<Default>
Home /home/$USER
</Default>
<Group secret>
Home /mnt/nfs/secret/$USER
</Group>
<User admin>
Home /
</User>
Here all users will have their home directory in /home/<username>, but members of the secret group will have
their home directory in /mnt/nfs/secret/<username>. To finish, admin user have access to the root directory.
IdleTimeOut
Synopsis
This tag disconnects users when the maximum idle time has been reached. The default unit value is second, but you
can change it by adding a suffix to the value (s: seconds, m: minutes, etc. . . ).
Options
Name Default Values Since version Context
IdleTimeOut 0 (unlimited) integer 0.1 Default,Group,IpRange,User,VirtualHost
Examples
If you want to free connections for idle users after a certain amount of time, you can set an idle timeout value like this:
<Default>
Home /home
IdleTimeOut 5m
</Default>
IgnoreHidden
Synopsis
Hide or not hidden files or folders (starting with a dot).
4.2. Detailed description 45

MySecureShell Documentation, Release 1.33
Options
Name Default Values Since version Context
IgnoreHidden false false 0.1 Default,Group,IpRange,User,VirtualHost
true
Examples
If you want to hide all files and folders starting with a dot file (eg: .DsStore):
<Default>
Home /home
IgnoreHidden true
</Default>
Include
Synopsis
With Include tag, you can have additional MySecureShell configuration files to help you to reorganize it if it’s becomes
to big.
Options
Name Default Values Since version Context
Include null path 0.3 Default,Group,IpRange,User,VirtualHost
Examples
To add a new file in the default configuration:
<Default>
Home /home
Include /etc/ssh/mysecureshell/my_sftp_config_file
</Default>
And then, in /etc/ssh/mysecureshell/my_sftp_config_file file, you can add configuration content.
IsAdmin
Synopsis
IsAdmin tag grants to a user or a set of users, admins permissions. That means they can administrate MySecureShell
throught sftp-admin CLI or with MySecureShell GUI.
46 Chapter 4. Configuration

MySecureShell Documentation, Release 1.33
Options
Name Default Values Since version Context
IsAdmin false false 0.7 Default,Group,IpRange,User,VirtualHost
true
Examples
If you want to grant to admins group the administrative rights:
<Default>
Home /home
</Default>
<Group admins>
IsAdmin true
</Group>
IsSimpleAdmin
Synopsis
IsSimpleAdmin tag grants to a user or a set of users, restricted admins permissions. That means they can administrate
MySecureShell throught sftp-admin CLI or with MySecureShell GUI. This tag is less permissive than IsAdmin
tag. IsSimpleAdmin permissions are limited to:
• See online users
• Disconnect users
• Start / shutdown MySecureShell server
• See statistics
Options
Name Default Values Since version Context
IsSimpleAdmin false false 1.0 Default,Group,IpRange,User,VirtualHost
true
Examples
If you want to grant to simpleadmins group the administrative rights:
<Default>
Home /home
</Default>
<Group simpleadmins>
(continues on next page)
4.2. Detailed description 47

MySecureShell Documentation, Release 1.33
(continued from previous page)
IsSimpleAdmin true
</Group>
LimitConnection
Synopsis
You can limit the number of maximum simultaneous connections.
Options
Name Default Values Since version Context
LimitConnection 0 (unlimited) integer 0.1 Default,Group,IpRange,User,VirtualHost
Examples
Here we want to limit the total maximum connections to 8. However the users members of the payment group doesn’t
have permission to have more than 4 simultaneous connections:
<Default>
Home /home
LimitConnection 8
</Default>
<Group payment>
LimitConnection 4
<Group>
LimitConnectionByIp
Synopsis
You can limit the number of maximum simultaneous connections per incoming IP address.
Options
Name Default Values Since version Context
LimitConnectionByIp 0 (unlimited) integer 0.1 Default,Group,IpRange,User,VirtualHost
Examples
Here we want to limit the total maximum connections to 8. However per connections IP address, it is restricted to 1
connection:
48 Chapter 4. Configuration

MySecureShell Documentation, Release 1.33
<Default>
Home /home
LimitConnection 8
LimitConnectionByIp 1
</Default>
LimitConnectionByUser
Synopsis
You can limit the number of maximum simultaneous connections per username.
Options
Name Default Values Since version Context
LimitConnectionByUser 0 (unlimited) integer 0.1 Default,Group,IpRange,User,VirtualHost
Examples
Here we want to limit the total maximum connections to 8. However per username connections, it is restricted to 1
connection:
<Default>
Home /home
LimitConnection 8
LimitConnectionByUser 1
</Default>
LogFile
Synopsis
This tag allows you can separate log files per parent tags.
Options
Name Default Values Since version Context
LogFile /var/log/sftp_server.log path 0.95 Default,Group,IpRange,User,VirtualHost
Examples
In this example, we separate the default log location and a virtual host log location:
4.2. Detailed description 49

MySecureShell Documentation, Release 1.33
<Default>
LogFile /var/log/sftp_server.log
</Default>
<VirtualHost www.example.com>
LogFile /var/log/sftp/www.example.com.log
</User>
LogFile
Synopsis
This tag allows you can modifiy log level per parent tags.
Options
Name Default Values Since version Context
LogLevel 6 (all) 0 (no log) 2.01 Default,Group,IpRange,User,VirtualHost
1 (show connexion)
2 (show transfert)
3 (show error)
4 (show warning)
5 (show info)
6 (show debug)
Examples
In this example, we modify the default log level and a virtual host log location:
<Default>
LogLevel 7
</Default>
<VirtualHost www.example.com>
LogLevel 3
</User>
LogSyslog
Synopsis
Write logs to Syslog. If you want to know more on Syslog, you can follow the link.
50 Chapter 4. Configuration
MySecureShell Documentation, Release 1.33
Options
Name Default Values Since version Context
LogSyslog false false 1.33 Default,Group,IpRange,User,VirtualHost
true
Examples
If you want to enable syslog loging:
<Default>
Home /home
LogSyslog true
</Default>
MinimumRights
Synopsis
Give the minimum allowed rights for new files and folders.
Options
Name Default Values Since version Context
MinimumRights null XXXX YYYY 1.0 Default,Group,IpRange,User,VirtualHost
• XXXX: numeric files rights
• YYYY: numeric folders rights
Examples
In this example, we do not want users to have more than 0644 persissions for files (they won’t be able to set executable
rights). And we want to restrict new created folders to the owner and the group only:
<Default>
Home /home
MinimumRights 0644 0770
</Default>
MaxOpenFilesForUser
Synopsis
You can limit the number of simultaneous opened files with that tag.
4.2. Detailed description 51

MySecureShell Documentation, Release 1.33
Options
Name Default Values Since version Context
MaxOpenFilesForUser 0 (unlimited) integer 0.3 Default,Group,IpRange,User,VirtualHost
Examples
If you want to limit to 5, the number of simultaneous opened files for a user:
<Default>
Home /home
MaxOpenFilesForUser 5
</Default>
MaxReadFilesForUser
Synopsis
You can limit the number of simultaneous read files with that tag.
Options
Name Default Values Since version Context
MaxReadFilesForUser 0 (unlimited) integer 0.3 Default,Group,IpRange,User,VirtualHost
Examples
If you want to limit to 5, the number of simultaneous read files for a user:
<Default>
Home /home
MaxReadFilesForUser 5
</Default>
MaxWriteFilesForUser
Synopsis
You can limit the number of simultaneous write files with that tag.
Options
Name Default Values Since version Context
MaxWriteFilesForUser 0 (unlimited) integer 0.3 Default,Group,IpRange,User,VirtualHost
52 Chapter 4. Configuration
MySecureShell Documentation, Release 1.33
Examples
If you want to limit to 5, the number of simultaneous write files for a user:
<Default>
Home /home
MaxWriteFilesForUser 5
</Default>
MaximumRights
Synopsis
Give the maximum allowed rights for new files and folders.
Options
Name Default Values Since version Context
MaximumRights null XXXX YYYY 1.20 Default,Group,IpRange,User,VirtualHost
• XXXX: numeric files rights
• YYYY: numeric folders rights
Examples
In this example, we do not want users to be able to restrict too much access. So the minimum allowed permissions are
0640 for files. And we want to restrict at minimum to 0750 to new created folders to the owner and the group only:
<Default>
Home /home
MaximumRights 0640 0750
</Default>
ResolveIP
Synopsis
You can have DNS name in your logs instead of IP addresses if you enable ResolveIP tag.
Options
Name Default Values Since version Context
ResolveIP false false 0.3 Default,Group,IpRange,User,VirtualHost
true
4.2. Detailed description 53

MySecureShell Documentation, Release 1.33
Examples
Here I want to resolve IP addresses for all connections:
<Default>
Home /home
ResolveIP true
</Default>
SftpProtocol
Synopsis
You can force a specific version of the SFTP protocol to enable or disable some features. To know more about them
you can consult those websites:
• http://www.greenend.org.uk/rjk/sftp/sftpversions.html
• http://tools.ietf.org/html/draft-ietf-secsh-filexfer-13
Options
Name Default Values Since version Context
SftpProtocol 4 integer 0.6 Default,Group,IpRange,User,VirtualHost
Examples
In this example, we want to force oldclients group to use SFTP protocol in version 3. All other users will be in version
4 of the protocol:
<Default>
Home /home
SftpProtocol 4
</Default>
<Group oldclients>
SftpProtocol 3
</Group>
Shell
Synopsis
By default MySecureShell doesn’t allow Shell access on SSH connections. But you may want to give to some users
Shell access.
54 Chapter 4. Configuration

MySecureShell Documentation, Release 1.33
Options
Name Default Values Since version Context
shell null path 0.2 Default,Group,IpRange,User,VirtualHost
Examples
To restrict a bash shell to the admins group:
<Default>
Home /home
</Default>
<Group admins>
Shell /bin/bash
</Group>
ShowLinksAsLinks
Synopsis
With ShowLinksAsLinks tag, users symbolic links are not seen as symlink but folders or files. If enabled, connected
users simply doesn’t know if a file or folders are in fact symbolic links or not.
Options
Name Default Values Since version Context
ShowLinksAsLinks false false 0.5 Default,Group,IpRange,User,VirtualHost
true
Examples
To avoid users to see if folders and files are symbolic links:
<Default>
Home /home
ShowLinksAsLinks true
</Default>
StayAtHome
Synopsis
The StayAtHome tag force the user to stay in his home directory. He won’t be able to move to a higher hierarchy level.
For example, a user getting his home directory in /home/user won’t be able to got to /home or / for example.
4.2. Detailed description 55

MySecureShell Documentation, Release 1.33
Options
Name Default Values Since version Context
StayAtHome false false 0.4 Default,Group,IpRange,User,VirtualHost
true
Examples
In this example, we want to be sure all users will stay in their home directory with sub directories:
<Default>
Home /home
StayAtHome true
</Default>
Upload
Synopsis
Upload tag allows to limit the maximum upload bandwidth per connected users.
Options
Name Default Values Since version Context
Upload 0 (unlimited) integer 0.1 Default,Group,IpRange,User,VirtualHost
Examples
In this example, all users will be able to upload up to a 100k maximum bandwith, while admin users will have 900k at
maximum:
<Default>
Home /home
Upload 100k
</Default>
<User admin>
Home /home
Upload 900k
</User>
VirtualChroot
Synopsis
This tag permit to add security to StayAtHome tag. It chroot the user in his home directory. So the user won’t be able
to know on which folder his home directory is located on the server. His home directory will be shown as /.
56 Chapter 4. Configuration

MySecureShell Documentation, Release 1.33
Options
Name Default Values Since version Context
VirtualChroot false false 0.1 Default,Group,IpRange,User,VirtualHost
true
Examples
In this example, we enabled the VirtualChroot for all users:
<Default>
Home /home
VirtualChroot true
</Default>
4.2.3 Deprecated tags
CanRemoveDir
Note: This tag is no more valid since 1.25 version
Synopsis
To allow users to delete directories, you need to enable this tag. This tag doesn’t bypass the default permissions. If
you do not have write permissions, you won’t be able to remove a directory even is this tag is enable.
Options
Name Default Values Since version Context
CanRemoveDir false false 0.9 -> 1.25 Default,Group,IpRange,User,VirtualHost
true
Examples
In this example, we allow admins group to remove folders:
<Default>
CanRemoveDir false
</Default>
<Group admins>
CanRemoveDir true
</Group>
4.2. Detailed description 57

MySecureShell Documentation, Release 1.33
CanRemoveFile
Note: This tag is no more valid since 1.25 version
Synopsis
To allow users to delete files, you need to enable this tag. This tag doesn’t bypass the default permissions. If you do
not have write permissions, you won’t be able to remove a file even is this tag is enable.
Options
Name Default Values Since version Context
CanRemoveFile false false 0.9 -> 1.25 Default,Group,IpRange,User,VirtualHost
true
Examples
In this example, we allow admins group to remove files:
<Default>
CanRemoveFile false
</Default>
<Group admins>
CanRemoveFile true
</Group>
GMTTime
Note: This tag is no more valid since 1.25 version
Synopsis
Adjust the clock time in the log file
Options
Name Default Values Since version Context
Charset null x(+,-) y(-12,+12 hour GMT) 0.8 -> 1.25 Default
58 Chapter 4. Configuration

MySecureShell Documentation, Release 1.33
Examples
In this example, we’re changing the GMTTime:
<Default>
Home /home
GMTTime +1
</Default>
HideFiles
Note: This tag is no more valid since 1.25 version
Synopsis
With HideFiles, you can hide files and directories using regular expressions.
Options
Name Default Values Since version Context
HideFiles regex null 1.0 -> 1.25 Default,Group,IpRange,User,VirtualHost
Examples
In this example we are hiding lost+found or public_html files and folders:
<Default>
Home /home
HideFiles "^(lost+found|public_html)$"
</Default>
PathAllowFilter
Note: This tag is no more valid since 1.25 version
Synopsis
With this tag, you can restrict files and folders by using a regular expression.
4.2. Detailed description 59

MySecureShell Documentation, Release 1.33
Options
Name Default Values Since version Context
PathAllowFilter null regex 1.20 -> 1.25 Default,Group,IpRange,User,VirtualHost
Examples
You can allow filetering only images extensions files like this:
<Default>
Home /home
PathAllowFilter "^
*
.(jpg|png|gif)$"
</Default>
PathDenyFilter
Note: This tag is no more valid since 1.25 version
Synopsis
With this tag, you can restrict files and folders by using a regular expression.
Options
Name Default Values Since version Context
PathDenyFilter null regex 0.3 -> 1.25 Default,Group,IpRange,User,VirtualHost
Examples
You can deny filetering images extensions files like this:
<Default>
Home /home
PathDenyFilter "^
*
.(jpg|png|gif)$"
</Default>
4.3 Use cases
Topics
• Use cases
60 Chapter 4. Configuration

MySecureShell Documentation, Release 1.33
– Basic usage
– Administering multiple websites
– High restriction access
To configure MySecureShell, you need to edit the /etc/ssh/sftp_config file. By default MySecureShell comes
with a commented example configuration. This may not match all your needs and you will need to modify it to get it
working as expected.
Note: Connect as root or use sudo to edit the configuration file.
To help you to understand and see what you can do with MySecureShell, we’re covering here some use cases.
4.3.1 Basic usage
In most of basic situations, you generally want:
• A defined home directory for a user and a set of user (group)
• Limit the bandwidth for the group (users)
• Restrict group to it’s home directory
• Have an admin user
Here is a configuration with commented examples:
<Default>
# For all users, they will have access to their own home directory
Home /home/$USER
</Default>
<User admin>
# This user can have advanced rights to manage MySecureShell from the CLI
IsAdmin true
</User>
<Group users>
# Force users to stay in their home directory
StayAtHome true
# Limit their download speed to 128k
Download 128k
# Limit their upload speed to 16k
Upload 16k
</Group>
4.3.2 Administering multiple websites
For this use case, let’s say you have multiple hosted clients and you have to manage their platforms. You want to:
• Give your clients full rights to manage their website content
• Limit the bandwidth
• Force rights creation
4.3. Use cases 61

MySecureShell Documentation, Release 1.33
• Limit the number of connexions and idle time
• Restrict their rights on files and folders
Here is a typical configuration:
<Default>
# For all users, they will have access to their own home directory
Home /home/$USER
# Force users to stay in their home directory
VirtualChroot true
# Set global download for the server to 100m
GlobalDownload 100m
# Set global upload for the server to 100m
GlobalUpload 100m
# Limit user download speed to 1m
Download 1m
# Limit user upload speed to 1m
Upload 1m
# Limit 6 users per IP
LimitConnectionByIP 6
# We limit a user up to 2 simultaneous connections
LimitConnectionByUser 2
# We do not want users to keep forever their idle connection
IdleTimeOut 10m
# Force user and group to apache daemon username
# to avoid rights issues
ForceUser www-data
ForceGroup www-data
# We do not want users to be able to set execution files
MaximumRights 0640 0750
# We do not want users to be able to change file attributes
DisableSetAttribute true
</Default>
<VirtualHost www.example.com>
# Set home directory for this virtualhost
Home /var/www/sites/www.example.com
# Set dedicated log file
LogFile /var/log/sftp/www.example.com
</VirtualHost>
<VirtualHost www.exemple.fr>
# Set home directory for this virtualhost
Home /var/www/sites/www.exemple.fr
# Set dedicated log file
LogFile /var/log/sftp/www.example.com
# Override the maximum number of connection per user
LimitConnectionByUser 4
</VirtualHost>
We can see here 2 different VirtualHost which have their own home directory and logs file. They both inherit their
configuration from the Default parent tag. However www.exemple.fr virtual host has a different configuration for
the maximum of simultaneous connected users.
4.3.3 High restriction access
In a very strict situations, you may want to:
62 Chapter 4. Configuration

MySecureShell Documentation, Release 1.33
• Restrict your user access to the minimum allowed files (images and pdf only)
• Deny any changes on those files (read only)
• Allow adding new files but in a specific folder (upload)
• Limit to 1 connection per user maximum
• Limit the bandwidth
Let’s say the Home folder contents looks like this:
drwxr-xr-x 2 user group 40 Aug 21 07:14 Download
drwxrwxrwx 2 user group 40 Aug 21 07:14 Upload
In the Download folder, read only files and folders will be present while in the Upload folder, users will be able to
upload anything. Here is what it should looks like:
<Default>
# For all users, they will have access to their own home directory
Home /home/sftp
# Force users to stay in their home directory
VirtualChroot true
# Set global download for the server to 100m
GlobalDownload 100m
# Set global upload for the server to 100m
GlobalUpload 100m
# Limit user download speed to 10m
Download 10m
# Limit user upload speed to 10m
Upload 10m
# Deny user simultaneous connections
LimitConnectionByUser 1
# We do not want users to keep forever their idle connection
IdleTimeOut 5m
# We do not want users to be able to modify files once uploaded
ForceRights 0440 0550
# To be sure they do not have the permission to delete
DisableRemoveFile true
DisableOverwrite true
# We do not want users to be able to change file attributes
DisableSetAttribute true
# Apply filters
ApplyFileSpec AllowedExtensions
</Default>
<FileSpec AllowedExtensions>
# Only check against filenames/folder names only
UseFullPath false
# we can use multiple deny/allow directives for clarity
Order AllowDeny
# Only allow images and pdf extensions
Allow ".
*
.(jpg|jpeg|png|gif|raw|psd|pdf)$"
# Deny anything else
Deny all
</FileSpec>
4.3. Use cases 63

MySecureShell Documentation, Release 1.33
64 Chapter 4. Configuration

CHAPTER 5
Usages
In this section, we will see how to use MySecureShell:
• For administration tools to manage users: you will have a look of the available tools to manage your MySe-
cureShell servers, how to validate your configuration, kill connected users, etc. . .
• For users utilization: this will explain for a basic user, what tool he has to choose for his usage, what can he
do, etc. . . this is a basic how to use sftp for low skilled users.
5.1 For Administrators
Topics
• For Administrators
– Configuration validator
– Updating configuration
– Service status
– Who is connected
– MySecureShell control remotely
– Check MySecureShell installation
– Manager users for MySecureShell
As an administrator, you have to tasks to know to manage your users and validate the configuration.
65

MySecureShell Documentation, Release 1.33
5.1.1 Configuration validator
Let’s say you’ve made a complex MySecureShell configuration and you want to validate the configuration of some
users. MySecureShell can natively perform those check for you and gives you the configuration related to a user:
$ MySecureShell --configtest
--- invite ---
Home = /home/invite
ByPassGlobalDownload = false
ByPassGlobalUpload = false
GlobalDownload = 5242880 bytes/s
GlobalUpload = 0 bytes/s
Download = 0 bytes/s
Upload = 0 bytes/s
StayAtHome = true
VirtualChroot = true
LimitConnection = 3
LimitConnectionByUser = 3
LimitConnectionByIP = 1
IdleTimeOut = 300s
ResolveIP = false
DirFakeUser = false
DirFakeGroup = true
DirFakeMode = 0000
HideFiles = {nothing to hide}
HideNoAccess = true
MaxOpenFilesForUser = 0
MaxReadFilesForUser = 0
MaxWriteFilesForUser = 0
PathDenyFilter = (null)
Shell = {no shell}
ShowLinksAsLinks = false
DefaultRights = 0000 0000
ConnectionMaxLife = 0s
DisableAccount = false
IsAdmin = false
Config is valid.
You can also enable verbose mode with -v argument. As you can see here, the message on the last line indicates the
configuration is valid, with means there is no syntax errors.
5.1.2 Updating configuration
With MySecureShell, you do not need to reload the service when you make a new or update the configuration.
Simply add your new parameters and once you write changes to disks, it will be applyed.
5.1.3 Service status
By default, MySecureShell doesn’t require a daemon as the configuration is reread each time a user connects to the
server. But you may want to temporary stop the service, start it or getting the status:
service mysecureshell stop
It will in fact add a lock file to the filesystem to inform MySecureShell to deny any new connections. This lock file is
released once the service is started.
66 Chapter 5. Usages

MySecureShell Documentation, Release 1.33
All available options are:
Options Description
stop / shutdown Deny new SFTP connections and keep current connected users
start / active Allow new SFTP connections
fullstop Deny new SFTP connexions and kill current running (clean memory as well)
restart / force-reload Make a fullstop and start
status Give the current status (up/down)
Note: The service command uses sftp-state binary. You can have a look at it if you do not want to use the
service command.
5.1.4 Who is connected
You can know how many users are connect, who, the used global bandwidth, per user bandwidth usage, the status and
other usefull information with the sftp-who command:
> sftp-who
--- 1 / 10 clients ---
Global used bandwith : 0 bytes/s / 0 bytes/s
PID: 3389 Name: mssuser IP:
Home: /home/mssuser
Status: idle Path: /
File:
Connected: 2014/08/19 15:38:27 [since 10s]
Speed: Download: 0 bytes/s [5.00 kbytes/s] Upload: 0 bytes/s [unlimited]
Total: Download: 1398 bytes Upload: 141 bytes
You also have --while option to automatically refresh the information with a desired time in seconds:
> sftp-who --while 2
This will force sftp-who to refresh every 2 seconds.
5.1.5 MySecureShell control remotely
You can remotely control MySecureShell and make actions on users, server state and more. Simply connect on SSH
with an admin account and you will have those features:
> sftp-admin [email protected]
[email protected]'s password:
> help
Usage:
kill [0 or PID] : kill user with PID or 0 to kill all users
list : list online users
log [x bytes] : show last x bytes of log
quit : quit program
server [start or stop] : start or stop server
5.1. For Administrators 67

MySecureShell Documentation, Release 1.33
5.1.6 Check MySecureShell installation
You can check MySecureShell installation easily with sftp-verif tool. It will check if every needed binaries are
present with correct rights and will check the configuration. You simply have to run it:
> sftp-verif
################################################################################
MySecureShell Verification Tool
################################################################################
### Verifing file existance ###
/usr/bin/mysecureshell [ OK ]
/bin/sftp-who [ OK ]
/bin/sftp-kill [ OK ]
/bin/sftp-state [ OK ]
/bin/sftp-admin [ OK ]
/bin/sftp-verif [ OK ]
/bin/sftp-user [ OK ]
### Verifing /etc/shells ###
/etc/shells contains /usr/bin/mysecureshell [ OK ]
### Verifing rights ###
Verifing file rights of /etc/ssh/sftp_config [ OK ]
Verifing file rights of /bin/sftp-who [ OK ]
Verifing file rights of /bin/sftp-verif [ OK ]
Verifing file rights of /bin/sftp-user [ OK ]
Verifing file rights of /bin/sftp-kill [ OK ]
Verifing file rights of /bin/sftp-state [ OK ]
Verifing file rights of /bin/sftp-admin [ OK ]
Verifing file rights of /usr/bin/mysecureshell [ OK ]
### Verifing rotation logs ###
Rotation logs have been found [ OK ]
### Verifing server status ###
Verifing server status (ONLINE) [ OK ]
### Verifing server dependencies ###
Show only error(s) :
### Verifing server configuration ###
Show only error(s) :
Trying user: root
(continues on next page)
68 Chapter 5. Usages

MySecureShell Documentation, Release 1.33
(continued from previous page)
Checking user : mssuser
### All tests dones ###
5.1.7 Manager users for MySecureShell
You can easily add a new user to MySecureShell by using the sftp-user command:
> sftp-user create mssuser /home/mssuser
Enter password:
This will create the user and password, then add MySecureShell shell to this user.
Note: sftp-user uses the common binary tool to create users (useradd on Linux and niutil on Mac OS).
You can also delete a user or getting the list of avaialable users:
> sftp-user list
mssuser
Here is the list of available options:
> sftp-user --help
Usage 1: sftp-user create [user] [hide user]
Usage 2: sftp-user delete [user]
Usage 3: sftp-user list
Usage 4: sftp-user hide [user] [hide] (Mac OS X Only)
Options Choices Descriptions
user Username User Name
hide user 1/0 hide user from login panel and user managements (Max OS X
˓→Only)
delete home 1/0 Remove user Home directory
hide 1/0 Hide/Unhide (Mac OS X Only)
5.2 For Users
Topics
• For Users
– Desktop clients
– Mobile clients
– Command line
A lot of clients exists and you may be lost. We will see here which solution MySecureShell Team recommand.
5.2. For Users 69

MySecureShell Documentation, Release 1.33
5.2.1 Desktop clients
For the desktop clients solutions, here is what you can use as user:
Plateform Free Proprietary
Linux FileZilla
gFTP
Mac OS Cyberduck Transmit
Windows WinSCP WebDrive
FileZilla
All those solutions have been tested and works well. Of course a lot of others exists be we unfortunately didn’t had
the time to test them.
5.2.2 Mobile clients
For mobile clients solutions, you can use:
Plateform Free Proprietary
Android AndFTP TurboFTP
5.2.3 Command line
With command line, you can easily do it as whell with sftp command:
> sftp user@host
Connected to user@host.
sftp>
You can look at the man if you want additional commands.
70 Chapter 5. Usages

CHAPTER 6
Frequently Asked Questions
Topics
• Frequently Asked Questions
– What can I do if I have a problem?
– Some features seem not working correctly
– I can’t open symbolic link folders
– Connection refused after connection
– Why do I got random errors on download or file access?
– Why uploaded files have 0 size on the server?
– Clients do not see all folders or files on the server, why?
– Only allow MySecureShell users for SFTP connections
– How can I enforce security like blocking bruteforce attacks?
– How coud I limit the number of simultaneous unauthenticated connections?
– How can I make a passwordless connection?
– Can I use another authentication system?
6.1 What can I do if I have a problem?
1. Be sure it’s not a miss-configuration problem first.
2. Check out the FAQ to be sure the problem was not already listed.
3. If the problem still persist, you can look at the list of issues to see if the problem have not already corrected.
71

MySecureShell Documentation, Release 1.33
4. If not, create an issue on GitHub.
On issues, we’ll do our best to reply as soon as possible.
6.2 Some features seem not working correctly
For some security reasons and for official packaging approval in several Linux distributions, the setuid right on the
/usr/bin/mysecureshell binary has been dropped by default.
Please check that you have the setuid with sftp-verif tool or directly set rights:
> chmod 4755 /usr/bin/mysecureshell
6.3 I can’t open symbolic link folders
There are several reasons why it may not work. Check those bullet points:
• If VirtualChroot is enabled and the symbolic link is outside the chroot, it is not accessible and is this normal
• If StayAtHome is enabled, it may be the same reason.
If the problem still persist, you can use --bind option to mount command. For example if you need to access to an
external folder (here /mnt/external) from the Home value (here /var/sftp):
> mkdir /var/sftp/external
> mount --bind /mnt/external /var/sftp/external
Then you’ll be able to access to the external folder inside the Home folder.
6.4 Connection refused after connection
When you have connection refused message when you’re trying to login, this is generally a problem of firewalling.
Check that you’re not behind a firewall or your SSH port (default is 22) is correctly open:
> nc -v your_sftp_server 22
Connection to localhost 22 port [tcp/ssh] succeeded!
If it’s still not ok, please check that your SSH service is properly running:
> service ssh status
6.5 Why do I got random errors on download or file access?
This is generally due to SFTP clients cache. Some clients like FileZilla have a cache enabled by default which can
indicates wrong informations (connected even if you’re not, showing files that do not exists anymore on the server,
etc. . . ).
The solution consist in disabling the cache on the client size.
72 Chapter 6. Frequently Asked Questions

MySecureShell Documentation, Release 1.33
6.6 Why uploaded files have 0 size on the server?
When this problem occurs, it’s usually because of a disc full on the server side.
6.7 Clients do not see all folders or files on the server, why?
Check if the HideNoAccess child tag is enabled. This tag hides folders and files to your users with no access to
them.
If you want your users to be able to see (but do not have access) to any files or folders without having rights, you
should consider disabling HideNoAccess value.
6.8 Only allow MySecureShell users for SFTP connections
If you want to only allow MySecureShell users to use sftp connections on your server, you need to change/adapt this
line (OpenSSH version > 4.5) in /etc/ssh/sshd_config:
Subsystem sftp /usr/bin/mysecureshell -c sftp-server
Warning: Changing this parameters will block users who do not have MySecureShell as a shell!
6.9 How can I enforce security like blocking bruteforce attacks?
You can use a solution called Fail2ban which will check at the authentication logs in real time. If it detects a certain
amount of failed login in a given time, it will block an IP address using iptables rules.
6.10 How coud I limit the number of simultaneous unauthenticated
connections?
If you want to limit the number of simultaneous unauthenticated connections by changing the MaxStartups value
in /etc/ssh/sshd_config file:
MaxStartups 5
In this example, we do not allow more than 5 unauthenticated connections at the same time.
6.11 How can I make a passwordless connection?
To get a secure connection without credentials, you can use SSH key exchange. One of the advantage of that solution is
the security enforcement. To make it work, be sure that your server allow it in its configuration file /etc/ssh/sshd_config:
PubkeyAuthentication yes
If you only want to allow this user using SSH key, you can disable it’s password account:
6.6. Why uploaded files have 0 size on the server? 73
MySecureShell Documentation, Release 1.33
> passwd -d useraccount
Note: Note that it will also disable local password account
6.12 Can I use another authentication system?
Of course you can use another authentication system like:
• OpenLDAP
• Kerberos
• . . .
You have to configure PAM (Pluggable Authentication Module) to be able to authenticate trought another backend.
You can check that your backend connection is working fine like this:
$ getent passwd username
username:x:1000:1000:username,,,:/home/username:/usr/bin/zsh
We can see here a user called username, with id 1000. You now have to change his shell to make it work properly.
74 Chapter 6. Frequently Asked Questions

CHAPTER 7
Contribute
Topics
• Contribute
– Which kind of contribution are accepted?
– What is the easiest solution to contribute code or doc?
*
Docker
*
Vagrant
– How can I contribute to the documentation?
– Share your MySecureShell usage and knowledge
You may be interrested in contribute to MySecureShell project. We’re going to see here how you can do this :-)
7.1 Which kind of contribution are accepted?
Any kind of contribution is welcome in fact :-).
• If it’s a bug or feature related, do not hesitate to use GitHub issues to inform us.
• You created a patch for MySecureShell? Please use GitHub Pull Request to provide it.
• You made a plugin for a third party application? Please inform us! And if you want we host it, do not hesitate
to inform us.
• The documentation is not good enough and you want to enhance it? Please make the changes from the sources
by using a Pull Request
• The documentation is not translated into your language? You can have a look to Transifex website and we will
integrate it.
75

MySecureShell Documentation, Release 1.33
• We did not make the package for your favorite distribution? Create your own and inform us how to install it, we
will add it to the documentation!
As you can see, we’re open to any kind of contribution and hope you’ll enjoy contributing.
7.2 What is the easiest solution to contribute code or doc?
We are providing Docker and Vagrant files that will install everything you need to have (packages, sources, dependan-
cies, documentation sources and so on. . . ) to help you to contribute.
7.2.1 Docker
With Docker, here is the content file for development:
FROM debian:unstable
MAINTAINER Pierre Mavro <[email protected]>
##################
# User Quick Try #
##################
RUN apt-get update
RUN DEBIAN_FRONTEND=noninteractive apt-get -y -o Dpkg::Options::="--force-confdef" \
-o Dpkg::Options::="--force-confold" install whois procps openssh-server
RUN mkdir /var/run/sshd
RUN echo 'root:root' | chpasswd
#######
# DEV #
#######
RUN apt-get update
RUN apt-get -y install git
RUN git clone https://github.com/mysecureshell/mysecureshell.git
RUN apt-get -y install libacl1-dev libgnutls28-dev gcc make
RUN apt-get -y install build-essential fakeroot lintian devscripts debhelper ubuntu-
˓→dev-tools \
cowbuilder autotools-dev
RUN apt-get -y install sphinx-doc sphinx-common python3-sphinx libjs-sphinxdoc \
python-pip texlive-latex-base texlive-latex-recommended texlive-latex-extra texlive-
˓→fonts-recommended
RUN apt-get clean
RUN pip install sphinx_rtd_theme
# Start SSHd
EXPOSE 22
CMD ["/usr/sbin/sshd", "-D"]
To install this container, simply build docker with the Dockerfile:
$ docker build -t mysecureshelldev \
https://raw.githubusercontent.com/mysecureshell/mysecureshell/master/deployment-tools/
˓→docker/dev/Dockerfile
Now you can run one:
76 Chapter 7. Contribute

MySecureShell Documentation, Release 1.33
$ docker run -d -p 22222:22 mysecureshelldev
If you need more explaination on how to use it, please look at the Quick Try section.
7.2.2 Vagrant
With Vagrant and the Vagrantfile:
# -
*
- mode: ruby -
*
-
# vi: set ft=ruby :
# MySecureShell Team <https://github.com/mysecureshell/mysecureshell>
# Vagrantfile API/syntax version. Don't touch unless you know what you're doing!
VAGRANTFILE_API_VERSION = "2"
$install_mss = <<INSTALL
echo "deb http://mysecureshell.free.fr/repository/index.php/debian/7.1 testing main
deb-src http://mysecureshell.free.fr/repository/index.php/debian/7.1 testing main
" > /etc/apt/sources.list.d/mysecureshell.list
gpg --keyserver hkp://pool.sks-keyservers.net --recv-keys E328F22B
gpg --export E328F22B | apt-key add -
apt-get update
apt-get -y install mysecureshell
pass=$(mkpasswd -m sha-512 -s mssuser)
useradd -m -s /usr/bin/mysecureshell -p $pass mssuser
chmod 4755 /usr/bin/mysecureshell
INSTALL
$install_mss_dev = <<INSTALL
apt-get update
#install git
apt-get -y install git
#get the sources
if [ -f /vagrant/id_rsa ] ; then
git clone [email protected]:mysecureshell/mysecureshell.git
else
git clone https://github.com/mysecureshell/mysecureshell.git
fi
chown -Rf vagrant. mysecureshell
#install C dependencies
apt-get -y install libacl1-dev libgnutls-dev gcc make
#install packaging dependencies
apt-get -i install build-essential fakeroot lintian devscripts debhelper ubuntu-dev-
˓→tools cowbuilder
#install Sphinxdoc dependencies
apt-get -y install sphinx-doc sphinx-common python3-sphinx libjs-sphinxdoc python-pip
˓→\
texlive-latex-base texlive-latex-recommended texlive-latex-extra texlive-fonts-
˓→recommended
#install sphinxdoc theme
pip install sphinx_rtd_theme
INSTALL
Vagrant.configure(VAGRANTFILE_API_VERSION) do |config|
config.vm.box = "deimosfr/debian-wheezy"
config.vm.network "forwarded_port", guest: 22, host: 22222
(continues on next page)
7.2. What is the easiest solution to contribute code or doc? 77
MySecureShell Documentation, Release 1.33
(continued from previous page)
config.vm.network "private_network", ip: "192.168.33.10"
config.vm.network "public_network"
config.vm.provider "virtualbox" do |v|
v.memory = 768
v.cpus = 2
end
config.vm.provision "shell", inline: $install_mss
# Uncomment if you want to install all dev dependancies (to contribute for example)
#config.vm.provision "shell", inline: $install_mss_dev
end
you just need to uncomment this line to install all development dependencies:
#config.vm.provision "shell", inline: $install_mss_dev
Then launch it:
$ vagrant up
If you need more explaination on how to use it, please look at the Quick Try section.
7.3 How can I contribute to the documentation?
The simplest solution is to look at the previous section to create a development environment with all the prequesites to
build the documentation.
All the documentation is based in the doc folder. The documentation has been made with Sphinx Doc, which is easy
to use.
When you’ve got the development environment and made modifications in the documentation, you can try to generate
a new one with this command inside the doc folder:
$ make html
sphinx-build -b html -d build/doctrees source build/html
Running Sphinx v1.2.2
loading pickled environment... done
loading intersphinx inventory from http://docs.python.org/objects.inv...
building [html]: targets for 1 source files that are out of date
updating environment: 0 added, 1 changed, 0 removed
reading sources... [100%] contribute
looking for now-outdated files... 77 found
pickling environment... done
checking consistency... done
preparing documents... done
writing output... [100%] usages_user
writing additional files... genindex search
copying images... [100%] images/logo_ubuntu.png
copying static files... done
copying extra files... done
dumping search index... done
dumping object inventory... done
build succeeded, 1 warning.
Build finished. The HTML pages are in build/html.
78 Chapter 7. Contribute

MySecureShell Documentation, Release 1.33
This will generate an html documentation available in the doc/build/html folder. Once done, you can create a pull
request for merging your modifications.
7.4 Share your MySecureShell usage and knowledge
If you like MySecureShell, do not hesitate to make blog posts, social sharing (Twitter, Google+, Facebook. . . ) or
participate with us to help users on GitHub issues.
Note: MySecureShell is available on Twitter with @MySecureShell username.
You can also help us on testing futures releases by participating to beta tests.
7.4. Share your MySecureShell usage and knowledge 79

MySecureShell Documentation, Release 1.33
80 Chapter 7. Contribute


MySecureShell Documentation, Release 1.33
• Small size logo:
• Badge 1:
• Badge 2:
8.2 Munin
Topics
• Munin
– Presentation and usage
Munin is a networked resource monitoring tool that can help analyze resource trends and “what just happened to kill
our performance?” problems. It is designed to be very plug and play. A default installation provides a lot of graphs
with almost no work.
We created a set of scripts for Munin to graph connected users and bandwidth.
82 Chapter 8. Third Party and Others
MySecureShell Documentation, Release 1.33
8.2.1 Presentation and usage
With Munin, you can graph the number of connected users:
You can graph the bandwidth usage:
And you can have the aggregation of both:
8.3 Nagios
Topics
• Nagios
– Presentation and usage
Nagios is a powerful monitoring system that enables organizations to identify and resolve IT infrastructure problems
before they affect critical business processes.
We are providing a set of Nagios scripts, compatible with most of the Monitoring tools (Shinken, Naemon, Sensu. . . ).
8.3.1 Presentation and usage
If you want to monitor how many users are connected an be alerted if a number of connected users is reached:
Usage: check_mss_users -w [warning] -c [critical] -p [1|0]
-h: show help (this message)
-w: set maximum connected users before warning
-c: set maximum connected users before critical
-p: set maximum connected in percentage instead
So for example, if you want to be warned when you’re raeching 80 users (warning) and receive a critical alert when
you’re reaching 100 users:
$ check_mss_users -w 80 -c 100
USERS OK - currently connected 0 / 10 |users=0;80;100
You can also decide to use pertencage instead:
$ check_mss_users -w 80 -c 90 -p 1
USERS OK - currently connected 0 / 10 |users=0;80;90
This will start alerting at 80% and be critical at 90%.
MySecureShell is a solution which has been made to bring more features to sftp/scp protocol given by OpenSSH.
By default, OpenSSH brings a lot of liberty to connected users which imply to trust in your users. The goal of
MySecureShell is to offer the power and security of OpenSSH, with enhanced features (like ACL) to restrict
connected users.
8.3. Nagios 83

MySecureShell Documentation, Release 1.33
MySecureShell was created because of the lack of file transfer features in OpenSSH. OpenSSH was not designed as a
file transfer solution, that’s why we made MySecureShell.
MySecureShell is not a patch for OpenSSH, it’s a shell for users. It has the advantage to:
• Avoid including security holes in OpenSSH
• No dependency on against an OpenSSH version
• No OpenSSH recompilation is required
So MySecureShell remains easy to install, secure and easy to configure.
Regarding MySecureShell projects, here are usefull links you need to know:
• You can follow us on Twitter.
• The online documentation can be found on ReadTheDoc. You can download the PDF,HTML or Epub version
directly from it.
• The source code is hosted on GitHub.
• If you encounter a bug or have any kind of issue related to MySecureShell:
– first read the Frequently Asked Questions
– If you do not have the answer, fell free to look at GitHub issues
– Finally open an issue if you still do not have answers.
• For documentation translation, we’re using Transifex, which is easilly usable if you want to produce a version
in your language. When fully completed, it will be embedded in the documentation.
84 Chapter 8. Third Party and Others
