
EQUITY
JOBS
STEM
CODING
CODING
ROBOTICS
CTE
ROBOTICS
STEM
CODING
CTE
CODING
EARLY-LEARNING
ACTIVITY GUIDE
BEE-BOT
®
91270

ST•0621•0000•00 91270
Written by Alison Lydon.
Adapted by Aubrey Vance.
Cover design and desktop publishing by Crista Cunningham.
©2021 Pitsco, Inc., 915 E. Jefferson, Pittsburg, KS 66762
No part of this publication may be reproduced, stored in a retrieval system, or transmitted in any form
or by any means, electronic, mechanical, photocopying, recording, scanning, or otherwise, except as
permitted under Section 107 or 108 of the 1976 United States Copyright Act, without the prior written
permission of the publisher.
Limit of Liability/Disclaimer of Warranty: While Pitsco has used its best efforts to prepare this teacher’s
guide, it makes no representations or warranties with respect to the accuracy or completeness of the
contents of this book and specifically disclaim any implied warranties of merchantability or fitness for a
particular purpose. No warranty may be created or extended by sales representatives or written sales
materials. The advice and strategies contained herein might not be suitable for every situation. Use
professional judgment where appropriate. Pitsco shall not be liable for any loss or damage, including but
not limited to special, incidental, consequential, or other damages.
All other product names mentioned herein might be the trademarks of their respective owners.
Navigation Key
Back to Last Page Viewed
Tap or click the icon to return to the
previously viewed page.
Table of Contents
Tap or click a page number to jump
to that section. Tap or click the icon
located at the bottom of the page
to return to the Table of Contents.
HOW TO NAVIGATE THIS GUIDE
This document has been digitally enhanced to offer quick and easy navigation for your
convenience. Features include an interactive Table of Contents and navigational buttons at
the bottom of each page. See the Navigation Key here for instructions on how to use each
interactive feature in this document.

1
TABLE OF CONTENTS
Introduction .....................................................................................................................................................................2-5
Early-Learning Activities ........................................................................................................................................... 6-11
Colors ................................................................................................................................................................................... 6
Itsy Bitsy Spider ................................................................................................................................................................7
Five Little Monkeys .................................................................................................................................................... 8-9
Names ...............................................................................................................................................................................10
Sequence the Story.........................................................................................................................................................11
Literacy Activities .................................................. .................................................................................................... 12-16
Guess Who? ......................................................................................................................................................................12
Deep, Dark Wood ...........................................................................................................................................................13
I Spy .....................................................................................................................................................................................14
Deliver the Mail ...............................................................................................................................................................15
Spell .....................................................................................................................................................................................16
Math Activities ........................................................................................................................................................... 17-22
Find the Answer ..............................................................................................................................................................17
Cave Explorer ................................................................................................................................................................. 18
Knock Them Down .........................................................................................................................................................19
Shapes ...............................................................................................................................................................................20
Find the Number ............................................................................................................................................................21
3-D Solids ......................................................................................................................................................................... 22
Science Activities ......................................................................................................................................................23-28
Materials Matter ...........................................................................................................................................................23
Leaf Explorer ..................................................................................................................................................................24
Push, Bee-Bot, Push! ...................................................................................................................................................25
Electricity .........................................................................................................................................................................26
Habitats ............................................................................................................................................................................27
Baby Animals ..................................................................................................................................................................28
History/Social Studies Activities ........................................................................................................................ 29-39
American Symbols ........................................................................................................................................................29
Historical Events ........................................................................................................................................................... 30
Homes ................................................................................................................................................................................31
Bee-Bot Knight .......................................................................................................................................................32-38
People Who Help Us ....................................................................................................................................................39
Geography Activities .............................................................................................................................................. 40-47
N, E, S, W ................................................................................................................................................................... 40-41
Plan a Pirate Route ...............................................................................................................................................42-44
Bee-Bot Challenge ................................................................................................................................................45-47
Other Activities ........................................................................................................................................................ 48-49
Shopping ..........................................................................................................................................................................48
Feelings .............................................................................................................................................................................49
Planning Form ............................................................................................................................................................... 50

2
Bee-Bot® is an appealing programmable robot for young children. It provides an easy way to
introduce coding into the classroom for children as young as three years old. However, its versatile
nature also means it can be used with children up to eight years old and supplement other areas of
the curriculum.
Many schools have found that Bee-Bot can help children develop skills or reinforce concepts that
other resources or methods don’t touch on.
We hope this book will give you some tips for using Bee-Bot with children of all ages to develop not
only their coding capability but also concepts in other areas.
BEE-BOT TIPS
Just as with any other lesson, planning is important when using Bee-Bot. You might need to think
about what you want your learners to achieve and the best ways to ensure this happens.
There are four main concepts when using a floor robot.
1. It turns on the spot – it does not shuffle sideways.
2. It moves forward and backward along a line.
3. The more times a button is pressed, the farther the robot moves.
4. Instructions need to be accurately entered by the user.
Make sure children are familiar with Bee-Bot’s buttons and know how to make it work. A mixture of
directed and free play time works well with Bee-Bot.
Children might need some time to understand the Clear
button, how to move forward and backward, and how to turn
left and right. They will also need to experiment pressing the
Go button when they are ready for Bee-Bot to move. It might
help children if you show them how to work Bee-Bot. While
some children will love to play and discover how to make it
work, many will get bored when Bee-Bot keeps doing the
wrong thing. The Clear button is very important. It informs
Bee-Bot to forget everything it’s learned so it can remember a
new set of commands.
Think carefully about the coding stage your learners are working at. There are several steps for
children to master when using Bee-Bot.
1. Program Bee-Bot to move forward one step at a time.
2. Program Bee-Bot to move forward several steps at a time before you press Go.
3. Program Bee-Bot to move forward and backward several steps before you press Go.
4. Program Bee-Bot to turn left or right.
5. Program Bee-Bot to move forward and backward several steps, including turns, before you
press Go.
6. Add pauses to the sequence.
7. Write the whole program on paper. Then, program it all into Bee-Bot before you press Go.
8. Edit the program, and rewrite as necessary.
Choose a step that suits the majority of the class. You can always make the task slightly easier or
more difficult so everyone has a chance to succeed.
INTRODUCTION
GO
Move forward
Go
Rotate right
Pause
Move backwardClear instructions
Rotate le

3
INTRODUCTION
Identify your learning objectives. Is your aim to develop coding skills, or is it to use Bee-Bot
to teach skills in other subjects such as ELA or math? If you’re developing concepts in other
curriculum areas, making the level of coding less complex enables children to concentrate on the
desired learning objectives more easily.
Choose a meaningful learning context. Would this activity link well to a book the class loves, or
would it link well to a theme such as pirates, insects, or teddy bears? There are many starting
points for activities – you might need to be inventive and create a story for them and Bee-Bot.
Think about materials carefully. There are a lot of materials available – large obstacle courses,
neighborhood mats, treasure island maps, cards to retell stories, picture cards, and so on. Have
a look at what is available by visiting Pitsco.com and searching Bee-Bot. Does anything link to
your idea? If so, they could save you time. Otherwise, will you need to make some materials? If
so, see the Making Materials section.
Many of the activities call for the Bee-Bot Pocket Mat or a transparent grid. The grid can be
made easily by using a clear shower curtain liner and drawing a 5 x 5 grid on it with squares
measuring 15 cm x 15 cm (5.9 in. x 5.9 in.).
Provide enough room to explore. Bee-Bot works best when it moves over a flat, hard surface.
You also want to make sure the workspace is big enough and that Bee-Bot will not tumble off a
table to the ground.
Remember to let children have time to explore and make mistakes. It is easy to jump in and help
them too quickly because you want them to succeed with this exciting coding tool. They really do
learn more, and faster, if you let them make and learn from their mistakes!
Give Bee-Bot a fresh charge. Bee-Bot will last six hours with normal use and one and a half
hours with continual use. It might take up to two hours to fully charge after the battery has been
depleted. Evaluate your schedule and make sure that Bee-Bot will have sufficient time to charge
for your activities.
Make some reward stickers. Address labels are great to use as stickers since there are so many
on a page! Just the words, “I used Bee-Bot today!” will
be cherished but also will serve to highlight to parents
that their children have used control technology at
school. This can be taken further with varieties of
stickers – gold, silver, and bronze Bee-Bot stickers are
another easy way of rewarding children’s ability to
program Bee-Bot.
Store your mats carefully. The activity mats are best rolled up and put in a poster storage
container. Bee-Bot is quite light in comparison to some other robots; folding the mat will cause
problems as Bee-Bot can’t always make it over a harsh crease. Before you roll the mat up, write
the name of the mat on the white side at both ends. This way, whatever way you roll it up, you
can see what mat it is.
If your mats get a bit creased or crumpled, iron them on a low setting. Make sure to cover them
with a cheese cloth or thin towel so the iron itself does not touch the mat. Put them printed side
down on the ironing board, white side up, and use a low temperature. It can take a while to
smooth the mats out, depending on the severity of the creases.
I USED BEE-BOT TODAY!

4
INTRODUCTION
Add timing to spice things up! How quickly can children navigate around the community? Get
them to time themselves and write down their scores on the board or a sheet of paper. Are they
faster or slower than the last person? Not only are they completing the Bee-Bot task, but they
are also using a stopwatch and working out if times are faster or slower than others. If you are
working with younger children or have a tight schedule, give the group a set amount of time to
see how far they get. For example, how many flowers can they visit before the sand timer runs
out? How many shops can they collect from before the big hand gets to the three on the clock?
You can lay the tiles out in lots of ways. A straight line is the easiest, while a wiggly line is a
little harder. Bee-Bot does not always need to start at one end either; it can start in the middle,
making the children move forward and backward immediately. Cards can also be clustered
together.
These are some ways to set out
nine cards. Remember, Bee-Bot
can start at an end or in the
middle!

5
MAKING MATERIALS
Although there are many materials you can buy, making your own can be quick and easy. Here
are some tips.
Keep a lookout for magazines with pictures you can use to make cards. Cut out images from
magazines and make into 15 cm x 15 cm cards. Children can choose images they want to get
Bee-Bot to. Older children can write a description on the back, so the cards can be turned over.
Older children love making games for their younger friends to play. This can easily turn into a
great STEM project with a clear problem and design need, specific criteria, and a market to
interview. When children have created their game, the evaluation is meaningful too, as the
specific criteria at the start can be run through.
Attach a magnet on the front of Bee-Bot. (Make sure it is low to the ground!) Lay some colored
paper clips out on the floor. Set a specific amount of time for your learners to collect as many
paper clips as possible and earn one point per paper clip. If you assign different amounts of
points for different colors, the children will need to add up their points. You can also have a color
that is worth negative points, or one special paper clip that will double the score.
Stick a hook-and-loop fastener to the front of Bee-Bot – the small circles are great – and Bee-
Bot can then pick up felt shapes or other shapes with self-fasteners stuck on them. (Make sure
the spiky side of the fastener is on Bee-Bot if you want to pick up felt.) Add a self-fastener to
Bee-Bot’s top to let children add some funky wool hairstyles!
Pipe cleaners can be used to accessorize. Use them to make glasses or wings, or an eye patch is
great for dressing up Bee-Bot as a pirate to find treasure on the Treasure Island mat!
INTRODUCTION
Teacher Instruction
6
COLORS
OUTLINE
This activity is aimed at young children to reinforce their
understanding of color. It is also an opportunity to introduce Bee-
Bot to young children using a concept many will understand.
Working on the floor, a small group can experiment with Bee-Bot
and become familiar with the controls.
MATERIALS
• Bee-Bot
• Squares of color (15 cm x 15 cm)
• Color die
ACTIVITY
Hold each color square up and ask the children what color it is. Can
they think of something else that is that color? What food is that
color? Who is wearing something that color?
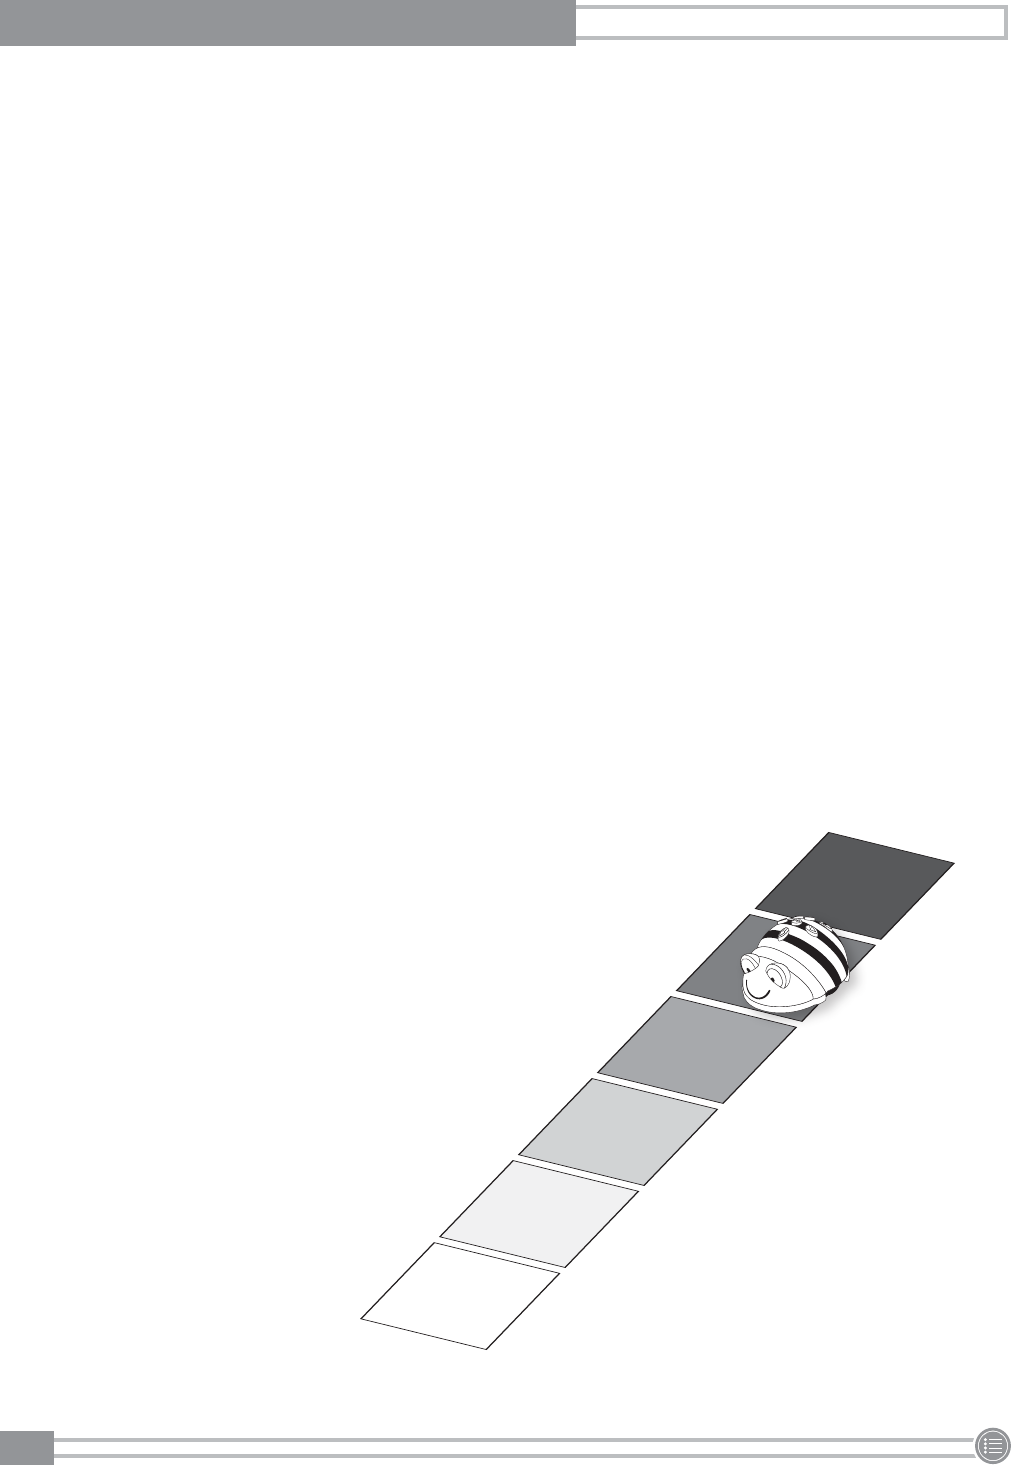
Place the squares of color in a long line, counting them as they are
placed. The line can be as long or short as you want, depending
on the ability and age of the children. Initially, a line of about six
squares is ideal.
Let the children take turns to roll the color die, see what color is
chosen, and make Bee-Bot move to that square. Some children
might be able to make Bee-Bot move backward too. After each
child’s turn is over, you can choose to move Bee-Bot back to the
start or move it from the last chosen color, depending on how
difficult you want the task to be.
After a while, the children might be able to count the number of
squares they need to move forward and to press the Forward
button the corresponding number of times to program Bee-Bot to
move.
KEY LEARNING CONCEPTS
• Colors
• Cause and effect
• Counting
Teacher Instruction
7
ITSY BITSY SPIDER
OUTLINE
This is a fun activity involving children in counting, repeating
rhymes, responding to rhymes, and programming Bee-Bot. Other
rhymes such as “Hickory Dickory Dock” also work well in this
format.
MATERIALS
• Bee-Bot
• Long strip of paper (90 cm), marked every 15 cm
• Bee-Bot shell customized to look like a spider (pipe cleaner
legs and a shell clipped on)
• Picture of the Sun
• Picture of a rain cloud
ACTIVITY
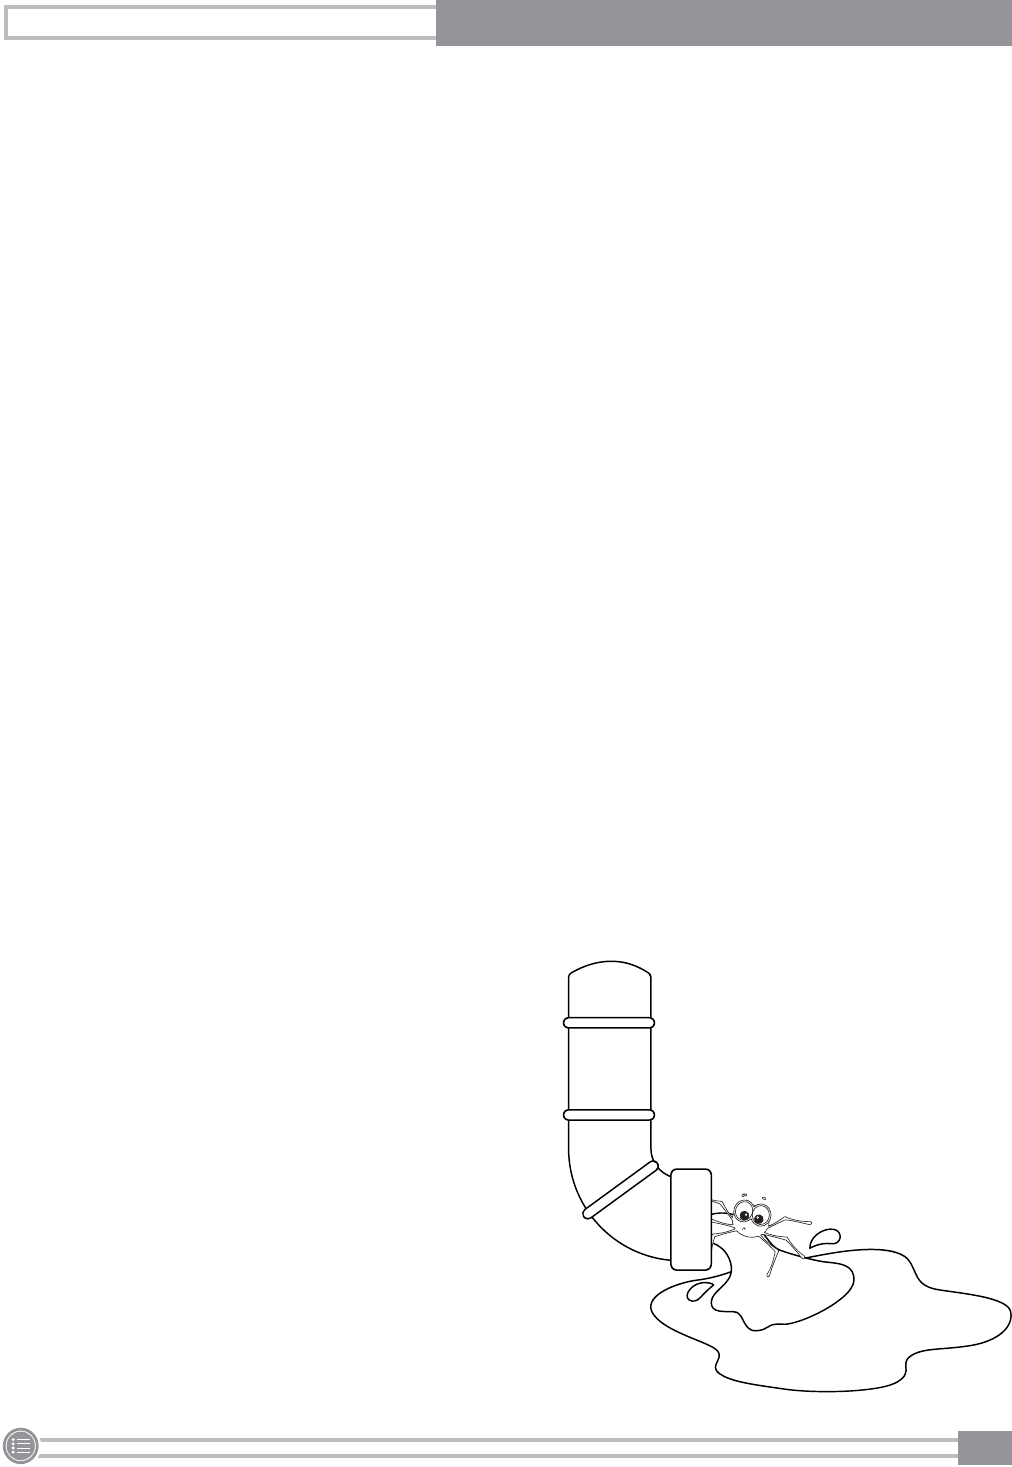
Place the strip of paper on the floor. This is a waterspout. Remind
them of the rhyme the “Itsy Bitsy Spider.” Place Spider Bee-Bot at
the bottom of the pipe. Sing the first part of the rhyme with the
children. “The itsy bitsy spider went up the waterspout.” Let the
children make Spider Bee-Bot climb the spout.
When they get it to the top, place the rain cloud there and sing
the next part of the rhyme, “Down came the rain and washed the
spider out.” Let the children move Spider Bee-Bot back down. Then,
swap the Sun for the rain, and the spider can climb up again! The
group can sing the last part of the song, “Out came the Sun and
dried up all the rain. Now the itsy bitsy spider went up the spout
again.”
How can the children make Spider Bee-Bot move up? Are they
going to turn it at the top or is it going to move backward? Can the
children make it move up the waterspout in one attempt?
KEY LEARNING CONCEPTS
• Following directions
• Cause and effect
• Counting
• Rhymes

Teacher Instruction
8
OUTLINE
This is a varied activity involving children in counting, repeating
rhymes, responding to rhymes, and programming Bee-Bot.
MATERIALS
• Bee-Bot
• 5 pictures of monkeys
• Large picture of a tree to fit under the transparent grid
• Transparent grid
• Bee-Bot shell customized to look like an alligator
• Five Little Monkeys rhyme
ACTIVITY
Place the transparent grid over the tree picture and the five
monkeys. Tell children the rhyme of five little monkeys, which can be
found on the next page.
Place Bee-Bot at the bottom of the tree. Read the rhyme with the
children, encouraging them to clap on the word snap.
Choose a child to program Alligator Bee-Bot to move to a monkey
to “snap” it out of the tree! Repeat the rhyme with remaining four
little monkeys and so on.
Other poems/songs this activity works well with:
• “10 in the Bed”
• “Five Little Ducks”
• “Five Little Speckled Frogs”
• “Five Little Monkeys Jumping on the Bed”
KEY LEARNING CONCEPTS
• Counting
• Cause and effect
• Rhymes
FIVE LITTLE MONKEYS

Rhyme
9
Five little monkeys
Sitting in the tree.
Teasing Mr. Alligator,
“You can’t catch me!”
“You can’t catch me!”
Along comes Mr. Alligator
Quiet as can be . . .
SNAP that monkey right out of that tree!
Four little monkeys
Sitting in the tree.
Teasing Mr. Alligator,
“You can’t catch me!”
“You can’t catch me!”
Along comes Mr. Alligator
Quiet as can be . . .
SNAP that monkey right out of that tree!
Three little monkeys
Sitting in the tree.
Teasing Mr. Alligator,
“You can’t catch me!”
“You can’t catch me!”
Along comes Mr. Alligator
Quiet as can be . . .
SNAP that monkey right out of that tree!
Two little monkeys
Sitting in the tree.
Teasing Mr. Alligator,
“You can’t catch me!”
“You can’t catch me!”
Along comes Mr. Alligator
Quiet as can be . . .
SNAP that monkey right out of that tree!
One little monkey
Sitting in the tree.
Teasing Mr. Alligator,
“You can’t catch me!”
“You can’t catch me!”
Along comes Mr. Alligator
Quiet as can be . . .
SNAP that monkey right out of that tree!
Now, no little monkeys
Sitting in the tree!
FIVE LITTLE MONKEYS
FIVE LITTLE MONKEYS

Teacher Instruction
10
OUTLINE
This activity is great for children just starting to write their names.
It is also a quick and easy activity to show lots of children how to
move Bee-Bot because it enables them to participate together
on the floor. Children write their names on squares of paper and
program Bee-Bot to reach each name. Further discussion about
names, letters, sounds, and so on can follow as children become
familiar with the activity.
MATERIALS
• Bee-Bot
• Squares of paper (15 cm x 15 cm)
• Pictures of faces (to add variety)
ACTIVITY
Give each child a square of paper to write their name on. Each
name is then put into a long line (or, if there are lots of names, two
parallel lines). The easiest option is to start from one end of the line
and have children take turns making Bee-Bot reach their name.
Lots of opportunities will arise for looking at names. Ask the
children whose name is next or what sound the next name starts
with. Are there any other names starting with that sound? Bee-Bot
could move to all names starting with a particular sound or letter
pattern, a boy’s name, the name before John’s, and so on.
KEY LEARNING CONCEPTS
• Writing
• Team building
• Cause and effect
NAMES

Teacher Instruction
11
OUTLINE
Reinforce stories and sequences using Bee-Bot. This activity lets
children program Bee-Bot to find the next picture in a sequence,
enabling them to develop vocabulary such as before, next, after,
and then. It also lets them collaborate in a group and listen to the
ideas of others. Any story or sequence of pictures could be used as
long as the pictures are 15 cm².
MATERIALS
• Bee-Bot
• 6-8 pictures from a story or sequence of events
(15 cm x 15 cm squares)
ACTIVITY
Make sure the children are familiar with the pictures on the cards.
What appears in the pictures? Can the children tell you the story
or sequence shown by the images? How do they know that? What
order do they go in?
Explain to the children that they are going to teach Bee-Bot the
story or sequence. With help from the children, lay the pictures out
in a line in the correct order. Initially, a line of about six pictures is
ideal. Now, they can program Bee-Bot to move along the line so it
looks at each picture. Children could take turns telling that section
of the story before Bee-Bot moves on to the next one.
After they have completed this, the pictures could be mixed up
in the line, so the children need to work out the sequence and
program Bee-Bot to move correctly.
Some sequences include:
• Setting the table
• Making a sandwich
• Doing a daily routine
• Going through the seasons
• Getting dressed
KEY LEARNING CONCEPTS
• Story elements
• Sequencing
• Counting
SEQUENCE THE STORY
Teacher Instruction
12
OUTLINE
This is a great activity for helping children become familiar with
faces and develop factual writing. This activity focuses on facial
recognition. Faces of teachers or other faculty in the school,
historical figures, or local celebrities from the community could be
used as long as the children are reasonably familiar with them. The
children work in groups, writing clues for each other to identify the
face and then programming Bee-Bot to get there.
MATERIALS
• Bee-Bot
• Pictures of faces (15 cm x 15 cm squares)
• Bee-Bot Pocket Mat or transparent grid
ACTIVITY
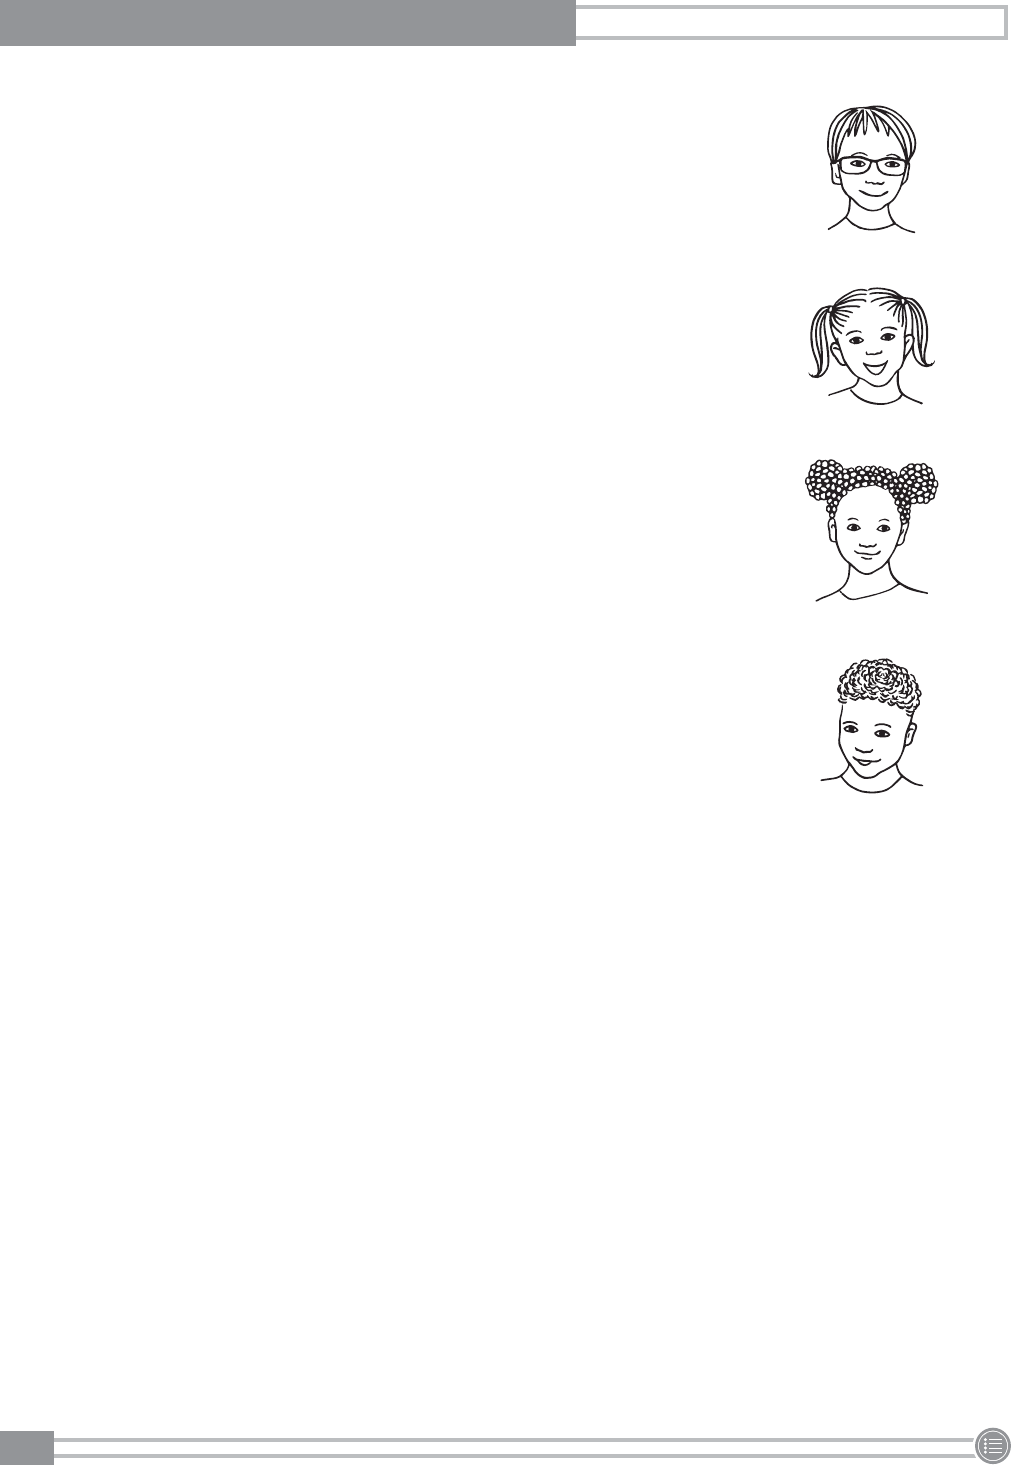
Discuss the pictures. Who are these people? What is special about
them? What do they do? Where are they based? Look at the
different characteristics of the faces. Can the children find someone
with glasses, a beard, long hair, no hair, or earrings?
Place the pictures in the pocket mat or under the transparent grid.
Help the children write a clue for one of the faces. For example,
“This person works in the school office. She has glasses and long
hair. Who is it?”
After the children have guessed the person, they can find the face
and program Bee-Bot to get there.
Children could also create their own pictures of people in art or take
the photographs themselves.
KEY LEARNING CONCEPTS
• Writing
• Team building
• Comparisons
GUESS WHO?

Teacher Instruction
13
OUTLINE
This activity is way to link Bee-Bot to familiar and well-loved
storybooks, developing both literacy and numeracy skills. A book
with a journey is required, such as We’re Going on a Bear Hunt,
Rosie’s Walk, or Little Red Riding Hood. The chosen example here is
The Gruffalo. This activity has a stopwatch to add a dimension of
speed and competition. Pairs of children compete to be the fastest.
MATERIALS
• Bee-Bot
• Pictures of the Gruffalo wood (15 cm x 15 cm squares)
• Bee-Bot Pocket Mat or transparent grid
• Stopwatch
ACTIVITY
Put the pictures in the pocket mat or under the transparent grid.
Place Bee-Bot at the start. Ask the children to imagine they have
just met the Gruffalo. How quickly can they get back to the safe
point on the map?
It is a race against time. One pair will program Bee-Bot, and the
other pair will time them!
Let children have a little bit of time to think and plan the journey.
When both pairs are ready, the stopwatch group can say “Go” and
start the stopwatch. How quickly can the other pair program Bee-
Bot to get away from the Gruffalo? Encourage the pair with the
stopwatch to count as each minute passes.
Children could attempt to write the route on small whiteboards
or paper using symbols for forward, left, and right before they
program Bee-Bot.
KEY LEARNING CONCEPTS
• Story retell
• Measurement
• Teamwork
DEEP, DARK WOOD
Start
Finish

Teacher Instruction
14
OUTLINE
This activity allows children to work on specific letter sounds. As
children program Bee-Bot to move to specific pictures, they also
develop their programming and counting skills.
MATERIALS
• Bee-Bot
• Bee-Bot Sounds Squares or pictures of objects starting with
specific sounds (15 cm x 15 cm squares)
• Bee-Bot Pocket Mat or transparent grid
ACTIVITY
Introduce the game “I Spy” to the children. Depending on the age
and requirements of your children, phonetic letter sounds can be
used rather than the traditional game with letter names.
Place the sound squares or pictures in the pocket mat or under the
transparent grid. Can the children see any pictures starting with
that sound? Let the children play the game, choosing a sound for
others to guess. Then, introduce Bee-Bot. Can they help Bee-Bot to
join in?
After a child chooses a sound for Bee-Bot to reach, the others can
help get Bee-Bot there. Are there any other pictures Bee-Bot could
have gone to with the same letter sound?
Try using letter sounds in the middle and end of words too. Can
children help Bee-Bot reach the word with a “ch” sound at the end
of the word?
Written words, such as sight words, could be substituted for the
pictures. “I spy with my little eye . . . the word the.” Can you help
Bee-Bot find it?
KEY LEARNING CONCEPTS
• Phonics
• Sight words
• Teamwork
I SPY

Teacher Instruction
15
OUTLINE
This activity allows you to link estimating and measurement skills
with a favorite book and writing skills. Choose a book with lots of
characters or places (such as houses in The Jolly Postman, places in
Winnie the Pooh, characters and their houses on the Isle of Struay
in Katie Morag, or the places the animals live in The Gruffalo.) There
are many great ones to choose from.
MATERIALS
• Bee-Bot
• Pictures of places or characters in a story
(15 cm x 15 cm squares)
• Letters addressed to the places or characters
• Starting card (either a home card or a picture of a post office)
ACTIVITY
When the children are familiar with the story you choose,
encourage them to write letters to its characters. The children could
write about kinds of similarities and differences or give advice to
the character. Place the letters in envelopes, stamp them, and add
addresses.
Place the pictures of the houses in a long line. Discuss the homes
with the children. What kind of place do they live in? Place all
the letters on the starting card. Pick an envelope from the pile.
Together, read whom it needs to be delivered to. Place Bee-Bot on
the starting card. Attach the letter to the front of Bee-Bot (make
sure you don’t cover the buttons).
The children need to make Bee-Bot deliver the letter to the correct
house and then return for the next letter. How far will it need to go?
Can they use the Pause button to make Bee-Bot stop while the
letter is taken off?
KEY LEARNING CONCEPTS
• Story retell
• Letter writing
• Community helpers
DELIVER THE MAIL

Teacher Instruction
16
OUTLINE
This activity is great for children who know how to spell their names
or other familiar words. It enables them to program Bee-Bot, and it
reinforces spelling knowledge. Children can practice new words and
write clues to spell messages. This activity works best with just a
couple of children at a time. After it has been introduced to a class,
pairs can take turns using Bee-Bot and the mat.
MATERIALS
• Bee-Bot
• Alphabet cards (15 cm x 15 cm squares)
• Bee-Bot Pocket Mat or transparent grid
ACTIVITY
Assemble an alphabet mat by placing the alphabet cards in the
pocket mat or under the transparent grid. Look at the alphabet
mat with the children. Can they find the letters to write their
names? Try starting with just the initial letter. Can they program
Bee-Bot to move to all the other letters?
Make sure there is a definite starting point for Bee-Bot and all
the children are familiar with it. Ask the children to write a set of
instructions for Bee-Bot to write their name. Bee-Bot should pause
on the correct letter. This set of instructions can be written on a
card. When all the children have completed this, challenge them to
pick up a card and predict the name. They can then program the
instructions into Bee-Bot to check.
This activity can be developed into writing words, making
instructions for the spelling words of the week, and so on.
KEY LEARNING CONCEPTS
• Spelling
• Sequencing
• Teamwork
SPELL
A
F
K
P
U
B
G
L
Q
V
C
H
M
R
W
D
I
N
S
X
E
J
O
T
Y

Teacher Instruction
17
OUTLINE
Help your class develop their mental math in a different way by
using Bee-Bot. Children work out the sum of three dice and then
program Bee-Bot to reach that number. For added excitement,
try using a stopwatch to time them from roll of dice to Bee-Bot
reaching the goal.
MATERIALS
• Bee-Bot
• Cards with numbers 3-18 (15 cm x 15 cm squares)
• 3 dice
• Bee-Bot Pocket Mat or transparent grid
ACTIVITY
Set up the pocket mat or transparent grid with the number cards in
random spaces. Explain to the children that together they are going
to help Bee-Bot do some math. They will roll the three dice, add the
numbers up, and move Bee-Bot to the correct square. BUT, they are
going to program the whole sequence in one attempt.
Demonstrate first. Place Bee-Bot on a number. Roll the dice and let
the children add the numbers up. Ask one child to find the number
on the mat.
Next, plan a route together to move Bee-Bot to the number. Where
you place Bee-Bot can make the route easier or more difficult, so
you might want to wait and see what the number is before placing
Bee-Bot! Let the children take turns to move Bee-Bot to the correct
number.
EXTENSION/VARIATION
Place Bee-Bot on a square. Ask the children to choose a number
each. Let them plan a sequence of instructions to get to the number
they have chosen. They should write this down and then swap the
sequence with a friend and try to work out where Bee-Bot will end
up. Then, let the children program their list of instructions into Bee-
Bot. Did the instructions work? Did the children guess the number?
KEY LEARNING CONCEPTS
• Addition
• Teamwork
• Sequencing
FIND THE ANSWER

Teacher Instruction
18
OUTLINE
This is a great activity when you have some boxes leftover from
copy paper or other school supplies! It helps children develop their
estimation, planning, and counting skills in a fun way. It also can be
linked to science standards on light or to the book We’re Going on a
Bear Hunt.
MATERIALS
• Bee-Bot
• Various sizes of cardboard boxes
• Scissors
ACTIVITY
Cut holes on opposites sides of the boxes big enough for Bee-Bot to
fit through. These will act as caves for Bee-Bot to travel through.
Show the children the different caves. Tell the children they will help
Bee-Bot get through the caves and out the other side.
Choose a cave to start with. Ask the children to estimate how many
steps forward Bee-Bot would need to move to get through the cave
and out the other side. They will need to program them all into Bee-
Bot before pressing Go or it will get stuck in the cave!
Have the children test their instructions. Was the group successful?
If not, what went wrong? Did Bee-Bot get stuck in the cave? What
number of steps should they try next? Keep taking turns to program
Bee-Bot to move through the tunnels.
Several boxes can be put together to make the distances longer,
or you can create exits at the side of the cave so Bee-Bot needs
to turn. Place boxes together to make a longer obstacle course for
Bee-Bot to complete.
EXTENSION
Children can decorate their cardboard box caves with paint and
materials to create their own foliage and scenic features.
KEY LEARNING CONCEPTS
• Measurement
• Problem-solving
• Design
CAVE EXPLORER

Teacher Instruction
19
OUTLINE
Children love knocking things down, so let them program Bee-Bot
to do it for them! Clever selection of objects to knock down can
reinforce developing skills in all areas of the curriculum including
estimation and programming.
MATERIALS
• Bee-Bot
• Objects for Bee-Bot to knock over: empty boxes, water bottles,
plastic bowling pins, and so on
º Note: Before the activity, check that Bee-Bot can knock the
objects over. Top-heavy objects are easier for Bee-Bot to
topple.
• Pictures or words to stick on the objects
ACTIVITY
Set up a starting line and, perpendicular to it, line up the objects
about five Bee-Bot lengths away.
Explain the task to the children. They need to make Bee-Bot knock
down the objects, but the children are not allowed past a certain
line or mark on the floor. Discuss how they could move Bee-Bot
forward a few steps at a time, rather than one step at a time. Pair
up the children and have each pair take turns to see how many
objects they can knock down. Point values can be added for each
item to make it a competition. After the objects have been knocked
down, they can be repositioned at a different distance from the
start line.
VARIATIONS
• Use map signs on the objects. Can Bee-Bot knock over the
“post office”?
• Put math sums on the objects and give the children a number.
Can they knock over the correct equation?
• Color the objects. Can they knock over the red objects?
• Put words on the objects and then read one of the words. Can
they find it and knock it over?
• If the children are finding it difficult to estimate the distance,
use a number line at the side or even squares of paper in a line
so they can count. These can be removed when the children no
longer need the support.
KEY LEARNING CONCEPTS
• Estimation
• Force
• Measurement
KNOCK THEM DOWN

Teacher Instruction
20
OUTLINE
Whatever their age, this activity is a great way to let children spend
some time focusing on the properties of shapes. Allowing children
make their own clue cards really forces them to be accurate and
precise. Trying to work out which shape (or shapes) Bee-Bot will visit
creates lots of shape-related discussion.
MATERIALS
• Bee-Bot
• Pictures of shapes (depending on the ability of your learners,
examples include squares, rectangles, circles, triangles,
pentagons, and hexagons) (on 15 cm x 15 cm squares)
• Index cards for children to write clues on
• Bee-Bot Pocket Mat or transparent grid
ACTIVITY
First, have the children create some clue cards that describe the key
features and properties of different shapes.
Examples of clues for basic shapes:
SHAPES
• Find a shape with 4 sides.
• Find a shape with 3 sides.
• Find a shape with 5 sides.
• Find a shape with 6 sides.
• Find a shape with 4 sides of
the same length.
• Find a shape with 5 corners.
• Find a shape with 4 corners.
• Find a shape with 0 corners.
• Find a circle.
• Find a square.
• Find a rectangle.
• Find a triangle.
Then, place the pictures of the shapes in the pocket mat or under
the transparent grid, spreading them out so there are some on
each line and row. Discuss the shapes with the children. Name them
and discuss the properties. Which ones have four sides? Can they
find a shape with a curved side?
Pick a clue card from the pile. Read it together. Place Bee-Bot on
the grid somewhere. Where does Bee-Bot need to go? Let children
take turns moving Bee-Bot to a shape.
Extra shapes can be added, depending on the ability of the
children. It is also possible to add lots of irregular quadrilaterals so
older children need to think carefully about shape properties such
as parallel lines, obtuse angles, and lines of symmetry.
KEY LEARNING CONCEPTS
• Shapes
• Directionality
• Geometry

Teacher Instruction
21
OUTLINE
This activity is designed to help children recognize numbers and
give them an opportunity to use vocabulary related to numbers. It
enables them to develop their understanding about the relationship
between numbers. Working in groups allows key number concepts
to be explored and discussed.
MATERIALS
• Bee-Bot
• Cards with numbers 1-25 (15 cm x 15 cm squares)
• Bee-Bot Pocket Mat or transparent grid
ACTIVITIES
Place the numbers in the pocket mat or under the transparent
grid. Discuss the numbers with the children. What numbers do they
recognize, and where do they recognize them from?
Pick a card and place Bee-Bot on that number. Ask a child to move
Bee-Bot to the number worth one greater than the number it is
on. Together, the group can work out how to move there. Do the
children know the number that comes before this one? Can they
find it on the grid? Can they make Bee-Bot move there?
What about the number worth two greater than this one? How
about three greater? Number lines can be used to help children find
the correct number. After the numbers around the original one have
been explored, a different number could be chosen.
Can they move Bee-Bot to a number between 3 and 8? Can Bee-
Bot find the answer to 2 plus 3? Children can find different numbers
depending on their age and experience. Bee-Bot can be moved
using single commands or a sequence.
KEY LEARNING CONCEPTS
• Number recognition
• Number sequence
• Sequencing
FIND THE NUMBER
1
6
11
16
21
2
7
12
17
22
3
8
13
18
23
4
9
14
19
24
5
10
15
20
25

Teacher Instruction
22
OUTLINE
This activity focuses on understanding different 3-D shapes and
their properties. It also incorporates a beginning discussion on the
understanding of angles.
MATERIALS
• Bee-Bot
• 4 different 3-D shapes
• 4 index cards with the name of the shapes written on them
• 8 index cards with L, R, LL, RR, LLL, RRR, LLLL, and RRRR
written on them
ACTIVITY
Discuss the shapes with the children. What are they called? How
can we identify them? What makes each shape special?
Now, discuss turning with the children. Explain that they will use
left and right turns to rotate Bee-Bot to face the correct shape. Let
the children practice being Bee-Bots while you control them. Have
them turn 90 degrees to the left or right or move two 90-degree
turns to the left and one to the right. (Bee-Bot moves only in
90-degree turns.)
Now, place Bee-Bot on the floor with the four shapes around it.
Pick a shape card from the pile. Together, look at the shape. What
shape is it? How can the children make Bee-Bot face the shape?
How far will Bee-Bot need to turn, and which way? Let the children
take turns rotating Bee-Bot to a shape.
After the children understand this, move on to the next set of cards,
asking them to predict where Bee-Bot will end up if they program
the list of turns.
KEY LEARNING CONCEPTS
• Shapes
• Directionality
• Geometry
3-D SOLIDS

Teacher Instruction
23
OUTLINE
This activity focuses on selecting materials based on specific
attributes. The children will explore aspects of the scientific method
as they discover the best surface for Bee-Bot to travel on.
MATERIALS
• Bee-Bot
• Different floor surfaces such as carpet, rugs, linoleum, or tile
ACTIVITY
Identify a floor surface that Bee-Bot does not travel well on such as
thick carpet or a textured box lid. Set up an activity and start using
Bee-Bot with the children. As Bee-Bot starts to not move properly,
stop the activity and open a discussion. What is happening? Why
is Bee-Bot not moving as we would expect? What other surfaces
would be better or not good for Bee-Bot?
Encourage the children to think of other floor surfaces in the school
they could explore. How could they set up a test to see what floors
Bee-Bot likes? Which floors do they think will work best, and which
ones would not be as good? Make a list together of the floors they
will test.
Let the children use Bee-Bot on different surfaces. They can decide
ways of making the tests fair together. For example, they could
place a 60 cm strip of paper on the floor, place Bee-Bot at one end,
and press its Forward button four times. How far along the paper
does Bee-Bot move? After they have tested the surfaces, have
them record how far Bee-Bot moves.
Did Bee-Bot travel as they expected? Did they predict accurately?
KEY LEARNING CONCEPTS
• Hypothesis
• Planning and conducting an experiment
• Material science
MATERIALS MATTER

Teacher Instruction
24
OUTLINE
This is a great activity for helping children become familiar with
different leaves, look for characteristics of objects, and develop
factual writing. It can be played at many levels, depending on the
age and experience of the children.
MATERIALS
• Bee-Bot
• Leaves (either real or pictures of them)
• Square cards (15 cm x 15 cm)
• Bee-Bot Pocket Mat or transparent grid
ACTIVITY
Take the children on a leaf walk. Let them each collect a different
leaf. By trying to find different leaves, they should be able to
compare the features of their leaves.
Back in the classroom, have the children research and identify their
leaf. They should then create a clue for their leaf. To create the clue,
the children will need to observe the leaf characteristics carefully.
They could try to include information about its shape, size, color,
edges, and veins. Try to encourage the children to think about what
makes their leaf special. On the reverse of the clue, they should
carefully trace the leaf and copy the name of the leaf.
Place the leaves in the pocket mat or under the transparent grid.
Choose one of the clues and let the children read it aloud. Can
they identify which leaf Bee-Bot should go to? When Bee-Bot is
there, the clue writer can tell the group the name of the leaf. Then,
another clue can be read to the group.
KEY LEARNING CONCEPTS
• Plants
• Comparisons
• Research with informational text
LEAF EXPLORER

Teacher Instruction
25
OUTLINE
This activity focuses on the concept of force and pushes and pulls
as well as scientific inquiry. The children see how strong Bee-Bot
is by testing the weight it can push. This activity can be biased
more toward math or science, depending on the learning outcomes
desired.
MATERIALS
• Bee-Bot
• Bee-Bot Pushers
• Weights or washers
• Small box (such as a milk carton with the top cut off)
ACTIVITY
Ask the children how strong Bee-Bot is. Ask them how they could
test its strength. Allow discussion and prediction of what will
happen. Steer discussions toward pushing and pulling.
To test pushing, attach the pusher to Bee-Bot. Children can
add weights or washers to the box and see if Bee-Bot can push
it a specified distance (such as 30 cm). Make sure the children
understand that a big washer or weight is not equal to a small
washer or weight, so the test is not fair if the same washers are
not used every time. What’s the maximum number of weights or
washers Bee-Bot can push? Predict as a class and then test. When
Bee-Bot cannot push any more weights or washers, take them out
and count them. Who predicted correctly?
Discuss as a class how they could test the load that Bee-Bot could
pull. If there’s time, have the children construct a structure to attach
to Bee-Bot to test how much Bee-Bot can pull.
KEY LEARNING CONCEPTS
• Forces
• Measurement
• Data collection
PUSH, BEE-BOT, PUSH!

Teacher Instruction
26
OUTLINE
This activity lets children explore the classroom and find appliances
that use or don’t use electricity. They can then use a digital camera
to take photographs of objects to use with Bee-Bot. This activity
can be altered to discuss examples and non-examples of any topic
such as living and nonliving organisms or even and odd numbers.
MATERIALS
• Bee-Bot
• Digital camera or magazines
• Square cards (15 cm x 15 cm)
• Bee-Bot Pocket Mat or transparent grid
ACTIVITY
Let the children use the digital camera to take a photograph
of two items in the classroom, one that uses electricity and one
that does not. Print the pictures and place them on square cards.
Alternatively, collect pictures from magazines and stick them on the
cards.
Discuss the objects with the children. What do all the electrical
items do? Where are they? Group the pictures in different ways
depending on identified criteria, such as what they do, where they
are located, their size, or if they use a battery.
Place the pictures in the pocket mat or under the transparent grid.
Each child should choose an item to go to, program Bee-Bot to get
there, and then explain what that item is and what its function is.
Remind children that Bee-Bot uses electricity to work.
KEY LEARNING CONCEPTS
• Electricity
• Classification
• Photography
ELECTRICITY

Teacher Instruction
27
OUTLINE
This activity can be modified to incorporate any concept where you
can match an image or definition to a specific word. This activity
requires children to apply their knowledge of a habitat.
MATERIALS
• Bee-Bot
• Index cards with types of habitats listed
• Pictures of habitats (15 cm x 15 cm squares)
• Bee-Bot Pocket Mat or transparent grid
ACTIVITY
Discuss each of the habitats listed on the cards and the
characteristics of each habitat. Identify animals, plants, and the
climate of each habitat. Show the picture cards to the children,
discussing what habitat each picture represents.
Place all the picture cards in the pocket mat or under the
transparent grid. Place all the cards with types of habitats listed on
them in a pile. Have the children work in pairs to choose a habitat
card, read the word, and move Bee-Bot to the image that matches
the habitat on the card. When Bee-Bot has reached the picture
card, discuss as a class if all the children agree or disagree with the
pair’s response.
KEY LEARNING CONCEPTS
• Habitats
• Vocabulary matching
• Critical reasoning
HABITATS

Teacher Instruction
28
OUTLINE
The children match the baby animal with its parent. This activity
encourages discussion about how many baby animals share
characteristics with their parents.
MATERIALS
• Bee-Bot
• Pictures of baby animals (15 cm x 15 cm squares)
• Pictures of adult animals corresponding to the baby animals
(15 cm x 15 cm squares)
• Bee-Bot Pocket Mat or transparent grid
ACTIVITY
Discuss the animals in the pictures. What is similar about some
of the baby animals? What are some special features they have?
How do they move? What are they covered with? Why? How big
are they? Have the children seen any of these animals? Have they
touched any? What does the parent of this animal look like?
Spread the parent animal pictures out in the pocket mat or under
the transparent grid. Pick a baby animal out of a bag or from a pile.
Take turns programming Bee-Bot to move to the correct parent
animal.
KEY LEARNING CONCEPTS
• Heredity
• Comparisons
• Offspring
BABY ANIMALS

Teacher Instruction
29
OUTLINE
Let children guide Bee-Bot to symbols of the United States and
discuss with them what each one means. This can be adapted to
any social studies topics – comparing past and current events,
recognizing similarities and differences with other cultures, and so
on.
MATERIALS
• Bee-Bot
• Pictures of symbols in the United States (such as the Statue of
Liberty, the flag, or Abraham Lincoln) (15 cm x 15 cm squares)
• Bee-Bot Pocket Mat or transparent grid
ACTIVITY
As a class, discuss what the word symbol means. You might want to
show examples of symbols such as hearts, stars, and stoplights.
Place the pictures of symbols in the pocket mat or under the
transparent grid. Let the children choose which picture Bee-Bot
will go to. Discuss the symbol with them when Bee-Bot reaches it.
What is the symbol? What does it mean? Where would you see this
symbol?
Record information about the symbol on a graphic organizer or an
anchor chart. Have the children direct Bee-Bot to a new symbol.
Repeat until all symbols have been explained.
Provide clues (or have the children take turns providing clues)
about a symbol. The children then program Bee-Bot to move to the
symbol that match the clue.
KEY LEARNING CONCEPTS
• Symbols
• American heritage
• Writing
AMERICAN SYMBOLS

Teacher Instruction
30
OUTLINE
This activity lets children program Bee-Bot to follow a sequence,
enabling them to develop vocabulary such as before, next, after,
and then. It also enables them to collaborate in a group and listen
to the ideas of others. This activity can work well with a picture
book about a historical event or person such as Martin Luther King
Jr., the American Revolution, or Cesar Chavez.
MATERIALS
• Bee-Bot
• Sentences or pictures that make up a sequence of events
(15 cm x 15 cm squares)
ACTIVITY
Make sure the children are familiar with the story that you will
be sequencing. Can the children tell you the story? Look at the
sequence cards and discuss the events written on them or what the
pictures represent.
Explain to the children that they are going to teach Bee-Bot the
story. With help from the children, lay the pictures out in a line in
the correct order. Now they can program Bee-Bot to move along
the line so it looks at each picture. Children could take turns to tell
that section of the story before Bee-Bot moves on.
After they have completed this, the pictures could be mixed up in
the line for the children to work out the sequence and program
Bee-Bot to move correctly.
KEY LEARNING CONCEPTS
• Story retell
• Historical events
• Sequencing
HISTORICAL EVENTS

Teacher Instruction
31
OUTLINE
What were homes like a long time ago? Discussing this can help
children realize that not all homes are alike as well as compare
homes from the past. An extension to this activity also links with
engineering as children are encouraged to design a home for Bee-
Bot.
MATERIALS
• Bee-Bot
• Pictures of houses (15 cm x 15 cm squares)
• Bee-Bot Pocket Mat or transparent grid
• Index cards
ACTIVITY
Discuss the house pictures with the children. What features can
they identify? How are the houses similar and different? Which
house looks the oldest or the newest? Which one might they like to
live in and why? Which one would they not like to live in and why?
Write their observations on blank index cards.
Place the pictures in the pocket mat or under the transparent grid.
Pick a feature from the pile of index cards and let the children read
it out loud. Can they identify which picture Bee-Bot should go to?
Are there more pictures Bee-Bot could get to?
EXTENSION
Children can design a home for Bee-Bot. Show the children where
Bee-Bot is currently stored. Discuss why this is a practical solution
to storing Bee-Bot. What could be improved? Children could either
design a front of a house to stick to a box, or they can design and
make a box for it.
KEY LEARNING CONCEPTS
• Comparisons
• Global connections
• Characteristics
HOMES

Teacher Instruction
32
OUTLINE
This activity gives children a chance to build up sequences of
instructions into Bee-Bot. It is based on a castle theme, but the
same concept can be used with many contexts, such as selecting
healthy food to eat, collecting pirate equipment, or choosing letters
to make a word.
MATERIALS
• Bee-Bot
• Worksheet
• Pictures of objects for Bee-Bot to collect
(15 cm x 15 cm square sequence cards)
• Bee-Bot Pocket Mat or transparent grid
ACTIVITY
Explain that Bee-Bot can store lists of instructions. Demonstrate
how it is much more efficient to do two things together (“Pick up a
pencil and a book.”) rather than say the same thing twice (“Pick up
a pencil. Pick up a book.”).
Place the pictures of objects for Bee-Bot to collect in the pocket
mat or under the transparent grid but not in the same order as on
the worksheet. Explain that Bee-Bot wants to be a knight, so the
children will help it by programming in a set of instructions. They
will complete the worksheet.
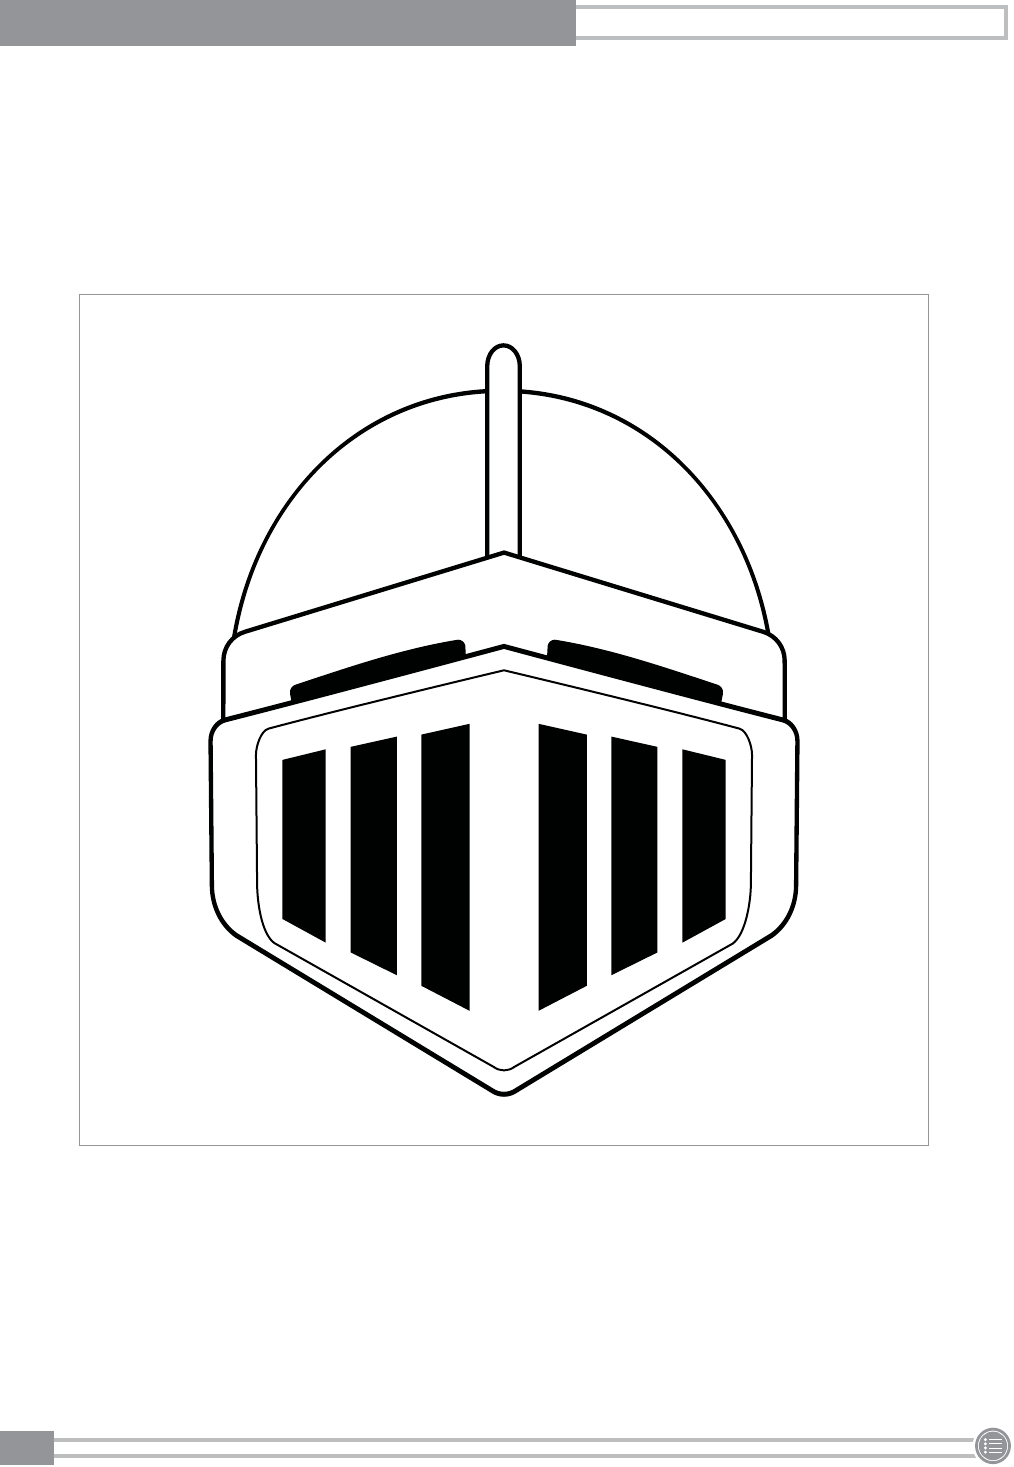
First, Bee-Bot needs to collect a shield. Help the group program
in all the instructions to get Bee-Bot to the shield. Test the list of
instructions.
Explain that the shield is not enough to make Bee-Bot a knight;
Bee-Bot also needs the sword. Put Bee-Bot back at the start, and
this time program Bee-Bot to move to the shield and then the
sword before pressing Go.
Work through the whole list so the children fully understand the
task, and then mix up the cards and let them try. They should
record their instructions on the worksheet.
KEY LEARNING CONCEPTS
• Sequencing
• Following instructions
• Teamwork
BEE-BOT KNIGHT

BEE-BOT KNIGHT
Worksheet
33
Name:
BEE-BOT KNIGHT
Bee-Bot is trying to be a knight. Can you help?
On the first day, Bee-Bot collected a shield.
CLEAR GO
It wasn’t enough to win the battle.
So, on the second day, Bee-Bot collected a shield and a sword.
CLEAR GO
It still wasn’t enough to win the battle.
So, on the third day, Bee-Bot collected a shield, a sword, and a helmet.
CLEAR GO
It still wasn’t enough to win the battle.
So, on the fourth day, Bee-Bot collected a shield, a sword, a helmet, and some shoes.
CLEAR GO
It still wasn’t enough to win the battle.
So, on the fifth day, Bee-Bot collected a shield, a sword, a helmet, some shoes, and a horse.
CLEAR GO
Hurray, that worked! Bee-Bot won the battle!


Teacher Instruction
39
OUTLINE
This activity and discussion develop an understanding of how
people help us and what their roles are in our community. Children
examine the roles of the people who help us at a level suitable to
their age.
MATERIALS
• Bee-Bot
• Pictures of people who help us (such as a nurse, dentist,
teacher, police officer, firefighter, bus driver, or doctor)
(15 cm x 15 cm squares)
• Bee-Bot Pocket Mat or transparent grid
ACTIVITY
Make sure the children are familiar with the pictures on the cards.
Who are the pictures of? What links the people? Why are they
special? What is their job? Who would they help? Have any of the
children been helped by the people in the pictures?
Place the pictures in the pocket mat or under the transparent grid.
Explain to the children that Bee-Bot has lots of problems. Can they
help Bee-Bot find the right person to get help?
Read a clue. For example, “Bee-Bot has a sore tooth. Who can help
it?” Ask the children to identify the picture for Bee-Bot to reach, and
help them to move it there. Then, choose the next clue.
KEY LEARNING CONCEPTS
• Community helpers
• Careers
• Teamwork
PEOPLE WHO HELP US

Teacher Instruction
40
OUTLINE
This activity gives children a chance to develop their understanding
of north, east, south, and west. By turning Bee-Bot, the children
need to think carefully about which way is north, differentiate left
from right, and realize that north stays north all the time.
MATERIALS
• Bee-Bot
• 4 square cards (15 cm x 15 cm), 1 each labeled North, South,
East, and West
• 12 index cards, 3 each labeled North, South, East, and West
• Bee-Bot Pocket Mat or transparent grid
• Home card
• Compass (if you don’t have one, consider using a
smartphone app)
ACTIVITY
Show the children the compass and explain how it tells you which
way is north. Use the compass to set the activity up with the square
cards in the pocket mat or under the transparent grid. Place the
Home card in the center and the direction cards around the edge
as shown in the diagram. Place Bee-Bot on the Home card facing
north.
Discuss north, south, east, and west with the group. Bee-Bot is
facing north. How could the group make it face east? Show them
how to make Bee-Bot turn 90 degrees to the right.
Ask one child to pick an index card and read it. A second child then
needs to make Bee-Bot face that direction. Bee-Bot does not move
back to north on its own, so the amount needed to turn varies each
time.
Counterclockwise and clockwise cards can be introduced too. The
children would then pick a direction card as well as a rotation card
and then program Bee-Bot to rotate the required amount and
direction.
To support children who are finding this difficult, return Bee-Bot to
the north position before a new card is picked.
KEY LEARNING CONCEPTS
• Geography
• Map reading
• Compasses
N, E, S, W
North
East
South
West


Teacher Instruction
42
OUTLINE
This activity gives children a chance to develop their understanding
of giving and following directions as well as be introduced to
mapping coordinates. Planning complete routes is a hard skill and
will need some support.
MATERIALS
• Bee-Bot
• Pirate treasure map and small copies
• Worksheet
ACTIVITY
Show the children the pirate map. Ask them to think about where
the treasure will be hidden and identify a coordinate on the map.
Show them the worksheet. It might be a good idea to give them a
plain piece of paper to write their instructions on first. After they
have tested their instructions, they can be copied to the worksheet.
Children can use the small copy of the pirate map to plan the route
and the large pirate map to check their instructions.
When they have completed their instructions and checked them,
the children should cut out the instructions and give them to
another child who needs to guess where the treasure is. Again,
small copies of the treasure map will be needed. The children can
mark on their copy of the map where they think the route will go
and then program everything into Bee-Bot, see where it goes, and
then mark the correct route.
EXTENSION
To extend this into language work, the children could turn the
journey to collect the treasure into a story.
KEY LEARNING CONCEPTS
• Map reading
• Following directions
• Writing
PLAN A PIRATE ROUTE


PLAN A PIRATE ROUTE
Worksheet
44
START IN SQUARE D1
1. Decide where you are going to put
the treasure.
My treasure will be in square
.
Name:
HUNT THE TREASURE
2. Use the space on the right to make
a list of instructions to help your
pirate friends reach the treasure.
3. Check it carefully.
4. Cut your instructions out and share
them with your crewmate so they
can find the treasure!

Teacher Instruction
45
OUTLINE
This is a challenge for the children to see if they can program Bee-
Bot to visit all the squares on the grid. There are a few different
ways of doing this, so it links well with problem-solving in math.
MATERIALS
• Bee-Bot
• Bee-Bot Pocket Mat or transparent grid
• Worksheet
ACTIVITY
Explain the challenge to the class. They are to make Bee-Bot visit
all the squares on the pocket mat or transparent grid using as few
moves as possible.
Let the children have some time to plan their routes using the mat.
How many different routes can they find? How many commands
are needed for each route? Which is the quickest route?
After the children have a route planned, they should write the list
of commands on the worksheet. They can then program Bee-Bot
to follow the route. Does it cover all the squares? How many moves
were needed? Which child or group had the least number of moves?
How many different routes did the group find?
KEY LEARNING CONCEPTS
• Geospatial reasoning
• Writing
• Following directions
BEE-BOT CHALLENGE


Teacher Instruction
48
OUTLINE
This activity allows the use of Bee-Bot to develop Spanish vocabulary
related to shopping. Children program Bee-Bot to collect the items
from the correct shop. More or less support can be given depending
on the level of Spanish of the children. You can substitute Spanish for
whatever language the children are working on.
MATERIALS
• Bee-Bot
• Images of items on the shopping list (15 cm x 15 cm squares)
• Various shopping lists in Spanish
• Bee-Bot Pocket Mat or transparent grid
ACTIVITY
Show the children a shopping list. Explain that together they are going
to help Bee-Bot go shopping. Discuss what the items are and the shop
they need to visit. Place the images in the pocket mat or under the
transparent grid. Demonstrate how to program Bee-Bot to move to an
item.
Place Bee-Bot on an empty space on the mat. The children have to
make Bee-Bot move to the first item on the list. What is the next
item? Does Bee-Bot need to move forward or backward? How far?
Encourage the children to use the numbers in Spanish too. Let the
children take turns to move Bee-Bot to the correct item.
Older or more experienced children can try to program Bee-Bot to
collect two shopping items before pressing the Go button.
KEY LEARNING CONCEPTS
• Foreign language
• Following directions
• Teamwork
SHOPPING

Teacher Instruction
49
OUTLINE
It is important for children to be able to discuss feelings, recognizing
that others have feelings and that they can impact how others
feel. This activity develops children’s vocabulary by allowing them
to discuss feelings and the causes of those feelings. They use Bee-
Bot to find out about feelings. This activity works especially well if
pictures have been taken of the children displaying various emotions.
They can use the digital camera and try to make sad, happy, worried,
frightened, excited, and angry faces. Alternatively, commercially
available expressions are available.
MATERIALS
• Bee-Bot
• Pictures of children with different expressions
(15 cm x 15 cm squares)
• Bee-Bot Pocket Mat or transparent grid
ACTIVITY
Make sure the children are familiar with the pictures on the cards.
Who are the pictures of? Can the children tell how the person is
feeling in the picture? How do they know that? What might have
made them feel like this? If it is a negative face, such as worried, how
could the child help their friend?
Place the pictures in the pocket mat or under the transparent grid,
and set a scene for the group. Imagine you are playing with a toy
and someone comes up and snatches it from you. How would you
feel? Let the group discuss this. Ask one child to move Bee-Bot to the
corresponding face. Make sure children feel they can have different
feelings and understand we don’t all feel the same about things.
Other ideas to try:
• Move Bee-Bot to the face showing how you feel when
.
• Move Bee-Bot to the face showing how you feel now.
• Move Bee-Bot to the face showing how the three bears felt
when they came home from the woods in Goldilocks and the
Three Bears.
KEY LEARNING CONCEPTS
• Social-emotional learning
• Feelings
• Teamwork
FEELINGS


