
3.1
Chapter 3: Input / Output
3.0.1 Objective
Modern computers use a rich variety of forms of input and output. In this unit, students will explore output
of images, text, speech, and music, and they will explore input of mouse clicks, buttons, text, voice, and
keypresses. Although programs that combine input and output can be created with just a few lines of
code, these simple programs can be among the most interesting and engaging for students. Any form of
input can be attached to any form of output, so creating connections between input and output provides a
large range of creative possibility.
3.0.2 Topic Outline
3.0 Chapter Introduction
3.0.1 Objectives
3.0.2 Topic Outlines
3.0.3 Key Terms
3.0.4 Key Concepts
3.1 Lesson Plans
3.1.1 Suggested Timeline
3.1.2 CSTA Standards
3.1.3 Lesson Plan I on using the Text and Sound block
3.1.4 Lesson Plan II on using the Button block
3.1.5 Lesson Plan III on using the Click block and the /img bot
3.1.6 Lesson Plan IV on in class lab activity.
3.2 Resources
3.2.1 Important links
3.0.3 Key terms
Input
Output
Human Computer Interaction (HCI)
Event Objext
Event Handler
Event Binding Function
Say, Play
Await
Spiral assignment
Assignment statements
Variables
3.0.4 Key Concepts
Computers are most interesting when used to interact with the world.
● Input brings data into the computer, e.g., when you type on a keyboard.
● Output sends data out of the computer, e.g., when you see things on the screen.
Together, input and output are sometimes called I/O. There are many types of I/O including human
interfaces, network interfaces, storage interfaces, and robotic interfaces. There is a lot of commonality in
how a computer program deals with all these types of input and output, regardless of whether the
interaction is with a person, a file, or some other device. User can learn important I/O techniques just by
learning how to create user interfaces.

3.2
Common Forms of Human Computer Interaction
This section focuses on human-computer interaction (HCI). When creating a user interface in a Web
application, programmers deal mainly with keyboard and mouse input, and with screen and audio output.
Here are some examples:
Input
Output
Graphical
Mouse, keypress
Graphics
Text-Oriented
Keyboard input
HTML
Audio
Microphone
Music, Speech
An Overview of I/O Concepts to Teach
Introduction to input and output:
● Output of graphical images, as seen in Chapter 2
● Simple input of mouse clicks
● Combining input and output
Expanding to different types of input and output:
● How to output text
● How to output speech, and music
● How to input from keys and buttons
● How to input text and speech
Special input strategies:
● Using CoffeeScript “await” to wait for input
● Using “pressed” to poll for input
Events for Mouse Click Input
In a graphical environment, the simplest way to collect input is to listen to events. An event is an object
created by the system that represents a single unit of input. For example, every time the mouse is clicked,
an event object is created representing the click. The event object has properties representing details of
the input such as the position, time, and which mouse button was clicked.
Event e
e.type = 'click'
The kind of event
e.x = -195
X position of click
e.y = 40
Y position of click
e.which = 1
Which mouse button
e.timestamp =
1454775914487
Number representing
the time of the click.
An event object has properties representing details
of the input, such as its position and time, and
which button was used. Not all properties of the
click event are shown here.
Clicking the mouse creates an
invisible event object.

3.3
Event objects are created by the system whenever user input occurs. A program can respond to events
by creating event handlers, explained next.
Creating Event Handlers
An event handler is a piece of code that runs to process an input event. It looks something like this:
click (e) ->
moveto e.x, e.y
An event handler to process a click event.
Each time a mouse click occurs, the handler runs
and moves the turtle to the location of the click.
There are three key parts of the code in the set up for an event handler.
The (e) is the event object parameter. When the input happens, the event object (containing the
location of the click on the screen) is made available in the variable e. The variable name can be chosen
to be any convenient name. It is conventional to use the name “e”, or “event” for an event object.
All together, the (e) -> moveto e.x, e.y is the event handler function, which is the code to run when
the event happens. Any number of lines of code can be indented after the arrow, and they will all be part
of the same event handler. (An event handler happens to be a function, which we will talk more about in
Chapter 5.)
The click command is an event binding function that means “listen to clicks”. It is a command that
connects the event handler to the system so that the handler is triggered when there is a click.
Combining Input and Output
The magic of input and output lies in creating new effects by combining them. For example, a new image
can be created for each click with this:
click (e) ->
img 't-watermelon'
Combining input and output by creating
a new image within a click event handler.
A watermelon is drawn for each click.
As students learn different types of input and output, it is helpful to have them try combining input and
output in different ways. Have students try the following:
click (e) ->
w = img 't-watermelon'
w.moveto e.x, e.y
In addition to making an image, move it to
the clicked location.
w = img 't-watermelon'
click (e) ->
w.moveto e.x, e.y
Move only a single watermelon image
instead of making a new one for each click.
pen purple
click (e) ->
Draw a line between clicks.

3.4
moveto e.x, e.y
Students can create a simple drawing program using just click events. They can do even more if they
combine different kinds of input and output.
Output of Text
To write text output on the screen, use the write command like this:
write 'Hello. My name is Compy.'
Writing a line of text output.
The write command writes text from top
to bottom, not at the the turtle.
When text is written to the screen using “write”, it appears from top to bottom on the screen, under all the
written text so far (not, for example, where the turtle is). The “img” command also puts new images at the
end of all written text and images so far.
Just like img, it is possible to use a variable to remember a text object and move it on the screen:
t = write 'Hello'
t.moveto 50, 100
t.rt 180
t.grow 2
By using a variable with written text,
text can be moved, turned, and grown.
To create text on the screen at the location of the turtle, the “label” command can be used:
label 'Turtle was here'
The label command makes text
at the location of the turtle.
Labels can also be moved in the same way as text with write and images, by using a variable.
Output of Speech and Music
The screen is not the only output device on a computer! The computer can also output using audio. There
are two interesting ways to do this: using speech or using tones.
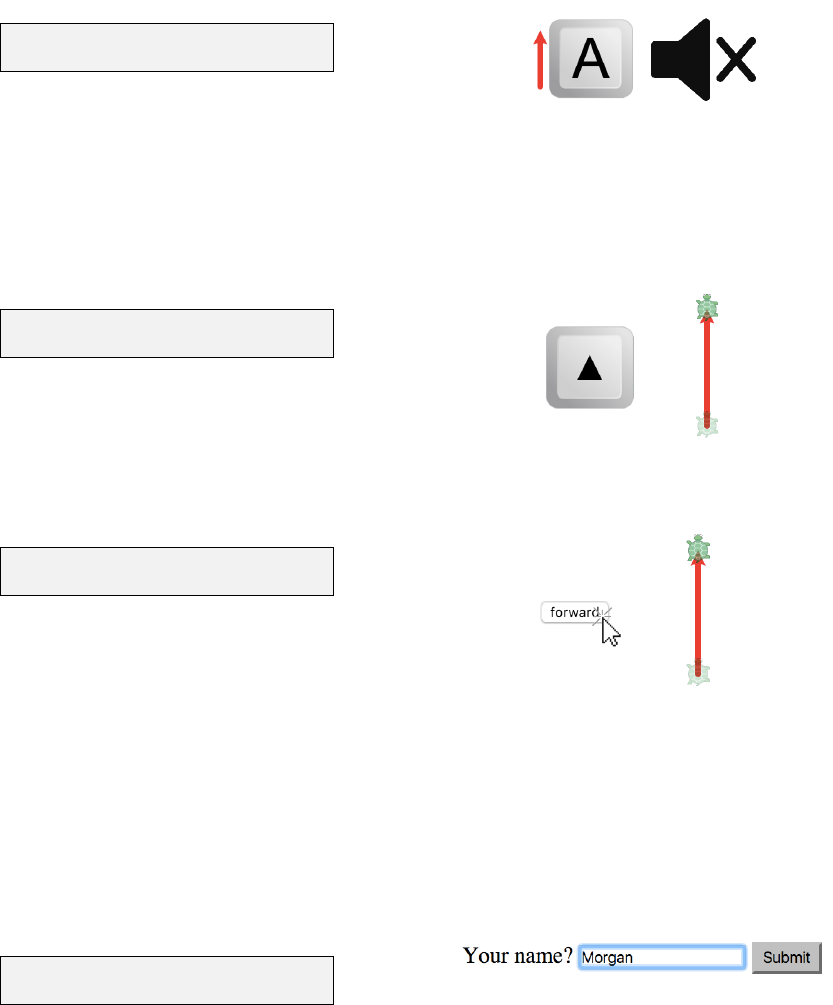
The say command utters speech audibly.
say 'Hello. My name is compy.'
The say command utters speech aloud.
3.5
To hear a program that uses speech, the browser needs to support speech synthesis. Chrome, Safari,
and Opera do, and browser support for speech standards may increase over time. The webpage
http://caniuse.com/#feat=speech-synthesis lists current browser versions that support speech.
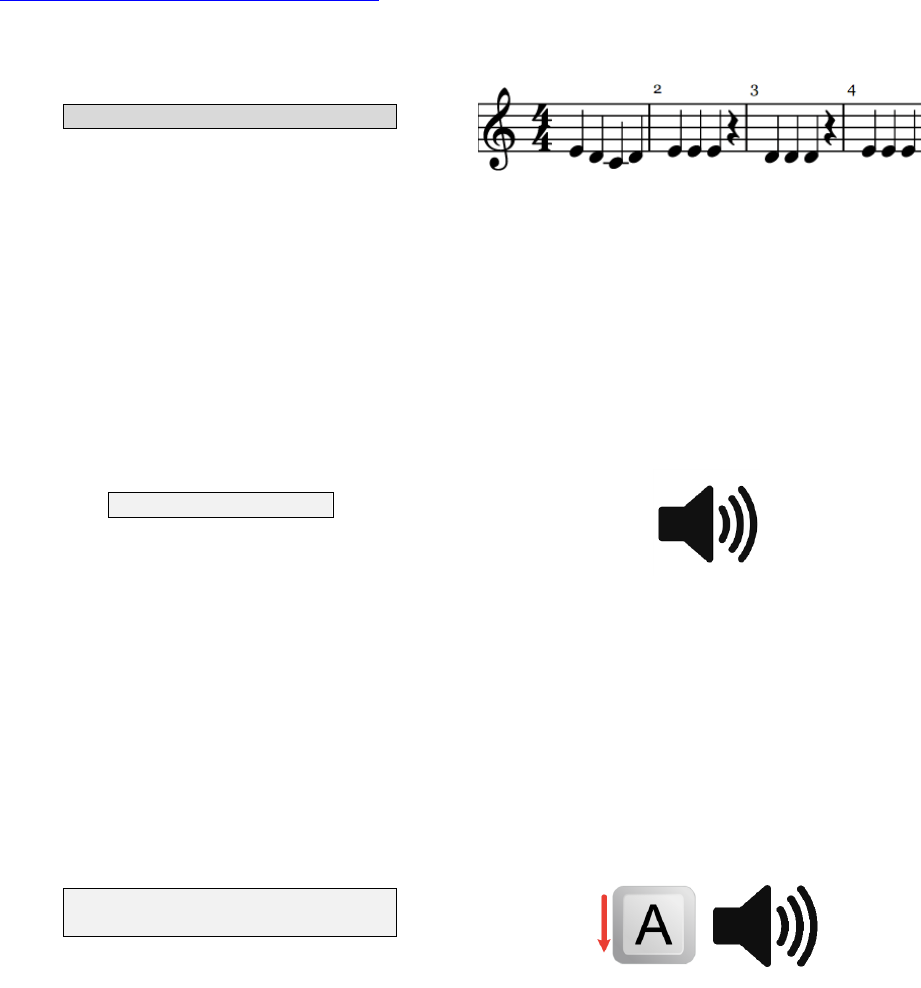
The play command plays a song using ABC notation, which represents each musical note with the letter
that musicians use for the note.
play 'EDCDEEEzDDDzEEE'
The play command uses ABC notation
to play musical notes.
In ABC notation, the letters A-G are used for notes. Uppercase is an octave higher, and the letter z rests
silently for a beat.
There are many other things that can be done with ABC notation (which you can read about by searching
for “ABC notation” on Google). For example, put a number “2” or fraction “1/2" after a note to change the
number of beats of that note, or put a “^” or “_” before a note to make it “sharp” or “flat”, or a comma after
a note to make it an octave lower.
The play command will sequence notes and wait its turn before beginning a song, but sometimes in an
interactive program, it is useful to play a note right away (without sequencing). To play a tone right away
without sequencing, use the “tone” command:
tone 'C'
Use tone to make a sound immediately.
Together, these are all the tools needed to make the computer say something or play a song or a tone or
write or utter a word when you click the mouse. Have students experiment with the different types of
output to create different types of interactions. Students should experiment to understand the difference in
timing between using “play” and “tone” when responding to multiple mouse clicks.
Input from Keyboard and Buttons
The mouse button is only one of the buttons a computer has: a typical computer will have another 100 or
so buttons on a keyboard!
An event handler can be used to collect input from those buttons using two other event binding functions:
keydown and keyup.
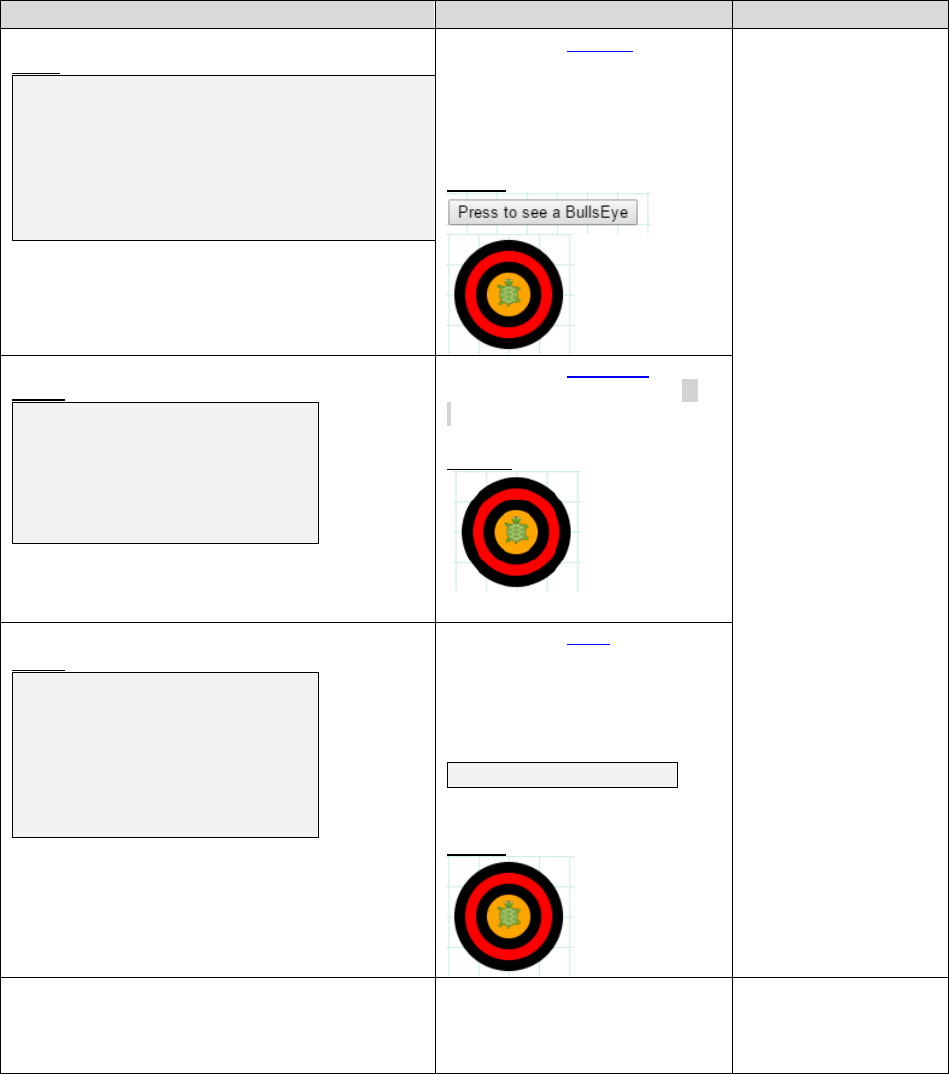
keydown 'A', ->
tone 'C'
Pressing the A on the keyboard sounds a C.
The program above will sound the C tone whenever the user presses down on the “A” key.
The comma after the key name is necessary. The comma is used because keydown is an event binding
function that is using two arguments instead of one: the first argument is the name of the key, and the
second argument is the event handler. Like any other command with two arguments, a comma must be
used between the arguments.
There is also a keyup event binding function. For example, to silence the C note when the user lets go of
the key, use this trick for sounding a zero-duration C when you release the A key:
3.6
keydown 'A', ->
tone 'C', 0
Releasing the A on the keyboard silences the C.
Many keydown and keyup event handlers can be combined create a whole piano or to create other
effects. For example, it is possible to create event handlers to attach turtle movements to specific keys
and make a system for steering the turtle around. Notice that the letter keys have obvious names, but
there are also names for the arrow keys: you can listen to the “up” arrow by saying keydown 'up', and
similarly for “down”, “left”, and “right”.
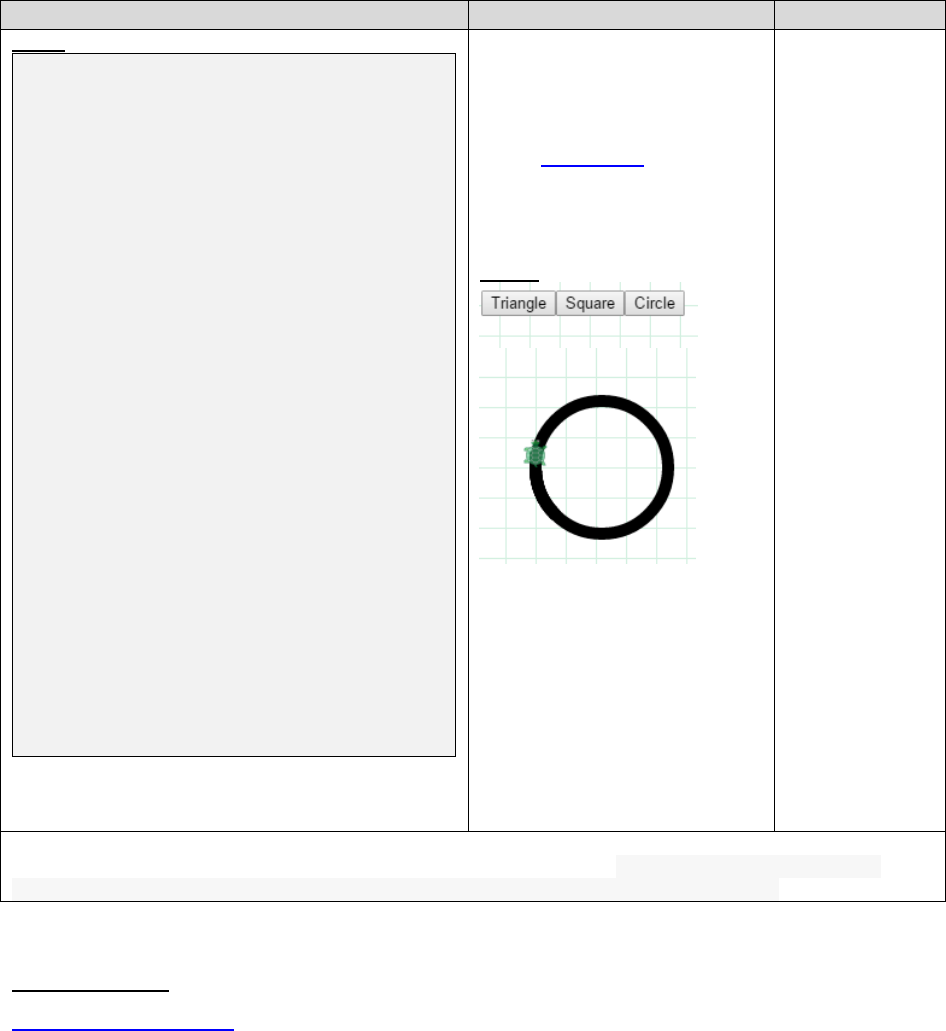
keydown 'up', ->
fd 100
The up arrow key moves the turtle forward.
An alternative to using physical keyboard keys is to use on-screen buttons. The “button” command is
used for this:
button 'forward', ->
fd 100
An on-screen button labelled “forward”
moves the turtle forward.
The advantage of on-screen buttons is that the user can see exactly what controls are available. With
good labels, they are self-explanatory. The disadvantage is that they take space on the screen.
Input of Text and Speech
When collecting text input from a user, listening to a single keypress at a time can be done, but it is very
inconvenient! That is why user interfaces use text input elements for entering text. The input element is a
box that shows text, and when it has focus, all keypresses automatically turn into text in the box.
To use a text input box in Pencil Code, use the read command, like this:
read 'Your name?', (n) ->
write 'Hello, ' + n
The handler is triggered after
text is entered and submitted.
As with click or button or keydown, the read command calls an event handler after the user has finished
providing input. There are a few differences between read and click:
● Instead of waiting for a single small action, read waits for a whole series of keystrokes and then
finishes when the user presses “Enter” (or clicks submit).
● The event handler for read is called just once. After the input, the input box goes away.
● Instead of binding the variable to an event object that has properties like x and y, read sets it to
the text value that was input (n in the example above).

3.7
To enter a number, consider the special variant readnum, which constrains the input to just digits.
readnum 'Your age?', (n) ->
write 'Next year you will be ' + (n + 1)
readnum constrains input to a number.
A keyboard is not the only way to enter text. Another option is to use voice input, which can be done
using “listen”. That function works just like “read”:
listen 'Say something', (t) ->
say 'You said: ' + t
listen accepts spoken voice input.
A few tips for working with voice: Currently voice recognition and speech synthesis work only on Chrome.
Before a webpage attempts turns on the microphone on Chrome, it must obtain the user’s permission. If
using the https (secure) version of Pencil Code, Chrome will remember the permission after it is given first
time so it does not need to ask every time.
When a page listens to the microphone, the browser asks for permission.
If the page is loaded over https, the permission is remembered.
Using CoffeeScript await to Wait for Input
Sometimes a program needs to read a sequence of inputs. To do this, chain the event binding functions
inside one another like this:
readnum 'Right triangle side a?', (a) ->
readnum 'Right triangle side b?', (b) ->
c = sqrt(a*a + b*b)
write 'The hypotenuse is', c
Using a sequence of input by
chaining event handlers.
This nesting makes the program look more complicated than it is, and make it difficult to use a loop.
The version of CoffeeScript used in Pencil Code has a pair of keywords “await” and “defer” that can
help in this situation by putting a program on hold while waiting for an event to occur. You put the word
“await” before the command that you want to pause, and “defer” in the place of an event handler along
with any variables that would have been event handler parameters:
await readnum 'Right triangle side a?', defer a
await readnum 'Right triangle side b?', defer b
c = sqrt(a*a + b*b)
write 'The hypotenuse is', c

3.8
Await and defer have a subtle relationship with function calls, so before putting await inside a user-
defined function, find understand the Web pages about “Iced CofeeScript” (if using await inside a
function, that function should also return its results using callbacks).
However, await is very straightforward and useful when used together with loops. Here is an example:
await readnum 'How many numbers to average?', defer count
total = 0
for j in [1..count]
await readnum 'Enter #' + j, defer val
total += val
write 'The total is ' + total
write 'The average is ' + (total / count)
This style of code is called “blocking i/o”, because the program blocks (stops) its progress while waiting
for an input or output to occur. Blocking i/o is the traditional way to teach Python or C input/output, but it is
very different from the way UI events are typically handled in JavaScript or Java GUIs, where input is
done using event handlers. Iced CoffeeScript’s await allows teaching both styles in the same system,
and even in the same program.
The await keyword is so useful that a version of it is on track to be added to a future version of the
JavaScript standard. However, it is not in the language right now, so you cannot use await in JavaScript
today. Instead, you must use function definitions (see Chapter 5) to achieve similar effects.
Polling Keyboard State Using pressed
So far we have seen two styles of input: “event handling”, and “blocking i/o.” A third style of input, called
polling, is often used in video games and real-time systems such as robots and you can also try it with
Pencil Code. A program using polling repeatedly checks the input state (of the keyboard) by asking a
question such as “is the key pressed down right now?”
Here is how Pencil Code does polling (usually in combination with the “forever” command).
forever ->
if pressed 'W'
fd 2
if pressed 'D'
rt 2
Inside a forever block, the function pressed
can be used to poll the keyboard state.
The “pressed” command is the polling command. It is true if a key is pressed and it is false if the key is
not pressed. The “if” can be used decide whether to take an action based on the state of a key. With
“pressed,” it is even possible to support “chording”, that is, making a program that responds to two keys
pressed at the same time. Students can experiment with this effect in the program above.
Polling is an advanced technique and there are several subtleties for getting it to work correctly that are
handled by the “forever” command. A “forever” loop differs from a traditional loop in several ways.
Inside a “forever” loop, the speed of turtles is automatically set to Infinity to avoid animation delays. Also,
a “forever” loop will also automatically put a short delay between each repetition so that you can see the
effects of the repetition over time. You can change the framerate of the “forever” loop by adding an extra
number argument. For example, “forever 10” will do 10 frames per second.

3.9
forever 10, ->
if pressed 'space'
fd 1
rt 1
The frequency of a forever block,
adjusted to 10 repetitions per second.
Combining Ideas
This unit on input and output covers a lot of powerful concepts, but the real power comes from finding
creative new ways to combine input and output. By combining graphics, text, and audio, students can
create applications such as calculators, games, conversational assistants, interactive drawing programs,
or musical instruments.
Each application may require a particular i/o model. The most common models are: event-based i/o,
blocking i/o, and polling. Sometimes the same application can be built in a different way using a different
i/o model so it is worth having students experiment with more than one model to learn how they work.
3.1.1 Suggested Timeline: 1 55-minute class period
Instructional Day
Topic
1 Days
Lesson Plan I: Text and Sound Blocks
1 Day
Lesson Plan II: Use of Buttons and Click (e) controls to show input
1 Day
Lesson Plan III- Demonstrate the use of the /img bot
2 Day
Lesson Plan IV Lab Activity – choose between a shape bot or paint bot
3.1.2 Standards
CSTA Standards
CSTA Strand
CSTA Learning Objectives Covered
Level 3 A
(Grades 9 – 12)
Computational
Thinking (CT)
Describe how computation shares features with art and
music by translating human intention into an artifact.
Level 3 A
(Grades 9 – 12)
Computers and
Communication
Devices (CD)
Describe the principal components of computer
organization (e.g., input, output, processing, and storage).
Level 3 A
(Grades 9 – 12)
CD
Compare various forms of input and output.
3.1.3 Lesson Plan I
This lesson focuses on using the Text, Sound and Control block palettes. Click on the Text, Sound and
Operators block to show students that input/output statement commands are located under these
palettes. Read and type the code as shown below and demonstrate the output to the students.
Note: Make sure you are in block mode. Type in the code (switch to block-mode if needed) and click the
play arrow to demonstrate the results.
Content details
Teaching
Suggestions
Time
Demonstrate write and say (Text & Sound block).
Write_Say
write 'Hi'
write 'Hello.'
write 'Can you say hello world?'
These are the output
statements.
Demonstration
10 minutes

3.10
Content details
Teaching
Suggestions
Time
say 'Hello World!'
Type in the code and
click the play arrow to
demonstrate the
results.
Displaying expressions
name = 'David Bau'
write 'Good to meet you ' + name
Output
Show how write can
show the value of a
variable or an
expression.
Demonstration
10 minutes
The question bot is a simple program that asks questions
and displays responses in an intelligent manner.
Code:
# questionBot
# short interview with await..defer
await read 'What is your name?', defer name
await read ('What is your favorite food, ' + name) + '?',
defer food
await read ("Sounds tasty. What's so good about " + food)
+ ', ' + name + '?', defer response
write 'Fair. I might just go try me some ' + food + 'now.
Nice chat!'
Output
Input Statements:
Demonstrate Await -
Read, using Question
Bot (Text Block)
Await waits till an input
is received. It then
stores the input to the
variable declared next
to defer.
Demonstration
15 minutes
Code:
# Question Bot using numbers
write 'Hello. Can you tell me your name
please?'
await read 'Your name?', defer name
write 'Hi '+ name
await readnum 'Can you tell me your age, ' +
name, defer age
write 'Hi ' + (name + ('. I have noted your
age '+ age))
Demonstrate Await –
ReadNum using
Question Bot (Text
Block).
Output
Demonstration
15 minutes
Students can now work on their version of Question Bot.
Encourage students to
express their own
individuality and
creativity and
experiment with using
“Say” in places where
“Write” is used. What
happens?
Student Practice
15 minutes
Look at exercises
Using the Art, Move,
Text and Sound block
Student Practice
15 minutes
3.11
3.1.4 Lesson Plan II
This lesson discusses the use of Buttons: the use of button clicks as input.
Note: Make sure you are in block mode. Type in the code (switch to block-mode if needed) and click the
play arrow to demonstrate the results.
Content details
Teaching Suggestions
Time
Code
button 'Press to see a BullsEye', ->
x = 18
dot black, x * 5
dot red, x * 4
dot black, x * 3
dot orange, x * 2
Demonstrate Button
(‘Click’)
The Button option lets the
user label the button and runs
the code that is within the
block.
Output
Demonstration
20 minutes
Code:
keydown 'a', ->
x = 18
dot black, x * 5
dot red, x * 4
dot black, x * 3
dot orange, x * 2
Demonstrate Keydown
The Keydown waits for the ‘a
‘key pressed to execute the
code within the block.
Output:
Code:
click (e) ->
moveto e.x, e.y
x = 18
dot black, x * 5
dot red, x * 4
dot black, x * 3
dot orange, x * 2
Demonstrate Click
The click will wait for a mouse
click and then execute the
code within the block.
The e variable represents the
click event, so
moveto e.x, e.y
moves to the location of the
click.
Output
Finish the lab exercise that was started the
pervious class period..
Student Practice:
Use the remainder of
class period and
homework if needed.

3.12
3.1.5 Lesson Plan III
This lesson plan introduces the Buttons and the Click (e) capability along with wear and img blocks which
display images from the internet. The wear and img blocks are available under the Art panel.
Note: Make sure you are in block mode. Type in the code (switch to block-mode if needed) and click the
play arrow to demonstrate the results.
Content details
Teaching Suggestions
Time
Code:
wear 't-pencil'
button 'Grow Smaller', ->
jumpxy 30, 20
grow 0.5
button 'Grow Larger', ->
grow 2.0
Output
Demonstrate how the wear
block works. Open the ImgBot
program.
Point out the use of Button and
Click (e) from the previous
lesson plans.
Explain how wear and img work
(refer to key concepts if
necessary).
Substitute other values for
pencil and show the kinds of
images that result.
Encourage students to play
with the wear and grow blocks.
Demonstration:
20 minutes
Student activity:
25 minutes.
3.1.6 Lesson Plan IV
This lesson plan provides instructions for designing the Shape Bot. Students Design a simple program
that draws geometric shapes such as a square, triangle, circle, etc. The program first asks the user for a
shape. It asks from the user to provide details such the number of sides, length of sides, and the radius of
the circle, etc.
3.13
Content details
Teaching Suggestions
Time
Code:
speed 100
pen black, 10
button 'Triangle', ->
await read 'How long are the
sides?', defer side
cs()
fd side
rt 120
fd side
rt 120
fd side
rt 120
button 'Square', ->
cs()
await read 'How long are the
sides?', defer side
fd side
rt 90
fd side
rt 90
fd side
rt 90
fd side
rt 90
button 'Circle', ->
cs()
await read 'How long is the radius',
defer radius
rt 360, radius
fd 10
Give the lab program to the
students. Encourage them to
experiment and improve the
design of the program. After
students have worked on it pull
up the Shapes Bot program
and start walking the students
through the program.
Encourage students to come up
and demonstrate their work.
Output
Student activity
55 minutes.
Demonstration
20 minutes
Encourage students to explore and understand their inclinations and strengths in programming by giving
various assignments to accomplish the same purpose. For example, consider a simulation of paint
splatter drawn as a collection of colored dots. This can be called the Paint Splatter Bot.
3.2 Resources
Important Links:
http://gym.pencilcode.net
Book: book.pencilcode.net
