
Five Easy Steps to a
Professional Newsletter
With industry-leading illustration, digital imaging and
motion graphics software in one complete package,
CorelDRAW Graphics Suite 12 is a breakthrough for a small
business on the go.
®
Created in CorelDRAW Graphics Suite 12.
© 2004 Corel Corporation. All rights reserved.

What you will learn
This tutorial shows you effective newsletter design
techniques using CorelDRAW 12 and is geared towards
people who already have a basic knowledge of
CorelDRAW. The tutorial is broken down into five
fundamental steps:
Step 1: Setting the page layout
Step 2: Creating graphic objects
Step 3: Adding and importing text
Step 4: Importing and editing images
Step 5: Output and publishing
Introduction
®
All-new CorelDRAW Graphics Suite 12 marks a leap forward in design. It’s easy-to-
use, and with unique new features like Smart Drawing tools you’re able to create
your own high-impact, professional communications like newsletters, logo’s,
business cards, letterhead and much more.
®
Create your own professional looking newsletters with CorelDRAW Graphics Suite 12 in
five quick steps.
A major challenge of newsletter design is achieving a balance between text and imagery. Too much
text can discourage a reader from pursuing content. By offering visually appealing graphic content to
offset small groups of text, designers can increase readability.
Newsletter design incorporates a wide spectrum of graphic design techniques, and CorelDRAW
Graphics Suite 12 gives you the tools to enhance your talent and complete your vision.

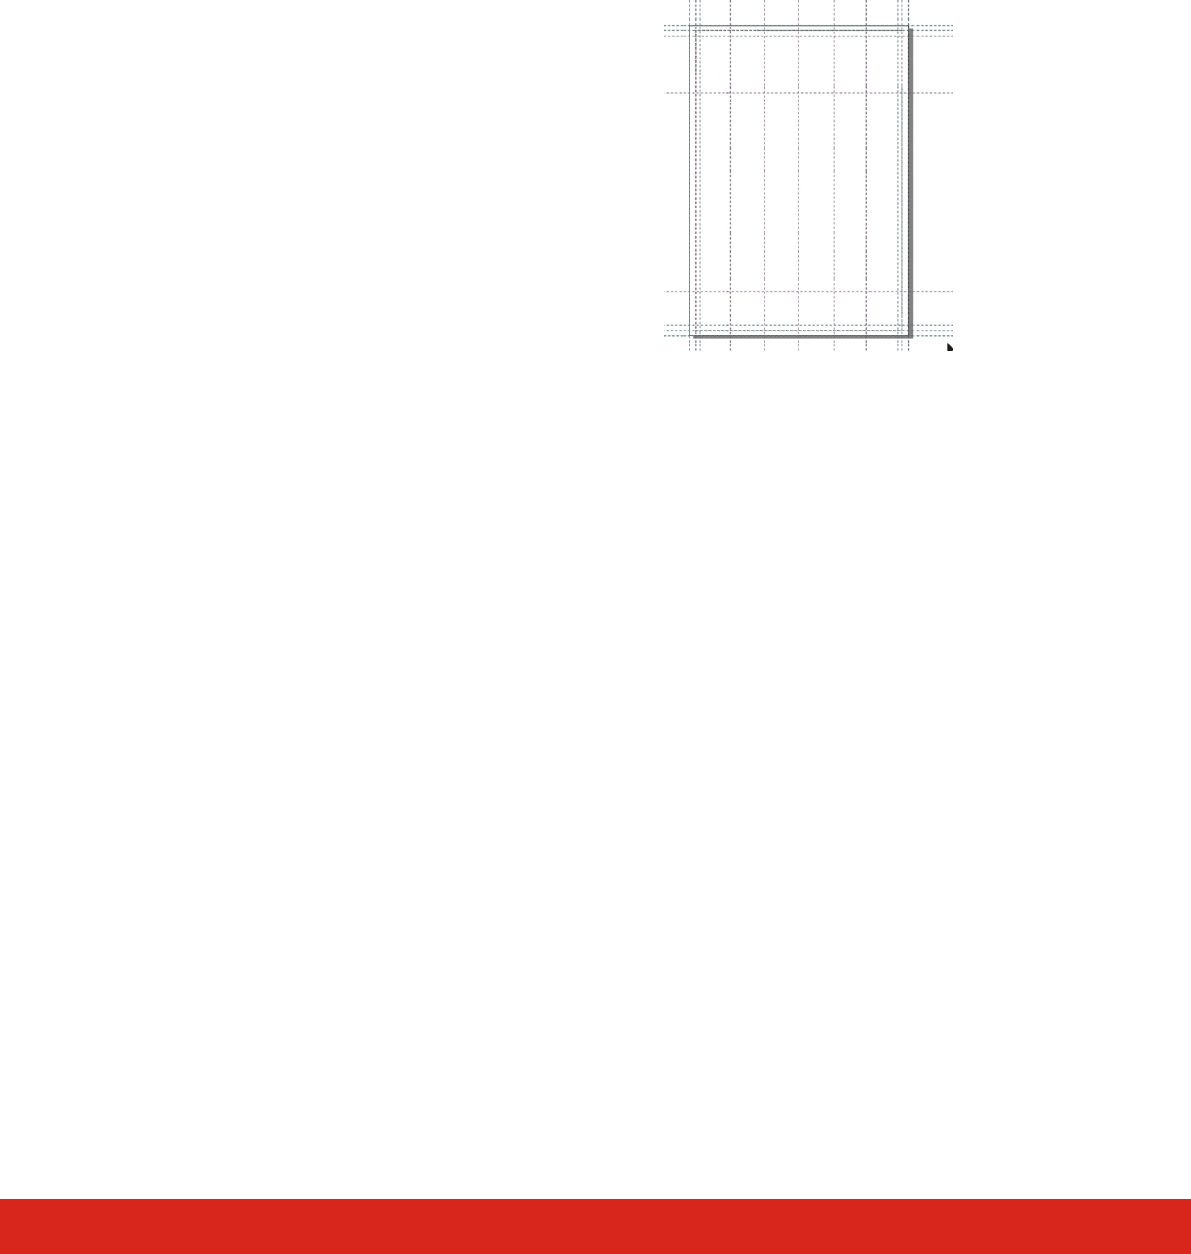
To assist with positioning objects accurately and precisely,
Before you start any graphic design process, you
it is advisable to use guidelines — lines that you can place
need to consider the overall appearance of your
anywhere in the drawing window. There are three types
final work. The first decision to make is page size.
of guidelines: horizontal, vertical, and slanted. You can
In CorelDRAW 12, you can choose from many
add a guideline wherever you need one; however, you
preset page sizes, ranging from legal-size paper and
can also choose to add preset guidelines.
envelopes to posters and Web pages. If a preset
page size does not meet your needs, you can create
1. In the drawing window, right-click the Ruler, and
a custom page size by specifying the dimensions
choose Guidelines Setup from the pop-up menu.
and orientation of the page.
2. Enable the Show Guidelines check box.
3. Enable the Snap to Guidelines check box.
4. In the Options list, click Presets.
For this tutorial, we’ll use A4 size paper
5. Enable the check boxes for One Centimeter
Margins, Bleed Area, Page Borders, and Printable
1. Start a new document, and choose A4 from the
Area.
Paper Type/Size list box on the property bar.
6. In the Options list, click Vertical.
2. Ensure that the Portrait button on the property
7. In the Vertical box, type 39.125, and click Add.
bar is enabled.
8. Repeat this process to add vertical guidelines at
3. From the property bar, choose millimeters from
72.062, 104.314, 138.624, and 169.493.
the Units list box.
9. Click OK.
4. Click Layout menu > Insert Page.
5. In the Insert Page dialogue box, choose 1 from
the Insert pages list box.
6. Enable the After option, and click OK to add
Page 2.
7. Click the Page 1 tab at the bottom of the
document window to return to the first page.
The printable area is determined by the current printer on
your system. This is a valuable setting in that it can ensure
that you place objects in an area on the page that your
printer can print. It is also useful for turning on the
guides for the page border and bleed area.
1. Click Layout menu > Page Setup.
In the Options dialogue box, choose Page from
the Options list.
2. Enable the Show printable area check box.
3. Enable the Show page border check box.
4. Enable the Show bleed area check box.
5. From the Options list, choose Size, type 10.0
millimeters in the Bleed box, and click OK.
Page setup
Showing the printing area
Setting guidelines
Step 1:
Setting the page layout

Step 1:Set up the Page Layouts

Step 1:Set up the Page Layouts
Step 1:Set up the Page Layouts

Creating a newsletter logo
Creating another rectangle
Creating logo graphics
Positioning the rectangles
rectangle, and snap it to the upper-left corner of
the first rectangle.
First, we’ll add a newsletter logo. The Object
Properties docker in CorelDRAW makes it easy to
adjust object settings.
We’ll use another rectangle to create a middle banner for
our newsletter logo.
1. From the Window menu, choose Dockers
Properties (shortcut: Alt + Enter) to display the
1. From the toolbox, select the Rectangle tool, and
Object Properties docker.
create a 110-mm x 5-mm (width x height)
2. From the toolbox, select the Rectangle tool
rectangle.
(shortcut: F6), and create a 110-mm x 100-mm
2. From the Object Properties docker, click the Fill
(width x height) rectangle. You can use the Status
tab and then the Uniform Fill button.
Bar to view Object Details such as width, height,
3. Click the Advanced button, enter CMYK values
and position on the page.
of C:64, M:94, Y:85, and K:24, and click OK.
3. From the property bar, choose Hairline from the
4. From the property bar, choose None from the
Outline Width list box.
Outline Width list box.
4. From the Object Properties docker, click the Fill tab
5. Position the rectangle below the second
and then the Uniform Fill button, and choose
rectangle to create a middle banner.
White from the Colors palette.
5. With the Rectangle tool selected, create a second
rectangle that is 110 mm x 45 mm (width x
height).
Next, we’ll create several small curved objects to give the
6. From the Object Properties docker, click the Fill
appearance of hilly plains to the newsletter logo.
tab, the Fountain Fill button, and then the
Advanced button.
1. From the toolbox, click the Curve flyout, and
7. In the Fountain Fill dialogue box, choose Radial
select the 3 Point Curve tool.
from the Type list box.
2. Click and drag a straight line of approximately
8. In the Center Offset area, type 2 in the Horizontal
30 mm in length (the guidelines are about
box and 39 in the Vertical box.
30mm apart, so they make an easy reference
9. In the Color Blend area, enable the Two color
point for the line length). Release the mouse
option.
button.
10. Click the From list box, choose Other, enter CMYK
3. Move the mouse upwards to create a curve
values of C:70, M:0, Y:10, and K:0, and click OK.
(approximately 15 mm), and click the mouse to
11. Click the To list box, choose White, and click OK.
set the curve.
4. From the property bar, type 1.058 mm in the
Outline Width list box.
5. From the Curve flyout, select the Polyline tool.
Next, we’ll eliminate the outline on the smaller rectangle
6. Click and release the mouse button on the left-
and position it within the first rectangle.
hand node of the open curve, and then double-
click the right-hand node to set the line.
1. Using the Pick tool, select the smaller rectangle,
7. From the Object Properties docker, click the Fill
click the Outline tab on the Object Properties
tab, the Uniform Fill button, and then the
docker, and choose None from the Width pop-
Advanced button.
up menu.
8. Enter CMYK values of C:33, M:11, Y:90, and
2. Select the upper-left corner of the blue
Step 2:
Creating graphic objects

K:0, and click OK. values of C:64, M:94, Y:85, and K:24.
9. From the Object Properties docker, click the 5. From the property bar, type 60.5 in the Font
Outline tab, and choose White from the Color Size list box.
6. Type Rolling Hills.
list box.
7. Marquee select the entire logo, and press
Ctrl + G.
8. Use the sizing arrows or type values in the
Object size boxes on the property bar to resize
To create additional curved objects, we’ll simply duplicate
the logo to 56.753 mm x 50.586 mm (width x
the original and use the sizing handles to adjust sizes.
height).
We’ll need eight curved objects to create the appearance
9. Position the logo in the upper-left corner of the
of hilly plains.
page at approximately x:35 mm, y:267 mm.
1. Using the Pick tool, select the original curved
object, and press Ctrl + D.
A new curved object appears on top of the
original.
The banner across the top of the newsletter, also known as
2. Move the new curved object, and use the sizing
the flag, is designed to enhance the display of the title.
arrows to adjust its size.
The nevisonCasDee font provides a strong horizontal
You can quickly move the objects to the top or
cursive face with a hand-scripted look, which lets us add
bottom of the layer order by pressing Shift +
contrast by using a strong colour against our background.
PgUp or Shift + PgDn.
3. When you have created eight curved objects,
1. From the toolbox, click the Rectangle flyout,
marquee select all the shapes, and press Ctrl + G
choose the Rectangle tool, and drag in the
to group them.
drawing window until the rectangle is
approximately 216 mm x 58 mm.
4. Select the group of hills, and position it along
the brown center banner.
2. Position the rectangle at approximately x:105
mm, y:271 mm, so that it bleeds off the page.
5. Select the brown center banner and move it to
the top layer.
3. From the Object Properties docker, click the Fill
tab and then the Uniform Fill button.
Tip: You can also use the Object Manager docker to
4. Click the Advanced button, and enter CMYK
change the layer order.
values of C:64, M:94, Y:85, and K:24.
5. The earthy theme provides contrast to the logo.
Select the flag, and choose Arrange menu >
Order > To Back (or Shift + PgDn).
Now, we’ll add text to complete the newsletter logo.
1. From the toolbox, select the Text tool, and click
in the white space below the brown rectangle.
To save time, we’ll use clipart from the 10,000 clipart
2. From the property bar, choose NevisonCasDEE,
images that ship with CorelDRAW Graphics Suite 12.
or any other font you would like to use, from the
Font list.
3. From the Object Properties docker, click the Fill
tab and then the Uniform Fill button.
4. Click the Advanced button, and enter CMYK
Duplicating and adjusting objects
Creating the newsletter flag
Adding text to the logo
Adding clipart
Step 2:Adding/Creating Illustrations

1. Insert the CorelDRAW Graphics Suite CD2 into
your CD drive.
2. In Windows Explorer, choose Clipart > Food >
Fruited, and double-click to open the
G0907375.cdr file.
3. Marquee select the image, and choose Ungroup
from the Arrange menu.
4. On the Standard toolbar, choose 400% from the
Zoom Levels list box.
5. Select and delete the Black outline, and all other
objects until you are left with just the grapes, the
vine, and the leaf.
Now, we’ll copy the grapevine into the newsletter and
create the effect of a vine growing up the page by
rotating, duplicating, and flipping the image.
1. Press Ctrl + C, and switch back to the newsletter
file.
2. Press Ctrl + V.
3. To duplicate the image, press Ctrl + D.
4. From the property bar, click the Horizontal Mirror
button (top Mirror button), and position the new
image so the vines appear attached.
5. Repeat the process until you have a string of six.
6. When you are satisfied with the appearance of
the images, marquee select them and press
Ctrl + G.
7. Position the string of vines at approximately x:
5 mm, y:127 mm so they fit vertically down the
first column of the page and bleed off the edge.
To complete our layout we’ll add a solid, colour-filled
rectangle at the base of the page to complement the flag
at the top of the page.
1. From the Rectangle flyout, choose the Rectangle
tool.
2. Click and drag in the drawing window until the
rectangle is 216.0 mm x 22.138 mm, and
position it at approximately x:105mm, y:5.7 mm.
3. From the Object Properties docker, click the Fill
tab, the Uniform Fill button, the Advanced
button and enter CMYK values of C:70, M:0,
Y:10, and K:0.
Copying the grapevine into the newsletter
Adding a finishing touch
Step 2:Set up the Page Layouts

down the page.
2. From the property bar, choose the
nevisonCasDee font from the Font List.
3. Choose 36 from the Font Size list box.
4. Type Wine Festival ’04.
5. Directly underneath, at approximately 215 mm
Next, we’ll add text. CorelDRAW 12 provides two options
down the page, type May 13th - 15th.
for text: artistic text and paragraph text. Artistic text is
6. Using the Text tool, select the text by dragging
used primarily for short lines of text to which you can
across it to highlight it, and apply the
apply a wide range of effects, such as drop shadows.
nevisionCasDee font, size 24.
Paragraph text is used for larger bodies of text that have
7. Directly underneath, at approximately 185 mm
greater formatting requirements.
down the page, type Wine of the Month.
Select the text, and apply the nevisionCasDee
font, size 36.
7. Directly underneath, at approximately 85 mm
1. From the toolbox, select the Text tool.
down the page, type Vineyard Report, and apply
2.
the same properties.
Click to place the cursor at the right edge of the
3rd column, at approximately x:60 mm, so the
text will stretch across the last four columns.
Tip: To copy all your font properties, you can use the
3. From the property bar, choose nevisonCasDee
Eyedropper tool in the toolbox to sample the properties,
from the Font list box.
according the settings you choose on the property bar,
4.
and apply the properties to other text objects using the
From the property bar, choose 72 from the Font
Paintbucket tool in the toolbox.
Size list box.
5. On the Fill tab of the Object Properties docker,
click the Uniform Fill button, click Advanced, and
enter CMYK values of C:70, M:0, Y:10, K:0.
6. Type Vineyard News.
To add paragraph text, you must first create a text frame.
7. Click to place the cursor below the N of News.
By default, paragraph text
8. From the property bar, choose Gill Sans MT or a
font of your choice from the Font list box.
frames remain the same size regardless of how much text
9. From the property bar, choose 24 from the Font
they contain. Any text that continues past the lower-right
Size list box.
border of the text frame is hidden until you either enlarge
10. Repeat step 5 to set the font colour.
the text frame or link it to another text frame.
11. Type May 2004.
You can fit text to a frame, which automatically adjusts
the point size of the text so that it fits perfectly in the
frame. You can also have paragraph text frames
automatically expand and shrink as you type, so the text
By using contrast to emphasize headings, the reader can
fits in the frame.
easily scan through the newsletter. Try using more space
above headings and subheadings, and less space below
CorelDRAW Graphics Suite 12 supports more than 100
to follow the rule of proximity: the headings should be
text import and export filters. To save time, we’ll import
closer to the paragraph to which it belongs and farther
text from the NewsletterPara*.WPD supporting files.
away from the paragraph above it.
1. With the Text tool, click to place the cursor at
the edge of the first column, approximately 225 mm
Adding artistic text for the newsletter title
Importing paragraph text
Adding headings
Importing the first paragraph
Step 3:
Step 3 — Adding and importing Text

1. From the toolbox, choose the Text tool.
CorelDRAW Graphics Suite 12 supports over 100 file
import and export filters. To save time in this tutorial we
2. Starting from the left side, click and drag to form
are going to import our text from the
a rectangular text frame across the second to
NewsletterPara*.WPD supporting files.
fifth columns below the artistic text heading May
13th - 15th.
1. Choose the Text Tool from the toolbox and click
3. From the File menu, choose Import, select SMB
and drag to form a rectangle text box across the
Newsletter Content Para1.wpd, and click Import.
2nd to 5th column below the Artistic text of
4. In the Importing / Pasting Text dialogue box,
“Wine Festival 04 May 13th - 15th”.
enable Discard Fonts and Formatting, and click
2. From File and Import select the SMB Newsletter
OK.
Content Para1.wpd. Ignore Fonts and formatting
5. If necessary, resize the length of the text frame.
as we will create and use styles within
CorelDRAW. Re-size the length of the text box
Importing the second paragraph
until the text fits.
3. Choose the Text Tool from the toolbox and click
1. Choose the Text tool.
and drag to form a 2nd rectangle text box
2. Starting from the left side, click and drag to form
across the 2nd to 5th column. Below the “Wine
a second rectangular text frame across the
of the Month” text, import SMB Newsletter
second to fifth columns below the artistic text
Content Para2.wpd. Ignore Fonts and formatting
heading “Wine of the Month”.
again. Resize the length of the text box until the
3. From the File menu, choose Import, select SMB
text fits.
Newsletter Content Para2.wpd, and click Import.
4. Directly below, create a 3rd Paragraph just across
4. In the Importing / Pasting Text dialogue box,
the 2nd column, about an inch long. Import
enable Discard Fonts and Formatting, and click
SMB Newsletter Content Para3.wpd Ignore Fonts
OK.
and formatting again. Re-size the length of the
5. If necessary, resize the length of the text frame.
text box until the text fits.
5. Create another paragraph across column 3 and
4, parallel to the last one and again about one
inch long. Import SMB Newsletter Content
1. Choose the Text tool.
Para4.wpd. Ignore Fonts and formatting. Resize
2 Starting from the left, click and drag to create a
the length of the text box until the text fits.
third paragraph across the second column,
6. For the last portion of text on page one of the
about 60 mm long.
Newsletter create a final text box across the 2nd
3. From the File menu, choose Import, select SMB
to 5th column below the Artistic text of
Newsletter Content Para3.wpd, and click Import.
“Vineyard Report” and about one inch long.
4. In the Importing / Pasting Text dialogue box,
Import SMB Newsletter Content Para5.wpd,
enable Discard Fonts and Formatting, and click
Ignore Fonts and formatting. Re-size to the end
OK.
of the first paragraph.
5. If necessary, resize the length of the text frame.
You can fit text to a frame, which automatically adjusts
the point size of text so that the text fits perfectly in the
You can either combine paragraph text frames or you can
frame. You can also have paragraph text frames
break paragraph text frames apart into sub-components
automatically expand and shrink as you type, so that the
— columns, paragraphs, bullets, lines, words, and
text fits perfectly in the frame.
Importing the third paragraph
Combine and link paragraph text frames
Step 3:Adding Text

characters. Every time you break apart a text frame, the
sub-components are placed into separate paragraph text
frames. By linking paragraph text frames you can direct
Styles can save you considerable time if you must apply
the flow of text from one text frame to another if the
the same formatting to several objects. Just like style
amount of text exceeds the size of the first text frame. If
within Word Processing applications, a text style is a set
you shrink or enlarge a linked paragraph text frame, or
of settings such as font type and size. Text styles can also
change the size of the text, the amount of text in the
include fill and outline attributes. For example, you can
next text frame is automatically adjusted.
create a style that applies a 72 point AvantGarde font
with a texture fill.
The text in this last text box does not fit, but we can
create another text box for the overflow.
1. Use the Pick tool from the toolbox to select the
frame.
2. Click the Text flow tab at the bottom of the text
frame or object. As the frame cannot hold all the
text, the cursor will change to a double headed
arrow.
3. When the pointer changes to a Link to pointer,
either click the frame or object into which you
want to continue the text flow. Or in this case -
create a 2nd text frame directly under the first.
Tip: If the frame or object is on a different page, first click
the corresponding Page tab on the Document Navigator.
If a text frame is linked, the Text flow tab changes, and a
blue arrow indicates the direction of text flow. If the
linked text is on another page, the page number and a
dashed blue line are displayed.
1. Click Tools, Graphic and text styles (ctrl+F5).
In the Graphic and text styles docker, click the
flyout button .
2. Click New, and click Paragraph text style
CorelDRAW offers various formatting options for
3. Change the Style name to Wine.
paragraph text: for text-intensive projects such as
4. Click the flyout button, and click Properties.
newsletters, magazines, and newspapers. You can create
5. Click Edit beside a property.
columns of equal or varying widths and gutters. Apply
6. Change the Font to Arial size 9 pt.
drop caps to paragraphs to enlarges the initial letter and
7. Style to Normal and Script to Latin. Leave the
insets it into the body of text. You can also use bulleted
rest as defaults.
lists to format information. You can have text wrap
8. On the Paragraph tab, change Alignment to left.
around bullets, or you can offset a bullet from text to
9. On the Effects Tab, change the Effect Type to
create a hanging indent.
Drop Cap. Dropped lines to 3 and Dropped.
10. Click OK twice.
Double click the Wine style to apply it to Paragraphs
1,2,5 and 6.
Create, apply and edit text styles:
Create or Edit the Wine Style
Formats and Styles
Step 3:Adding Text

Tip: Applying drop caps to paragraphs enlarges the initial
letter and insets it into the body of text. You can customize
a drop cap by changing its settings. For example, you can
change the distance between the drop cap and the body
of text, or specify the number of lines of text you want to
appear beside the drop cap. You can remove the drop cap
at any point, without deleting the letter.
1. Copy the grape illustration from page one and
For our second style, we are going to use bulleted lists to
rotate to fit across the top of the page at
format information. It is possible to either have text wrap
x:109.448 mm y:289.211 mm.
around bullets, or offset a bullet from text to create a
2. Use ctrl+D to duplicate the illustration and
hanging indent. CorelDRAW lets you customize bullets by
ungroup this second iteration (ctrl+U) and delete
changing their size, position, and distance from text.
the last 2 sections so you are just left with 3
After you add a bullet, you can remove it without
sections.
deleting the text.
3. Regroup these and rotate so the will be able to
go dawn the left hand of the page. Move to co-
ordinates x: 8.163 mm by y: 225.379 mm.
1. Click Tools, Graphic and text styles (ctrl+F5).
In the Graphic and text styles docker, click the
flyout button .
2. Click New, and click Paragraph text style.
3. Change the Style name to Wine2.
4. Click the flyout button, and click Properties.
5. Click Edit beside a property.
6. Change the Font to Arial size 9 pt.
7. Style to Normal and Script to Latin. Leave the
rest as defaults.
8. On the Paragraph tab, change Alignment to left.
9. On the Effects Tab, change the Effect Type to
Bullet.
10. Font to TT Food. Symbol # 76. Size 11. Position
0.353. Bulleted.
11. Click OK twice.
1. With the Text Tool selected choose the ‘Brush
Script 6’ font from the Font List , size 36.
Apply the Wine2 style to Paragraphs 3 and 4.
2. Place the cursor at the edge of the 1st column at
about 245mm down the page and Type “Cellar
notes".
3. Change the color of this and all other headline
Copy the grape illustration from page one and use along
text to C:80 M:71 Y:0 K:0.
the top and left side of page 2.
4. For the 2nd headline place the cursor at the
edge of the 1st column at about 125mm down
the page and Type “2004 Events”.
Use the Illustration as a Flag
Bitting the Bullet:
Create or Edit the Wine2 Style
Create the Headlines
Add content to Page 2 of the Newsletter
Step 3:Adding Text

Create the Paragraph text
Adding Columns to Text
Continue on to Step 4
Formats and Styles
Columns are ideal to lay out text-intensive projects such
1. Choose the Text Tool from the toolbox and
as newsletters, magazines, and newspapers. It is possible
simply click and drag to form a rectangle text
to create columns of equal or varying widths and gutters.
box across the 2nd to 5th column below the
1. Simply select a paragraph text frame.
Artistic text of “Cellar Notes”.
2. Click Text, Format text.
2. From File and Import select the SMB Newsletter
3. Click the Columns tab.
Content Para6.wpd file and import the text.
4. Type 2 in the Number of columns box, so that you
Choose to ignore Fonts and formatting as we
have 2 balanced columns of 58.838mm with a
will create and use styles within CorelDRAW.
gutter of 12.7mm within each box. Click OK.
5. Resize both text boxes so the amount of text is
The text in this text box will overflow. We need to create
balanced between the two
another text box for the overflow.
3. Use the pick tool from the toolbox to select the
frame.
4. Click the Text flow tab at the bottom of the text
frame or object. As the frame cannot hold all the
text, the cursor will change to a double headed
arrow.
5. When the pointer changes to a Link to pointer,
either click the frame or object into which you
want to continue the text flow. Or in this case -
create a 2nd text frame directly under the first.
Apply the Wine style to both text boxes.
Step 3:Adding Text
1. On CD3 you will find a selection of stock 6. Drag the clone brush in the image window
Photo’s. Locate 853077.jp2 from CD3 and open downwards to apply the pixels from the
this within Corel Photo-Paint. source point and repeat until the flag has been
2. From File, choose Save As and save this locally
cloned out.
with a CPT file extension so that it is a native
Corel Photo-Paint file.
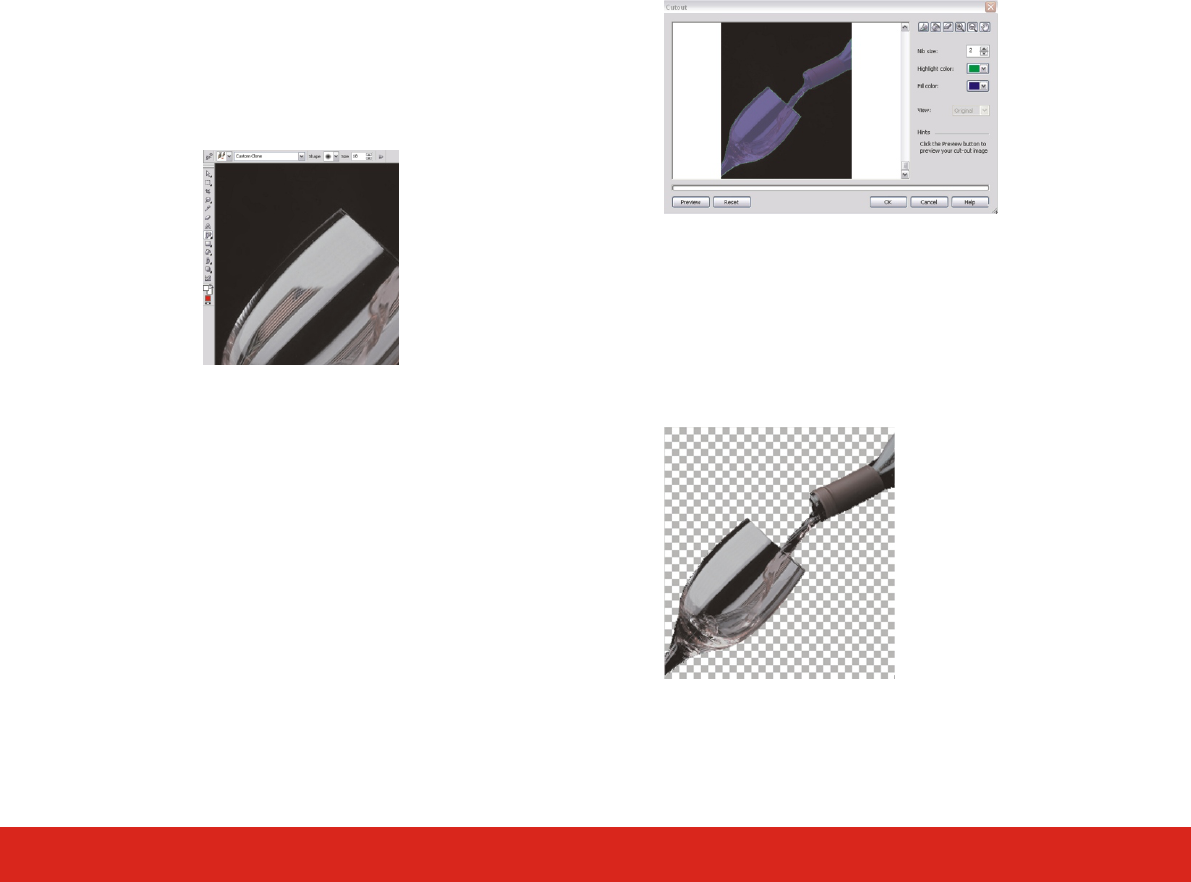
Within Corel Photo-Paint it is possible to use a variety of
different methods to extract image areas by removing the
You can copy pixels from one image area to another in
surrounding background. For the purpose of our
order to cover damaged or unwanted elements in an
Newsletter image, we want to remove the shape of the
image. For example, fixing a tear or removing a person
glass and the wine pouring from the bottle from the
from an image by applying cloned pixels over the area
black background. This feature lets you isolate even the
you want to remove.
most detailed image areas while preserving edge detail,
such as hair or blurred edges. The cut-out image area
When you clone, two brushes display in the image
becomes an object that you can place against any
window: a source point brush and a clone brush that
background image.
applies the copied pixels from the source point. A cross-
hair displays in the source point brush to distinguish it
from the clone brush. The source point brush moves
relative to the clone brush as you drag across the image.
To cut out an image area, you begin by drawing a
highlight over its edges. Then, you apply a fill to define
the inside of the area. You can preview the cut-out image
with the background removed, and you can switch
between the cut-out and original views of the image to
evaluate the results. If necessary, you can erase and redo
In order to remove the flag from within the glass:
sections of the highlighted area.
1. Open the Touch-up flyout, and click the
Clone tool .
2. On the property bar, open the Clone picker, and
click Custom Clone.
3. Change the brush size to 19.
4. Click the image to set a source point for the
clone.(Choose the reflected area of the glass just
next to the flag.
5. If you want to reset the source point, right-click
the area you want to clone.
Cut out the Wine
Clone out the Flag
To clone an image area or object
Step 4:
Importing Graphics
1. From the menu, Click Image, Cutout. 1. From File, choose Import and choose your Cut
2. In the Cutout dialog box, click the Highlighter tool
out image from the previous step. As we can
already see the sizing information before we
. 3. In the preview window draw a line along the
apply, we already know that it is best to
edges of the glass, wine and bottle you want to
marquee size the image first.
cut out. The line should slightly overlap the
surrounding background.
2. Move the cursor to the co-ordinates of about
x:145mm y:-25mm and drag to x:0 y:115.
4. Click the Inside fill tool, and click inside the
image area.
5. Click Preview.
6. If you want to switch between the original and
cut-out view of an image, choose a view from
To quickly create the effect of text wrapping around the
the View list box.
shape of the glass we need to create a freehand shape
7. Click OK when you are happy with the result
that traces the contour of the glass.
(this may take a couple of attempts to perfect.
8. Save the image (remember the save as a Photo-
Paint file)
Tip: The Zoom in and Zoom out tool lets you use the
highlighter tool to its best advantage.
1. Zoom onto the image of the glass and choose
the Curve flyout, and click the Freehand tool (F5).
2. Click where you want to start the curve (the top
right corner of the glass) , and drag to draw the
line around the glass.
3. Import the last SMB Newsletter Content
Para2.wpd text following the same instructions
as before and place this paragraph over the
picture and our outline.
4. Choose Wine2 as the style so as to add the
bullet points.
5. Select the free hand outline we created and
right click to show the properties (if the
The next step of this Newsletter is to import some
Properties docker is already open then just
additional graphics along the top. CorelDRAW Graphics
select the freehand object and click on the
Suite 12 supports over 100 different file formats for its
properties docker).
import/export filters enabling seamless graphic creation
6. Select the General (3rd tab) and change the
workflow via seamless support for file formats like Adobe
paragraph wrap to “Contour Flows Right”and
Illustrator, SAG, PDF, PNG, Photoshop, just to name a few.
change the text wrap to about 2.54 mm.
7. Click apply.
Wrap text
Import the Photo into CorelDRAW
Step 3: Importing Graphics

1. Open the Rectangle flyout, and click the
You may need to manually move the text box around a
Rectangle tool.
little and play with the positioning of the text to get it
perfect. Once you are satisfied, change the outline style to
2. Drag in the drawing window until the rectangle
None from the property bar so this object remains hidden.
is the size you want (216.0 mm by 22.138 mm)
and position it to (x:105.00 mm by y:5.681 mm)
so that we have the bleed off the page.
3. To stick with the same sky theme as our logo we
choose the fill color of C:70 M:0 Y:10 K:0.
1. From the Toolbox, select the Rectangle Tool (F6)
and create a rectangle measuring 36.258 mm by
55.008 mm with an outline of 8pt and change the
outline color to C:70 M:0 Y:10 K:0. And no fill.
2. Move the rectangle to co-ordinates x:
153.945 mm y:70.226 mm.
3. Select the Text tool and marquee drag to create
a text box within the newly created rectangle.
4. Add the text opposite and apply the Wine Style.
To complete our initial layout we are going to add a solid
rectangle of color at the base of the page that will
compliment our flag at the top of the page.
Create the Contact Information
Continue on to Step 5
Complete the Layout
Step 3: Importing Graphics

Export For Office Print, Prepress & Preflight
Publish to PDF
CorelDRAW Graphics Suite 12 also has the new feature When outputting your final content it is important to be
of Export For Office, allowing you to quickly optimize the able to identify any possible issues before they actually
export of a graphic for use within productivity occur. Preflight checks the status of your file before you
®
decide to output it. A summary of issues and potential
tools—such as Microsoft Office or WordPerfect Office.
problems–and suggestions for resolving them–is
provided. You can specify which issues Preflight checks
With real-time visual feedback, you can immediately
for. You can also customise and save Preflight settings.
apply your graphic for the correct use.
The Open Prepress Interface (OPI) within Corel DRAW lets
you use low-resolution images as placeholders for the
high-resolution images that appear in your final work.
When a service bureau receives your file, the OPI server
substitutes the low-resolution images for the high-
resolution images.
Document settings can be preserved to maintain how a
PDF file looks. You can preserve document overprints,
halftone screen information, and spot colors. It is also
possible to place Printer's marks to provide information to
the service bureau about how the work should be
Now that you have completed your Newsletter, you need
printed. You can specify which printer's marks to include
to prepare it for output. CorelDRAW Graphics Suite 12
on the page. The available printer's marks are as follows:
supports professional color management and contains
wizards to help develop content for a Service Bureau—
Crop marks—represent the size of the paper and
along with the ability to publish to PDF functionality.
appear at the corners of the page
Registration marks — are required to line up the
We can generate PDF files without the need for 3rd party
film, analog proofs, or print plates on a color
software. CorelDRAW Graphics Suite 12 includes many
press. Also registration marks print on each sheet
prepress options and a preflight engine to show any
of a color separation.
potential problems you may have on output.
Densitometer scale — a series of gray boxes
ranging from light to dark. These boxes are
1. From File, choose Publish to PDF.
required to test the density of halftone images.
Step 5:
Output and Publishing

Service Bureaus and Color Management
From here...
CorelDRAW features color management controls
designed to help you achieve the best possible color
matches. You can also take advantage of three
predefined color management styles (for the Web, for
desktop printing and for professional output), removing
the guesswork from color management, or you can have
the flexibility of creating and saving your own profiles.
This tutorial provided a step-by-step approach to
using CorelDRAW 12 to develop a newsletter. We
hope that you continue to explore the many
Accurate, reliable color management is the cornerstone of
exciting possibilities of Corel software products.
any creative design process. CorelDRAW Graphics Suite 12
makes color management more intuitive by combining all
For more information about the topics and tools
the essential color management options in one dialog box.
presented in this tutorial, please refer to the
CorelDRAW Graphics Suite 12 User Guide
Color management is the process of matching colors
between devices, such as scanners, digital cameras,
printers, and monitors.
Step 5: Output and Publishing
Congratulations!
