
Microsoft
®
Word Cheat Sheet
Basic Skills
The Word Program Screen
Word Fundamentals
Create a Blank Document: Click the File tab,
select New, and click Blank document; or, press
Ctrl + N.
Open a Document: Click the File tab and select
Open, or press Ctrl + O. Select a location with a
file you want, then select a file and click Open.
Save a Document: Click the Save button on the
Quick Access Toolbar, or press Ctrl + S. Choose
a location where you want to save the file. Give the
file a name, then click Save.
Recover an Unsaved Document: Restart Word
after a crash. If a document can be recovered, the
Recover unsaved documents link will appear on
the start screen. Click the link to open the
Document Recovery pane, then select an
autorecovered document.
Change Document Views: Click the View tab and
select a view, or click one of the View buttons at
the bottom of the window.
Reading View
Print Layout View
Web Layout View
Print: Click the File tab, select Print, specify print
settings, and click Print.
Select and Edit Text
Select a Block of Text: Click and drag across the
text you want to select; or, click at the beginning of
a text block, hold down the Shift key, and click at
the end of a text block.
Select a Sentence: Press the Ctrl key and click in
a sentence.
Select a Line of Text: Click in the left margin for the
line you want to select.
Select a Paragraph: Double-click in the left margin
for the paragraph you want to select.
Select Everything: Click the Select button on the
Home tab and click Select All, or press Ctrl + A.
Edit Text: Select the text you want to replace and
type new text.
Cut, Copy and Paste: Select the text you want to
cut or copy and click the Cut or Copy button
on the Home tab. Click where you want to paste
the text, and click the Paste button.
Undo: Click the Undo button on the Quick
Access Toolbar.
Redo or Repeat: Click the Redo button on the
Quick Access Toolbar. The button turns to Repeat
once everything has been re-done.
General
Open a document ................ Ctrl + O
Create a new document ....... Ctrl + N
Save a document ................. Ctrl + S
Print a document ................. Ctrl + P
Close a document ................ Ctrl + W
Navigation
Move the text cursor ............ , , , →
Up one screen ..................... Page Up
Down one screen ................. Page Down
Beginning of a line ................ Home
End of a line ......................... End
Beginning of a document ..... Ctrl + Home
End of a document ............... Ctrl + End
Open Go To dialog box ........ Ctrl + G
Editing
Cut ...................................... Ctrl + X
Copy .................................... Ctrl + C
Paste ................................... Ctrl + V
Undo ................................... Ctrl + Z
Redo .................................... Ctrl + Y
Find ..................................... Ctrl + F
Replace ............................... Ctrl + H
Select All ............................. Ctrl + A
Check Spelling and
Grammar ............................. F7
Formatting
Bold ..................................... Ctrl + B
Italics ................................... Ctrl + I
Underline ............................. Ctrl + U
Align Left ............................. Ctrl + L
Align Center ......................... Ctrl + E
Align Right ........................... Ctrl + R
Justify .................................. Ctrl + J
Indent a paragraph .............. Ctrl + M
Remove an indent ................ Ctrl + Shift + M
Increase font size ................. Ctrl + Shift + >
Decrease font size ............... Ctrl + Shift + <
Increase font size 1pt ........... Ctrl + ]
Decrease font size 1pt ......... Ctrl + [
Copy formatting ................... Ctrl + Shift + C
Paste formatting................... Ctrl + Shift + V
Show/Hide Formatting
Marks .................................. Ctrl + Shift + *
Keyboard Shortcuts
Quick Access Toolbar
Title bar
Minimize Window
Close
Rulers
Status bar
Views
Zoom
Ribbon
Free Cheat Sheets
Visit ref.customguide.com
Sign Up for a Free Course!
www.customguide.com
© 2024 CustomGuide

Select and Edit Text
Spelling and Grammar Errors: Potential spelling
errors are underlined in red and potential
grammar errors are underlined in blue.
Correct a Spelling or Grammar Error: Manually
make the correction, or right-click the error and
select a suggestion you want to use.
Ignore a Spelling or Grammar Error: Right-click
the error and select Ignore All.
Check Spelling and Grammar: Click
the Review tab and click the Spelling &
Grammar button.
Find the Word Count: Click the word count in
the lower-left corner; or click the Review tab
and click the Word Count button.
Use the Thesaurus: Click the word you want to
replace, click the Thesaurus button on the
Review tab, click a word’s list arrow, and select
Insert; or, right-click the word you want to
replace, select Synonyms, and select a word
from the menu.
Find Text: Click the Find button on the Home
tab, type the text you want to find in the Search
box, and click an item to jump to it in the
document.
Replace Text: Click the Replace button on
the Home tab. Enter the word you want to find in
the Find What field, then enter the text that will
replace it in the Replace With field. Click
Replace or Replace All. Click OK when
finished.
Insert a Symbol: Click where you want to insert
the symbol. Click the Insert tab and click the
Symbol button. Either select a symbol from
the menu or select More Symbols, select a
symbol, and click Insert.
Insert Text from Another File: Place the cursor
where you want to insert the text. Click the
Insert tab, click the Object button list
arrow, and select Text from File. Select the file
containing the text you want to insert, then click
the Insert button.
Format Text and Paragraphs
Change the Font: Select the text you want to
change, click the Font list arrow, and select a
new font.
Change the Font Size: Select the text you want
to change, click the Font Size list arrow, and
select a new font size.
Change the Font Color: Select the text you want
to change, click the Font Color button list
arrow, and select a new color.
Apply Bold, Italic, or an Underline: Click the
Bold , Italic or Underline button in the
Font group on the Home tab.
Clear Formatting: Select the text you want to
clear formatting from, then click the Clear All
Formatting button.
Format Text and Paragraphs
Create a Bulleted List: Select the text you want
to make into a bulleted list, and click the Bullets
button.
Change a Bulleted List Style: Select a bulleted
list, click the Bullets button list arrow, and
select a bullet symbol.
Create a Numbered List: Select the text you
want to make into a numbered list, and click the
Numbering button.
Change a Numbered List Style: Select a
numbered list, click the Numbering button
list arrow, and select a numbered list style.
Align a Paragraph: Click anywhere in the
paragraph you want to align and click an
alignment option in the Paragraph group on the
Home tab.
Left aligned
Center aligned
Right aligned
Add a Border: Click in the paragraph where you
want to add a border, click the Borders button
list arrow, and select a border.
Add Shading: Click in the paragraph where you
want to add shading, click the Shading
button list arrow, and select a shading color.
Change Line Spacing: Select the paragraph you
want to adjust, click the Line Spacing
button, and select a spacing option.
Change Paragraph Spacing: Click the
Paragraph group’s dialog box launcher ,
change the values in the Before or After
spacing fields, and click OK.
Copy Formatting: Select the formatted text you
want to copy, click the Format Painter
button, and select the text you want to apply
formatting to.
Indent Paragraphs: Click anywhere in the
paragraph you want to indent and click the
Increase Indent or Decrease Indent
button on the Home tab.
Set Custom Indents: Click anywhere in the
paragraph you want to indent and click the
Paragraph group’s dialog box launcher .
Adjust the values in the Left and Right fields,
then click OK.
Enable the Ruler: Click the View tab, then
check the Ruler check box.
Set a Tab Stop: Click anywhere in the
paragraph you want to add a tab stop to, then
click a spot on the ruler. Or, click the Paragraph
group’s dialog box launcher , click the Tabs
button, enter a tab stop position in the text field,
and then click Set. Click OK when you’re
finished adding tab stops.
Format Text and Paragraphs
Types of Tab Stops: Pressing the Tab key will
advance the cursor to the next tab stop and
align the text at that point, depending on the
type of tab stop.
Left aligned will align the left side of
the text with the tab stop.
Center aligned will align the text so
that it’s centered under the tab stop.
Right aligned will align the right side of
the text with the tab stop.
Decimal aligned will align text and
numbers by a decimal point.
Remove a Tab Stop: Click and drag a tab stop
off of the ruler.
Format the Page
Choose a Margin Size: Click the Layout tab,
click the Margins button, and select a
common margin setting. Or, click and drag the
Adjust Left, Adjust Right, Adjust Top, or
Adjust Bottom line on the Ruler.
Change Paper Size: Click the Layout tab, click
the Size button, and select the size you want
to use.
Change Paper Orientation: Click the Layout
tab, click the Orientation button, and select
Portrait or Landscape.
Use a Header or Footer: Click the Insert tab,
click either the Header or Footer button,
and select an option.
Add Page Numbers: Click the Insert tab, click
the Page Number button, select a part of the
page, and select a page number style.
Format Columns: Click the Layout tab, click the
Columns button, and select a column
option.
Insert Column Breaks: Place your cursor where
you want to start a new column, click the
Layout tab, click the Breaks button, then
select Column.
Insert Page Breaks: Place your cursor where
you want to start a new page, click the Insert
tab, and click the Page Break button.
Add a Watermark: Click the Design tab, click
the Watermark button, and select a
watermark style.
Add Page Color: Click the Design tab, click the
Page Color button, and select a page color.
Add Page Borders: Click the Design tab, then
click the Page Borders button. In the
Borders and Shading dialog box, customize the
border style, color, and width, as well as which
sides the border will appear on, and then click
OK.
Sign Up for a Free Course!
www.customguide.com
© 2024 CustomGuide

Microsoft
®
Word Cheat Sheets
Intermediate Skills
Elements of a Table
Insert a Table: Click the Insert tab, click the Table
button, and select the number of rows and
columns that you want.
Add a Row or Column: Click in a cell next to where
you want to add a row or column. Click the Table
Tools Layout tab, then click Insert Above ,
Insert Below , Insert Left , or Insert Right
, depending on where you want the row or
column to be added.
Delete a Row or Column: Click in a cell in the row
or column you want to delete, click the Table Tools
Layout tab, click the Delete button, then select
Delete Row or Delete Column .
Convert a Table to Text: Select the table, click the
Table Tools Layout tab, click the Convert to Text
button, choose how to separate the cells, and
click OK.
Manually Resize a Table Row or Column: Click and
drag the cell border.
Automatically Resize a Table Row or Column:
Click within the table, click the Table Tools Layout
tab, click the AutoFit button, and select an
option.
Merge Cells: Select multiple cells that share a
border, click the Table Tools Layout tab, and click
the Merge Cells button.
Split Cells: Select a cell, click the Table Tools
Layout tab, click the Split Cells button, enter
the number of rows and columns, and then click
OK.
Distribute Rows and Columns: Click within the
table, click the Table Tools Layout tab, click the
Distribute Rows button to distribute the rows
evenly, or click the Distribute Columns
button to distribute the columns evenly.
Apply a Table Style: Click inside the table, click
the Table Tools Design tab, and select a style
from the Table Styles gallery.
Apply Text Alignment: Select the cell(s), click the
Table Tools Layout tab, and select an option
from the Alignment group.
Add a Border to a Table: Select a table, click the
Table Tools Design tab, click the Border Styles
button list arrow, select a border style, click the
Borders button list arrow, and select a border
option.
Add Cell Shading: Select the cell(s), click the
Shading button list arrow, and select a color.
Split a Table: Click in the row where the second
table will start, click the Table Tools Layout tab,
and click the Split Table button.
Navigating a Table
Next cell .......................... Tab
Previous cell .................... Shift + Tab
Next row ..........................
Previous row ....................
First cell in a row .............. Alt + Home
Last cell in a row .............. Alt + End
First cell in a column ........ Alt + Page Up
Last cell in a column ........ Alt + Page Down
Selecting Cells in a Table
Select a Single Cell: Click in the lower-left
corner of a cell, when the cursor changes
to an arrow ; or triple-click a cell; or click
the Table Tools Layout tab, click Select ,
and choose Select Cell.
Select a Row: Click to the left of the table
row (just outside the table itself); or click
the Table Tools Layout tab, click
Select , and choose Select Row.
Select a Column: Click above a column,
when the cursor changes to an arrow ; or
click the Table Tools Layout tab, click
Select , and choose Select Column.
Select an Entire Table: Click the table
selector button in the upper-left corner
of a table; or click the Table Tools Layout
tab, click Select , and choose Select
Table.
Table Style Options
Configure Table Style Options: Place the
text cursor within the table, click the Table
Tools Design tab, then check the check
boxes in the Table Style Options group to
toggle certain table elements.
The appearance of these elements will
vary, based on the current Table Style.
• Header Row applies special formatting
to the first row of a table.
• Total Row applies special formatting to
the final row of a table.
• Banded Rows alternates the shading
for the body rows between two
different colors.
• First Column applies special formatting
to the first column in a table.
• Last Column applies a special
formatting to the last column in a table.
• Banded Columns alternates the
shading for body columns between two
different colors.
Navigating a Table
Column
Row
Header Row
Selected Cell
Table Selector
Resize Handle
Tables
Total Row
Free Cheat Sheets
Visit ref.customguide.com
Sign Up for a Free Course!
www.customguide.com
© 2024 CustomGuide

Graphics
Insert a Picture: Place the text cursor where you
want to insert a picture, click the Insert tab,
click the Pictures button, select a picture,
and click Insert.
Remove a Picture’s Background: Select a
picture, click the Format tab, and click the
Remove Background button. Areas that will
be removed are highlighted. Click the Mark
Areas to Keep button to draw over any area
accidentally highlighted, and click the Mark
Areas to Remove button to draw over any
area that needs to be removed. Click the Keep
Changes button.
Insert a Text Box: Click the Insert tab, click the
Text Box button, and select a style of text
box.
Insert a Shape: Click the Insert tab, click the
Shapes button, select a shape, then click to
place a shape (or click and drag to place the
shape at a certain size).
Insert a Drawing: Click the Draw tab, click the
Draw with Touch button, then click and drag
the mouse (or use your finger on a touchscreen)
to draw a shape. Click the Draw with Touch
button again when you’re done drawing.
Format a Shape: Select a shape, then click the
Format tab and use the options in the Shape
Styles group to customize the appearance of
the shape.
• Click the Shape Fill button and select a
color to change the shape’s fill color.
• Click the Shape Outline button and
select a color and weight for the shape’s
outline, as well as dash and arrow styles.
• Click the Shape Effects button and
select a shape effect, such as shadow,
glow, or bevel.
• Select a shape style preset from the Shape
Styles gallery. Click the gallery’s More
button to see more presets.
Insert WordArt: Click the Insert tab, click the
Insert WordArt button, and select a style of
WordArt.
Insert a Chart: Click the Insert tab, click the
Add a Chart button, select a chart category
on the left, select a chart type, and click OK.
Edit the chart data in the window that opens.
Resize an Object: Select an object, then click
and drag the sizing handles on the sides and
corners until it’s the size you want.
Move an Object: Select an object, then click
and drag it to a new location.
Rotate an Object: Select an object, then click
and drag the rotate handle to the left or right.
Or, select an object, click the Format tab, click
the Rotate Objects button, and select a
rotation option.
Graphics
Flip an Object: Select an object, click the
Format tab, click the Rotate Objects
button and select Flip Vertical or Flip
Horizontal.
Position an Object on the Page: Select an
object, click the Format tab, click the Position
button, and select a position.
Wrap Text Around an Object: Select an object,
click the Format tab, click the Wrap Text
button, and select a text wrapping style.
Move an Object Up or Down One Layer: Select
an object, click the Format tab, and click the
Bring Forward button to move the object
forward one layer, or click the Send Backward
button to send the object backward one
layer.
Group Objects: Select multiple objects, click the
Format tab, click the Group Objects button,
and select Group.
Ungroup Objects: Select a group, click the
Format tab, click the Group Objects button,
and select Ungroup.
Align Objects: Select multiple objects, click the
Format tab, click the Align button, and
select an alignment option.
Distribute Objects: Select multiple objects, click
the Format tab, click the Align button, and
select Distribute Horizontally or Distribute
Vertically.
Styles, Themes, and Templates
Apply a Style: Place the text cursor in a
paragraph and select a style from the Styles
gallery on the Home tab. Click the gallery’s
More button to see additional styles.
Display the Styles Pane: Click the dialog box
launcher in the Styles group on the Home
tab.
Create a Style: Select some text that’s
formatted the way you want the style to appear,
then click the Styles gallery’s More button
and select Create a Style (or, click the New
Style button in the Styles pane). Give the new
style a name and click OK.
Modify a Style: Change the formatting for some
text with a style applied, right-click the style in
the Styles gallery (or in the Styles pane) and
select Update ___ to Match Selection.
Apply a Theme: Click the Design tab, click the
Themes button, and select a theme.
Use a Document Template: Click the File tab,
click New, search for a template in the search
field or select a recommended template, select
a template, and click Create.
Create a Document Template: Click the File
tab, click Save As, select a location, give the
file a name, click the Save As Type list arrow,
select Word Template, and click Save.
Long Documents
Use Outline View: Click the View tab and click
the Outline button. Click the Close Outline
View button to return to the previous view.
Demote Items: While in Outline view, click the
item you want to demote and click the Demote
button (or the Demote to Body Text
button).
Promote Items: While in Outline view, click the
item you want to promote and click the
Promote button (or the Promote to
Heading 1 button).
Navigate Long Documents: Click the View tab,
check the Navigation Pane check box, and
use the Pages tab to browse by page, or use
the Headings tab to navigate by headings.
Add a Bookmark: Select the text you want to
bookmark, click the Insert tab, click the
Bookmark button in the Links group, give the
bookmark a name, and click Add.
Insert a Section Break: Place the cursor where
you want the section to start, click the Layout
tab, click the Breaks button, and select a
type of section break.
Insert a Link: Select the text you want to use as
a link, click the Insert tab, click the
Link button, choose what type of link to
create, choose where to link to, and click OK.
Create Footnotes and Endnotes: Click the text
that you want the footnote / endnote to refer to,
click the References tab, click the Insert
Footnote (or Insert Endnote ) button,
and type your footnote / endnote.
Insert a Table of Contents: Place the text cursor
where you want to insert a table of contents,
click the References tab, click the Table of
Contents button, and select a table of
contents style.
Insert an Index Entry: Select the text you want
the index entry to refer to, click the References
tab, and click the Mark Entry button. Set any
index entry options you want, then click Mark
(or, click Mark All to mark all instances of the
text). Click Close.
Insert an Index: Place the text cursor where you
want to insert an index, click the References
tab, click the Insert Index button. Set up the
index’s options, then click OK.
Create a Citation: Click the References tab,
click the Insert Citation button, and select
Add New Source. Enter the source’s
information, then click OK.
Insert a Citation: Click the References tab,
click the Insert Citation button, and select a
citation from the menu.
Insert a Bibliography: Click the References tab,
click the Bibliography button, then select a
bibliography style.
Sign Up for a Free Course!
www.customguide.com
© 2024 CustomGuide

Microsoft
®
Word Cheat Sheet
Advanced Skills
The Developer Tab
Share a Document: Make sure the document is
shared to an online-accessible location, such as
OneDrive or SharePoint. Click the Share button
above the ribbon and enter someone’s email
address in the Invite People field (or, click the
Address Book button and select someone in
the Address Book dialog box). Choose their
permission level by clicking the permissions list
arrow and selecting a level. Enter a short
message (optional), then click the Share button.
Highlight Text: Select the text you want to
highlight, click the Text Highlight Color
button list arrow on the Home tab, and select a
highlight color.
Insert a Comment: Select the text you want to
add a comment to, click the Review tab, click the
New Comment button, and add your
comment. Click outside of the comment field
when you’re finished.
Delete a Comment: Click a comment to select it,
click the Review tab, and click the Delete
button.
Reply to a Comment: Click a comment to select it
and click the Reply button in the comment.
Type your response, then click outside the
comment field when you’re finished.
Show / Hide Comments: Click the Review tab and
click the Show Comments button to toggle it
on or off.
Toggle Track Changes: Click the Review tab and
click the Track Changes button in the Tracking
group.
View Markup: Click the Review tab, click the
Show Markup button in the Tracking group,
and select a type of markup to show or hide.
Review Revisions: Click the Review tab, then click
the Next Change and Previous Change
buttons in the Changes group. Click the Accept
button to accept a change, or the Reject button
to reject it.
Compare Two Documents: Click the Review tab,
click the Compare button, and select
Compare. Select the original document from the
Original Document list arrow (or click the
Browse icon and select it), then select the revised
document from the Revised Document list arrow
(or click the Browse icon and select it). Click the
More button and select what types of differences
to look for (optional). Click OK.
Add Line Numbers: Click the Layout tab, click the
Line Numbers button, and select an option.
Add Forms to a Document
Enable the Developer Tab: Before adding
forms, you must enable the Developer tab
on the ribbon. Click the File tab, click
Options, click Customize Ribbon, check
the Developer check box, and click OK.
Add a Form Control: Place the text cursor
where you want the form control, click the
Developer tab, click the Design Mode
button in the Controls group, and click the
button for the form control you want to add.
Click the Design Mode button again
when you’re finished adding form controls.
Finalize a Form: Click the Developer tab
and click the Restrict Editing button to
open the Restrict Editing pane. Check the
Editing Restrictions check box, click the
Editing Restrictions list arrow, and select
Filling in forms. Click the Yes, Start
Enforcing Protections button, enter a
password (optional), and click OK.
Types of Form Controls
Form Controls: You can add different types
of form controls that allow a user to enter
different types of data into a form.
• Rich Text allows users to enter
text that can be formatted with different
fonts and font styles.
• Plain Text allows users to enter
text, but not to format that text.
• Picture allows the user to add a
picture from their computer or an
online location to the form.
• Check Box places a form with a
check box that the user can check or
uncheck.
• Combo Box adds a list with a text
box, where users can choose an option
or enter their own.
• Drop-Down List adds a list with
several options that a user can choose
from.
• Date Picker lets the user choose a
date from a calendar.
• Repeating Section contains other
types of content controls and repeats
as many times as you need it.
• Legacy Types of content controls
were used in older versions of Word.
You can still use them in a Word 97-
2003 document.
Forms
The Code group
contains commands
to record and edit
macros, as well as
control the level of
macro security in
Word.
The Add-ins
group configures
add-ins to extend
the functionality
of Word.
The Controls group lets
you add form controls to a
document. Click Design
Mode, then click a form
control button to insert it.
Click Design Mode again
when you’re finished.
The Mapping
group lets you
link content
controls to
external XML
data.
The Protect group
lets you restrict the
ability to make
changes to a
document (or certain
parts of a
document).
The Templates
group lets you
switch document
templates and
other add-ins.
Collaborate in Word
Free Cheat Sheets
Visit ref.customguide.com
Sign Up for a Free Course!
www.customguide.com
© 2024 CustomGuide

Collaborate in Word
Customize Line Numbers: Click the Layout tab,
click the Line Numbers button, and select
Line Numbering Options. Click the Line
Numbers button. Customize where the line
numbers start, how far they appear from the
text, and how often they appear. Click OK, then
click OK again.
Protect a Document: Click the File tab, click the
Protect Document button, and select Mark
as Final. Click OK in both the confirmation
dialog boxes.
Password Protect a Document: Click the File
tab, click the Protect Document button, and
select Encrypt with Password. Enter a
password, click OK, then enter that password
again to confirm it, and click OK again.
Remove a Password: Click the File tab, click
the Protect Document button, select
Encrypt with Password, remove the password
from the text field and click OK.
Inspect a Document: Click the File tab, click the
Check for Issues button, and select Inspect
Document. Select the types of content you
want to check for, then click Inspect. After
inspection, click Remove All for any content
that you want to remove, then click Close.
Macros
Enable the Developer Tab: Before adding
macros, you must enable the Developer tab on
the ribbon. Click the File tab, click Options,
click Customize Ribbon, check the Developer
check box, and click OK.
Record a Macro: Click the Developer tab, click
the Record Macro button, and give the
macro a name. Click either Button or
Keyboard to assign a button or keyboard
shortcut to the new macro (optional). Click OK.
Perform the tasks you want to record, then click
the Stop Recording button.
Run a Macro: Place the text cursor where you
want the macro to run. Click the Developer
tab, click the Macros button, select a macro,
and click Run.
Edit a Macro: Click the Developer tab, click the
Macros button, select a macro, and click
Edit. Modify the macro using the Visual Basic
editor, then close Visual Basic.
Advanced Documents
Customize Word’s Options: Click the File tab
and click Options. Select a category on the left,
and then customize options on the right. Click
OK when you’re finished.
Customize the Ribbon: Click the File tab, click
Options, then click the Customize Ribbon
tab. Select and expand a ribbon tab, then select
and expand a group. Select a command from
the left column, then click Add to add it, or
select a command from the right column and
click Remove to remove it from the ribbon.
Advanced Documents
Change Word’s Default Font: Start in a new,
blank document. Click the Font group’s dialog
box launcher . Choose the new default font or
font style, then click the Set as Default button.
Select All documents based on the Normal
template, then click OK.
Create a Building Block: Select the text or
objects you want to use as a building block.
Then, click the Insert tab, click the Explore
Quick Parts button, and select Save
Selection to Quick Part Gallery.
Insert a Building Block: Place the text cursor
where you want a building block placed. Click
the Insert tab, click the Explore Quick Parts
button, and either select a building block from
the menu, or select Building Blocks
Organizer. Select a building block, and then
click Insert.
Find and Replace Using Wildcards: Click the
Find button list arrow, select Advanced
Find, and expand the dialog box by clicking the
More button. Check the Use Wildcards check
box, then while entering a search phrase in the
Find What field, click the Special button and
select a wildcard.
Wildcard Examples
?
any single character
*
any number of characters
[ ]
one of these characters
[ - ]
one of these characters in a
range
[! ]
none of the specified characters
<
beginning of a word
>
end of a word
@
one or more instances of a
character
{n}
exactly n instances of a character
{n, }
at least n instances of a character
{n, m}
between n and m instances of a
character
Find and Replace Special Characters: Click the
Find button list arrow, select Advanced
Find, and expand the dialog box by clicking the
More button. While entering a search phrase in
the Find What field, click the Special button
and select a special character.
Edit a Document in Multiple Languages: Select
the text in another language, click the Review
tab, click the Language button, and select
Set Proofing Language. Select a language
and click OK.
Add Additional Editing Languages: Click the
Review tab, click the Language button, and
select Language Preferences. Click the Add
additional editing languages list arrow and
select a language. Click Add, then click OK.
Insert a Date and Time Field: Click the Insert
tab, click the Date and Time button, select a
date format, check the Update Automatically
check box, and click OK.
Advanced Documents
Insert a Field: Click the Insert tab, click the
Explore Quick Parts button, and select
Field. Select a field category, then a field. Click
OK.
View Field Codes: Right-click a field and select
Toggle Field Codes.
Mail Merge
1 – Start the Mail Merge Wizard: Click the
Mailings tab, click the Start Mail Merge
button, and select Step-by-Step Mail Merge
Wizard.
2 – Choose a Document Type: In the Mail
Merge pane, select a document type, then click
Next.
3 – Select a Document: In the Mail Merge pane,
select whether to use the current document,
start a new document from a template, or use
another existing file, then click Next.
4 – Select Recipients: In the Mail Merge pane,
select whether to use an existing list, select
contacts from Outlook, or type a new list.
If using an existing list, click the Browse button,
select a file with a list of recipients, and click
Open. Select which contacts in the list you want
to use by checking or unchecking them, then
click OK.
If selecting contacts from Outlook, click the
Choose Contacts Folder button, select a
contacts folder to import, and click OK. Select
which contacts in the list you want to use by
checking or unchecking them, then click OK.
If typing a new list, click the Create button, then
fill out the fields for each address. Click OK
when finished.
Click Next.
5 – Write Your Letter: Place the text cursor
where you want an element, then click the
button for the element you want to add (such as
an Address Block or a Greeting Line),
choose an element’s options, then click OK. Or,
click the More Items button, select a specific
field to insert, click Insert, and then click Close.
When you’ve added all the fields you need, click
Next.
6 – Preview Your Letter: In the Mail Merge pane,
click the << and >> buttons to preview the
placeholders filled in with a recipient’s data.
When you’re finished previewing, click Next.
7 – Complete the Merge: In the Mail Merge
pane, click Print to print the finished mail
merged documents, or click Edit individual
letters to create a new document for all or
some of the records.
Close the Mail Merge pane when you’re finished
with the merge.
Sign Up for a Free Course!
www.customguide.com
© 2024 CustomGuide
Customizable Courses
Make ready-made learning your own. Brand & customize over 300
ready-made courses to jumpstart your training.
For verified skills in:
© 2024 CustomGuide
Sign up for a Free Course!
www.customguide.com
“So impressed with your
features and ease of use.
What a terrific product!”
“Customizing the
courses has saved
countless hours of work.”
Trusted by 3,000 Organizations
4.9 out of 5
Microsoft Word
Microsoft
Business Skills
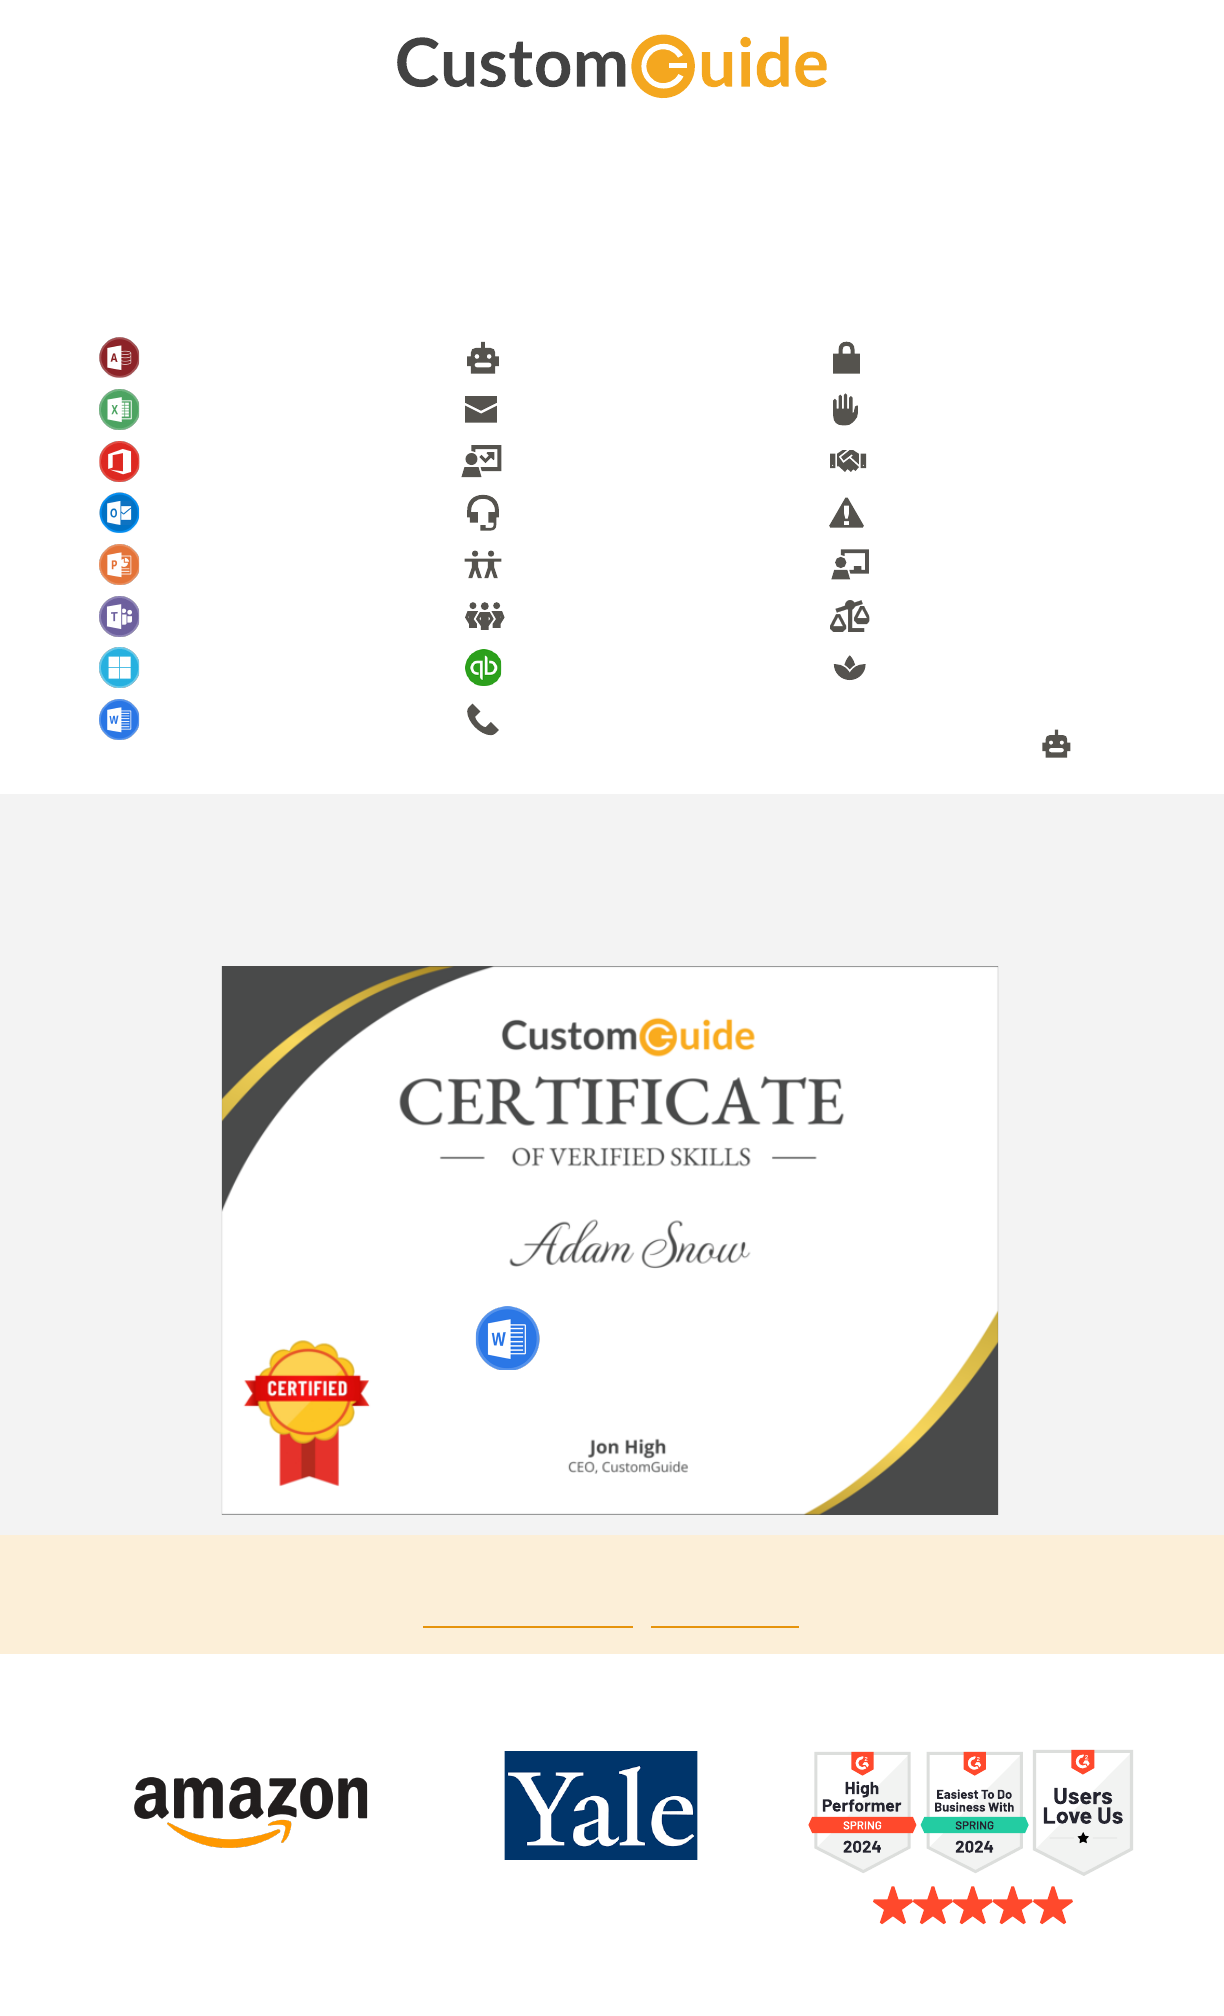
Verified Skill Certificates
Verified Learning with accurate skill assessments.
All courses include LinkedIn-ready certificates.
Onboarding & Compliance
Microsoft Access AI Cyber Security
Microsoft Teams Leadership
Microsoft Windows QuickBooks Wellness
Microsoft Outlook Customer Service
Microsoft Word Sales & Marketing
HRMicrosoft PowerPoint
Microsoft Excel Communication Harassment
Microsoft Office Career Development Onboarding
Create your own
courses with AI
Unconscious Bias
Safety
Training
