
© Copyright 2021 Agiloft Inc. All Rights Reserved. HELP-31Mar2021
2.13 — End User Interface

CONTENTS
Accessing and Customizing the EUI
7.
Text and Localization in the EUI
. . . . . . . . . . . . . . . . . . . . . . . . . . . . . . . . . . . . . . . . . . .
43
6.
EUI Template Reference
. . . . . . . . . . . . . . . . . . . . . . . . . . . . . . . . . . . . . . . . . . . . . . . . .
40
5.
Macros, Methods, and Conditionals
. . . . . . . . . . . . . . . . . . . . . . . . . . . . . . . . . . . . . . .
36
4.
Permissions and Visibility in the EUI
. . . . . . . . . . . . . . . . . . . . . . . . . . . . . . . . . . . . . . .
28
3.
Using Default Searches
. . . . . . . . . . . . . . . . . . . . . . . . . . . . . . . . . . . . . . . . . . . . . . . . . .
26
2.
Working with the Default EUI Templates
. . . . . . . . . . . . . . . . . . . . . . . . . . . . . . . . . . .
6
1.
Accessing and Customizing the EUI
. . . . . . . . . . . . . . . . . . . . . . . . . . . . . . . . . . . . . . . .
3

3© 2021 Agiloft Inc.
End users use an end user license and access a special interface called the ). All end End User Interface (EUI
users belong to an end user group, which is defined in the , end users in Group Permissions wizard and
different groups see different EUIs. For instance, may external customers are part of one group that sees an
In either case, external-facing EUI, while end users who are company employees see an internal-facing EUI.
the end user license and EUI are designed for records or requests but do not work users who typically submit
on them.
The default EUI covers a range of common uses, such as support applications, contract management, and
document management. However, theEUI can also be highly customized depending on the needs of your
You can:users.
Construct different screen layouts
Provide your own style of toolbar
Adjust the options on the main page
Add your own fonts, color scheme, logo, and buttons using standard HTML and CSS
Create a home page for each group, with customized navigation options
You can even direct power users to the EUI if you want to use a more customized interface for them.
End users can access the EUI in . For example, several ways the standard knowledgebase login page offers an
More commonly, e users access the system through a company web End User option for the interface. nd
portal or a hotlink stored as a bookmark or sent by email. These methods automatically log the user in to the
appropriate interface, without requiring the user to select the EUI option or manually enter login credentials.
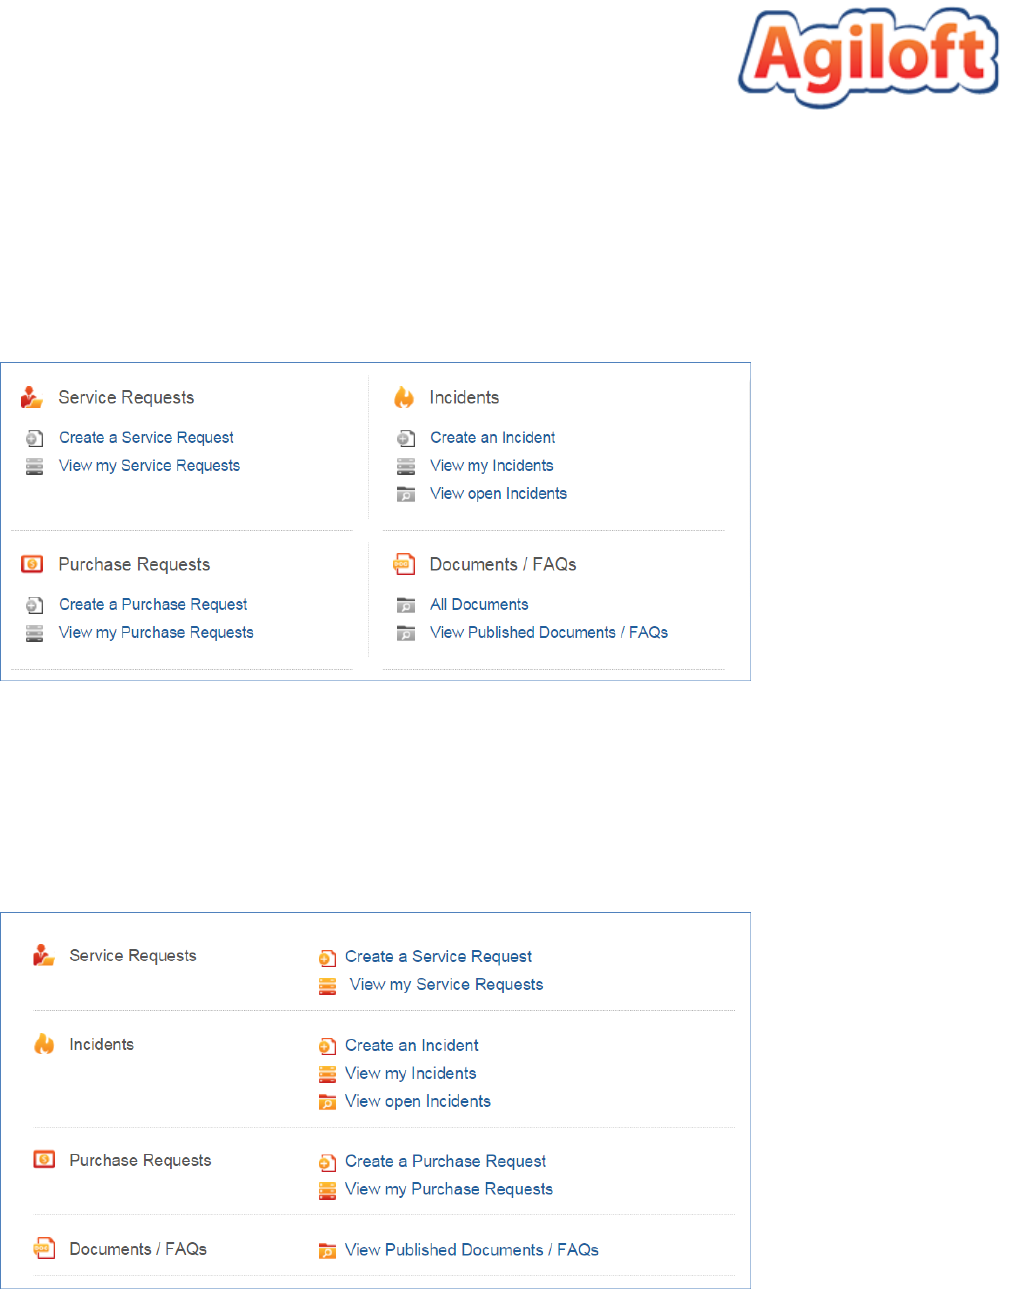
When a user enters the EUI, the default setup shows tables and links based on the their group membership.
For example, users in the Customer group see links to the Support Cases they've submitted, which can be
accessed on the Home tab and the View drop-down menu.
Depending on their permissions and your setup, end users may also use the EUI to complete other tasks, such
as the following:
Search, view, and print FAQs
Accessing and Customizing the EUI
Accessing the EUI

4© 2021 Agiloft Inc.
1.
2.
3.
4.
Submit new items in any table
Edit items defined as their own in any table
View items in any table, as well as run and save simple and complex searches
Edit their user profile
The EUI offers extensive customization options that can be useful for power users as well. In that case, you
might design a customized EUI specifically for power users, and you would need to direct power users to that
interface automatically. You can automatically send power users to the EUI if necessary, through custom login
pages or using (SSO).Single Sign-on
To use custom login pages, work with Support to compose hyperlinks that direct the user to one interface or
the other. With this method, you can simply distribute the EUI link, Power User link, or both to each Interface
user as appropriate.
To set the EUI as the default interface option with SSO, open the user record and set the Preferred Interface
field to "EUI." The "Based on Permission" value points to the setting on the General tab of the user's group,
where the group is configured as a Power User or End User group. Users with at least one Power User group
are shown the Power User Interface unless their Preferred Interface is set to "EUI."
If you don't have the Preferred Interface field in your system:
Create a new Choice field in the People table.
Name it Preferred Interface.
Assign it a new choice list with the options "Based on Permission" and "EUI."
Set the default value to "Based on Permission."
The EUI is customized by , which determine how different parts of the EUI look. For editing EUI templates
example, one template determines how the navigation menu looks and what options are included in the
another template determines the items in the search area.Not all templates stand alone, and some aremenu;
or included in other pages. For instance, the , , and used by other templates header.htm footer.htm menu.
templates are included in every page of the htm EUI.
Directing Power Users to the EUI
If you need to test this method without setting up an SSO-friendly test user, you can use this hyperlink
syntax to pass the EUI interface preference, replacing , and , but make sure to KBName login password
if you need to send it to an external party:encrypt the URL
https:// .KBName agiloft.com/gui2/login.jsp? &user= &keyID=0&kb=KBName login
password= &password State=Main&gui=enduser&euiurl=/eui2template/main.php
Customizing the EUI

5© 2021 Agiloft Inc.
All EUI templates are stored as records in the EUI Templates table, and editing the templates allows you to
customize different parts of the EUI.However, before editing anything in the EUI,we strongly recommend that
you have a basic understanding of CSS and HTML.W3 Schools is a helpful online resource for learning about
you'll find it easier to makechanges to individual EUI those topics. Once you have a grasp of HTML and CSS,
templates. One you understand CSS in particular, you can make global formatting changes by editing the
template file.style.css
For more information about how to customize EUI templates, see some of the main Working with the Default
. For general information about the EUI templates, see .EUI Templates EUI Template Reference
Macros
When you're customizing the EUI, understanding how macros work is important. The main template for the
home page is , but this template doesn't directly contain the elements displayed on the home page. main.php
Instead, it uses the macro to pull in the contents of three other template records: #ew_include() header.
, , and .In turn, uses the same macro to include the template htm home.htm footer.htm header.htm menu.
, and includes . The file also uses macros to reference to the htm home.htm search-form.htm header.htm
logo, plus user information and a logout link in the upper-right corner. For more information on macros, see
.Macros, Methods, and Conditionals
In to the HTML-based EUI that uses EUI templates, offers a with limited addition Agiloft Legacy EUI
functionality.
Editing EUI Templates
When you make changes to any record in the EUI Templates table, save a copy of the text so that you
can revert the code back to its original state if necessary.
Working with the Default EUI Templates

6© 2021 Agiloft Inc.
This topic provides instructions on how to control which tables are displayed on the home page of theEnd
(EUI), as well as which tables and tabs appear in the navigation menu. The tables and tabs that User Interface
the EUI displays are controlled by records in the EUI Templates table, which also control the functionality and
appearance of the EUI. For information on changing any text that appears on the EUI, see Text and
.Localization in the EUI
In addition to working with specific EUI templates, use these pages to learn more about other aspects of the
EUI that involve working with templates:
Creating a New Page Tutorial: Learn how to manually add a new record submission form for a table.
EUI Portal Tutorial: Learn to create a very basic EUI portal from scratch.
Using Quick Links to Prepopulate Records in the EUI: Learn how to use parameters and macros in the
EUI to create records that are populated with content. This page requires knowledge of web
development and JavaScript.
EUI Setup Tips: Learn about some additional setup tips regarding single sign-on, drop-down menus,
language selection, and browser pop-ups.
For more information on getting started with the EUI, and to complete interactive practice exercises, we highly
recommend signing up for the and completing the EUI chapter in Unit 2.online training
The EUI has three predefined home page template files that determine the layout of the home page. Two of
the template files are mutually exclusive and display multiple tables to the user, whereas the third file is used
when the user only has permission to view a single table. This third file is used because the other two
template files are not optimized for viewing a single . The system automatically calculates the tables table
available to the user and displays the appropriate home page.
Working with the Default EUI Templates
Prerequisites
Before making changes to the EUI, we recommend that you have a basic understanding of the
following topics:
HTML
CSS
Macros, methods, and conditionals, as they're used in the EUI
For more information on HTML and CSS, visit .W3 Schools
Working with Home Pages
7© 2021 Agiloft Inc.
home.htm—Default Layout
The default template file provides a dynamic two-column display. The system dynamically home.htm
calculates the layout to list the available tables in order from . Available links to left to right and top to down
create or view items appear under each table heading.
home-1column.htm—Alternate Layout
The alternate template file arranges each table on its own row with the links in a second home-1column.htm
column to the right.

8© 2021 Agiloft Inc.
home-1table.htm—Default Single-Table Layout
The template uses a similar layout to the template. The primary home-1table.htm home-1column.htm
differences are larger icons and text in , as well as an additional block of text to fill space home-1table.htm
on the page.
The home page template file that the system uses is configured in the file, which translation.properties
is located in the EUI Templates table. By changing one or more variables in , you translation.properties
can choose the home page that the EUI uses. The file has three variables near translation.properties
the top that define the home page template files:
global.home.file: Defines the main home page file. The default value is . If you prefer the home.htm
alternate layout, change the variable to . If neither of the predefined home pages home-1column.htm
suit your needs, you can also create your own home page and enter the template name here.
global.home.one.table.file: Defines a third home page file that's displayed if the user who logs in
only has access to a single table. The default value is .home-1table.htm
global.search.file: Defines the file that controls the tables displayed in the global search area. The
default value is .home-multiple-search.htm
Taken together, the template files defined by these variables determine which tables are shown to users, the
ordering of the tables, and other formatting.Although some page components are static, such as the Logout
link, other links and headings are controlled by a combination of user permissions, variables defined in
, and code in the template files.translations.properties
To change the default home page:
Change the Home Page

9© 2021 Agiloft Inc.
1.
a.
b.
2.
3.
4.
1.
If you want to use an entirely new home page, copy and edit one of the default home page files in the
EUI Templates table, or create a new template record. Skip this step if you want to change the home
page to one of the predefined template files.
Make any changes to the code as desired.
Save the file.
Open .translation.properties
Update one or both of the and variables to point to the new global.home global.home.one.table
home page file.
Click Save.
Each table included in the home page has its own block of code.In the default home page, each block of table
code looks like the following:
#if ($ewText.get("show.incidents")=="yes" && ($ewPermission.
table("incident","view_own") || $ewPermission.table("incident","
v_own_with_ssearch") || $ewPermission.table("incident","view_others") ||
$ewPermission.table("incident","v_oth_with_ssearch")))
#set($rowcount=$rowcount+1)
...
#end
Notice that the code begins with an directive and ends with an directive. The order of these code #if #end
sections determines the order in which tables are displayed to users. The alternate home page follows a
similar logic, but the code looks slightly different.
To change the order of the tables on the home page:
Open the desired home page file.
The system counts the number of tables available to a user by using code in the template menu.htm
file. If the table count results in a total value of 1, the template file displays the single-table main.php
home page. Otherwise, the main home page file is displayed.
Change the Order of Tables

10© 2021 Agiloft Inc.
1.
2.
3.
Open the desired home page file.
Cut and paste one table’s section above or below another section. Be careful to include all of the section
related to the table. Pay special attention to nested and directives so that you cut and paste #if #end
in the correct location.
Click Save.
For more information on how permissions are used in the home page to display tables to users, see
.Permissions and Visibility in the EUI
The following section is a snippet of code for a single table in the default template. It contains home.htm
added comments that explain the purpose of the code, so if you want to make manual adjustments to your
home page, use the comments to help you know how each block of code affects the page.
Support Cases Table
#if ($ewText.get("show.support.cases")=="yes" &&
($ewPermission.table("case","view_own") ||
$ewPermission.table("case","v_own_with_ssearch") || $ewPermission.table("case","
view faq") || $ewPermission.table("case","view faq_with_ss")))
#set($rowcount=$rowcount+1)
<td class="home-section">
<div class="home-cont">
<div>
<img src="#ew_image('/gif/light_orange_red_20/master_light_orange_red_20_57.png')"
style="vertical-align: bottom" width="20" height="20" alt=""/> $ewText.
get('home.sc.h3')</div>
<div class="home-sm-link">
Before making changes to any code, create a copy of the existing text so that you can revert the
code back to its original state if necessary.
Review the Home Page Code

11© 2021 Agiloft Inc.
If the show.support.cases variable is set to Yes and the user’s record-level
permissions include view own, view own with saved search, view FAQs, or view FAQs
with saved search, then the code sets the row count and displays the table heading.
#if($ewPermission.table("case","create"))
<img src="#ew_image('/gif/light_orange_red_16/master_light_orange_red_16_96.png')"
alt=""/>
<a href='#ew_forward("new_supportcase.html")'>$ewText.get('home.sc.new.link')</a>
<br />
#end
If the user has create permissions, the Create a Support Case link is displayed.
#if ($ewPermission.table("case","view_own") || $ewPermission.table("case","
v_own_with_ssearch"))
<img src="#ew_image('/gif/light_orange_red_16/master_light_orange_red_16_02.png')"
alt=""/>
<a href='#ew_forward("my_supportcases.html")'>$ewText.get('home.sc.my.link')</a><br
/>
#end
If the user has view own or view own with saved search record permissions, the View
My Support Cases link is displayed.
#if ($ewText.get("show.sc.faqs")=="yes" && ($ewPermission.table("case","view faq")
|| $ewPermission.table("case","view faq_with_ss")))
<img src="#ew_image('/gif/light_orange_red_16/master_light_orange_red_16_157.png')"
alt=""/>
<a href='#ew_forward("supportcases-faq.html")'>$ewText.get('home.sc.faq.link')<
/a>
#end
If the show.sc.faqs variable is set to Yes and the user has view FAQs or view FAQs
with saved search permissions, the FAQs link is displayed.
</div>
</div>
</td>
#if ($rowcount%2==0)
</tr>
<tr>
<td class="h-line"></td>
<td></td>
<td class="h-line"></td>
</tr>
<tr>
#else
<td class="v-line"></td>
#end
#end

12© 2021 Agiloft Inc.
1.
2.
3.
4.
1.
Depending on the table's location in the code and the row count, this defines
whether it's placed in the first or second column and inserts the appropriate
vertical or horizontal lines.
The navigation menu refers to series of tabs and drop-downs in the top-right of the default home page. Its
contents are defined in the template and files.menu.htm translation.properties
The tabs on the navigation menu are controlled by and variables in . menu.htm translation.properties
You can control whether the New, View, FAQs, and MyProfile tabs appear at all or only to certain users.
To control which tabs can appear at all:
In the EUI Templates table, open .translation.properties
Find the note beginning with "#These determine whether the menu bar shows..." and notice the
variables immediately below the note.
If you do or do not want to display a tab, change the corresponding variable to Yes or No, respectively.
For example, if you don't want to display the View tab, the variable would look like the following:
show.menu.view=no
Click Save.
To control which tabs are visible depending on a user's group, team, or permissions:
In the EUI Templates table, open .translation.properties
Working with the Navigation Menu
Change the Navigation Menu Tabs
If the variable for a tab is set to Yes, users not see the tab if you've applied conditional might
visibility to it in . See the steps below for more information.menu.htm
13© 2021 Agiloft Inc.
2.
3.
4.
5.
6.
7.
8.
Find the note beginning with "#These determine whether the menu bar shows..."and notice the
variables immediately below the note.
For tabs you want to display to , make sure the corresponding variable is set to Yes. at least some users
If the variable is set to No, users will not be able to see the tab, regardless of any conditions you create.
For example, if you want to display the New, View, and My Profile tabs to some users, but you don't
want to display the FAQs tab to any users, the variables would look like this:
show.menu.new=yes
show.menu.view=yes
show.document.faqs=no
show.myprofile=yes
Click Save.
Open .menu.htm
Find the beginning line that corresponds to the tab you want to make conditionally visible. For example,
the New tab begins with the following line:
#if ($ewText.get("show.menu.new")=="yes")
On the same line, add a logical operator and an appropriate method to define the type of conditional
visibility you want to use. For example, if you only want users in the Contract Creator group to see the
New tab, your code would look like this:
#if ($ewText.get("show.menu.new")=="yes" && $ewUser.isInGroup("Contract
Creator"))
For more information on using conditionals and methods, see and Macros, Methods, and Conditionals
.EUI Method Reference
Click Save.
Like the navigation menu tabs themselves, the links they contain arecontrolled by and variables inmenu.htm
.translation.properties
Change the Links under the Navigation Menu
Tabs

14© 2021 Agiloft Inc.
1.
2.
3.
4.
1.
2.
3.
4.
5.
6.
You can control whether a link appears at all or only to certain users. In most cases, it's better to make the
links appear to only certain users by creating conditions that check a user's team, group, or table permissions.
This is because themethod to control whether a link can appear at all also controls whether a table may
appear at all in the EUI. For example, if you prevent the Support Case link from appearing at all by setting the
variable to No, you also prevent the Support Cases table from appearing on the EUI. show.support.cases
However, if a table is no longer in use or end users shouldn't have access to it, it can sometimes be useful to
completely remove the table and its associated links from the EUI.
To control which links can appear at all:
In the EUI Templates table, open .translation.properties
Find the note beginning with "#These values determine whether a table..."and notice the variables
immediately below the note.
If you do or do not want to display a link, . change the corresponding variable to Yes or No, respectively
Each variable may control multiple links. For example, if you set the variable to show.support.cases
No, both the Support Case and My Support Cases links are removed.
Click Save.
To control which links arevisible depending on a user's group, team, or permissions:
In the EUI Templates table, open .translation.properties
Find the note beginning with "#These values determine whether a table..."and notice the variables
immediately below the note.
For links you want to display to any users, make sure the corresponding variable is set to Yes. If the
variable is set to No, users will not be able to view the link, regardless of the condition.
Click Save.
Open .menu.htm
Find the link that you want to make conditionally visible. Each link uses a few lines of code, and it's
placed within a section of code for the corresponding tab. For example, lines 4 - 6 of the code below
refer to the Service Request link, and the rest of the code indicates that it's within the New tab on the
navigation menu:
#if ($ewText.get("show.menu.new")=="yes")
<li id="new" class="submenu"><a>$ewText.get('menu.new')</a>
<ul>
#if ($ewText.get("show.service.requests")=="yes" && $ewPermission.table
("helpdesk_case","create"))
<li><a href='#ew_forward("new_servicerequest.html")'>$ewText.
get('menu.new.sr')</a></li>
#end
...
</ul>
</li>
#end
If the variable for a table is set to Yes, users might still not see any related links if you've applied
conditional visibility in . See the steps below for more information.menu.htm

15© 2021 Agiloft Inc.
7.
8.
1.
Edit the existing conditional to define the type of conditional visibility you want to use. For example, the
above example requires that the variable in is show.service.requests translation.properties
set to Yes and that the user has permission in the Service Requests table to create records. If you also
want to require that the user is in the Service Manager group, your code would look like :this
#if ($ewText.get("show.menu.new")=="yes")
<li id="new" class="submenu"><a>$ewText.get('menu.new')</a>
<ul>
#if ($ewText.get("show.service.requests")=="yes" && $ewPermission.table
("helpdesk_case","create") && $ewUser.isInGroup("Service Manager"))
<li><a href='#ew_forward("new_servicerequest.html")'>$ewText.
get('menu.new.sr')</a></li>
#end
...
</ul>
</li>
#end
For more information on creating conditionals, see .Macros, Methods, and Conditionals
Click Save.
The header refers to the top area of the EUI that includes the company logo, language drop-down, user
information, and logout link. It's controlled by and variables in . The header.htm translation.properties
navigation menu is not considered part of the header and is controlled separately with .menu.htm
One of the first changes you may want to make is to replace the existing logo in the EUI with your company
logo. You can do this by editing the and changing its file path. macro#ew_image
You first need to add the image to the server, so go to and Setup > Look and Feel > End User Schemes
edit any existing scheme.
Working with the Header
Customize the Logo

16© 2021 Agiloft Inc.
2.
3.
4.
5.
a.
b.
6.
1.
2.
3.
4.
Upload the new logo on the Icons tab of the wizard and click Finish. This makes it Look and Feel
available in the image directory so that it can be referenced by the macro.#ew_image
Go to the EUI Templates table and edit .header.htm
In the Body field, locate the following line:
<a href='#ew_forward("main.php")'><img src="#ew_image('/gif/agiloft-logo.
png')" width="185" height="75" alt="Agiloft" style="vertical-align: middle" / <
/a>
To change the logo, replace the reference to in the macro with the agiloft-logo.png #ew_image
new file name.
Change the alt attribute value from "Agiloft" to the new logo . This is the text that screen name
readers use and that appears when you hover over the image.
Change the width and height properties to match the new logo dimensions, or leave out the
dimensions to display it at its full size.
For example, your new code may look like the following:
<a href='#ew_forward("main.php")'><img src="#ew_image('/gif/sample-logo.
png')" width="225" height="100" alt="Company logo" style="vertical-align:
middle" /></a>
Click Save. The new logo will be visible when you log into the EUI.
Customize the Logo with Conditional Branding
Suppose you want to display a different logo to users in a particular group or team. You can achieve this by
adjusting the code in the .previous section
Follow the steps in the to upload a second image.previous section
Go to the EUI Templates table and edit .header.htm
In the Body field, locate the line you edited earlier. From the previous example, it looks like this:
<a href='#ew_forward("main.php")'><img src="#ew_image('/gif/sample-logo.png')"
width="225" height="100" alt="Company logo" style="vertical-align: middle" /><
/a>
Create a conditional that displays each logo to the appropriate users:
If you want to display one logo to users in a certain group and the other logo to everyone else,
your code might look like this:

17© 2021 Agiloft Inc.
4.
5.
#if ($ewUser.isInGroup("Contract Creator"))
<img src="#ew_image('/gif/sample-logo.png')" width="225" height="100"
alt="Company logo" style="vertical-align: middle" />
#else
<img src="#ew_image('/gif/new-logo.png')" width="220" height="150" alt="
New logo" style="vertical-align: middle" />
#end
If you want to display one logo to users in a certain team and the other logo to everyone else,
your code might look like this:
#if ($ewUser.isInTeam("Contract Creator Team"))
<img src="#ew_image('/gif/sample-logo.png')" width="225" height="100"
alt="Company logo" style="vertical-align: middle" />
#else
<img src="#ew_image('/gif/new-logo.png')" width="220" height="150" alt="
New logo" style="vertical-align: middle" />
#end
For more information on creating conditionals, see .Macros, Methods, and Conditionals
Click Save.
The EUI comes with several default tables already included. Each table hasindividual template files for each of
its pages in the EUI, as well asvariables in the template file that these and other translation.properties
pages use. For example, the Support Cases table has template files that allow users to create new support
cases, view support cases, and search support cases. The text that these pages use, such as the header or
search label, is defined with variables in .translation.properties
You can edit the template files to change the formatting and content of individual EUI pages. For example, you
can move or resize a page's header, or you can apply a different saved search. Some changes, like resizing the
header, require only a basic knowledge of HTML. Other changes, like applying a different saved search,
require an understanding of the macros used in the EUI. For more information on applying a new saved
search to a page, see . For more information on macros in general, seeUsing Default Searches Macros,
.Methods, and Conditionals
If you want to add a table to the EUI that is not included in the default setup, you must update the EUI
templates to provide this access. To do so, you can either add the code manually or generate the code using
the New EUI Table Excel template. We strongly recommend that you use the Excel template, which you can
download . Using the template is much easier and much less likely to result in errors than entering the here
code manually. The steps below describe how to use the Excel template.
Working with Tables
Add a New Table

18© 2021 Agiloft Inc.
1.
2.
3.
4.
5.
6.
7.
Update translation.properties
The first step to adding a new table is to create the variables used in the file. If translation.properties
you have a multilingual knowledgebase, you need to update the file for each translation.properties
language, using the same variables created below but with appropriately translated values.
Download the .New EUI Table Excel template
Click the Table Name sheet, located on the bottom of the Excel window.
Enter the table information, including the name; plural label; a unique, three-letter abbreviation; and
the logical table name. You can use any three-letter abbreviation you want, but it must be unique and
not match any existing table abbreviations in .translation.properties
Click the translation.properties sheet and copy the code from Column N. Don't close the spreadsheet
until this entire process is complete because you still need code from the other Excel sheets.
In your knowledgebase, go to the EUI Templates table and open .translation.properties
Paste the code from Column N into the bottom of the Body field.
Click Save.
Create the New Template Files
Next, create the template files for the pages that the new table will use.
Before you start, go to Setup [ ] for the table you're adding and note the following Table Name
information on the General tab:
The plural table label
The logical table name
The code in is separated into sections and listed in alphabetical translation.properties
order, but this is only for readability. The code works anywhere you place it, but it's typically
good practice to keep code organized.

19© 2021 Agiloft Inc.
1.
a.
b.
c.
d.
2.
3.
4.
a.
b.
c.
d.
5.
Next, create the template files for the pages that the new table will use.
Create the first template file:
Go to the EUI Templates table and click New. This template will be for displaying all records in the
table.
In the Name field, enter a name like all_records.html or all_widgets.html.
Provide a Description, but leave the Body field blank for now.
Click Save.
Repeat the previous steps to create pages for creating new records, viewing the user's own records, and
using searches on the table. For example, you might create pages new_record.html, my_records.titled
html, and my_records-search.htm. The search page must end in ".htm" and the other three pages must
end in ".html" for the table to be correctly added.
Go to the table in your knowledgebase and create a search called"My[ ]" that finds all Plural Table Label
records assigned to the currently logged in user. For example, you might name it My Records or My
Widgets.
Retrieve the code for the first template file:
In the Excel spreadsheet, click the EUI Templates_import sheet.
Copy the code from cell D2 and paste it into a Word document or other word processor. You
must paste it into a word processor before pasting it into the template file. Otherwise, Excel
automatically includes quotation marks that prevent the HTML from working properly.
Copy the code from the Word document, go the the EUI Templates table, and open the
page you created.all_records.html
Paste the code into the Body field and click Save.
Repeat the previous steps and use cells D3, D4, and D5 to retrieve and insert the correct code for the
respective pages.
Add the Table to the Home Page
After you've created the new template files, edit the home page template file so that the new table appears on
the home page.
Although the tables can be titled anything you like, we recommend that you follow a consistent
naming convention throughout the EUI.
Tip
To define the view for a specific template file, add the View Name (not View Label) to the #ew_table
line, in the blank expression after the table name.
If you are using the alternate home page or a custom home page, you need to manually enter the

20© 2021 Agiloft Inc.
1.
2.
3.
4.
5.
6.
1.
2.
a.
In the Excel spreadsheet, click the home.htm sheet.
Copy the code from cell B1 and paste it into a Word document or other word processor. As before, you
must paste it into a word processor before pasting it into the template file.
Copy the code from the Word document, go the the EUI Templates table, and open .home.htm
Scroll down to find the the last two directives that are directly after one another, and place your #end
cursor after the second directive.#end
Press Enter and paste the code from the Word document. Make sure the code is placed after the
second directive but before the tag.#end </tr>
Click Save.
Create Links from the Navigation Menu
Now that users can view the table on the home page, add some links to the navigation menu. This lets users
create new records in the table and view records that they own, assuming they have the appropriate
permissions.
In the Excel spreadsheet, click the menu.htm sheet.
Copy the code in cell B1 and paste it into a Word document.
Copy the code from the Word document, go to theEUI Templatestable, and open .menu.htm
If you are using the alternate home page or a custom home page, you need to manually enter the
code in the template file. To help prevent errors, use the the code for existing tables as a model when
you add the new table.

21© 2021 Agiloft Inc.
2.
b.
c.
d.
3.
a.
b.
c.
d.
1.
2.
Find the last directive in the first unordered list. An unordered list begins with a tag #end <ul>
and ends with a matching tag.</ul>
Place your cursor directly after the directive and press Enter.#end
Paste the code from the Word document. Make sure the code is placed after the directive #end
and before the tag. Don't close the record yet.</ul>
Go back to the Excel spreadsheet, copy the code in cell B2, and paste it into a Word document.
Copy the code from the Word document and go back to .menu.htm
Find the last directive in the second unordered list, which is near the bottom of the field.#end
Place your cursor directly after the directive, press Enter, and paste the code.#end Make sure the
is placed after the directive and before the tag.code #end </ul>
Click Save.
Add the Table to the Single-Table Home Page
The next step is to add the table to the single-table home page, which is displayed in cases where the user
only has access to this table.
In the Excel spreadsheet, click the home-1table.htm sheet.

22© 2021 Agiloft Inc.
2.
3.
4.
5.
6.
7.
1.
2.
3.
Copy the code in cell B1 and paste it into a Word document.
Copy the code from the Word document, go to theEUI Templatestable, and open .home-1table.htm
Find the last directive in the table element. It's near the bottom of the page and preceded by two #end <
tags./div>
Place your cursor directly after the directive and press Enter.#end
Paste the code from the Word document. Make sure the code is placed after the directive and #end
before the tag.</td>
Click Save.
Make the Table Searchable from the Global Search
Block
The final step is to add the table to the global search block so that users can search it. This step involves
editing three template files.
Edit home-multiple-search.htm
In the Excel spreadsheet, click the home-multiple-search.htm sheet.
Copy the code in cell B1 and paste it into a Word document.
Copy the code from the Word document, go to theEUI Templatestable, and open home-multiple-
.search.htm
23© 2021 Agiloft Inc.
4.
5.
6.
7.
1.
2.
3.
4.
5.
6.
Find the last directive in the div element.It's near the bottom of the page and preceded by a #end <br>
tag.
Place your cursor directly after the directive and press Enter.#end
Paste the code from the Word document. Make sure the code is placed after the directive and #end
before the tag.</div>
Click Save.
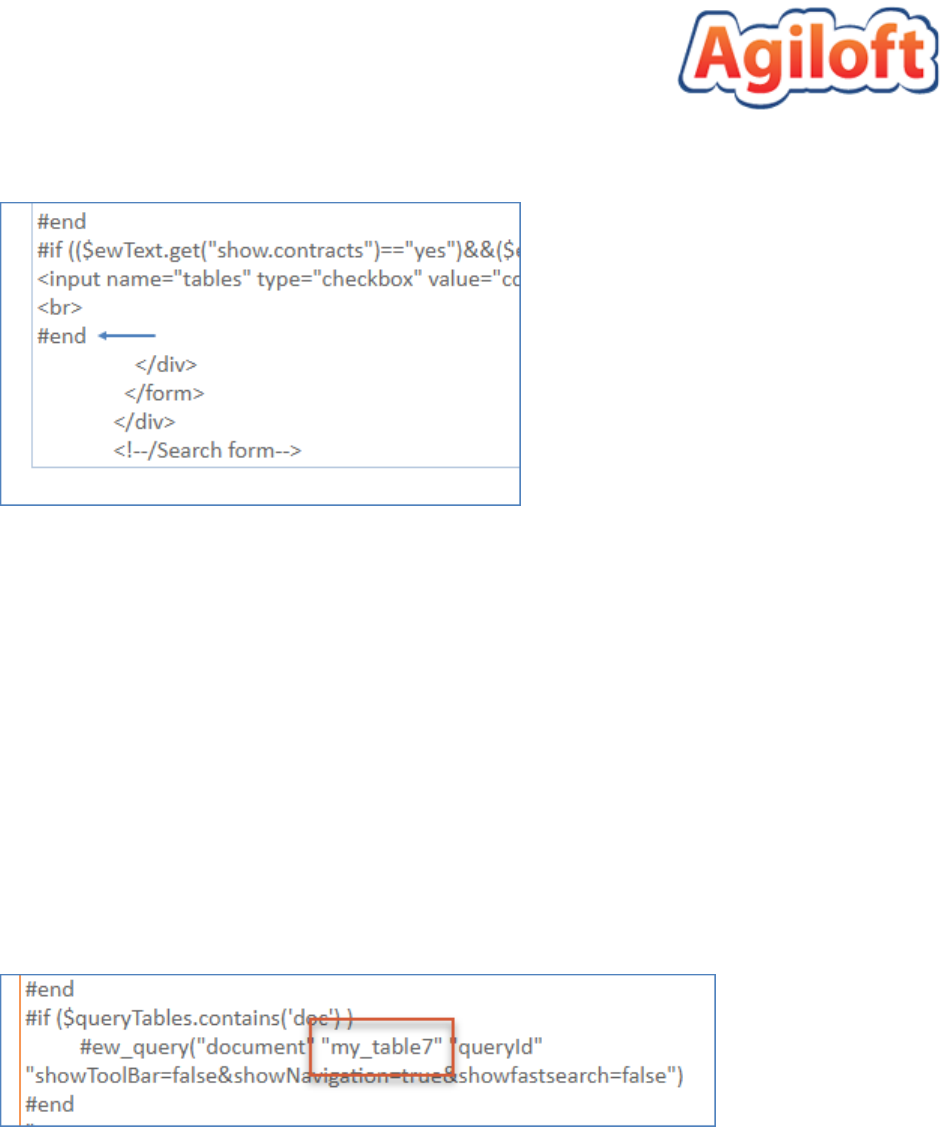
Edit multiple-search.htm
In theEUI Templatestable, open . Notice the directives and the multiple-search.htm #if my_table
parameter that they each contain.
Find the last directive and make note of the number that follows its parameter. For #if my_table
example, it might be .my_table7
In the Excel spreadsheet, click the multiple-search.htm sheet.
In cell B3, edit the parameter so that it uses the next table number in sequence. For my_table
example, if the last directive in#end contained , you would enter multiple-search.htm my_table7
in cell B3.my_table8
Copy the updated code in cell B1 and paste it into a Word document.
Go back to in the EUI Templates table.multiple-search.htm

24© 2021 Agiloft Inc.
7.
8.
9.
10.
1.
2.
a.
b.
c.
d.
3.
Find the last directive in the div element.It's near the bottom of the page and preceded by several #end
visualization parameters.
Place your cursor directly after the directive and press Enter.#end
Paste the code from the Word document. Make sure the code is placed after the directive and #end
before the characters.">
Click Save.
Edit multiple-search-result.html
In the Excel spreadsheet, click the multiple-search-result.html sheet.
Copy the code in cell B1 and paste it into a Word document.
Copy the code from the Word document, go to theEUI Templatestable, and open multiple-
.search-result.html
Find the last directive in the first part of the body element. It's preceded by a tag #end </div>
and immediately followed by a element.<script language="JavaScript">
Place your cursor directly after the directive and press Enter.#end
Paste the code from the Word document. Make sure the code is placed after the directive #end
and before the element. Don't close the record yet.<script language="JavaScript">
Go back to the Excel spreadsheet, copy the code from cell B2 on the multiple-search-result.html sheet,
and paste it into a Word document.

25© 2021 Agiloft Inc.
3.
a.
b.
c.
d.
Go back to in the EUI Templates table, and find the last multiple-search-result.html #end
directive in the second part of the body element.It's near the bottom of the page and preceded
by several visualization parameters.
Place your cursor directly after the directive and press Enter.#end
Paste the code from the Word document. Make sure the code is placed after the directive #end
and before the character.}
Click Save.
The new table is now added to the EUI and searchable from the global search block. If you want to adjust how
the table appears on the home page or edit the links on the navigation menu, see Working with Home Pages
and , respectively.Working with the Navigation Menu
Using Default Searches

26© 2021 Agiloft Inc.
1.
2.
3.
4.
Default searches can be configured on specific pages in the EUI to determine the records that are displayed.
For example, when a user clicks a page, you might only want to display records that are assigned to them.
To update the default search, you can use an existing saved search or create a new saved search.
Navigate to the table that contains the records on which you want to run the search.
Hover over Search to open the drop-down. Note the name of the search you'd like to use as the new
default search, or click New to create a new saved search that you want to use.
Navigate to the EUI Templates table.
Edit the .html record that corresponds to the page in the EUI on which you'd like the search to run.
Using Default Searches
Prerequisites
Before making changes to the EUI, we recommend that you have a basic understanding of the
following topics:
HTML
CSS
Macros, methods, and conditionals, as they're used in the EUI
For more information on HTML and CSS, visit .W3 Schools
Updating the Default Search
27© 2021 Agiloft Inc.
4.
5.
6.
7.
8.
Locate the line of code beginning with that lists the current default search:#set
#set ($defaultsearch="My Incidents")
<div class="wrapper">
<div class="top-space"></div>
<div class="main">
#ew_include("header.htm")
<div class="content">
<div style="float: left"><h2>$ewText.get('myinc.header')</h2>
<div class="title-desc"></div></div>
#ew_include("my_incidents-search.htm")
#ew_status()
<div id="main_frame">
#ew_table("incident" "" $defaultsearch ""
"showToolBar=false&showNavigation=true&showfastsearch=false" "my_table" "")
Following in the first line, replace the name in quotation marks with the name of ($defaultsearch=
the new default search.
, ensure In the last line of the code block shown above $defaultsearch is listed in the second set of
quotation marks after #ew_table.
Click Save. The default search is now updated.
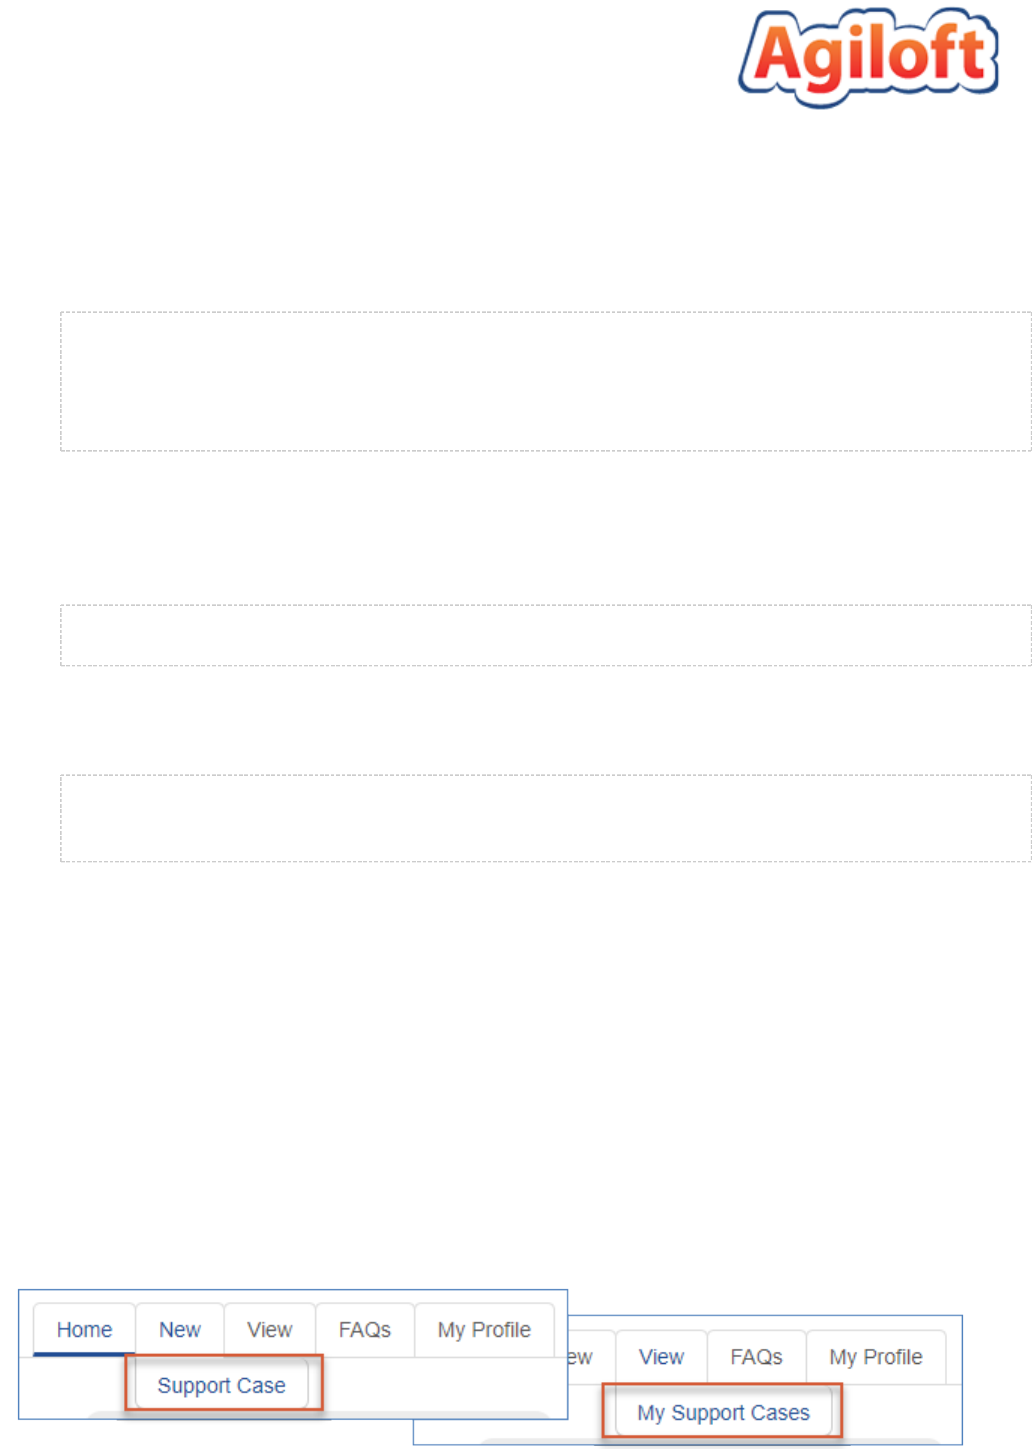
By default, the .html records you need to edit are named after the page titles in the EUI. For
example, the My Service Requests page is , the My Incidents page my_servicerequests.html
is , and so on.my_incidents.html
Permissions and Visibility in the EUI

28© 2021 Agiloft Inc.
User permissions determine which elements on the EUI are visible to . Oftentimes, you may have each user
several groups of users, and you want the different groups to see different elements on the interface. In other
cases, you may want the same user to see different parts of a record based on the the page they're viewing.
For example, when a user is submitting a support case, you might not show the Created By field because it
. In either case, understanding how permissions control visibility in the EUI can help you create isn't relevant
an interface that suits your needs.
The interface that a user sees depends on two factors:
Their group permissions.
The status of a table or menu tab in the file. Tables and menu tabs can be translation.properties
if their value is No. If a table or menu tab is not turned on, turned on if their value is Yes and turned off
end users will not see it, regardless of their .permissions
To illustrate this, the three images below show the home page contents for three different users: one in the
Admin group, one in the Document Creator group, and one in the Customer group. Each user sees a different
interface based on their permissions. Notice that not even the user in the Admin group sees the Change
Requests or Tasks tables, which are turned off in these examples.
A user in the Admin group sees six tables and sets of links:
Permissions and Visibility in the EUI
Prerequisites
Before making changes to the EUI, we recommend that you have a basic understanding of the
following topics:
HTML
CSS
Macros, methods, and conditionals, as they're used in the EUI
For more information on HTML and CSS, visit .W3 Schools
Controlling Visibility

29© 2021 Agiloft Inc.
A user in the Document Creator group sees four tables and sets of links:
A user in the Customer group sees two tables and sets of links:

30© 2021 Agiloft Inc.
1.
2.
3.
4.
5.
When users log in, the system checks their group permissions and uses the method $ewPermission.table
to determine which EUI elements they see. This method requires two parameters, the logical table name and
the permission type, which take the form . For example,$ewPermission.table("table","permission")
returns “true” if the currently logged in user user has $ewPermission.table("case","view_own")
permission to view their own records in the Support Cases table.
You can insert the method in a conditional that surrounds an element, such as a link $ewPermission.table
or menu item. Conditionals are used throughout the records in the EUI Templates table to dynamically control
element visibility based on group permissions. For example, consider the following conditional:
#if ($ewPermission.table("case","view_own"))
<li><a href='#ew_forward("my_supportcases.html")'>$ewText.get('menu.view.
mysc')</a></li>
#end
If the user has permission to view their own records in the Support Cases table, the system shows the user a
menu item to view a page containing support cases that they own.
To control which permissions control the display of an element:
In the EUI Templates table, open the desired template file.
Find the method that relates to the relevant table and element.
Edit the permission in the second parameter, or add a logical operator to expand the conditional. For a
complete list of permission types, see below. For more information on Permission Parameters
conditionals and the available logical operators, see .Macros, Methods, and Conditionals
Click Save.
View the EUI page with the relevant user to verify that the element visibility is working as intended.
Control Visibility with Permissions
The logical table name might be different from the table name that's displayed. To find the logical
table name, open the Table wizard for the desired table and check the General tab.
Control Visibility with translation.properties

31© 2021 Agiloft Inc.
1.
2.
3.
4.
5.
The file in the EUI Templates table controls the global visibility for tables and translation.properties
menu tabs by turning on or turning off specific tables and tabs. For users to see a table or menu tab in the
EUI, it must be turned on in . To prevent all users from seeing a table or menu translation.properties
tab, you can turn it off.
Table visibility is controlled near the , and menu tab visibility is controlled just below top of the template file
the table visibility section. If the show.[ ] key is set to Yes for a given table or tab, then it's included table.or.tab
in the interface for those users with permission to view it. If show.[ ] is set to No, it's not shown on the item
home page or navigation menu to any users, regardless of their permissions.
To control global :visibility for tables and tabs
In the EUI Templates table, open .translation.properties
Set the relevant table and menu tab keys to Yes or No.
Click Save.
If other languages are in use, open any other versions of and repeat the translation.properties
process.
View the EUI to confirm that changes have taken effect.
Control Visibility with translation.properties
Th file hasalternate versions for other languages, which allow for a translation.properties
multilingual environment. If your KB is available in multiple languages, be sure to update the keys in
each translation file when making changes. For more information on localization and the EUI, see Text
.and Localization in the EUI

32© 2021 Agiloft Inc.
Keep in mind that whether a user can actually view a table or the items within a tab still depends on the user’s
group permissions.
The table below lists the permission-based parameters for use with themost common $ewPermission.
method. Each of these values corresponds to a permission setting in the .table Table Permissions wizard
Permission Type Description
create Create records in the table
edit_own Edit their own records in the table
e_own_with_ssearch Edit only their own records matching a saved search
delete_own Delete their own records in the table
view_own View their own records in the table
v_own_with_ssearch View only their own records matching a saved search
view_others View other people’s records in the table
v_oth_with_ssearch View only others’ records matching a saved search
view_faq View FAQs from the table
view_faq_with_ss View only FAQs matching a saved search
The table below lists the complete list of permission-based parameters.
Permission Type Description
Record Permissions
create Allow user to create a new record
delete_own Allow user to delete own records
delete_others Allow user to delete others’ records
mass_delete Allow user to delete multiple records
dele_oth_if_pub_y Delete others’ records if published field is yes
massedit Allow user to perform mass edit
import_multiple Allows import of multiple records from a file
export_multiple Allows export of multiple records to a file
Permission Parameters

33© 2021 Agiloft Inc.
link_multiple_recs Link multiple records using the Link menu
print_recs Print records using the printer icon
View and Edit Permissions
view_own Allow user to view own records
view_others Allow user to view others’ records
view_own_if_pub_y View own records if published field is yes.
view_oth_if_pub_y View others’ records if published field is yes.
edit_own Allow user to edit own records
edit_others Allow user to edit others’ records
Saved Search Permissions
mod_own_s_searches Allow user to modify/delete saved searches that they created
mod_all_s_searches Allow user to modify/delete all saved searches
mod_own_s_views Allow user to modify/delete saved views that they created
mod_all_s_views Allow user to modify/delete all saved views
mod_own_s_reports Allow user to modify/delete saved reports that they created
mod_all_s_reports Allow user to modify/delete all saved reports
pub_s_reports Allow user to publish saved reports
v_own_with_ssearch View own entries that satisfy the saved search
v_oth_with_ssearch View others’ entries that satisfy the saved search
e_own_with_ssearch Edit own entries that satisfy the saved search
e_oth_with_ssearch Edit others’ entries that satisfy the saved search
d_oth_with_ssearch delete others’ entries that satisfy the saved search
acc_oth_ss Allow access to others’ saved searches
acc_oth_ss_py Allow access to others’ saved searches if Published=Yes
FAQ Permissions
view_faq Allow user to view FAQs
view_faq_with_ss View FAQs that satisfy the saved search
Table Permissions
ed_rec_tab_view

34© 2021 Agiloft Inc.
ed_rec_tab_view Edit records from table view
omit_table_label Allow user to set show label on view/editing on General tab
copy_recs Copy $table-label-plural
show_in_main_tabs Allow user to see it in main tabs
allow_sel_ed_flds Allow user to select editable fields in view they can edit
apply_to_subtabls Apply changes to subtables (in groups wizard)
apply_all_to_subtabls Apply everything to subtables (in groups wizard)
Custom Report Permissions
create_calendar Create calendar records on specific subtype
c_cal_with_ssearch Create calendars on records that satisfy the saved search
view_own_calendar View own calendar entries
v_own_cal_with_ssearch View own entries that satisfy the saved search
view_others_calendar View other peoples’ calendar entries
others_cal_with_ssearch View other peoples’ entries that satisfy the saved search
edit_own_calendar Edit own calendar entries
e_own_cal_with_ssearch Edit own entries that satisfy the saved search
edit_others_calendar Edit other peoples’ calendar entries
e_others_cal_with_ssearch Edit other peoples’ entries that satisfy the saved search
delete_own_calendar Delete own calendar entries
d_own_cal_with_ssearch Delete own entries that satisfy the saved search
delete_others_calendar Delete other peoples’ calendar entries
d_others_cal_with_ssearch Delete other peoples’ entries that satisfy the saved search
Email Permissions
view_comm_from View outgoing email address FROM
edit_comm_from Edit outgoing email address FROM
view_comm_replyto View send-back email address REPLY-TO
edit_comm_replyto Edit send-back email address REPLY-TO
create_comm Create a communication record linked to the given subtype

35© 2021 Agiloft Inc.
Email Template Permissions
mod_own_eml_tmpl Allow users to modify/delete own email templates
mod_all_eml_tmpl Allow users to modify/delete all email templates
viewsend_own_eml_tmpl Allow viewing/sending only their own email templates
viewsend_ownpublished_eml_tmpl Allow viewing/sending own and published email templates
viewsend_ownpublished_eml_tmpl Allow viewing/sending own and published email templates
viewsend_all_eml_tmpl Allow viewing/sending of all email templates
publish_eml_tmpl Allow user to publish email templates
Print Template Permissions
cr_mod_own_ptmpl Create/modify own print templates
cr_mod_all_ptmpl Create/modify all print templates
use_all_ptmpl Use all print templates
use_ownpub_ptmpl Use/own/publish print templates
can_pub_ptmpl User can publish print templates
Macros, Methods, and Conditionals

36© 2021 Agiloft Inc.
Macros are short, reusable pieces of code that represent a longer set of instructions for the software or
browser to run. Macros allow developers to save time and simplify their code. In the EUI, macros are Agiloft
shorthand instructions for linking to pages, requesting data from the system, creating table views, and other
operations.
Macros are often combined with methods and conditional statements, or conditionals, to control the visibility
of a macro's content. Methods typically function as the actual condition of a conditional, and the conditional
determines what the user sees on the EUI. For example, consider two macros that each display an image. A
conditional might tell the system to use one macro to show image A if the user is in group A and use the other
macro to display image B if the user is in group B. In this case, the method checks the user's group, and the
conditional is the entire statement that uses the user's group membership to determine which image is
displayed.
Understanding how macros, methods, and conditionals work in the EUI is helpful if you plan to make any
customizations to the interface. Each of these elements is an essential part to how the EUI functions, so
knowing how they work can help you create an EUI that suits your needs.
uses the (VTL) template engine to process macros, which uses a special Agiloft Velocity Template Language
syntax:
#macro_name("$param1" "$param2" "$param3" ...)
Macros begin with a "#" followed by the name of the macro, and many macros also require one or more sign
parameters, which function as additional instructions. Parameters immediately follow the macro name and
are enclosed in parentheses. Parameters are each further enclosed in single or double quotes, depending on
context. Although the actual name of a parameter includes a dollar sign, in practice the parameter does not
typically use a dollar sign when it's replaced by a value.
Macros, Methods, and Conditionals
Macros
37© 2021 Agiloft Inc.
When a macro uses multiple parameters, the order of the parameters is important. The system uses the
parameter order to determine which parameter you're setting. Even if you're not setting a specific parameter,
or if you're leaving it at its default value, you need to leave a space for it in the code so that you retain the
correct parameter order. Parameters that aren't set or that are left at their default value are indicated with a
pair of empty quotation marks.
In practice, a macro with several parameters may look like this:
#ew_table("contract" "" $defaultsearch ""
"showToolBar=false&showNavigation=true&showfastsearch=false" "my_table" "")
This macro contains seven parameters. One parameter, , is a special variable parameter $defaultsearch
that references a saved search and uses a dollar sign but doesn't require quotation marks. See Using Default
for more information on how this parameter works. You can find the other six parameters by Searches
counting the pairs of quotation marks. Notice that three parameters are empty, meaning that they use a
default value. For more information on this macro and its parameters, as well as other macros, see EUI Macro
.Reference
In the default EUI setup, each of the basic page types corresponds to an macro that uses parameters Agiloft
to reference the table, record, or form. The macros can also apply search filters or set additional parameters.
Table views,such as the My Support Cases or All Documents pages, use the macro, which #ew_table
creates an iframe and displays an inside it.Agiloft table
Record editing pages,such as the My Profile page, use the macro.#ew_edit_record
Submission forms,such as the Create a Support Case page, use the macro.#ew_create_record
FAQ pages,such as the Document / FAQs page, use the macro.#ew_faq
For more information on these macros, see .EUI Macro Reference
Macros with Multiple Parameters
Macros and Page Types

38© 2021 Agiloft Inc.
In addition to specialized macros, the (VTL)also has prebuilt directives for Velocity Template Language
creating conditional statements, or conditionals. You can use conditionals within the body of an EUI template
to . Conditionals are typically combined with methods, which are show or hide HTML elements and macros
ways of checking the conditions, making decisions, and retrieving information. Our discussion only covers the
basics, so reference the more information.VTL user manual if you need
Before including methods, let's first consider conditionals on their own:
#if(condition A is true)
<p>Welcome!</p>
#end
This conditional displays the text "Welcome!" only if the condition is true; otherwise, nothing happens.
Conditionals start with the directive and end with the directive, like in this example. However, they #if #end
can also be combined with and directives, as well as logical operators, to create more #else #elseif
complex conditionals. For instance, consider this example:
#if([condition A is true] && [condition B is true])
<p>Welcome!</p>
#else
<p>Hello!</p>
#end
This conditional displays the text "Welcome!" if both the conditions are true. Otherwise, it displays the text
"Hello!" Similarly, consider this example:
#if([condition A is true] || [condition B is true])
<p>Welcome!</p>
#else
<p>Hello!</p>
#end
This conditional displays the same "Welcome!" text, but this time the text is displayed if either condition is
true. If neither condition is true, it displays the text "Hello!"
Logical Operators
Conditionals and Methods
Using Conditionals
39© 2021 Agiloft Inc.
Logical Operators
These are the logical operators you can use when comparing conditions within a :conditional
Operator Definition
|| Or
&& And
! Not
< Less than
> Greater than
== Is equal to
Methods often function as the actual condition of a conditional. For instance, some common methods check a
user's group membership, team membership, and permission settings, and the conditional uses the result to
determine what the user sees. Methods begin with a dollar sign and, like macros, contain one or more
parameters. Parameters immediately follow the method name and are enclosed inparentheses, and each
parameter is further enclosed in double quotes and separated by commas. For instance, a method might look
like this:
$ewUser.isInGroup("group name")
This methodchecks the current user's group membership to see if they're a member of the specified group.
Notice that this method only has a single parameter, which contains the group name. When a method is used
with a conditional and a macro, it might look like :this
#if ($ewUser.isInGroup("Contract Creator") || $ewUser.isInGroup("Contract Manager"))
<img src="#ew_image('/gif/contract-team-logo.png')" />
#else
<img src="#ew_image('/gif/main-logo.png')" />
#end
This conditional uses the method to check if the current user is in the Contract Creator or Contract Manager
groups. If they are, the system uses some HTML with a macro to display . If the contract-team-logo.png
user is not in either of these groups, the system displays .sample-logo.png
For a list of common methods used in the EUI, see .EUI Method Reference
Using Methods
EUI Template Reference

40© 2021 Agiloft Inc.
The EUI is managed by a set of HTML files stored as records in the EUI Templates table. Using HTML, Agiloft
you can redesign the interface in any number of ways to match your branding and web design. This article
contains a description for each of the main EUI templates. To see the code for each template, go to the EUI
Templates table in your knowledgebase and open the desired template.For more detailed instructions on
editing the templates, seeWorking with Default EUI Templates.
Each page of the EUI has a corresponding record in the EUI Templates table. The Name field shows the full
template name including the file extension, .htm, .html, .css, .php, or .properties.such as
The Body field holds the code, and modifying the code to the EUI.makes changes For this reason, we
recommend making a copy before editing any template records so that you can revert to the old code if
necessary.
Some EUI templates don't stand alone as separate pages, but are used by other templates or included in
other pages. For instance, the templates , and are included in every page header.htm footer.htm menu.htm
of the EUI. Here are other examples of these "helper" files:
iresize.js:Contains a piece of JavaScript
search-form.htm: Contains the search block found on every home page
meta.htm: Holds meta data included in every page
The standard login pages provided by are set to direct a user to when logging into the Agiloft main.php
custom portal.The following wireframe image shows how the elements contained in the page fit main.php
together:
EUI Template Reference
main.php

41© 2021 Agiloft Inc.
The file does not directly contain the elements that are displayed to the user on the page. Instead, main.php
uses the to pull in the contents of three other HTML files:main.php #ew_include() macro
header.htm
home.htm
footer.htm
Header.htm in turn includes the file , and pulls in . also menu.htm home.htm search-form.htm Header.htm
contains the reference to the logo, plus user information and a logout link in the upper right corner.
Although a login page does have to specify which page a user is taken to, it does not have to be themain.php
page. Different login pages for the same project could even direct users to different landing .pages
The template file is the main part of the page that users see when they log in to the EUI. It makes home.htm
heavy use of conditionalsto show different tables to different user groups. An HTML table lines up the Agiloft
tables incolumns and rows. On the EUI, the horizontal and vertical lines are table cells with particular CSS
classes designated. Using conditionals with this type of layout provides a relatively compact presentation
when there are only a few options for each user.
You do not have to use if it is not suitable for your needs. In ,you can replace the home.htm main.php
reference to with a different EUI template to serve as your main home page. See home.htm Working with
for more .Home Pages information
The template file creates the navigation menu, or the tabs across the top of the . menu.htm screen
home.htm
menu.htm

42© 2021 Agiloft Inc.
Each tab of the menu is held in an unordered HTML list in . The template file also contains ascript menu.htm
near the bottom that highlights the current tab. If you add any extra tabs to the EUI, ensure that you give each
a unique ID new item in the script.
The area used by the tabs expands to accommodate any extra tabs added. If the area used by the tabs
becomes larger than the area available to the menu, it creates a second line, which generally looks bad. For
this reason, we recommend that you limit the number of tabs you add, useshorter tab names, or add line
breaks into the tab names so that users see a limited number of tabs. You can also create drop-down menus
for the extra items.For more information on how to do this, see the page.EUI Setup Tips
The template file controls the appearance of the EUI header and also references to header.htm menu.htm
display the contains the reference to the logo, plus user information and a navigation menu. Header.htm
logout link in the upper right corner.The method uses the $ewText.get userinfo.name.labeland
userinfo.logout.link variablesto retrieve the words "User:" and "Logout," respectively, from the
file.translation.properties
The file is actually part of a family of files. The default setup includestranslation.properties Agiloft
, , and . These translation.properties translation_ru.properties translation_zh.properties
records hold the text retrieved by the method for English, Russian, and Chinese, respectively. $ewText.get
For more information about , localization, and the EUI, see translation.properties Text and Localization
.in the EUI
The file contains the CSS code for the EUI, which defines the page formatting and can be updated style.css
as desired. By default, is already referenced on each page by including the file, which style.css meta.htm
calls along with several other standard scripts. You can use this same shortcut on pages you style.css
create.
header.htm
translation.properties
style.css
When editing the CSS, keep in mind that by default the in have their location <divs> home.htm
When editing the CSS, keep in mind that by default the in have their location <divs> home.htm
This means that the location of a determined by the HTML table and do not use relative positioning.
particular on the page is determined by its placement within the HTML table. If you want to <div>
update the to use positioning, then you must remove the HTML table in or style.css home.htm
your positioning will not work as intended.

© 2021 Agiloft Inc.
1.
2.
3.
4.
The EUI uses the method, along with key and value pairs in , to $ewText.get translation.properties
display text on the interface. When the method contains a particular key, the key's $ewText.get
corresponding value is inserted wherever that key appears. This allows the EUI to provide support for multiple
languages and facilitate localization. By using these key and value pairs, a f can be ull translation of the EUI
created by simply copying the file and translating the value for each key.translation.properties
Displaying text in the EUI with key and value pairs also creates consistency and allows you to easily make
changes. If you need to make a terminology change, it's easier when the text values are contained a single file
that each page can reference. For example, if you decide to change the name of a table from Support Cases to
Support Tickets, you can go to and make that change in one place to propagate translation.properties
the change anywhere the table name appears.
If you want to change text on the EUI, you need to edit the key to which the text corresponds in
.Although it is possible to enter text directly on an EUI page, we recommend translation.properties
using the key-value pairs in for consistency across the EUI templates, as well as translation.properties
to facilitate any future localization efforts.
To change text on the interface:
Open and search for the text you want to change.translation.properties
Make the change to the text. Be careful not to remove the equals sign (=) or the text that precedes it.
Click Save.
Text and Localization in the EUI
The file only allows you to create a full translation of the system text, translation.properties
such as menus, tabs, buttons, and page titles. You cannot translate the text contained in records with
this method.
Prerequisites
Before making changes to the EUI, we recommend that you have a basic understanding of the
following topics:
HTML
CSS
Macros, methods, and conditionals, as they're used in the EUI
For more information on HTML and CSS, visit .W3 Schools
Working with Text
Key-value pairs are organized by function and then by table.
43

© 2021 Agiloft Inc.
4. Open the corresponding EUI page and confirm that the is updated. Remember, if the key to which text
the text corresponds is used in more than one place, the updated text will appear in the EUI in more
than one place too.
The purpose of the method and the file is to allow for a $ewText.get() translation.properties
multilingual environment. This is possible because is actually a part of a family of translation.properties
files, with the default setup also including andtranslation_ru.properties translation_zh.
.These latter two files hold the text for Russian and Chinese, respectively, and properties translation.
holds the text for English.properties
When the system sets the locale for each user session, the method the session locale $ewText.get checks
and uses that to determine which file to use. For instance, consider this key and translation.properties
text value pair from :translation.properties
home.hc.my.link=My
The key is , which is followed by an equals sign ( ), which is then followed by the text value home.hc.my.link =
"My Cases." Whenever appears in an EUI template, "My Cases" $ewText.get("home.hc.my.link")
isdisplayed in the English is the locale. However, if the locale is Russian or Chinese, the value EUI when
displayed in the EUI is whatever translation of "My Cases" is in or translation_ru.properties
, respectively.translation_zh.properties
There are a few common ways to set the session locale:
Add lang=XX to the .login URL
Use the macro in to display a list of available languages for the user.#ew_languages main.php
Use the macro in to set the locale.#ew_locale main.php
If a locale is not set, the default file is used, which is typically English but could in translation.properties
principle be other languages. For more information on 's localization-related macros, seeAgiloft EUI Macro
.Reference
Localization with ewText.get and
translation.properties
If you add other languages to the system, the corresponding language file must be named
where XX is a proper Java locale code. You can find a list of translation_XX.properties,
supported Java locale codes .For more information on the localization process, see .here Localization
Set the Session Locale
44
