
1
Recording TV Programs
You can record current shows, schedule future shows to record, and watch the recorded shows at any
time. You can record an individual show or record a series of episodes that occur at regular intervals.
AT&T U-verse TV stores your recordings and keeps an up-to-date list of them. You can find
programs using the Recorded TV screen and the program guide.
You can pause, rewind, and fast-forward recorded shows just as you would a DVD or a videotape.
Hard Disk Drive Required
You can record programs only if your receiver has a built-in or externally connected hard disk drive.
If there is no hard disk drive, you see an error message when you try to use this feature.
Scheduled Recordings Complete in Standby State
When you schedule a program to be recorded, the recording completes even if the box is in Standby
mode during recording. This applies only to a scheduled recording, not to an unscheduled recording
that you started by pressing the RECORD button while watching full-screen TV.
Recording Locked Programs
You do not have to enter a PIN to schedule recordings for programs locked by the parental locking
feature, but viewers do have to enter the correct PIN to view the recording. For more information
about Parental Locking see
Using Parental Locking (Parental Control) .
Contents
Recording a Single Program ...............................................................................................3
Recording the Program You Are Watching .................................................................3
Stopping Recording of the Program You Are Watching..............................................5
Seeing if a Program Is Recording.................................................................................5
Recording a Single Program Using the Program Guide...............................................6
Recording a Single Program by Channel, Date, and Time...........................................9
Recording a Series.............................................................................................................10
Recording a Weekly Series Using the Program Guide...............................................10
Recording a Daily or Weekly Series Using the Program Guide ................................11
Resolving Recording Conflicts .........................................................................................14
Resolving Conflicts for a Single Recording...............................................................14
Resolving Conflicts for a Series Recording ...............................................................15
Preliminary & Tentative
Statements, conclusions, observations and characterizations contained herein are reflected herein for purposes of a self-
critical analysis of certain AT&T operations and practices. Unless expressly approved by an appropriate governing body
of AT&T Communications or its affiliates, the contents of this document do not necessarily reflect the positions or opinions
of AT&T Communications or its management, and, therefore, should be considered preliminary and tentative.
© 2005-2006 AT&T Knowledge Ventures. All rights reserved.

2
Recording or Clearing an Overridden Single Recording............................................16
Recording or Clearing an Overridden Series Recording............................................17
Listing Scheduled Recordings...........................................................................................20
Listing All Scheduled Recordings..............................................................................20
Listing Scheduled Series Recordings.........................................................................21
Canceling Scheduled Recordings......................................................................................21
Canceling a Single or Series Recording from the Program Guide.............................22
Canceling a Single Recording from the Recorded TV Screen...................................22
Canceling a Series Recording from the Recorded TV Screen....................................23
Playing a Recorded Program.............................................................................................25
Stopping a Recorded Program...........................................................................................27
Tuning To and From a Recording.....................................................................................28
Erasing an Existing Recording..........................................................................................29
Preliminary & Tentative
Statements, conclusions, observations and characterizations contained herein are reflected herein for purposes of a self-
critical analysis of certain AT&T operations and practices. Unless expressly approved by an appropriate governing body
of AT&T Communications or its affiliates, the contents of this document do not necessarily reflect the positions or opinions
of AT&T Communications or its management, and, therefore, should be considered preliminary and tentative.
© 2005-2006 AT&T Knowledge Ventures. All rights reserved.

3
Recording a Single Program
You can record the program you are currently watching, or you can schedule a program to be recorded
in the future.
Recording the Program You Are Watching
While watching full-screen live TV, you can record the program you are watching.
You can record the program until its scheduled end, or you can add padding time after the end to make
sure the whole program records if it runs longer than expected.
To record the program you are watching until its scheduled end
• Press the RECORD button on your receiver remote control.
The message “Recording” appears briefly on the screen. The RECORDING LED on your receiver
lights up and remains on while the program is recording.
The recording begins immediately and stops automatically at the end of the program time slot
shown in the program guide.
To record the program you are watching with padding after the end
1) Press the INFO button, select Record program or Record series, and then press the OK
button.
The
Record screen appears.
2) If you want to stop recording exactly when the program is scheduled to end, press the OK button
with
Record selected.
The recording is now scheduled and will stop at the scheduled end time, even if the program runs
longer than expected, as often happens with sports events.
Preliminary & Tentative
Statements, conclusions, observations and characterizations contained herein are reflected herein for purposes of a self-
critical analysis of certain AT&T operations and practices. Unless expressly approved by an appropriate governing body
of AT&T Communications or its affiliates, the contents of this document do not necessarily reflect the positions or opinions
of AT&T Communications or its management, and, therefore, should be considered preliminary and tentative.
© 2005-2006 AT&T Knowledge Ventures. All rights reserved.

4
3) If you want to add a padding period to make sure you record the entire program:
a) Use the arrow keys on your remote control to select the “
+” symbol in the Stop Recording
element.
b) Press the
OK button to step forward through the available padding times. You can also use the
“
-“symbol to step backwards through the times.
c) Select
Record, and then press OK.
The recording is now scheduled and will stop the specified number of minutes after the
scheduled end time.
Notes
• If you pause a live TV program, then press PLAY to begin watching the paused portion, and then
start recording the program, the program jumps to the point where the program is live and begins
recording from there. The paused portion of the program is not recorded.
For more information on pausing live programs, see
Controlling Live TV .
• If you start recording the program you are watching and then press the POWER button on your
remote control to put the receiver in Standby mode, the recording continues. A previously
scheduled recording will continue even if the receiver is in Standby mode.
• You cannot schedule a series recording while watching full-screen TV. You can only schedule a
recording of the episode you are watching. For more information about series recordings, see
Recording a Series .
Preliminary & Tentative
Statements, conclusions, observations and characterizations contained herein are reflected herein for purposes of a self-
critical analysis of certain AT&T operations and practices. Unless expressly approved by an appropriate governing body
of AT&T Communications or its affiliates, the contents of this document do not necessarily reflect the positions or opinions
of AT&T Communications or its management, and, therefore, should be considered preliminary and tentative.
© 2005-2006 AT&T Knowledge Ventures. All rights reserved.

5
Stopping Recording of the Program You Are Watching
Use the STOP button to stop recording the program you are watching.
To stop recording a TV program you are watching
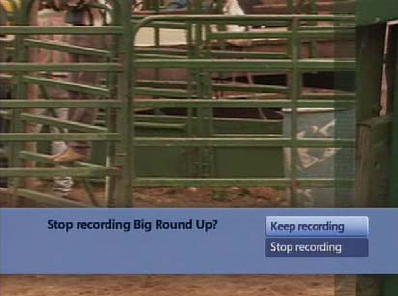
1) Press the STOP button on your remote control while watching a program in full-screen TV.
A message appears that lets you stop or keep recording.
2) With
Stop recording and change channel selected, press the OK button on your remote control.
The message “Recording stopped” appears. The program guide no longer displays a red dot in the
grid cell for that program.
Note If you do not want to stop the recording, select Keep recording, and then press the OK
button.
Seeing if a Program Is Recording
There are several ways to determine if a currently playing program is recording.
To determine if a currently playing program is recording
• Look at the RECORDING LED on the receiver. It remains lit while a program is being recorded.
• Tune to the program, and then press
INFO on the remote control. A Program Info screen appears.
If the program is recording, the Program Info screen displays a red dot.
• Press
GUIDE on the remote control and look for the red dot in the program guide cell for the
program.
• Press
RECORDED TV on the remote control to go to the Recorded TV screen.
Preliminary & Tentative
Statements, conclusions, observations and characterizations contained herein are reflected herein for purposes of a self-
critical analysis of certain AT&T operations and practices. Unless expressly approved by an appropriate governing body
of AT&T Communications or its affiliates, the contents of this document do not necessarily reflect the positions or opinions
of AT&T Communications or its management, and, therefore, should be considered preliminary and tentative.
© 2005-2006 AT&T Knowledge Ventures. All rights reserved.
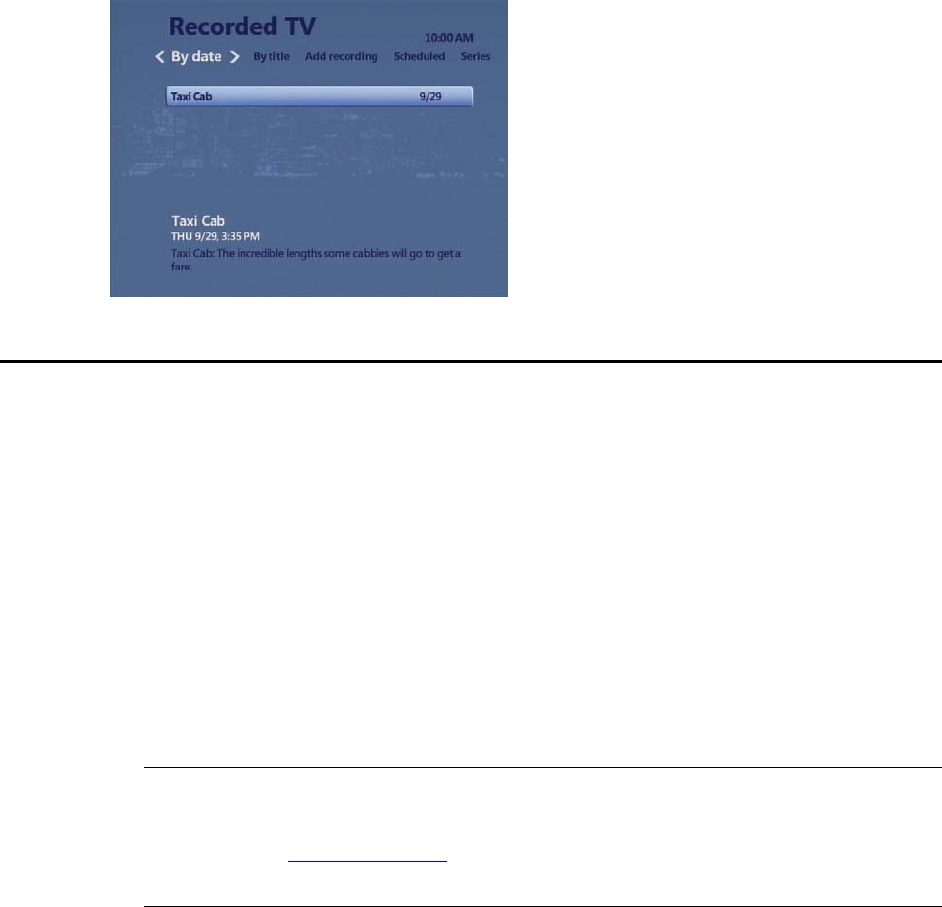
6
This screen displays the title of a recorded program as soon as it begins recording.
Recording a Single Program Using the Program Guide
You can use the program guide to schedule a current or future program to record.
You can record the program until its scheduled end, or you can add padding time after the end to make
sure the whole program records if it runs longer than expected.
To record a program until its scheduled end
1) Press GUIDE on your remote control, and then use the arrow buttons to move through the listings
to a program you want to record.
2) Press the
RECORD button.
A red dot in the program guide cell indicates that the program is now scheduled to record.
Recording begins immediately if the program is currently playing.
Note Pressing the RECORD button twice on a program schedules a series recording (this
recording will take place the same day and time every week) and makes three overlapping
dots appear (see
Recording a Series ). Pressing it a third time cancels recording and makes the
dots disappear.
If you schedule a series recording by mistake, press RECORD a third time to cancel the recording,
and then press
RECORD again to schedule the individual recording.
Preliminary & Tentative
Statements, conclusions, observations and characterizations contained herein are reflected herein for purposes of a self-
critical analysis of certain AT&T operations and practices. Unless expressly approved by an appropriate governing body
of AT&T Communications or its affiliates, the contents of this document do not necessarily reflect the positions or opinions
of AT&T Communications or its management, and, therefore, should be considered preliminary and tentative.
© 2005-2006 AT&T Knowledge Ventures. All rights reserved.

7
When the scheduled recording actually begins, the RECORDING LED on your receiver lights up
and remains on while the program is recording.
To record a program with padding time after the end
1) Press GUIDE on your remote control, and then use the arrow buttons to move through the listings
to the program you want to record.
2) Press the
INFO button, select Record program or Record series, and then press the OK button.
The
Record (or Record Episode) screen appears.
3) If you want to stop recording exactly when the program is scheduled to end, press the
OK button
with
Record selected.
The recording is now scheduled and will stop at the scheduled end time, even if the program runs
longer than expected, as often happens with sports events.
4) If you want to add a padding period to make sure you record the entire program:
a) Use the arrow keys on your remote control to select the “
+” symbol in the Stop Recording
element.
Preliminary & Tentative
Statements, conclusions, observations and characterizations contained herein are reflected herein for purposes of a self-
critical analysis of certain AT&T operations and practices. Unless expressly approved by an appropriate governing body
of AT&T Communications or its affiliates, the contents of this document do not necessarily reflect the positions or opinions
of AT&T Communications or its management, and, therefore, should be considered preliminary and tentative.
© 2005-2006 AT&T Knowledge Ventures. All rights reserved.

8
b) Press the OK button to step forward through the available padding times. You can also use the
“
-“ symbol to step backwards through the times.
c) Select
Record, and then press OK.
The recording is now scheduled and will stop the specified number of minutes after the
scheduled end time.
Preliminary & Tentative
Statements, conclusions, observations and characterizations contained herein are reflected herein for purposes of a self-
critical analysis of certain AT&T operations and practices. Unless expressly approved by an appropriate governing body
of AT&T Communications or its affiliates, the contents of this document do not necessarily reflect the positions or opinions
of AT&T Communications or its management, and, therefore, should be considered preliminary and tentative.
© 2005-2006 AT&T Knowledge Ventures. All rights reserved.

9
Recording a Single Program by Channel, Date, and Time
You can schedule a recording manually by specifying the channel, date, time, and duration. You can
schedule only one recording at a time using this screen.
To schedule a recording manually
1) Press the MENU button, and then press the RIGHT ARROW button to select Recorded TV.
2) Press the
DOWN ARROW button to select Set Recording, and then press OK.
3) Select
CREATE A CUSTOM RECORDING WITH Channel and time, and then press the OK button.
4) Fill in the fields on the
Add Recording screen.
• Use the arrow buttons on your remote control to navigate through the fields.
• Use the number buttons to enter the channel to record under
CHANNEL.
• Select the
+ and – icons under DATE, and then press the OK button to step forward or
backward through the available dates on which you can record the program.
• Use the number buttons to enter the time you want to start recording (under
START) and the
time you want to stop recording (under
STOP). You can set the starting and stopping times to
record the exact length of the program, or you can add padding time to make sure the whole
program records if it starts earlier or runs longer than expected.
• Select
AM or PM next to the starting and stopping times and then press the OK button to
change the starting and stopping times to
AM or PM.
5) Select
Record, and then press the OK button to schedule the recording. You can also choose
Don't Record to exit from the screen without scheduling a recording.
Preliminary & Tentative
Statements, conclusions, observations and characterizations contained herein are reflected herein for purposes of a self-
critical analysis of certain AT&T operations and practices. Unless expressly approved by an appropriate governing body
of AT&T Communications or its affiliates, the contents of this document do not necessarily reflect the positions or opinions
of AT&T Communications or its management, and, therefore, should be considered preliminary and tentative.
© 2005-2006 AT&T Knowledge Ventures. All rights reserved.

10
Recording a Series
You can schedule a program to be recorded weekly or daily. You can also schedule every weekday or
every weekend day.
This feature enables to you record recurring programs, such as episodes in a series. Once scheduled, a
series recording occurs indefinitely until canceled.
There are some restrictions on series recording in this release:
• You cannot change the schedule for a series recording once you have set it up. You must cancel it
and then reschedule it.
• You cannot schedule a series recording manually, using the Add Recording screen, as you can for
an individual recording. You must select the program in the program guide.
Recording a Weekly Series Using the Program Guide
You can use the RECORD button on your remote control to schedule a program to record at the same
time every week.
To schedule a weekly recording
1) Press GUIDE on your remote control, and then use the arrow buttons to move through the listings
to the program you want to record.
2) Press the
RECORD button twice.
A red dot appears in the program guide cell on the first press, and three overlapping dots appear
on the second press.
U-verse TV will now record that program at the same time on the same day each week for the
exact length of time shown in the program guide.
Note U-verse TV does not adjust if the program’s schedule changes to a new time slot. U-
verse TV records whatever is playing on that channel during the selected time slot.
Preliminary & Tentative
Statements, conclusions, observations and characterizations contained herein are reflected herein for purposes of a self-
critical analysis of certain AT&T operations and practices. Unless expressly approved by an appropriate governing body
of AT&T Communications or its affiliates, the contents of this document do not necessarily reflect the positions or opinions
of AT&T Communications or its management, and, therefore, should be considered preliminary and tentative.
© 2005-2006 AT&T Knowledge Ventures. All rights reserved.

11
Pressing the RECORD button a third time cancels the series recording and makes the three dots
disappear from the program guide cell.
Recording a Daily or Weekly Series Using the Program Guide
You can use the desired program’s Program Info screen to schedule a recording to happen at the same
time each week or each day.
You can record each episode until its scheduled end, or you can add padding time after the end to
make sure the whole episode records if it runs longer than expected.
To schedule a weekly or daily series recording
1) Press GUIDE on your remote control, and then use the arrow buttons to move through the listings
to the program you want to record.
2) Press the
INFO button, select Record series, and then press the OK button.
3) Use the arrow buttons on your remote control to select the plus (
+) symbol under TIME, and then
press the OK button repeatedly to step through the scheduling options for how often to record.
Preliminary & Tentative
Statements, conclusions, observations and characterizations contained herein are reflected herein for purposes of a self-
critical analysis of certain AT&T operations and practices. Unless expressly approved by an appropriate governing body
of AT&T Communications or its affiliates, the contents of this document do not necessarily reflect the positions or opinions
of AT&T Communications or its management, and, therefore, should be considered preliminary and tentative.
© 2005-2006 AT&T Knowledge Ventures. All rights reserved.

12
Select the minus (–) symbol, and then press the OK button to step backwards through the options.
You can choose one of the following options:
• Every week on the day and time shown.
This is just like scheduling a weekly recording by pressing the RECORD button twice on the
program guide cell.
• Every day at the time shown.
• Every weekday at the time shown.
(Only available if the episode that you select to start the series recording occurs on a
weekday.)
• Every weekend day at the time shown.
(Only available if the episode that you select to start the series recording occurs on a Saturday
or Sunday.)
4) If you want each episode to stop recording at the exact time when the episode is scheduled to end,
then make sure
At scheduled time shows under STOP RECORDING, select Record, and then press
OK.
The series recording is now scheduled, and each episode will stop at the scheduled end time, even
if the episode runs longer than expected, as often happens with sports events.
5) If you want to add a padding period to make sure you record each entire episode:
a) Use the arrow keys on your remote control to select the “
+” symbol under STOP RECORDING.
b) Press the
OK button to step forward through the available padding times. You can also use the
“
— “symbol to step backwards through the times.
Preliminary & Tentative
Statements, conclusions, observations and characterizations contained herein are reflected herein for purposes of a self-
critical analysis of certain AT&T operations and practices. Unless expressly approved by an appropriate governing body
of AT&T Communications or its affiliates, the contents of this document do not necessarily reflect the positions or opinions
of AT&T Communications or its management, and, therefore, should be considered preliminary and tentative.
© 2005-2006 AT&T Knowledge Ventures. All rights reserved.

13
c) Select
Record, and then press OK.
The recording is now scheduled and will stop the specified amount of time after the scheduled
end time.
Preliminary & Tentative
Statements, conclusions, observations and characterizations contained herein are reflected herein for purposes of a self-
critical analysis of certain AT&T operations and practices. Unless expressly approved by an appropriate governing body
of AT&T Communications or its affiliates, the contents of this document do not necessarily reflect the positions or opinions
of AT&T Communications or its management, and, therefore, should be considered preliminary and tentative.
© 2005-2006 AT&T Knowledge Ventures. All rights reserved.

14
Resolving Recording Conflicts
The receiver can record one program at a time. You can schedule multiple recordings if the time slots
do not overlap. Recordings conflict when more than one program is scheduled to record at the same
time.
This can happen when scheduling individual or series recordings.
Resolving Conflicts for a Single Recording
When an individual recording conflicts with one or more previously scheduled recordings, a Conflict
screen asks you which program to record.
To resolve a conflict with one program
• Use the arrow buttons on your remote control to select the program you want to record, and then
press the
OK button.
Sometimes a new recording conflicts with more than one previously scheduled recording. This can
happen if the program you are trying to record overlaps the time slots of two or more other programs
you have scheduled to record. If this happens, you can do one of the following:
•
Record the new program and cancel all the conflicting recordings. Select the new program, and
then press
OK.
•
Skip the new program and keep all of the previously scheduled recordings. Select Previously
scheduled programs
, and then press OK.
Preliminary & Tentative
Statements, conclusions, observations and characterizations contained herein are reflected herein for purposes of a self-
critical analysis of certain AT&T operations and practices. Unless expressly approved by an appropriate governing body
of AT&T Communications or its affiliates, the contents of this document do not necessarily reflect the positions or opinions
of AT&T Communications or its management, and, therefore, should be considered preliminary and tentative.
© 2005-2006 AT&T Knowledge Ventures. All rights reserved.

15
After you resolve the conflict, a conflict symbol appears in the program guide cell of each
overridden program.
Resolving Conflicts for a Series Recording
When episodes of a series conflict with previously scheduled recordings, a Conflict screen lets you
choose how to resolve the conflict.
To record all episodes of the series and cancel conflicting recordings
• Select Record all episodes of new series, and then press the OK button.
The recordings of episodes for the new series override and cancel any previously scheduled
recordings.
A conflict symbol appears in the program guide cell of each overridden program.
To record only those episodes that do not conflict with previously scheduled recordings
• Select Record only when no conflict occurs, and then press the OK button.
Preliminary & Tentative
Statements, conclusions, observations and characterizations contained herein are reflected herein for purposes of a self-
critical analysis of certain AT&T operations and practices. Unless expressly approved by an appropriate governing body
of AT&T Communications or its affiliates, the contents of this document do not necessarily reflect the positions or opinions
of AT&T Communications or its management, and, therefore, should be considered preliminary and tentative.
© 2005-2006 AT&T Knowledge Ventures. All rights reserved.

16
Episodes that conflict with previously scheduled recordings are not recorded. The previously
scheduled recordings occur as planned.
Recording or Clearing an Overridden Single Recording
An individual conflict symbol (the crossed-out red dot) in the program guide marks a individual
recording that was overridden and canceled in favor of another individual recording or a series
recording.
When you select the overridden recording in the program guide, a program info screen appears.
You can handle an overridden recording in one of the following ways:
• Leave it as is.
If you cancel the conflict winner later, the overridden recording is again scheduled for recording.
The conflict symbol turns back into a red dot.
• Record the overridden program in place of the previous conflict winner.
Preliminary & Tentative
Statements, conclusions, observations and characterizations contained herein are reflected herein for purposes of a self-
critical analysis of certain AT&T operations and practices. Unless expressly approved by an appropriate governing body
of AT&T Communications or its affiliates, the contents of this document do not necessarily reflect the positions or opinions
of AT&T Communications or its management, and, therefore, should be considered preliminary and tentative.
© 2005-2006 AT&T Knowledge Ventures. All rights reserved.

17
• Clear the conflict symbol so the overridden program is not recorded even if you cancel the
previous conflict winner.
To record an overridden program instead of the previous conflict winner
1) Select the overridden program in the program guide, and then press the OK button on your remote
control.
A
Program Info screen appears.
2) Select Resolve Conflict, and then press the OK button.
A
Conflict screen appears.
3) Select the previously overridden program, and then press OK.
The overridden program now overrides the previous conflict winner.
You can use this feature to restore an individual recording that was overridden by a series
recording without affecting other episodes of the series recording.
To clear the conflict symbol for an individual recording
1) Select the overridden program in the program guide, and then press the OK button on your remote
control.
A
Program Info screen appears.
2) Select Don’t Record, and then press OK.
The conflict symbol disappears from the program guide.
Recording or Clearing an Overridden Series Recording
A series conflict symbol (crossed-out overlapping red dots) in the program guide marks a series
episode that was overridden and canceled in favor of another recording.
Preliminary & Tentative
Statements, conclusions, observations and characterizations contained herein are reflected herein for purposes of a self-
critical analysis of certain AT&T operations and practices. Unless expressly approved by an appropriate governing body
of AT&T Communications or its affiliates, the contents of this document do not necessarily reflect the positions or opinions
of AT&T Communications or its management, and, therefore, should be considered preliminary and tentative.
© 2005-2006 AT&T Knowledge Ventures. All rights reserved.

18
When you select an overridden series episode in the program guide, a
Program Info screen appears.
You can handle an overridden series episode in one of the following ways:
• Leave it as is.
If you cancel the conflict winner later, the overridden series episode is rescheduled for recording.
The conflict symbol turns back into overlapping red dots.
• Record the overridden series episodes in place of the previous conflict winner.
• Cancel the entire series recording.
To record an overridden series episode instead of the previous conflict winner
1) Select the overridden episode in the program guide, and then press the OK button on your remote
control.
A
Program Info screen appears.
2) Select Resolve Conflict, and then press the OK button.
A
Conflict screen appears.
3) Select the previously overridden series episode, and then press
OK.
Preliminary & Tentative
Statements, conclusions, observations and characterizations contained herein are reflected herein for purposes of a self-
critical analysis of certain AT&T operations and practices. Unless expressly approved by an appropriate governing body
of AT&T Communications or its affiliates, the contents of this document do not necessarily reflect the positions or opinions
of AT&T Communications or its management, and, therefore, should be considered preliminary and tentative.
© 2005-2006 AT&T Knowledge Ventures. All rights reserved.
19
The recording for the overridden episode overrides and cancels the recording for previous conflict
winner.
To cancel the entire series
1) Select the overridden episode in the program guide, and then press the OK button on your remote
control.
A
Program Info screen appears.
2) Select
Cancel Series, and then press the OK button.
3) Select
Cancel Series in the resulting confirmation screen, and then press OK.
The entire series recording is canceled. All series conflict symbols for it are cleared.
This does not erase episodes that have already been recorded.
Preliminary & Tentative
Statements, conclusions, observations and characterizations contained herein are reflected herein for purposes of a self-
critical analysis of certain AT&T operations and practices. Unless expressly approved by an appropriate governing body
of AT&T Communications or its affiliates, the contents of this document do not necessarily reflect the positions or opinions
of AT&T Communications or its management, and, therefore, should be considered preliminary and tentative.
© 2005-2006 AT&T Knowledge Ventures. All rights reserved.

20
Listing Scheduled Recordings
Use the Recorded TV screen to view a list of programs scheduled to record.
Listing All Scheduled Recordings
You can list the individual programs and series episodes scheduled to record in the future.
To list all scheduled recordings
1) Press the MENU button, and then press the RIGHT ARROW button to select Recorded TV.
2) Press the
DOWN ARROW button to select Scheduled, and then press OK.
The
Recorded TV screen appears.
The Recorded TV screen now lists all upcoming individual recordings, including series episodes,
in the order in which they will be recorded.
4) Use the arrow buttons or the
CHANNEL/PAGE button on your remote control to scroll through the
list.
Listing Scheduled Series Recordings
You can list the series you have scheduled to record and then the individual episodes you have
scheduled to record for each series.
To list the series recordings you have scheduled
1) Press the MENU button, and then press the RIGHT ARROW button to select Recorded TV.
2) Press the
DOWN ARROW button to select Scheduled, and then press OK.
The
Recorded TV screen appears.
3) Use the
RIGHT ARROW button to select series on the horizontal menu bar.
The
Recorded TV screen now lists the series you have scheduled to record.
4) Use the arrow buttons or the CHANNEL/PAGE button on your remote control to scroll through the
list.
Preliminary & Tentative
Statements, conclusions, observations and characterizations contained herein are reflected herein for purposes of a self-
critical analysis of certain AT&T operations and practices. Unless expressly approved by an appropriate governing body
of AT&T Communications or its affiliates, the contents of this document do not necessarily reflect the positions or opinions
of AT&T Communications or its management, and, therefore, should be considered preliminary and tentative.
© 2005-2006 AT&T Knowledge Ventures. All rights reserved.
21
To list upcoming recordings for a particular series
1) Select the desired series in the Recorded TV screen, and then press OK.
The
Series Info screen appears.
2) Press the RIGHT ARROW button to select scheduled.
The
Recorded TV screen now shows the episodes scheduled to record for the selected series.
3) Use the arrow buttons or the
CHANNEL/PAGE button on your remote control to scroll through
the list.
Preliminary & Tentative
Statements, conclusions, observations and characterizations contained herein are reflected herein for purposes of a self-
critical analysis of certain AT&T operations and practices. Unless expressly approved by an appropriate governing body
of AT&T Communications or its affiliates, the contents of this document do not necessarily reflect the positions or opinions
of AT&T Communications or its management, and, therefore, should be considered preliminary and tentative.
© 2005-2006 AT&T Knowledge Ventures. All rights reserved.

22
Canceling Scheduled Recordings
You can use the program guide or the Recorded TV screen to cancel a single recording or a series
recording.
Canceling a Single or Series Recording from the Program Guide
In the program guide, individually scheduled recordings are marked by a red dot, and series recordings
are marked by three overlapping dots.
To cancel a recording from the program guide
1) Use the CHANNEL/PAGE button and arrow buttons on your remote control to locate and select the
program.
2) Use the RECORD button to cancel the recording:
• If the program is an individually scheduled recording (single red dot), press the
RECORD
button on your remote control twice.
The first press changes it to a series recording (three overlapping dots), and the second press
cancels the recording (the dots disappear).
Note If the series recording scheduled on the first press conflicts with previously
scheduled recordings, a conflict screen appears. Press OK on the remote control until the
conflict screen disappears and the display returns to the program guide. At this point,
there should be three overlapping red dots in the program guide cell. Then press the
RECORD button again.
• If the program is a series recording (three overlapping dots), press the RECORD button once.
This cancels the entire series recording, and the dots disappear from the program guide.
Preliminary & Tentative
Statements, conclusions, observations and characterizations contained herein are reflected herein for purposes of a self-
critical analysis of certain AT&T operations and practices. Unless expressly approved by an appropriate governing body
of AT&T Communications or its affiliates, the contents of this document do not necessarily reflect the positions or opinions
of AT&T Communications or its management, and, therefore, should be considered preliminary and tentative.
© 2005-2006 AT&T Knowledge Ventures. All rights reserved.

23
Canceling a Single Recording from the Recorded TV Screen
You can cancel an individual recording after selecting it in the Recorded TV screen.
To cancel a scheduled individual recording
1) Press the MENU button, and then press the RIGHT ARROW button to select Recorded TV.
2) Press the
DOWN ARROW button to select Scheduled, and then press OK.
The
Recorded TV screen appears.
The Recorded TV screen now lists all upcoming individual recordings, including series episodes,
in the order in which they will be recorded.
4) Use the arrow buttons or the
CHANNEL/PAGE button on your remote control to scroll through the
list.
5) Select the scheduled recording you want to cancel, and then press
OK.
The
Program Info screen appears.
6) Select Don’t Record, and then press OK.
If the upcoming recording that you select is an episode of a series rather than an individually
scheduled recording, you cannot cancel recording of the individual episode. You can cancel only
the recording of the entire series.
If you do not want to cancel recording of the entire series, press the
BACK button on your remote
control.
Canceling a Series Recording from the Recorded TV Screen
You can cancel an individual recording after selecting it in the Recorded TV screen.
To cancel recording of a series
1) Press the MENU button, and then press the RIGHT ARROW button to select Recorded TV.
2) Press the
DOWN ARROW button to select Scheduled, and then press OK.
The
Recorded TV screen appears.
3) Use the
RIGHT ARROW button to select series on the horizontal menu bar.
The
Recorded TV screen now lists the series you have scheduled to record.
Preliminary & Tentative
Statements, conclusions, observations and characterizations contained herein are reflected herein for purposes of a self-
critical analysis of certain AT&T operations and practices. Unless expressly approved by an appropriate governing body
of AT&T Communications or its affiliates, the contents of this document do not necessarily reflect the positions or opinions
of AT&T Communications or its management, and, therefore, should be considered preliminary and tentative.
© 2005-2006 AT&T Knowledge Ventures. All rights reserved.
24
4) Use the arrow buttons or the CHANNEL/PAGE button on your remote control to scroll through the
list.
5) Select the desired series, and then press
OK.
The
Series Info screen appears.
6) Select Cancel series, and then press OK.
7) Select
Cancel Series in the resulting confirmation screen, and then press OK.
The entire series recording is canceled.
This does not erase episodes that have already been recorded.
Preliminary & Tentative
Statements, conclusions, observations and characterizations contained herein are reflected herein for purposes of a self-
critical analysis of certain AT&T operations and practices. Unless expressly approved by an appropriate governing body
of AT&T Communications or its affiliates, the contents of this document do not necessarily reflect the positions or opinions
of AT&T Communications or its management, and, therefore, should be considered preliminary and tentative.
© 2005-2006 AT&T Knowledge Ventures. All rights reserved.

25
Playing a Recorded Program
After you have recorded a program, you can watch it whenever you want.
To watch a recorded program
1) Press the RECORDED TV button on your remote control.
You can also press the
MENU button, press the RIGHT ARROW button to move to Recorded TV,
select
Browse Recordings, and then press the OK button.
The
Recorded TV screen lists your available recordings by date, from the most recently recorded
to the oldest recordings.
To see a list of the recordings alphabetically by title, use the
RIGHT ARROW button to select by
title
.
2) Select the recorded show you want to watch, and then press the
OK button.
One of the
Program Info screens appears.
3) In the Program Info screen:
• Select
Play to play the recording from the beginning.
Note If the recorded program is locked by parental locking, the Lock screen appears. To
unlock the program, press OK, enter your PIN, select Unlock this Program, and then press
OK. The program automatically relocks after <<4>> hours. For more information, see
Watching a Locked Program .
• If you stopped watching the recorded program in the middle, you can choose Resume play to
continue watching a recorded program where you left off
or Start over to start watching the
program from the beginning.
Controlling Playback
You can control recorded TV using the same playback control buttons you use to pause, rewind, and
fast-forward rented videos. For more information, see
Controlling Videos .
Preliminary & Tentative
Statements, conclusions, observations and characterizations contained herein are reflected herein for purposes of a self-
critical analysis of certain AT&T operations and practices. Unless expressly approved by an appropriate governing body
of AT&T Communications or its affiliates, the contents of this document do not necessarily reflect the positions or opinions
of AT&T Communications or its management, and, therefore, should be considered preliminary and tentative.
© 2005-2006 AT&T Knowledge Ventures. All rights reserved.
26
Watching While You Are Recording
While you are recording a program, you can watch that program or another previously recorded
program.
You cannot watch another live TV channel or a rented video without stopping the recording in
progress.
If you try to tune away from the channel you are recording to a live TV channel or to a rented video, a
message appears asking whether you want to cancel the recording in progress on the current channel.
Choose one of the following:
•
Stop recording and change channel. The receiver stops the recording and tunes to the other
channel.
•
Keep recording and don’t change channel. The receiver continues recording and stays on the
current channel.
Preliminary & Tentative
Statements, conclusions, observations and characterizations contained herein are reflected herein for purposes of a self-
critical analysis of certain AT&T operations and practices. Unless expressly approved by an appropriate governing body
of AT&T Communications or its affiliates, the contents of this document do not necessarily reflect the positions or opinions
of AT&T Communications or its management, and, therefore, should be considered preliminary and tentative.
© 2005-2006 AT&T Knowledge Ventures. All rights reserved.

27
Stopping a Recorded Program
When a recording finishes playing, it stops and displays the Finished screen.
You can also stop the recording before it finishes by pressing the STOP button on your remote
control.
To dismiss a recording after it finishes playing
• Use the arrow buttons on your remote control to select Done in the Finished screen, and then press
the
OK button.
This displays the
Recorded TV screen, which lists your recordings.
You can also choose:
• Start over to start watching the program again from the beginning.
• Erase to stop watching the program and to erase it permanently.
To stop watching a recorded program before it finishes
1) Press the STOP button on your remote control.
The
Stopped screen appears.
2) Use the arrow buttons on your remote control to select Done, and then press the OK button.
This displays the
Recorded TV screen, which lists your recordings.
You can also choose:
•
Resume to continue watching the recorded program where you left off.
• Start over to start watching the program again from the beginning.
•
Erase to stop watching the program and to erase it permanently.
Preliminary & Tentative
Statements, conclusions, observations and characterizations contained herein are reflected herein for purposes of a self-
critical analysis of certain AT&T operations and practices. Unless expressly approved by an appropriate governing body
of AT&T Communications or its affiliates, the contents of this document do not necessarily reflect the positions or opinions
of AT&T Communications or its management, and, therefore, should be considered preliminary and tentative.
© 2005-2006 AT&T Knowledge Ventures. All rights reserved.

28
Tuning To and From a Recording
All recordings play on a channel. You can tune to the channel and away from it just as you would any
channel.
To tune to or away from a channel containing a recording
• Press the CHANNEL/PAGE button on your remote control, or the select the desired channel in the
program guide.
If you tune away from a recording while it is playing, this pauses the recording.
If you tune back to a channel on which a recording was paused, the recording resumes playing
from where you left off.
Note You can also resume playing the recording by selecting it in the Recorded TV screen.
For more information, see Playing a Recorded Program .
If you tune to a recording channel on which no recording is playing (for example, because the last
recording playing on that channel was stopped) you see a display screen that instructs you to press
OK to view a list of current recordings.
Press the
OK button on your remote control to view the Recorded TV screen.
Preliminary & Tentative
Statements, conclusions, observations and characterizations contained herein are reflected herein for purposes of a self-
critical analysis of certain AT&T operations and practices. Unless expressly approved by an appropriate governing body
of AT&T Communications or its affiliates, the contents of this document do not necessarily reflect the positions or opinions
of AT&T Communications or its management, and, therefore, should be considered preliminary and tentative.
© 2005-2006 AT&T Knowledge Ventures. All rights reserved.

29
Erasing an Existing Recording
A program you record remains in your Recorded TV library until you erase it or until the receiver
erases old recordings to make space for new recordings. You can erase a recorded program manually
to make room for new recordings.
To erase a program manually
1) Press the RECORDED TV button on your remote control.
You can also press the
MENU button, press the RIGHT ARROW button to select Recorded TV,
select
Browse Recordings, and then press the OK button.
The
Recorded TV screen lists your available recordings by date from most recently recorded to
oldest recordings.
To see a list of the recordings alphabetically by title, use the
RIGHT ARROW button on your
remote control to select by title.
2) Select the recorded show you want to erase, and then press the
OK button.
The Program Info screen appears.
3) Select
Erase, and then press the OK button.
A confirmation message appears.
4) Select
Erase again, and then press the OK button.
This erases the program permanently. You cannot recall it.
You can also select
Don’t Erase to avoid erasing the program.
6/26/2006
Preliminary & Tentative
Statements, conclusions, observations and characterizations contained herein are reflected herein for purposes of a self-
critical analysis of certain AT&T operations and practices. Unless expressly approved by an appropriate governing body
of AT&T Communications or its affiliates, the contents of this document do not necessarily reflect the positions or opinions
of AT&T Communications or its management, and, therefore, should be considered preliminary and tentative.
© 2005-2006 AT&T Knowledge Ventures. All rights reserved.
