MySQL Connector/NET Developer Guide

Abstract
This manual describes how to install and configure MySQL Connector/NET, the connector that enables .NET
applications to communicate with MySQL servers, and how to use it to develop database applications.
For notes detailing the changes in each release of Connector/NET, see MySQL Connector/NET Release Notes.
For legal information, including licensing information, see the Preface and Legal Notices.
For help with using MySQL, please visit the MySQL Forums, where you can discuss your issues with other MySQL
users.
Document generated on: 2024-09-12 (revision: 79651)

Table of Contents
Preface and Legal Notices .................................................................................................................. v
1 Introduction to MySQL Connector/NET ............................................................................................. 1
2 Connector/NET Versions ................................................................................................................. 3
3 Connector/NET Installation .............................................................................................................. 7
3.1 Installing Connector/NET on Windows ................................................................................... 7
3.1.1 Installing Connector/NET Using the Standalone Installer .............................................. 7
3.1.2 Installing Connector/NET Using NuGet ....................................................................... 8
3.2 Installing Connector/NET on Unix with Mono ....................................................................... 10
3.3 Installing Connector/NET from Source ................................................................................. 10
4 Connector/NET Connections .......................................................................................................... 13
4.1 Creating a Connector/NET Connection String ...................................................................... 13
4.2 Managing a Connection Pool in Connector/NET ................................................................... 16
4.3 Handling Connection Errors ................................................................................................ 17
4.4 Connector/NET Authentication ............................................................................................. 18
4.5 Connector/NET Connection Options Reference .................................................................... 23
5 Connector/NET Programming ........................................................................................................ 41
5.1 Using GetSchema on a Connection ..................................................................................... 42
5.2 Using MySqlCommand ....................................................................................................... 44
5.3 Using Connector/NET with Table Caching ........................................................................... 47
5.4 Preparing Statements in Connector/NET .............................................................................. 47
5.5 Creating and Calling Stored Procedures .............................................................................. 48
5.6 Handling BLOB Data With Connector/NET ........................................................................... 52
5.6.1 Preparing the MySQL Server ................................................................................... 53
5.6.2 Writing a File to the Database .................................................................................. 53
5.6.3 Reading a BLOB from the Database to a File on Disk ............................................... 55
5.7 Working with Partial Trust / Medium Trust ............................................................................ 56
5.7.1 Evolution of Partial Trust Support Across Connector/NET Versions ............................. 57
5.7.2 Configuring Partial Trust with Connector/NET Library Installed in GAC ........................ 57
5.7.3 Configuring Partial Trust with Connector/NET Library Not Installed in GAC .................. 59
5.8 Writing a Custom Authentication Plugin ............................................................................... 60
5.9 Using the Connector/NET Interceptor Classes ..................................................................... 63
5.10 Handling Date and Time Information in Connector/NET ...................................................... 65
5.10.1 Fractional Seconds ................................................................................................ 65
5.10.2 Problems when Using Invalid Dates ........................................................................ 65
5.10.3 Restricting Invalid Dates ......................................................................................... 66
5.10.4 Handling Invalid Dates ........................................................................................... 66
5.10.5 Handling NULL Dates ............................................................................................ 66
5.11 Using the MySqlBulkLoader Class ..................................................................................... 67
5.12 Connector/NET Tracing ..................................................................................................... 68
5.12.1 Enabling OpenTelemetry Tracing ............................................................................ 68
5.12.2 Using the Connector/NET Trace Source Object ....................................................... 69
5.13 Using Connector/NET with Crystal Reports ........................................................................ 74
5.13.1 Creating a Data Source .......................................................................................... 74
5.13.2 Creating the Report ................................................................................................ 75
5.13.3 Displaying the Report ............................................................................................. 76
5.14 Asynchronous Methods ..................................................................................................... 79
5.15 Binary and Nonbinary Issues ............................................................................................. 85
5.16 Character Set Considerations for Connector/NET ............................................................... 86
6 Connector/NET Tutorials ................................................................................................................ 87
6.1 Tutorial: An Introduction to Connector/NET Programming ..................................................... 87
6.1.1 The MySqlConnection Object ................................................................................... 87
iii

MySQL Connector/NET Developer Guide
6.1.2 The MySqlCommand Object ..................................................................................... 88
6.1.3 Working with Decoupled Data .................................................................................. 91
6.1.4 Working with Parameters ......................................................................................... 94
6.1.5 Working with Stored Procedures ............................................................................... 95
6.2 ASP.NET Provider Model and Tutorials ............................................................................... 97
6.2.1 Tutorial: Connector/NET ASP.NET Membership and Role Provider ............................. 99
6.2.2 Tutorial: Connector/NET ASP.NET Profile Provider .................................................. 102
6.2.3 Tutorial: Web Parts Personalization Provider ........................................................... 105
6.2.4 Tutorial: Simple Membership Web Provider ............................................................. 109
6.3 Tutorial: Using an Entity Framework Entity as a Windows Forms Data Source ...................... 114
6.4 Tutorial: Data Binding in ASP.NET Using LINQ on Entities .................................................. 122
6.5 Tutorial: Generating MySQL DDL from an Entity Framework Model ..................................... 125
6.6 Tutorial: Basic CRUD Operations with Connector/NET ........................................................ 126
6.7 Tutorial: Configuring SSL with Connector/NET ................................................................... 129
6.7.1 Using PEM Certificates in Connector/NET ............................................................... 130
6.7.2 Using PFX Certificates in Connector/NET ................................................................ 131
6.8 Tutorial: Using MySqlScript ............................................................................................... 133
7 Connector/NET for Entity Framework ........................................................................................... 137
7.1 Entity Framework 6 Support .............................................................................................. 137
7.2 Entity Framework Core Support ......................................................................................... 143
7.2.1 Creating a Database with Code First in EF Core ..................................................... 145
7.2.2 Scaffolding an Existing Database in EF Core .......................................................... 148
7.2.3 Configuring Character Sets and Collations in EF Core ............................................. 151
8 Connector/NET API Reference ..................................................................................................... 153
8.1 MySql.Data.Common.DnsClient ......................................................................................... 153
8.2 MySql.Data.MySqlClient Namespace ................................................................................. 153
8.3 MySql.Data.MySqlClient.Authentication Namespace ........................................................... 156
8.4 MySql.Data.MySqlClient.Interceptors Namespace ............................................................... 157
8.5 MySql.Data.MySqlClient.Replication Namespace ................................................................ 157
8.6 MySql.Data.Types Namespace .......................................................................................... 157
8.7 MySql.Data.EntityFramework Namespace .......................................................................... 157
8.8 Microsoft.EntityFrameworkCore Namespace ....................................................................... 159
8.9 MySql.EntityFrameworkCore Namespace ........................................................................... 159
8.10 MySql.Web Namespace .................................................................................................. 161
9 Connector/NET Support ............................................................................................................... 165
9.1 Connector/NET Community Support .................................................................................. 165
9.2 How to Report Connector/NET Problems or Bugs .............................................................. 165
10 Connector/NET FAQ .................................................................................................................. 167
iv

Preface and Legal Notices
This is the developer guide for MySQL Connector/NET.
Licensing information. This product may include third-party software, used under license. MySQL
Connector/NET 9.0 Community License Information User Manual has information about licenses relating
to Connector/NET community releases in the 9.0 release series. MySQL Connector/NET 9.0 Commercial
License Information User Manual has information about licenses relating to Connector/NET commercial
releases in the 9.0 release series.
Legal Notices
Copyright © 2004, 2024, Oracle and/or its affiliates.
License Restrictions
This software and related documentation are provided under a license agreement containing restrictions
on use and disclosure and are protected by intellectual property laws. Except as expressly permitted
in your license agreement or allowed by law, you may not use, copy, reproduce, translate, broadcast,
modify, license, transmit, distribute, exhibit, perform, publish, or display any part, in any form, or by any
means. Reverse engineering, disassembly, or decompilation of this software, unless required by law for
interoperability, is prohibited.
Warranty Disclaimer
The information contained herein is subject to change without notice and is not warranted to be error-free.
If you find any errors, please report them to us in writing.
Restricted Rights Notice
If this is software, software documentation, data (as defined in the Federal Acquisition Regulation), or
related documentation that is delivered to the U.S. Government or anyone licensing it on behalf of the U.S.
Government, then the following notice is applicable:
U.S. GOVERNMENT END USERS: Oracle programs (including any operating system, integrated
software, any programs embedded, installed, or activated on delivered hardware, and modifications
of such programs) and Oracle computer documentation or other Oracle data delivered to or accessed
by U.S. Government end users are "commercial computer software," "commercial computer software
documentation," or "limited rights data" pursuant to the applicable Federal Acquisition Regulation and
agency-specific supplemental regulations. As such, the use, reproduction, duplication, release, display,
disclosure, modification, preparation of derivative works, and/or adaptation of i) Oracle programs (including
any operating system, integrated software, any programs embedded, installed, or activated on delivered
hardware, and modifications of such programs), ii) Oracle computer documentation and/or iii) other Oracle
data, is subject to the rights and limitations specified in the license contained in the applicable contract.
The terms governing the U.S. Government's use of Oracle cloud services are defined by the applicable
contract for such services. No other rights are granted to the U.S. Government.
Hazardous Applications Notice
This software or hardware is developed for general use in a variety of information management
applications. It is not developed or intended for use in any inherently dangerous applications, including
applications that may create a risk of personal injury. If you use this software or hardware in dangerous
applications, then you shall be responsible to take all appropriate fail-safe, backup, redundancy, and other
measures to ensure its safe use. Oracle Corporation and its affiliates disclaim any liability for any damages
caused by use of this software or hardware in dangerous applications.
v

Documentation Accessibility
Trademark Notice
Oracle, Java, MySQL, and NetSuite are registered trademarks of Oracle and/or its affiliates. Other names
may be trademarks of their respective owners.
Intel and Intel Inside are trademarks or registered trademarks of Intel Corporation. All SPARC trademarks
are used under license and are trademarks or registered trademarks of SPARC International, Inc. AMD,
Epyc, and the AMD logo are trademarks or registered trademarks of Advanced Micro Devices. UNIX is a
registered trademark of The Open Group.
Third-Party Content, Products, and Services Disclaimer
This software or hardware and documentation may provide access to or information about content,
products, and services from third parties. Oracle Corporation and its affiliates are not responsible for and
expressly disclaim all warranties of any kind with respect to third-party content, products, and services
unless otherwise set forth in an applicable agreement between you and Oracle. Oracle Corporation and its
affiliates will not be responsible for any loss, costs, or damages incurred due to your access to or use of
third-party content, products, or services, except as set forth in an applicable agreement between you and
Oracle.
Use of This Documentation
This documentation is NOT distributed under a GPL license. Use of this documentation is subject to the
following terms:
You may create a printed copy of this documentation solely for your own personal use. Conversion to other
formats is allowed as long as the actual content is not altered or edited in any way. You shall not publish
or distribute this documentation in any form or on any media, except if you distribute the documentation in
a manner similar to how Oracle disseminates it (that is, electronically for download on a Web site with the
software) or on a CD-ROM or similar medium, provided however that the documentation is disseminated
together with the software on the same medium. Any other use, such as any dissemination of printed
copies or use of this documentation, in whole or in part, in another publication, requires the prior written
consent from an authorized representative of Oracle. Oracle and/or its affiliates reserve any and all rights
to this documentation not expressly granted above.
Documentation Accessibility
For information about Oracle's commitment to accessibility, visit the Oracle Accessibility Program website
at
http://www.oracle.com/pls/topic/lookup?ctx=acc&id=docacc.
Access to Oracle Support for Accessibility
Oracle customers that have purchased support have access to electronic support through My Oracle
Support. For information, visit
http://www.oracle.com/pls/topic/lookup?ctx=acc&id=info or visit http://www.oracle.com/pls/topic/
lookup?ctx=acc&id=trs if you are hearing impaired.
vi

Chapter 1 Introduction to MySQL Connector/NET
MySQL Connector/NET enables you to develop .NET applications that require secure, high-performance
data connectivity with MySQL. It implements the required ADO.NET interfaces and integrates into
ADO.NET-aware tools. You can build applications using your choice of .NET languages. Connector/NET
is a fully managed ADO.NET data provider written in 100% pure C#. It does not use the MySQL C client
library.
Connector/NET source code and tests are available from the NuGet Gallery and GitHub. For notes
detailing the changes in each release of Connector/NET, see MySQL Connector/NET Release Notes.
Connector/NET includes full support for:
• Features provided by MySQL Server, up to and including the MySQL 9.0 release series.
• MySQL as a document store (NoSQL), along with X Protocol connection support to access MySQL data
using X Plugin ports.
• Large-packet support for sending and receiving rows and BLOB values up to 2 gigabytes in size.
• Protocol compression, which enables compressing the data stream between the client and server.
• Connections using TCP/IP sockets, named pipes, or shared memory on Windows.
• Connections using TCP/IP sockets or Unix sockets on Unix.
• Encrypted connections using:
• TLSv1.2 protocol over TCP/IP with Connector/NET 8.0.11 and later.
• TLSv1.3 protocol over TCP/IP with Connector/NET 8.0.20 and later.
• .NET Standard and runs on the Universal Windows Platform (UWP) .NET implementation.
• Entity Framework 6 and Entity Framework Core to migrate data to and from MySQL data tables.
• The Open Source Mono framework developed by Novell.
Connector/NET supports Microsoft Visual Studio 2013, 2015, 2017, and 2019, although the extent of
support may be limited depending on the versions of Connector/NET and Visual Studio you use. For
details, see Chapter 2, Connector/NET Versions.
Key Topics
• For connection string properties when using the MySqlConnection class, see Section 4.5, “Connector/
NET Connection Options Reference”.
1

2

Chapter 2 Connector/NET Versions
MySQL Connector/NET 9.0 is a continuation of Connector/NET 8.0, but now named to synchronize
with the (latest) MySQL server version it supports. This version combines the functionality of the
previous Connector/NET release series, including support for X Protocol connections. Connector/NET
customizes Entity Framework Core to operate with MySQL data, enables compression in the .NET driver
implementation, and extends cross-platform support to Linux and macOS.
Secure connections using the TLSv1.2 protocol require Connector/NET 8.0.11 or later. In addition, your
Microsoft Windows host must have the TLSv1.2 protocol enabled. Connections made using Windows
named pipes or shared memory do not support the TLSv1.2 protocol. For general guidance about
configuring the server and clients for secure connections, see Configuring MySQL to Use Encrypted
Connections.
Note
.NET 6, 7, 8, 9, and .NET Framework 4.6 (as of 8.4.0) and 4.8 include support for
the TLSv1.3 protocol. Be sure to confirm that the operating system running your
application also supports TLSv1.3 before using it exclusively for connections.
The following table shows the versions of ADO.NET, .NET (Core and Framework), and MySQL Server
that are supported or required by MySQL Connector/NET. For the specific Entity Framework versions that
Connector/NET targets, see Chapter 7, Connector/NET for Entity Framework.
Table 2.1 Connector/NET Requirements for Related Products
Connector/NET
Version
ADO.NET
Version
.NET Versions and Visual Studio MySQL
Server
9.1.0 2.x+ For apps that target .NET 9 preview, use VS 2022
(v17.9 or later)
For apps that target .NET 8, use VS 2022 (v17.8 or
later)
For apps that target .NET 6, use VS 2022 (v17.0 and
later) or VS 2022 for Mac (v17.6 or later)
For apps that target .NET Framework 4.8, use VS
2019 (v16.3 or later)
For apps that target .NET Framework 4.6.2, use VS
2017 (v15.9 or later)
MySQL 8.0 or
later
Archived Connector/NET versions and their requirements:
• C/NET 9.0.0: .NET 8, use VS 2022 (v17.8 or later) | .NET 6, use VS 2022 (v17.0 and later) or VS 2022
for Mac (v17.6 or later) | .NET Framework 4.8, use VS 2019 (v16.3 or later) | .NET Framework 4.6.2, use
VS 2017 (v15.9 or later)
Recommended server versions: MySQL 8.0 or later
• C/NET 8.4.0: .NET 8, use VS 2022 (v17.8 or later) | .NET 7, use VS 2022 (v17.4 or later) | .NET 6,
use VS 2022 (v17.0 and later) or VS 2022 for Mac (v17.6 or later) | .NET Framework 4.8, use VS 2019
(v16.3 or later) | .NET Framework 4.6.2, use VS 2017 (v15.9 or later)
Recommended server versions: MySQL 8.0 or later
3

• C/NET 8.3.0: .NET 8, use VS 2022 (v17.8 or later) | .NET 7, use VS 2022 (v17.4 or later) | .NET 6,
use VS 2022 (v17.0 and later) or VS 2022 for Mac (v17.6 or later) | .NET Framework 4.8, use VS 2019
(v16.3 or later) | .NET Framework 4.6.2, use VS 2017 (v15.9 or later)
Recommended server versions: MySQL 8.3, MySQL 8.0, or MySQL 5.7
• C/NET 8.2.0: .NET 8 preview, use VS 2022 (v17.6 or later) | .NET 7, use VS 2022 (v17.4 or later) | .NET
6, use VS 2022 (v17.0 and later) or VS 2022 for Mac (v17.6 or later) | .NET Framework 4.8, use VS 2019
(v16.3 or later) | .NET Framework 4.6.2, use VS 2017 (v15.9 or later)
Recommended server versions: MySQL 8.2, MySQL 8.0, or MySQL 5.7
• C/NET 8.1.0: .NET 7, use VS 2022 (v17.4 or later) | .NET 6, use VS 2022 (v17.0 and later) or VS 2022
for Mac (v17.6 or later) | .NET Framework 4.8, use VS 2019 (v16.3 or later) | .NET Framework 4.6.2, use
VS 2017 (v15.9 or later)
Recommended server versions: MySQL 8.1, MySQL 8.0, or MySQL 5.7
• C/NET 8.0.33: .NET 7, use VS 2022 (v17.4 or later) | .NET 6, use VS 2022 (v17.0) or VS 2022 for Mac
(v17.0 preview) | .NET Core 3.1, use VS 2019 (v16.4 or later) | .NET Framework 4.8, use VS 2019
(v16.3 or later) | .NET Framework 4.6.2, use VS 2017 (v15.9 or later)
Recommended minimum server version: MySQL 8.0.33 or MySQL 5.7.42
• C/NET 8.0.28+: .NET 6, use VS 2022 (v17.0 or later) or VS 2019 for Mac (v8.10) | .NET 5, use VS 2019
(v16.8) or VS 2019 for Mac (v8.8) | .NET Core 3.1, use VS 2019 (v16.4 or later) | .NET Framework 4.8,
use VS 2019 (v16.3 or later) | .NET Framework 4.6.2, use VS 2017 (v15.9 or later)
Recommended minimum server version: MySQL 8.0.28 or MySQL 5.7.37
• C/NET 8.0.23+: .NET 5, use VS 2019 (v16.8) or VS 2019 for Mac (v8.8) | .NET Core 3.1, use VS 2019
(v16.4 or later) | .NET Framework 4.8, use VS 2019 (v16.3 or later)
Recommended minimum server version: MySQL 8.0.23 or MySQL 5.7.33
• C/NET 8.0.22+: .NET 5, use VS 2019 (v16.7) or VS 2019 for Mac (v8.7) | .NET Core 3.1, use VS 2019
(v16.4 or later) | .NET Framework 4.8, use VS 2019 (v16.3 or later)
Recommended minimum server version: MySQL 8.0.22 or MySQL 5.7.32
• C/NET 8.0.20+: .NET Core 3.1, use VS 2019 (v16.4 or later) | .NET Framework 4.8, use VS 2019 (v16.3
or later)
Recommended minimum server version: MySQL 8.0.20 or MySQL 5.7.30
• C/NET 8.0.19+: .NET Core 3.0, use VS 2019 (v16.3 or later) | .NET Framework 4.8, use VS 2019 (v16.3
or later)
Recommended minimum server version: MySQL 8.0.19 or MySQL 5.7.29
• C/NET 8.0.18+: .NET Core 3.0, use VS 2019 (v16.3 or later)
Recommended minimum server version: MySQL 8.0.18 or MySQL 5.7.28
• C/NET 8.0.17+: .NET Core 2.2, use VS 2017 (v15.0.9 or later) | .NET Core 2.1, use VS 2017 (v15.0.7 or
later)
Recommended minimum server version: MySQL 8.0.17 or MySQL 5.7.27
4

• C/NET 8.0.10+: .NET Core 2.0, use VS 2017 (v15.0.3 or later)
Recommended minimum server version: MySQL 8.0.17 or MySQL 5.7.27
• C/NET 8.0.8+: .NET Framework 4.5.x, use VS 2013 / 2015 / 2017
Recommended minimum server version: MySQL 8.0.17 or MySQL 5.7.27
5

6

Chapter 3 Connector/NET Installation
Table of Contents
3.1 Installing Connector/NET on Windows ........................................................................................... 7
3.1.1 Installing Connector/NET Using the Standalone Installer ...................................................... 7
3.1.2 Installing Connector/NET Using NuGet ............................................................................... 8
3.2 Installing Connector/NET on Unix with Mono ............................................................................... 10
3.3 Installing Connector/NET from Source ......................................................................................... 10
MySQL Connector/NET runs on any platform that supports the .NET Standard (.NET Framework, .NET
Core, and Mono). The .NET Framework is primarily supported on recent versions of Microsoft Windows
and Microsoft Windows Server.
Cross-platform options:
• .NET Core provides support on Windows, macOS, and Linux.
• Open Source Mono platform provides support on Linux.
Connector/NET is available for download as a standalone MSI Installer or from the NuGet gallery. The
source code is available for download from MySQL Download MySQL Connector/NET or at GitHub from
the MySQL Connector/NET repository.
Note
Starting with Connector/NET 8.0.33, application developers must ensure the
availability of following libraries at run time. Previously, the libraries were bundled
with Connector/NET installations.
For applications using OCI Authentication and SSL Certificates validation:
• Portable.BouncyCastle (see https://www.nuget.org/packages/
Portable.BouncyCastle)
For applications using X DevAPI:
• K4os.Compression.LZ4.Streams (see https://www.nuget.org/packages/
K4os.Compression.LZ4.Streams)
• Google.Protobuf (see https://www.nuget.org/packages/Google.Protobuf)
3.1 Installing Connector/NET on Windows
On Microsoft Windows, you can install either through a binary installation process using a Connector/NET
MSI, using NuGet, or by downloading and using the source code.
Before installing, ensure that your system is up to date, including installing the latest version of the .NET
Framework or .NET Core. For additional information, see Chapter 2, Connector/NET Versions.
3.1.1 Installing Connector/NET Using the Standalone Installer
You can install MySQL Connector/NET through a Windows Installer (.msi) installation package, which
can install Connector/NET on supported Windows operating systems. The MSI package is a file named
mysql-connector-net-version.msi, where version indicates the Connector/NET version.
7

Installing Connector/NET Using NuGet
To install Connector/NET:
1. Double-click the MSI installer file, and click Next to start the installation.
2. Choose the type of installation to perform (Typical, Custom, or Complete) and then click Next.
• The typical installation is suitable in most cases. Click Typical and proceed to Step 5.
• A Complete installation installs all the available files. To conduct a Complete installation, click the
Complete button and proceed to step 5.
• To customize your installation, including choosing the components to install and some installation
options, click the Custom button and proceed to Step 3.
The Connector/NET installer will register the connector within the Global Assembly Cache (GAC) - this
will make the Connector/NET component available to all applications, not just those where you explicitly
reference the Connector/NET component. The installer will also create the necessary links in the Start
menu to the documentation and release notes.
3. If you have chosen a custom installation, you can select the individual components to install, including
the core interface component, supporting documentation options, examples, and the source code. Click
Disk Usage to determine the disk-space requirements of your component choices.
Select the items and their installation level and then click Next to continue the installation.
4. You will be given a final opportunity to confirm the installation. Click Install to copy and install the files
onto your computer. Use Back to return to the modify your component options.
5. When prompted, click Finish to exit the MSI installer.
Unless you choose a different folder, Connector/NET is installed in C:\Program Files (x86)\MySQL
\MySQL Connector Net version (the version installed). New installations do not overwrite existing
versions of Connector/NET.
You may also use the /quiet or /q command-line option with the msiexec tool to install the Connector/
NET package automatically (using the default options) with no notification to the user. Using this method
the user cannot select options. Additionally, no prompts, messages or dialog boxes will be displayed.
C:\> msiexec /package connector-net.msi /quiet
To provide a progress bar to the user during automatic installation, use the /passive option.
3.1.2 Installing Connector/NET Using NuGet
MySQL Connector/NET functionality is available as packages from NuGet, an open-source package
manager for the Microsoft development platform (including .NET Core). The NuGet Gallery is the central
software package repository populated with the most recent NuGet packages for Connector/NET.
You can install or upgrade one or more individual Connector/NET packages with NuGet, making it a
convenient way to introduce existing technology, such as Entity Framework, to your project. NuGet
manages dependencies across the related packages and all of the prerequisites are listed in the NuGet
Gallery. For a description of each Connector/NET package, see Connector/NET Packages (NuGet).
Important
For projects that require Connector/NET assemblies to be stored in the GAC or
integration with Entity Framework Designer (Visual Studio), use the standalone MSI
to install Connector/NET, rather than installing the NuGet packages.
8

Installing Connector/NET Using NuGet
Consuming Connector/NET Packages with NuGet
The NuGet Gallery (https://www.nuget.org/) provides several client tools that can help you install or
upgrade Connector/NET packages. If you are not familiar with the tool options or processes, see Package
consumption workflow to get started. After locating a package description in NuGet, confirm the following
information:
• The identity and version number of the package are correct. Use the Version History list to select the
current version.
• All of the prerequisites are installed. See the Dependencies list for details.
• The license terms are met. See the License Info link to view this information.
Connector/NET Packages (NuGet)
Connector/NET provides the following five NuGet packages:
MySql.Data This package contains the core functionality of Connector/NET,
including using MySQL as a document store (with Connector/NET 8.0
only). It implements the required ADO.NET interfaces and integrates
with ADO.NET-aware tools. In addition, the packages provides access
to multiple versions of MySQL server and encapsulates database-
specific protocols.
MySql.Web The MySql.Web package includes support for the ASP.NET 2.0
provider model (see Section 6.2, “ASP.NET Provider Model and
Tutorials”). This model enables you to focus on the business logic of
your application, rather than having to recreate boilerplate items such as
membership and roles support. The package supports the membership,
role, profile, and session-state providers.
Package dependency: MySql.Data.
MySql.Data.EntityFrameworkThis package provides object-relational mapper (ORM) capabilities,
which enables you to work with MySQL databases using domain-
specific objects, thereby eliminating the need for most of the data
access code. Select this package for your Entity Framework 6
applications (see Section 7.1, “Entity Framework 6 Support”).
Package dependency: MySql.Data.
MySql.Data.EntityFrameworkCoreThis package is similar to the MySql.Data.EntityFramework
package; however, it provides multi-platform support for Entity
Framework tasks. Select this package for your Entity Framework Core
applications (see Section 7.2, “Entity Framework Core Support”).
MySql.Data.EntityFrameworkCore.DesignThe MySql.Data.EntityFrameworkCore.Design package
includes shared design-time components for Entity Framework Core
tools, which enable you to scaffold and migrate MySQL databases.
Note
Beginning with Connector/NET 8.0.20,
the functionality provided in this
package has been relocated to the
MySql.Data.EntityFrameworkCore
9

Installing Connector/NET on Unix with Mono
package. The original
MySql.Data.EntityFrameworkCore.Design
package is deprecated.
3.2 Installing Connector/NET on Unix with Mono
There is no installer available for installing the MySQL Connector/NET component on your Unix
installation. Before installing, ensure that you have a working Mono project installation. To test whether
your system has Mono installed, enter:
$> mono --version
The version of the Mono JIT compiler is displayed.
To compile C# source code, make sure a Mono C# compiler is installed.
Note
There are three Mono C# compilers available: mcs, which accesses the 1.0-profile
libraries, gmcs, which accesses the 2.0-profile libraries, and dmcs, which accesses
the 4.0-profile libraries.
To install Connector/NET on Unix/Mono:
1. Download the mysql-connector-net-version-noinstall.zip and extract the contents to a
directory of your choice, for example: ~/connector-net/.
2. In the directory where you unzipped the connector to, change into the bin subdirectory. Ensure the file
MySql.Data.dll is present. This filename is case-sensitive.
3. You must register the Connector/NET component, MySql.Data, in the Global Assembly Cache (GAC).
In the current directory enter the gacutil command:
#> gacutil /i MySql.Data.dll
This will register MySql.Data into the GAC. You can check this by listing the contents of /usr/lib/
mono/gac, where you will find MySql.Data if the registration has been successful.
You are now ready to compile your application. You must ensure that when you compile your application
you include the Connector/NET component using the -r: command-line option. For example:
$> gmcs -r:System.dll -r:System.Data.dll -r:MySql.Data.dll HelloWorld.cs
The referenced assemblies depend on the requirements of the application, but applications using
Connector/NET must provide -r:MySql.Data at a minimum.
You can further check your installation by running the compiled program, for example:
$> mono HelloWorld.exe
3.3 Installing Connector/NET from Source
Building MySQL Connector/NET from the source code enables you to customize build parameters and
target platforms such as Linux and macOS. The procedures in this section describe how to build source
with Microsoft Visual Studio (Windows or macOS) and .NET Core CLI (Windows, macOS, or Linux).
MySQL Connector/NET source code is available for download from https://dev.mysql.com/downloads/
connector/net/. Select Source Code from the Select Operating System list. Use the Archive tab to
download a previous version of Connector/NET source code.
10

Building Source Code with Visual Studio
Source code is packaged as a ZIP archive file with a name similar to mysql-connector-net-8.0.19-
src.zip. Unzip the file to local directory.
The file includes the following directories with source files:
• EFCore: Source and test files for Entity Framework Core features.
• EntityFramework: Source and test files for Entity Framework 6 features.
• MySQL.Data: Source and test files for features using the MySQL library.
• MySQL.Web: Source and test files for the web providers, including the membership, role, profile
providers that are used in ASP.NET or ASP.NET Core websites.
Building Source Code with Visual Studio
The following procedure can be used to build the connector on Microsoft Windows or macOS. Connector/
NET supports various versions of Microsoft Visual Studio and .NET libraries. For guidance about the
Connector/NET version you intend to build, see Chapter 2, Connector/NET Versions before you begin.
1. Navigate to the root of the source code directory and then to the directory with the source files to build,
such as MySql.Data. Each source directory contains a Microsoft Visual Studio solution file with the
.sln (for example, MySqlData.sln).
2. Double-click the solutions file to start Visual Studio and open the solution.
Visual Studio opens the solution files in the Solution Explorer. All of the projects related to the solution
also appear in the navigation tree. These related projects can include test files and the projects that
your solutions requires.
3. Locate the project with the same name as the solution (MySql.Data in this example). Right-click the
node and select Build from the context menu to build the solution.
Building Source Code with .NET Core CLI
The following procedure can be used to build the connector on Microsoft Windows, Linux, or macOS.
A current version of the .NET Core SDK must be installed locally to execute dotnet commands. For
additional usage information, visit https://docs.microsoft.com/en-us/dotnet/core/tools/.
1. Open a terminal such as PowerShell, Command Prompt, or bash.
Navigate to the root of the source code directory and then to the directory with the source files to build,
such as MySQL.Data.
2. Clean the output of the previous build.
dotnet clean
3. Type the following command to build the solution file (MySql.Data.sln in this example) using the
default command arguments:
dotnet build
Solution and project default. When no directory and file name is provided on the command line,
the default value depends on the current directory. If the command is executed from the top directory,
such as MySQL.Data, the solution file is selected (new with the .NET Core 3.0 SDK). Otherwise, if
executed from the src subdirectory, the project file is used.
11

Building Source Code with .NET Core CLI
Configuration default, -c | --configuration. Defaults to the Debug build configuration.
Alternatively, -c Release is the other supported build configuration argument value.
Framework default, -f | --framework. When no framework is specified on the command line, the
solution or project is built for all possible frameworks that apply. To determine which frameworks are
supported, use a text editor to open the related project file (for example, MySql.Data.csproj in the
src subdirectory) and search for the <TargetFrameworks> element.
To build source code on Linux and macOS, you must target .NET Standard (-f netstandard2.0 or
-f netstandard2.1). To build source code on Microsoft Windows, you can target .NET Standard
and .NET Framework (-f net452 or -f net48).
12

Chapter 4 Connector/NET Connections
Table of Contents
4.1 Creating a Connector/NET Connection String .............................................................................. 13
4.2 Managing a Connection Pool in Connector/NET ........................................................................... 16
4.3 Handling Connection Errors ........................................................................................................ 17
4.4 Connector/NET Authentication ..................................................................................................... 18
4.5 Connector/NET Connection Options Reference ............................................................................ 23
All interaction between a .NET application and the MySQL server is routed through a MySqlConnection
object when using the classic MySQL protocol. Before your application can interact with the server, it must
instantiate, configure, and open a MySqlConnection object.
Even when using the MySqlHelper class, a MySqlConnection object is created by the helper class.
Likewise, when using the MySqlConnectionStringBuilder class to expose the connection options as
properties, your application must open a MySqlConnection object.
This sections in this chapter describe how to connect to MySQL using the MySqlConnection object.
4.1 Creating a Connector/NET Connection String
The MySqlConnection object is configured using a connection string. A connection string contains
several key-value pairs, separated by semicolons. In each key-value pair, the option name and its
corresponding value are joined by an equal sign. For the list of option names to use in the connection
string, see Section 4.5, “Connector/NET Connection Options Reference”.
The following is a sample connection string:
"server=127.0.0.1;uid=root;pwd=12345;database=test"
In this example, the MySqlConnection object is configured to connect to a MySQL server at
127.0.0.1, with a user name of root and a password of 12345. The default database for all statements
will be the test database.
Connector/NET supports several connection models:
• Opening a Connection to a Single Server
• Opening a Connection for Multiple Hosts with Failover
• Opening a Connection Using a Single DNS Domain
Opening a Connection to a Single Server
After you have created a connection string it can be used to open a connection to the MySQL server.
The following code is used to create a MySqlConnection object, assign the connection string, and open
the connection.
MySQL Connector/NET can also connect using the native Windows authentication plugin. See Section 4.4,
“Connector/NET Authentication” for details.
13

Opening a Connection to a Single Server
You can further extend the authentication mechanism by writing your own authentication plugin. See
Section 5.8, “Writing a Custom Authentication Plugin” for details.
C# Example
MySql.Data.MySqlClient.MySqlConnection conn;
string myConnectionString;
myConnectionString = "server=127.0.0.1;uid=root;" +
"pwd=12345;database=test";
try
{
conn = new MySql.Data.MySqlClient.MySqlConnection();
conn.ConnectionString = myConnectionString;
conn.Open();
}
catch (MySql.Data.MySqlClient.MySqlException ex)
{
MessageBox.Show(ex.Message);
}
Visual Basic Example
Dim conn As New MySql.Data.MySqlClient.MySqlConnection
Dim myConnectionString as String
myConnectionString = "server=127.0.0.1;" _
& "uid=root;" _
& "pwd=12345;" _
& "database=test"
Try
conn.ConnectionString = myConnectionString
conn.Open()
Catch ex As MySql.Data.MySqlClient.MySqlException
MessageBox.Show(ex.Message)
End Try
You can also pass the connection string to the constructor of the MySqlConnection class:
C# Example
MySql.Data.MySqlClient.MySqlConnection conn;
string myConnectionString;
myConnectionString = "server=127.0.0.1;uid=root;" +
"pwd=12345;database=test";
try
{
conn = new MySql.Data.MySqlClient.MySqlConnection(myConnectionString);
conn.Open();
}
catch (MySql.Data.MySqlClient.MySqlException ex)
{
MessageBox.Show(ex.Message);
}
Visual Basic Example
Dim myConnectionString as String
myConnectionString = "server=127.0.0.1;" _
& "uid=root;" _
14

Opening a Connection for Multiple Hosts with Failover
& "pwd=12345;" _
& "database=test"
Try
Dim conn As New MySql.Data.MySqlClient.MySqlConnection(myConnectionString)
conn.Open()
Catch ex As MySql.Data.MySqlClient.MySqlException
MessageBox.Show(ex.Message)
End Try
After the connection is open, it can be used by the other Connector/NET classes to communicate with the
MySQL server.
Opening a Connection for Multiple Hosts with Failover
Data used by applications can be stored on multiple MySQL servers to provide high availability. Connector/
NET provides a simple way to specify multiple hosts in a connection string for cases in which multiple
MySQL servers are configured for replication and you are not concerned about the precise server your
application connects to in the set. For an example of how to configure multiple hosts with replication, see
Using Replication & Load balancing.
Starting in Connector/NET 8.0.19, both classic MySQL protocol and X Protocol connections permit the use
of multiple host names and multiple endpoints (a host:port pair) in a connection string or URI scheme.
For example:
// classic protocol example
"server=10.10.10.10:3306,192.101.10.2:3305,localhost:3306;uid=test;password=xxxx"
// X Protocol example
mysqlx://test:test@[192.1.10.10:3305,127.0.0.1:3306]
An updated failover approach selects the target for connection first by priority order, if provided, or random
order when no priority is specified. If the attempted connection to a selected target is unsuccessful,
Connector/NET selects a new target from the list until no more hosts are available. If enabled, Connector/
NET uses connection pooling to manage unsuccessful connections (see Section 4.2, “Managing a
Connection Pool in Connector/NET”).
Opening a Connection Using a Single DNS Domain
When multiple MySQL instances provide the same service in your installation, you can apply DNS Service
(SRV) records to provide failover, load balancing, and replication services. DNS SRV records remove the
need for clients to identify each possible host in the connection string, or for connections to be handled by
an additional software component. They can also be updated centrally by administrators when servers are
added or removed from the configuration or when their host names are changed. DNS SRV records can be
used in combination with connection pooling, in which case connections to hosts that are no longer in the
current list of SRV records are removed from the pool when they become idle. For information about DNS
SRV support in MySQL, see Connecting to the Server Using DNS SRV Records.
A service record is a specification of data managed by your domain name system that defines the
location (host name and port number) of servers for the specified services. The record format defines
the priority, weight, port, and target for the service as defined in the RFC 2782 specification (see
https://tools.ietf.org/html/rfc2782). In the following SRV record example with four server targets (for
_mysql._tcp.foo.abc.com.), Connector/NET uses the server selection order of foo2, foo1, foo3,
and foo4.
Name TTL Class Priority Weight Port Target
_mysql._tcp.foo.abc.com. 86400 IN SRV 0 5 3306 foo1.abc.com
_mysql._tcp.foo.abc.com. 86400 IN SRV 0 10 3306 foo2.abc.com
_mysql._tcp.foo.abc.com. 86400 IN SRV 10 5 3306 foo3.abc.com
15

Managing a Connection Pool in Connector/NET
_mysql._tcp.foo.abc.com. 86400 IN SRV 20 5 3306 foo4.abc.com
To open a connection using DNS SRV records, add the dns-srv connection option to your connection
string. For example:
C# Example
var conn = new MySqlConnection("server=_mysql._tcp.foo.abc.com.;dns-srv=true;" +
"user id=user;password=****;database=test");
For additional usage examples and restrictions for both classic MySQL protocol and X Protocol, see
Options for Both Classic MySQL Protocol and X Protocol.
4.2 Managing a Connection Pool in Connector/NET
The MySQL Connector/NET supports connection pooling for better performance and scalability with
database-intensive applications. This is enabled by default. You can turn it off or adjust its performance
characteristics using the connection string options Pooling, Connection Reset, Connection
Lifetime, Cache Server Properties, Max Pool Size and Min Pool Size. See Section 4.1,
“Creating a Connector/NET Connection String” for further information.
Connection pooling works by keeping the native connection to the server live when the client disposes of
a MySqlConnection. Subsequently, if a new MySqlConnection object is opened, it is created from the
connection pool, rather than creating a new native connection. This improves performance.
Guidelines
To work as designed, it is best to let the connection pooling system manage all connections. Do not create
a globally accessible instance of MySqlConnection and then manually open and close it. This interferes
with the way the pooling works and can lead to unpredictable results or even exceptions.
One approach that simplifies things is to avoid creating a MySqlConnection object manually. Instead,
use the overloaded methods that take a connection string as an argument. With this approach, Connector/
NET automatically creates, opens, closes and destructs connections, using the connection pooling system
for best performance.
Typed Datasets and the MembershipProvider and RoleProvider classes use this approach. Most
classes that have methods that take a MySqlConnection as an argument, also have methods that take a
connection string as an argument. This includes MySqlDataAdapter.
Instead of creating MySqlCommand objects manually, you can use the static methods of the
MySqlHelper class. These methods take a connection string as an argument and they fully support
connection pooling.
Resource Usage
Connector/NET runs a background job every three minutes and removes connections from pool that have
been idle (unused) for more than three minutes. The pool cleanup frees resources on both client and
server side. This is because on the client side every connection uses a socket, and on the server side
every connection uses a socket and a thread.
Multiple endpoints. Starting with Connector/NET 8.0.19, a connection string can include multiple
endpoints (server:port) with connection pooling enabled. At runtime, Connector/NET selects one of
the addresses from the pool randomly (or by priority when provided) and attempts to connect to it. If the
connection attempt is unsuccessful, Connector/NET selects another address until the set of addresses is
exhausted. Unsuccessful endpoints are retried every two minutes. Successful connections are managed
by the connection pooling mechanism.
16

Handling Connection Errors
4.3 Handling Connection Errors
Because connecting to an external server is unpredictable, it is important to add error handling to
your .NET application. When there is an error connecting, the MySqlConnection class will return a
MySqlException object. This object has two properties that are of interest when handling errors:
• Message: A message that describes the current exception.
• Number: The MySQL error number.
When handling errors, you can adapt the response of your application based on the error number. The two
most common error numbers when connecting are as follows:
• 0: Cannot connect to server.
• 1045: Invalid user name, user password, or both.
The following code example shows how to manage the response of an application based on the actual
error:
C# Example
MySql.Data.MySqlClient.MySqlConnection conn;
string myConnectionString;
myConnectionString = "server=127.0.0.1;uid=root;" +
"pwd=12345;database=test";
try
{
conn = new MySql.Data.MySqlClient.MySqlConnection(myConnectionString);
conn.Open();
}
catch (MySql.Data.MySqlClient.MySqlException ex)
{
switch (ex.Number)
{
case 0:
MessageBox.Show("Cannot connect to server. Contact administrator");
break;
case 1045:
MessageBox.Show("Invalid username/password, please try again");
break;
}
}
Visual Basic Example
Dim myConnectionString as String
myConnectionString = "server=127.0.0.1;" _
& "uid=root;" _
& "pwd=12345;" _
& "database=test"
Try
Dim conn As New MySql.Data.MySqlClient.MySqlConnection(myConnectionString)
conn.Open()
Catch ex As MySql.Data.MySqlClient.MySqlException
Select Case ex.Number
Case 0
MessageBox.Show("Cannot connect to server. Contact administrator")
Case 1045
MessageBox.Show("Invalid username/password, please try again")
17

Connector/NET Authentication
End Select
End Try
Important
If you are using multilanguage databases then you must specify the character set
in the connection string. If you do not specify the character set, the connection
defaults to the latin1 character set. You can specify the character set as part of
the connection string, for example:
MySqlConnection myConnection = new MySqlConnection("server=127.0.0.1;uid=root;" +
"pwd=12345;database=test;Charset=latin1");
4.4 Connector/NET Authentication
MySQL Connector/NET implements a variety of authentication plugins that MySQL Server can invoke to
authenticate a user. Pluggable authentication enables the server to determine which plugin applies, based
on the user name and host name that your application passes to the server when making a connection. For
a complete description of the authentication process, see Pluggable Authentication.
Connector/NET provides the following authentication plugins and methods:
• authentication_kerberos_client
• authentication_ldap_sasl_client
• authentication_oci_client
• authentication_webauthn_client
• authentication_windows_client
• caching_sha2_password
• mysql_clear_password
• mysql_native_password
• sha256_password
authentication_kerberos_client
For general information, see Kerberos Pluggable Authentication.
Applications and MySQL servers are able use the Kerberos authentication protocol to authenticate MySQL
Enterprise Edition user accounts and services. With the authentication_kerberos_client plugin,
both the user and the server are able to verify each other's identity. No passwords are ever sent over the
network and Kerberos protocol messages are protected against eavesdropping and replay attacks. The
server-side plugin is supported only on Linux.
Note
The Defaultauthenticationplugin connection-string option is mandatory for
supporting userless and passwordless Kerberos authentications (see Options for
Classic MySQL Protocol Only).
The availability of and the requirements for enabling Kerberos authentication differ by host type.
Connector/NET does not provide Kerberos authentication for .NET applications running on macOS.
On Windows, the Kerberos mode can be set using the KerberosAuthMode connection option (see
Section 4.5, “Connector/NET Connection Options Reference”).
18

authentication_ldap_sasl_client
Applications running on Linux and Windows participate in Kerberos authentication based on the following
interfaces:
• Generic Security Service Application Program Interface (GSSAPI)
Minimum version:
• Connector/NET 8.0.26 for classic MySQL protocol connections. Supported on Linux only.
• Connector/NET 8.0.32 for classic MySQL protocol connections through the MIT Kerberos library.
Supported on Windows only.
MIT Kerberos must be installed on each client system to enable authentication of request tickets for
Connector/NET by a MySQL server. The libgssapi_krb5.so.2 library for Linux is required. On
Windows, use the KRB5_CONFIG and KRB5CCNAME environment variables to specify configuration and
cache locations when using GSSAPI through the MIT Kerberos library.
For an overview of the connection process, see Connection Commands for Linux Clients.
• Security Support Provider Interface (SSPI) for Windows
Minimum version: Connector/NET 8.0.27 for classic MySQL protocol connections. Supported on
Windows only.
Connector/NET uses SSPI/Kerberos for authentication. On Windows, SSPI implements GSSAPI. The
behavioral differences between SSPI and GSSAPI include:
• Configuration. Windows clients do not use any external libraries or Kerberos configuration. For
example, with GSSAPI you can set the ticket-granting ticket (TGT) expiry time, key distribution center
(KDC) port, and so on. With SSPI, you cannot set any of these options.
• TGT tickets caching. If you provide a user name and password for authentication in SSPI mode,
those credentials can be obtained from the Windows in-memory cache, but the obtained tickets are
not stored in the Kerberos cache. New tickets are obtained every time.
• Userless and passwordless authentication. In SSPI mode, Windows logged-in user name and
credentials are used. Windows client must be part of the Active Directory domain of the server for a
successful login.
For an overview of the connection process, see Connection Commands for Windows Clients in SPPI
Mode.
authentication_ldap_sasl_client
For general information, see LDAP Pluggable Authentication.
SASL-based LDAP authentication requires MySQL Enterprise Edition and can be used to establish classic
MySQL protocol connections only. This authentication protocol applies to applications running on Linux,
Windows (partial support), but not macOS.
Minimum version:
• Connector/NET 8.0.22 (SCRAM-SHA-1) on Linux and Windows.
• Connector/NET 8.0.23 (SCRAM-SHA-256) on Linux and Windows.
• Connector/NET 8.0.24 (GSSAPI) on Linux only.
19

authentication_oci_client
MIT Kerberos must be installed on each client system to enable authentication of request tickets for
Connector/NET by a MySQL server. The authentication_ldap_sasl plugin must be configured to
use the GSSAPI mechanism and the application user must be identified as follows:
IDENTIFIED WITH 'authentication_ldap_sasl'
The libgssapi_krb5.so.2 library for Linux is required.
authentication_oci_client
Minimum version: Connector/NET 8.0.27 for classic MySQL protocol connections only.
Connector/NET supports Oracle Cloud Infrastructure pluggable authentication, which enables .NET
applications to access HeatWave Service in a secure way without using passwords. This pluggable
authentication is not supported for .NET Framework 4.5.x implementations.
Prerequisites for this type of connection include access to a tenancy, a Compute instance, a DB System
attached to a private network, and properly configured groups, compartments, and policies. An Oracle
Cloud Infrastructure administrator can provide the basic setup for MySQL user accounts.
In addition, the DB System must have the server-side authentication plugin installed and loaded before a
connection can be attempted. Connector/NET implements the client-side authentication plugin.
During authentication, the client-side plugin locates the client user’s Oracle Cloud Infrastructure
configuration file from which it obtains a signing key file. The location of the configuration file can
be specified with the ociConfigFile connection option; otherwise, the default location is used. In
Connector/NET 8.0.33, the OciConfigProfile connection option permits selecting a profile in the
configuration file to use for authentication. Connector/NET then signs a token it receives from the server,
uses the token to create the SHA256 RSA signature that it returns to the server, and waits for the success
or failure of the authentication process.
To support Oracle Cloud Infrastructure ephemeral key-based authentication, Connector/NET 8.0.33 (and
later) obtains the location of the token file from the security_token_file entry. For example:
[DEFAULT]
fingerprint=59:8a:0b[...]
key_file=~/.oci/sessions/DEFAULT/oci_api_key.pem
tenancy=ocid1.tenancy.oc1.[...]
region=us-ashburn-1
security_token_file=~/.oci/sessions/DEFAULT/token
Connector/NET sends to the server a JSON attribute (named "token") with the value extracted from the
security_token_file field. If the target file referenced in the profile does not exist, or if the file exceeds
a specified maximum value, then Connector/NET terminates the action and returns an exception with the
cause.
Connector/NET sends an empty token value in the JSON payload if:
• The security-token file is empty.
• The configuration option security_token_file is found but the value in the configuration file is
empty.
In all other cases, Connector/NET adds the content of the security-token file intact to the JSON document.
Potential error conditions include:
• Private key could not be found at location given by OCI configuration entry
'key_file'.
20

authentication_webauthn_client
Connector/NET could not find the private key at the specified location.
• OCI configuration entry 'key_file' does not reference a valid key file.
Connector/NET was unable to load or use the specified private key.
• OCI configuration file does not contain a 'fingerprint' or 'key_file' entry.
The configuration file is missing the fingerprint entry, the key_file entry, or both.
• OCI configuration file could not be read
Connector/NET could not find or load the configuration file. Be sure the ociConfigFile value matches
the location of the file.
• The OCI SDK cannot be found or is not installed
Connector/NET could not load the Oracle Cloud Infrastructure SDK library at run time.
Connector/NET references the OCI.DotNetSDK.Common NuGet package in the Oracle Cloud
Infrastructure SDK library to read configuration-file entry values and this package must be available.
Tip
To manage the size of your .NET project, include only the required package for
authentication rather than the full set of packages in the library.
For specific details about usage and support, see SDK and CLI Configuration File.
authentication_webauthn_client
For general information, see WebAuthn Pluggable Authentication.
MySQL Enterprise Edition supports authentication to MySQL Server 8.2.0 (and higher) using devices such
as smart cards, security keys, and biometric readers. This authentication method is based on the FIDO
and FIDO2 standards, and uses a pair of plugins, authentication_webauthn on the server side and
authentication_webauthn_client on the client side. Connector/NET 8.2.0 supports the client-side
WebAuthn authentication plugin.
The WebAuthn authentication method can be used directly for one-factor authentication (1FA) or combined
with existing MySQL authentication methods to support accounts that use 2FA or 3FA. Connector/NET
provides a callback mechanism to notify the application that the user is expected to interact with the FIDO/
FIDO2 device through its authenticator. For example:
public void OpenConnection()
{
using(var connection = new MySQLConnection("host=foo; .. "))
connection.WebAuthnActionRequested += WebAuthnActionRequested;
connection.Open();
// ...
}
public void WebAuthnActionRequested()
{
Console.WriteLine("Please insert WebAuthn device and perform gesture action for authentication to complete.");
}
If the following requirements are satisfied, Connector/NET notifies the application that it is expecting user
interaction with the FIDO/FIDO2 device:
21

authentication_windows_client
• The FIDO/FIDO2 device must be registered for the specific authentication factor associated with each
user account.
• The application, Connector/NET, and the FIDO/FIDO2 device must be available on the same host or
within a trusted network.
• On Windows, the application must run as administrator to access the required libfido2 library, which
must be present on the client.
The authentication process terminates after a reasonable time interval has elapsed without user-device
interaction.
Note
The related authentication_fido_client plugin and FidoActionCallback
callback (both added in Connector/NET 8.0.29) were removed in Connector/NET
8.4.0 in favor of using WebAuthn authentication.
authentication_windows_client
Supported for all versions of Connector/NET. For general information, see Windows Pluggable
Authentication.
MySQL Connector/NET applications can authenticate to a MySQL server using the Windows Native
Authentication Plugin. Users who have logged in to Windows can connect from MySQL client programs to
the server based on the information in their environment without specifying an additional password. The
interface matches the MySql.Data.MySqlClient object. To enable, pass in Integrated Security to the
connection string with a value of yes or sspi.
Passing in a user ID is optional. When Windows authentication is set up, a MySQL user is created and
configured to be used by Windows authentication. By default, this user ID is named auth_windows,
but can be defined using a different name. If the default name is used, then passing the user ID to the
connection string from Connector/NET is optional, because it will use the auth_windows user. Otherwise,
the name must be passed to the connection string using the standard user ID element.
caching_sha2_password
Minimum version: Connector/NET 8.0.11 for classic MySQL protocol connections only. For general
information, see Caching SHA-2 Pluggable Authentication.
mysql_clear_password
Minimum version: Connector/NET 8.0.22 for classic MySQL protocol connections only. For general
information, see Client-Side Cleartext Pluggable Authentication.
mysql_clear_password requires a secure connection to the server, which is satisfied by either
condition at the client:
• The SslMode connection option has a value other than Disabled or None (deprecated in Connector/
NET 8.0.29). The value is set to Preferred by default.
• The ConnectionProtocol connection option is set to unix for Unix domain sockets.
mysql_native_password
Supported for all versions of Connector/NET to establish classic MySQL protocol and X Protocol
connections. For general information, see Native Pluggable Authentication.
22

sha256_password
Note
The mysql_native_password plugin is disabled by default as of MySQL Server
8.4.0 and removed as of MySQL Server 9.0.0.
sha256_password
Minimum version: Connector/NET 8.0.11 for classic MySQL protocol connections or X Protocol
connections with the MYSQL41 mechanism (see the Auth connection option). For general information, see
SHA-256 Pluggable Authentication.
Note
The sha256_password plugin is deprecated as of MySQL Server 8.0.16 and
subject to removal in a future version.
4.5 Connector/NET Connection Options Reference
This chapter describes the full set of MySQL Connector/NET 8.0 connection options. The protocol you use
to make a connection to the server (classic MySQL protocol or X Protocol) determines which options you
should use. Connection options have a default value that you can override by defining the new value in the
connection string (classic MySQL protocol and X Protocol) or in the URI-like connection string (X Protocol).
Connector/NET option names and synonyms are not case sensitive.
For instructions about how to use connection strings, see Section 4.1, “Creating a Connector/NET
Connection String”. For alternative connection styles, see Connecting to the Server Using URI-Like Strings
or Key-Value Pairs.
The following sections list the connection options that apply to both protocols, classic MySQL protocol only,
and X Protocol only:
• Options for Both Classic MySQL Protocol and X Protocol
• Options for Classic MySQL Protocol Only
• Options for X Protocol Only
Options for Both Classic MySQL Protocol and X Protocol
The following Connector/NET connection options can be used with either protocol.
Connector/NET 8.0 exposes the options in this section as properties in both
the MySql.Data.MySqlClient.MySqlConnectionStringBuilder and
MySqlX.XDevAPI.MySqlXConnectionStringBuilder classes.
CertificateFile ,
Certificate File
Default: null
This option specifies the path to a certificate file in PKCS #12 format
(.pfx). For an example of usage, see Section 6.7.2, “Using PFX
Certificates in Connector/NET”.
CertificatePassword ,
Certificate Password
Default: null
Specifies a password that is used in conjunction with a certificate
specified using the option CertificateFile. For an example of
usage, see Section 6.7.2, “Using PFX Certificates in Connector/NET”.
23

Options for Both Classic MySQL Protocol and X Protocol
CertificateStoreLocation
, Certificate Store
Location
Default: null
Enables you to access a certificate held in a personal store, rather than
use a certificate file and password combination. For an example of
usage, see Section 6.7.2, “Using PFX Certificates in Connector/NET”.
CertificateThumbprint ,
Certificate Thumbprint
Default: null
Specifies a certificate thumbprint to ensure correct identification of a
certificate contained within a personal store. For an example of usage,
see Section 6.7.2, “Using PFX Certificates in Connector/NET”.
CharacterSet , Character
Set , CharSet
Specifies the character set that should be used to encode all queries
sent to the server. Results are still returned in the character set of the
result data.
ConnectionProtocol ,
Protocol , Connection
Protocol
Default: socket (or tcp)
Specifies the type of connection to make to the server. Values can be:
• socket or tcp for a socket connection using TCP/IP.
• pipe for a named pipe connection (not supported with X Protocol).
• unix for a UNIX socket connection.
• memory to use MySQL shared memory (not supported with X
Protocol).
Database , Initial
Catalog
Default: mysql
The case-sensitive name of the database to use initially.
dns-srv , dnssrv Default: false
Enables the connection to resolve service (SRV) addresses in a DNS
SRV record, which defines the location (host name and port number)
of servers for the specified services when it is used with the default
transport protocol (tcp). A single DNS domain can map to multiple
targets (servers) using SRV address records. Each SRV record includes
the host name, port, priority, and weight. DNS SRV support was
introduced in Connector/NET 8.0.19 to remove the need for clients
to identify each possible host in the connection string, with or without
connection pooling.
Specifying multiple host names, a port number, or a Unix socket, named
pipe, or shared memory connection (see the ConnectionProtocol
option) in the connection string is not permitted when DNS SRV is
enabled.
Using classic MySQL protocol. The dns-srv option applies
to connection strings; the DnsSrv property is declared in the
MySqlConnectionStringBuilder class.
// Connection string example
var conn = new MySqlConnection("server=_mysql._tcp.example.abc.com.;
dns-srv=true;
24

Options for Both Classic MySQL Protocol and X Protocol
user id=user;
password=****;
database=test");
// MySqlConnectionStringBuilder class example
var sb = new MySqlConnectionStringBuilder();
{
Server = "_mysql._tcp.example.abc.com.",
UserID = "user",
Password = "****",
DnsSrv = true,
Database = "test"
};
var conn = new MySqlConnection(sb.ConnectionString);
Using X Protocol. The dns-srv option applies to connection
strings and anonymous objects. The DnsSrv property is declared in
the MySqlXConnectionStringBuilder class. An error is raised
if both dns-srv=false and the URI scheme of mysqlx+srv://
are combined to create a conflicting connection configuration. For
details about using the mysqlx+srv:// scheme element in URI-like
connection strings, see Connections Using DNS SRV Records.
// Connection string example
var session = MySQLX.GetSession("server=_mysqlx._tcp.example.abc.com.;
dns-srv=true;
user id=user;
password=****;
database=test");
// Anonymous object example
var connstring = new
{
server = "_mysqlx._tcp.example.abc.com.",
user = "user",
password = "****",
dnssrv = true
};
var session = MySQLX.GetSession(connString);
// MySqlXConnectionStringBuilder class example
var sb = new MySqlXConnectionStringBuilder();
{
Server = "_mysqlx._tcp.example.abc.com.",
UserID = "user",
Password = "****",
DnsSrv = true,
Database = "test"
};
var session = MySQLX.GetSession(sb.ConnectionString);
25

Options for Both Classic MySQL Protocol and X Protocol
Keepalive , Keep Alive Default: 0
For TCP connections, idle connection time measured in seconds, before
the first keepalive packet is sent. A value of 0 indicates that keepalive
is not used. Before Connector/NET 6.6.7/6.7.5/6.8.4, this value was
measured in milliseconds.
Password , Password1 , pwd
, pwd1
Default: an empty string
The password for the MySQL account being used for one-factor/single-
factor authentication (1FA/SFA), which uses only one authentication
method such as a password.
Starting with Connector/NET 8.0.28, this option also provides the first
secret password for an account that has multiple authentication factors.
The server can require one (1FA), two (2FA), or three (3FA) passwords
to authenticate the MySQL account. For example, if an account with
2FA is created as follows:
CREATE USER 'abe'@'localhost'
IDENTIFIED WITH caching_sha2_password
BY 'sha2_password'
AND IDENTIFIED WITH authentication_ldap_sasl
AS 'uid=u1_ldap,ou=People,dc=example,dc=com';
Then your application can specify a connection string with this option
(password or its synonyms) and a value, sha2_password in this
case, to satisfy the first authentication factor.
var connString = "server=localhost;
user=abe;
password=sha2_password;
password2=ldap_password;
port=3306";
Alternatively, for a connection made using the
MySqlConnectionStringBuilder object:
MySqlConnectionStringBuilder settings = new MySqlConnectionStringBuilder()
{
Server = "localhost",
UserID = "abe",
Pwd1 = "sha2_password",
Pwd2 = "ldap_password",
Port = 3306
};
If the server does not require a secret password be used with an
authentication method, then the value specified for the password,
password2, or password3 option is ignored.
Password2 , pwd2 Default: an empty string
The second secret password for an account that has multiple
authentication factors (see the Password connection option).
Password3 , pwd3 Default: an empty string
The third secret password for an account that has multiple
authentication factors (see the Password connection option).
26

Options for Both Classic MySQL Protocol and X Protocol
Port Default: 3306
The port MySQL is using to listen for connections. This value is ignored
if Unix socket is used.
Server , Host , Data
Source , DataSource
Default: localhost
The name or network address of one or more host computers. Multiple
hosts are separated by commas and a priority (0 to 100), if provided,
determines the host selection order. As of Connector/NET 8.0.19, host
selection is random when priorities are omitted or are the same for each
host.
// Selects the host with the highest priority (100) first
server=(address=192.10.1.52:3305,priority=60),(address=localhost:3306,priority=100);
No attempt is made by the provider to synchronize writes to the
database, so take care when using this option. In UNIX environments
with Mono, this can be a fully qualified path to a MySQL socket file.
With this configuration, the UNIX socket is used instead of the TCP/IP
socket. Currently, only a single socket name can be given, so accessing
MySQL in a replicated environment using UNIX sockets is not currently
supported.
SslCa , Ssl-Ca Default: null
Based on the type of certificates being used, this option either specifies
the path to a certificate file in PKCS #12 format (.pfx) or the path to a
file in PEM format (.pem) that contains a list of trusted SSL certificate
authorities (CA).
With PFX certificates in use, this option engages when the SslMode
connection option is set to a value of Required, VerifyCA, or
VerifyFull; otherwise, it is ignored.
With PEM certificates in use, this option engages when the SslMode
connection option is set to a value of VerifyCA or VerifyFull;
otherwise, it is ignored.
For examples of usage, see Section 6.7.1, “Using PEM Certificates in
Connector/NET”.
SslCert , Ssl-Cert Default: null
The name of the SSL certificate file in PEM format to use for
establishing an encrypted connection. This option engages only when
VerifyFull is set for the SslMode connection option and the SslCa
connection option uses a PEM certificate; otherwise, it is ignored. For
an example of usage, see Section 6.7.1, “Using PEM Certificates in
Connector/NET”.
SslKey , Ssl-Key Default: null
The name of the SSL key file in PEM format to use for establishing an
encrypted connection. This option engages only when VerifyFull
is set for the SslMode connection option and the SslCa connection
option uses a PEM certificate; otherwise, it is ignored. For an example
27

Options for Both Classic MySQL Protocol and X Protocol
of usage, see Section 6.7.1, “Using PEM Certificates in Connector/
NET”.
SslMode , Ssl Mode , Ssl-
Mode
Default: Depends on the version of Connector/NET and the protocol in
use. Named-pipe and shared-memory connections are not supported
with X Protocol.
• Required for 8.0.8 to 8.0.12 (both protocols); 8.0.13 and later (X
Protocol only).
• Preferred for 8.0.13 and later (classic MySQL protocol only).
This option has the following values:
• Disabled – Do not use SSL. Non-SSL enabled servers require this
option be set to Disabled explicitly for Connector/NET 8.0.29 or
later.
• None – Do not use SSL. Non-SSL enabled servers require this option
be set to None explicitly for Connector/NET 8.0.8 or later.
Note
This value is deprecated starting with
Connector/NET 8.0.29. Use Disabled
instead.
• Preferred – Use SSL if the server supports it, but allow connection
in all cases. This option was removed in Connector/NET 8.0.8 and
reimplemented in 8.0.13 for classic MySQL protocol only.
Note
Do not use this option for X Protocol
operations.
• Required – Always use SSL. Deny connection if server does not
support SSL.
• VerifyCA – Always use SSL. Validate the certificate authorities
(CA), but tolerate a name mismatch.
• VerifyFull – Always use SSL. Fail if the host name is not correct.
tlsversion , tls-version ,
tls version
Default: A fallback solution decides which version of TLS to use.
Restricts the set of TLS protocol versions to use during the TLS
handshake when both the client and server support the TLS versions
indicated and the value of the SslMode connection-string option is
not set to Disabled or None (deprecated in Connector/NET 8.0.29).
This option accepts a single version or a list of versions separated by a
comma, for example, tls-version=TLSv1.2, TLSv1.3;.
Connector/NET supports the following values:
• TLSv1.3
28

Options for Classic MySQL Protocol Only
• TLSv1.2
An error is reported when a value other than those listed is assigned.
Likewise, an error is reported when an empty list is provided as
the value, or if all of the versions in the list are unsupported and no
connection attempt is made.
UserID , User Id ,
Username , Uid , User name
, User
Default: null
The MySQL login account being used.
Options for Classic MySQL Protocol Only
Options related to systems using a connection pool appear together at the end of the list of general options
(see Connection-Pooling Options). Connector/NET 8.0 exposes the options in this section as properties in
the MySql.Data.MySqlClient.MySqlConnectionStringBuilder class.
General Options. The Connector/NET options that follow are for general use with connection strings
and the options apply to all MySQL server configurations:
AllowBatch , Allow Batch Default: true
When true, multiple SQL statements can be sent with one command
execution. Batch statements should be separated by the server-defined
separator character.
AllowLoadLocalInfile ,
Allow Load Local Infile
Default: false
Disables (by default) or enables the server functionality to load the
data local infile. If this option is set to true, uploading files from
any location is enabled, regardless of the path specified with the
AllowLoadLocalInfileInPath option.
AllowLoadLocalInfileInPath
, Allow Load Local
Infile In Path
Default: null
Specifies a safe path from where files can be read and uploaded
to the server. When the related AllowLoadLocalInfile
option is set to false, which is the default value, only those
files from the safe path or any valid subfolder specified with the
AllowLoadLocalInfileInPath option can be loaded. For example,
if /tmp is set as the restricted folder, then file requests for /tmp/
myfile and /tmp/myfolder/myfile can succeed. No relative paths
or symlinks that fall outside of this path are permitted.
The following table shows the behavior that results when the
AllowLoadLocalInfile and AllowLoadLocalInfileInPath
connection string options are combined.
AllowLoadLocalInfile
Value
AllowLoadLocalInfileInPath
Value
Behavior
true Empty string or
null value
All uploads are
permitted.
true A valid path All uploads
are permitted
29

Options for Classic MySQL Protocol Only
AllowLoadLocalInfile
Value
AllowLoadLocalInfileInPath
Value
Behavior
(the path is not
respected).
false Empty string or
null value
No uploads are
permitted.
false A valid path Only uploads
from the
specified folder
and subfolder
are permitted.
AllowPublicKeyRetrieval Default: false
Setting this option to true informs Connector/NET that RSA public
keys should be retrieved from the server and that connections using
the classic MySQL protocol, when SSL is disabled, will fail by default.
Exceptions to the default behavior can occur when previous successful
connection attempts were made or when pooling is enabled and a
pooled connection can be reused. This option was introduced with the
8.0.10 connector.
Caution
This option is prone to man-in-the-middle
attacks, so it should be used only in situations
where you can ensure by other means that your
connections are made to trusted servers.
AllowUserVariables ,
Allow User Variables
Default: false
Setting this to true indicates that the provider expects user variables in
the SQL.
AllowZeroDateTime , Allow
Zero Datetime
Default: false
If set to True, MySqlDataReader.GetValue() returns a
MySqlDateTime object for date or datetime columns that
have disallowed values, such as zero datetime values, and a
System.DateTime object for valid values. If set to False (the default
setting) it causes a System.DateTime object to be returned for all
valid values and an exception to be thrown for disallowed values, such
as zero datetime values.
AutoEnlist , Auto Enlist Default: true
If AutoEnlist is set to true, which is the default, a connection
opened using TransactionScope participates in this
scope, it commits when the scope commits and rolls back if
TransactionScope does not commit. However, this feature is
considered security sensitive and therefore cannot be used in a medium
trust environment.
As of 8.0.10, this option is supported in .NET Core 2.0 implementations.
30

Options for Classic MySQL Protocol Only
BlobAsUTF8ExcludePattern Default: null
A POSIX-style regular expression that matches the names of BLOB
columns that do not contain UTF-8 character data. See Section 5.16,
“Character Set Considerations for Connector/NET” for usage details.
BlobAsUTF8IncludePattern Default: null
A POSIX-style regular expression that matches the names of BLOB
columns containing UTF-8 character data. See Section 5.16, “Character
Set Considerations for Connector/NET” for usage details.
CheckParameters , Check
Parameters
Default: true
Indicates if stored routine parameters should be checked against the
server.
CommandInterceptors ,
Command Interceptors
The list of interceptors that can intercept SQL command operations.
ConnectionTimeout
, Connect Timeout ,
Connection Timeout
Default: 15
The length of time (in seconds) to wait for a connection to the server
before terminating the attempt and generating an error.
ConvertZeroDateTime ,
Convert Zero Datetime
Default: false
Use true to have MySqlDataReader.GetValue() and
MySqlDataReader.GetDateTime() return DateTime.MinValue
for date or datetime columns that have disallowed values.
DefaultAuthenticationPluginTakes precedence over the server-side default authentication
plugin when a valid authentication plugin is specified
(see Section 4.4, “Connector/NET Authentication”). The
Defaultauthenticationplugin option is mandatory for supporting
userless and passwordless Kerberos authentications in which the
credentials are retrieved from a cache or the Key Distribution Center
(KDC). For example:
MySqlConnectionStringBuilder settings = new MySqlConnectionStringBuilder()
{
Server = "localhost",
UserID = "",
Password = "",
Database = "mydb",
Port = 3306,
DefaultAuthenticationPlugin = "authentication_kerberos_client"
};
If no value is set, the server-side default authentication plugin is used.
This option was introduced with the 8.0.26 connector.
DefaultCommandTimeout ,
Default Command Timeout
Default: 30
Sets the default value of the command timeout to be used. This does
not supersede the individual command timeout property on an individual
command object. If you set the command timeout property, that will be
used.
31

Options for Classic MySQL Protocol Only
DefaultTableCacheAge ,
Default Table Cache Age
Default: 60
Specifies how long a TableDirect result should be cached, in
seconds. For usage information about table caching, see Section 5.3,
“Using Connector/NET with Table Caching”.
ExceptionInterceptors ,
Exception Interceptors
The list of interceptors that can triage thrown MySqlException
exceptions.
FunctionsReturnString ,
Functions Return String
Default: false
Causes the connector to return binary or varbinary values as
strings, if they do not have a table name in the metadata.
Includesecurityasserts ,
Include security asserts
Default: false
Must be set to true when using the MySQLClientPermissions class
in a partial trust environment, with the library installed in the GAC of
the hosting environment. See Section 5.7, “Working with Partial Trust /
Medium Trust” for details.
As of 8.0.10, this option is supported in .NET Core 2.0 implementations.
InteractiveSession ,
Interactive , Interactive
Session
Default: false
If set to true, the client is interactive. An interactive client is one
in which the server variable CLIENT_INTERACTIVE is set. If an
interactive client is set, the wait_timeout variable is set to the value
of interactive_timeout. The client session then times out after this
period of inactivity. For more information, see Server System Variables
in the MySQL Reference Manual.
As of 8.0.10, this option is supported in .NET Core 2.0 implementations.
IntegratedSecurity ,
Integrated Security
Default: no
Use Windows authentication when connecting to server. By default,
it is turned off. To enable, specify a value of yes. (You can also use
the value sspi as an alternative to yes.) For details, see Section 4.4,
“Connector/NET Authentication”.
Currently not supported for .NET Core implementations.
KerberosAuthMode ,
kerberos auth mode
Default: AUTO
On Windows, provides authentication support using Security Support
Provider Interface (SSPI), which is capable of acquiring credentials
from the Windows in-memory cache, and Generic Security Service
Application Program Interface (GSSAPI) through the MIT Kerberos
library. GSSAPI is capable of acquiring cached credentials previously
generated using the kinit command. The default value for this option
32

Options for Classic MySQL Protocol Only
(AUTO) attempts to authenticate with GSSAPI if the authentication using
SSPI fails.
Note
This option is permitted in Windows
environments only. Using it in non-Windows
environments produces an Option not supported
exception.
Possible values for this connection option are:
• AUTO – Use SSPI and fall back to GSSAPI in case of failure.
• SSPI – Use SSPI only and raise an exception in case of failure.
• GSSAPI – Use GSSAPI only and raise an exception in case of failure.
Always use the KRB5_CONFIG and KRB5CCNAME environment
variables to specify configuration and cache locations when using
GSSAPI through the MIT Kerberos library on Windows.
Logging Default: false
When the value is set to true, various pieces of information are sent
to all configured trace listeners. For a more detailed description, see
Section 5.12, “Connector/NET Tracing”.
As of 8.0.10, this option is supported in .NET Core 2.0 implementations.
ociConfigFile , OCI
Config File
Defaults to one of the following path names:
• ~/.oci/config on Linux and macOS host types
• %HOMEDRIVE%%HOMEPATH%\.oci\config on Windows host types
If set, this option specifies an alternative location to the Oracle Cloud
Infrastructure configuration file. Connector/NET 8.0.27 (and later) uses
the Oracle Cloud Infrastructure SDK to obtain a fingerprint of the API
key to use for authentication (fingerprint entry) and location of a
PEM file with the private part of the API key (key_file entry). The
entries should be specified in the [DEFAULT] profile. If the [DEFAULT]
profile is missing from the configuration file, Connector/NET locates the
next profile to use instead.
Not supported for .NET Framework 4.5.x implementations.
OciConfigProfile , OCI
Config Profile
If set in Connector/NET 8.0.33 (or later), this option specifies which
profile in an Oracle Cloud Infrastructure configuration file to use. The
profile value defaults to the DEFAULT profile when no value is provided.
Not supported for .NET Framework 4.5.x implementations.
OldGuids , Old Guids Default: false
The back-end representation of a GUID type was changed from
BINARY(16) to CHAR(36). This was done to allow developers to
use the server function UUID() to populate a GUID table - UUID()
33

Options for Classic MySQL Protocol Only
generates a 36-character string. Developers of older applications can
add 'Old Guids=true' to the connection string to use a GUID of
data type BINARY(16).
OldGetStringBehavior Default: false
As of Connector/NET 8.3.0, calling the MySqlDataReader.GetString()
method throws an InvalidCastException exception if the column is
not a string type. All text types including char and varchar are allowed;
and blob is not considered a text type.
Setting this OldGetStringBehavior connection option to true restores
previous behavior by logging a deprecation warning instead of throwing
the exception.
This option was added in 8.3.0 and removed in 9.0.0.
PersistSecurityInfo ,
Persist Security Info
Default: false
When set to false or no (strongly recommended), security-sensitive
information, such as the password, is not returned as part of the
connection if the connection is open or has ever been in an open state.
Resetting the connection string resets all connection string values,
including the password. Recognized values are true, false, yes, and
no.
PipeName , Pipe Name ,
Pipe
Default: mysql
When set to the name of a named pipe, the MySqlConnection
attempts to connect to MySQL on that named pipe. This setting only
applies to the Windows platform.
Important
For MySQL 8.0.14 and later, 5.7.25 and later,
and 5.6.43 and later, minimal permissions
on named pipes are granted to clients that
use them to connect to the server. However,
Connector/NET can use named pipes only
when granted full access on them. As a
workaround, create a Windows local group
containing the user that executes the client
application. Restart the target server with the
named_pipe_full_access_group system
variable and specify the local group name as its
value.
Currently not supported for .NET Core implementations.
ProcedureCacheSize ,
Procedure Cache Size
, procedure cache ,
procedurecache
Default: 25
Sets the size of the stored procedure cache. By default, Connector/NET
stores the metadata (input/output data types) about the last 25 stored
procedures used. To disable the stored procedure cache, set the value
to zero (0).
Replication Default: false
34

Options for Classic MySQL Protocol Only
Indicates if this connection is to use replicated servers.
As of 8.0.10, this option is supported in .NET Core 2.0 implementations.
RespectBinaryFlags ,
Respect Binary Flags
Default: true
Setting this option to false means that Connector/NET ignores a
column's binary flags as set by the server.
SharedMemoryName , Shared
Memory Name
Default: mysql
The name of the shared memory object to use for communication if
the transport protocol is set to memory. This setting only applies to the
Windows platform.
Currently not supported for .NET Core implementations.
SqlServerMode , Sql
Server Mode
Default: false
Allow SQL Server syntax. When set to true, enables Connector/NET
to support square brackets around symbols instead of backticks. This
enables Visual Studio wizards that bracket symbols between the [
and ] characters to work with Connector/NET. This option incurs a
performance hit, so should only be used if necessary.
TableCaching , Table
Cache , TableCache
Default: false
Enables or disables caching of TableDirect commands. A value of
true enables the cache while false disables it. For usage information
about table caching, see Section 5.3, “Using Connector/NET with Table
Caching”.
TreatBlobsAsUTF8 , Treat
BLOBs as UTF8
Default: false
Setting this value to true causes BLOB columns to have a
character set of utf8 with the default collation for that character
set. To convert only some of your BLOB columns, you can
make use of the 'BlobAsUTF8IncludePattern' and
'BlobAsUTF8ExcludePattern' keywords. Set these to a regular
expression pattern that matches the column names to include or
exclude respectively.
TreatTinyAsBoolean ,
Treat Tiny As Boolean
Default: true
Setting this value to false causes TINYINT(1) to be treated as an
INT. See Numeric Data Type Syntax for a further explanation of the
TINYINT and BOOL data types.
UseAffectedRows , Use
Affected Rows
Default: false
When true, the connection reports changed rows instead of found
rows.
35

Options for Classic MySQL Protocol Only
UseCompression , Compress
, Use Compression
Default: false
Setting this option to true enables compression of packets exchanged
between the client and the server. This exchange is defined by the
MySQL client/server protocol.
Compression is used if both client and server support ZLIB
compression, and the client has requested compression using this
option.
A compressed packet header is: packet length (3 bytes), packet
number (1 byte), and Uncompressed Packet Length (3 bytes). The
Uncompressed Packet Length is the number of bytes in the original,
uncompressed packet. If this is zero, the data in this packet has not
been compressed. When the compression protocol is in use, either the
client or the server may compress packets. However, compression will
not occur if the compressed length is greater than the original length.
Thus, some packets will contain compressed data while other packets
will not.
UseDefaultCommandTimeoutForEF
, Use Default Command
Timeout For EF
Default: false
Enforces the command timeout of EFMySqlCommand, which is set to
the value provided by the DefaultCommandTimeout property.
UsePerformanceMonitor ,
Use Performance Monitor ,
UserPerfMon , PerfMon
Default: false
Indicates that performance counters should be updated during
execution.
Currently not supported for .NET Core implementations.
UseUsageAdvisor , Use
Usage Advisor , Usage
Advisor
Default: false
Logs inefficient database operations.
As of 8.0.10, this option is supported in .NET Core 2.0 implementations.
Connection-Pooling Options. The following options are related to connection pooling within
connection strings. For more information about connection pooling, see Opening a Connection to a Single
Server.
CacheServerProperties ,
Cache Server Properties
Default: false
Specifies whether server variable settings are updated by a SHOW
VARIABLES command each time a pooled connection is returned.
Enabling this setting speeds up connections in a connection pool
environment. Your application is not informed of any changes to
configuration variables made by other connections.
ConnectionLifeTime ,
Connection Lifetime
Default: 0
When a connection is returned to the pool, its creation time is compared
with the current time and the connection is destroyed if that time span
(in seconds) exceeds the value specified by Connection Lifetime.
This option is useful in clustered configurations to force load balancing
36

Options for X Protocol Only
between a running server and a server just brought online. A value of
zero (0) sets pooled connections to the maximum connection timeout.
ConnectionReset ,
Connection Reset
Default: false
If true, the connection state is reset when it is retrieved from the pool.
The default value of false avoids making an additional server round trip
when obtaining a connection, but the connection state is not reset.
MaximumPoolsize , Max
Pool Size , Maximum Pool
Size , MaxPoolSize
Default: 100
The maximum number of connections allowed in the pool.
MinimumPoolSize , Min
Pool Size , Minimum Pool
Size , MinPoolSize
Default: 0
The minimum number of connections allowed in the pool.
Pooling Default: true
When true, the MySqlConnection object is drawn from the
appropriate pool, or if necessary, is created and added to the
appropriate pool. Recognized values are true, false, yes, and no.
Options for X Protocol Only
The connection options that follow are valid for connections made with X Protocol.
Connector/NET 8.0 exposes the options in this section as properties in the
MySqlX.XDevAPI.MySqlXConnectionStringBuilder class.
Auth , Authentication ,
Authentication Mode
Authentication mechanism to use with the X Protocol. This option was
introduced with the 8.0.9 connector and has the following values, which
are not case-sensitive: MYSQL41, PLAIN, and EXTERNAL. If the Auth
option is not set, the mechanism is chosen depending on the connection
type. PLAIN is used for secure connections (TLS or Unix sockets) and
MYSQL41 is used for unencrypted connections. EXTERNAL is used for
external authentication methods such as PAM, Windows login IDs,
LDAP, or Kerberos. (EXTERNAL is not currently supported.)
The Auth option is not supported for classic MySQL protocol
connections and returns NotSupportedException if used.
Compression , use-
compression
Default: preferred
Compression is used to send and receive data when both the client
and server support it for X Protocol connections and the client requests
compression using this option. After a successful algorithm negotiation
is made, Connector/NET can start compressing data immediately.
To prevent the compression of small data packets, or of data already
compressed, Connector/NET defines a size threshold of 1000 bytes.
When multiple compression algorithms are supported by the server,
Connector/NET applies the following priority by default: zstd_stream
(first), lz4_message (second), and deflate_stream (third). The
deflate_stream algorithm is supported for use with .NET Core, but
not for .NET Framework.
37

Options for X Protocol Only
Tip
Use the compression-algorithms option to
specify one ore more supported algorithms in a
different order. The algorithms are negotiated in
the order provided by client. For usage details,
see the compression-algorithms option.
Data compression for X Protocol connections was added in the
Connector/NET 8.0.20 release. The Compression option accepts the
following values:
• preferred to apply data compression if the server supports the
algorithms chosen by the client. Otherwise, the data is sent and
received without compression.
• required to ensure that compression is used or to terminate the
connection and return an error message.
• disabled to prevent data compression.
compression-algorithms ,
CompressionAlgorithms
As of Connector/NET 8.0.22, a client application can specify the order
in which supported compression algorithms are negotiated with the
server. The value of the Compression connection option must be set
to preferred or to required for this option to apply. Unsupported
algorithms are ignored.
This option accepts the following algorithm names and synonyms:
• lz4_message or lz4
• zstd_stream or zstd
• deflate_stream or deflate (not valid with .NET Framework)
Algorithm names and synonyms can be combined in a comma-
separated list or provided as a standalone value (with or without
brackets). Examples:
// Compression option set to preferred (default)
MySQLX.GetSession("mysqlx://test:test@localhost:3306?compression-algorithms=[lz4_message,deflate]
MySQLX.GetSession("mysqlx://test:test@localhost:3306?compressionalgorithms=lz4
MySQLX.GetSession("mysqlx://test:test@localhost:3306?compression=preferred&compression-algorithms=[zstd]
// Compression option set to required
MySQLX.GetSession("mysqlx://test:test@localhost:3306?compression=required&compression-algorithms=[zstd_stream,lz4_message]
MySQLX.GetSession("mysqlx://test:test@localhost:3306?compression=required&compression-algorithms=[lz4]
MySQLX.GetSession("mysqlx://test:test@localhost:3306?compression=required&compression-algorithms=zstd_stream
// Connection string
MySQLX.GetSession("server=localhost;port=3306;uid=test;password=test;compression=required;compression-algorithms=lz4_message;")
// Anonymous object
MySQLX.GetSession(new {
server = "localhost",
port = "3306",
uid = "test",
password = "test",
compression="required",
38

Options for X Protocol Only
compressionalgorithms = "deflate_stream" })
For additional information, see Connection Compression with X Plugin.
connection-attributes ,
ConnectionAttributes
Default: true
This option was introduced in Connector/NET 8.0.16 for submitting
a set of attributes to be passed together with default connection
attributes to the server. The aggregate size of connection
attribute data sent by a client is limited by the value of the
performance_schema_session_connect_attrs_size server
variable. The total size of the data package should be less than the
value of the server variable. For general information about connection
attributes, see Performance Schema Connection Attribute Tables.
The connection-attributes parameter value can be empty (the same as
specifying true), a Boolean value (true or false to enable or disable
the default attribute set), or a list or zero or more key=value specifiers
separated by commas (to be sent in addition to the default attribute
set). Within a list, a missing key value evaluates as the NULL value.
Examples:
// Sessions
MySQLX.GetSession($"mysqlx://user@host/schema")
MySQLX.GetSession($"mysqlx://user@host/schema?connection-attributes")
MySQLX.GetSession($"mysqlx://user@host/schema?connection-attributes=true")
MySQLX.GetSession($"mysqlx://user@host/schema?connection-attributes=false")
MySQLX.GetSession($"mysqlx://user@host/schema?connection-attributes=[attr1=val1,attr2,attr3=]")
MySQLX.GetSession($"mysqlx://user@host/schema?connection-attributes=[]")
// Pooling
MySQLX.GetClient($"mysqlx://user@host/schema")
MySQLX.GetClient($"mysqlx://user@host/schema?connection-attributes")
MySQLX.GetClient($"mysqlx://user@host/schema?connection-attributes=true")
MySQLX.GetClient($"mysqlx://user@host/schema?connection-attributes=false")
MySQLX.GetClient($"mysqlx://user@host/schema?connection-attributes=[attr1=val1,attr2,attr3=]")
MySQLX.GetClient($"mysqlx://user@host/schema?connection-attributes=[]")
Application-defined attribute names cannot begin with _ because such
names are reserved for internal attributes.
If connection attributes are not specified in a valid way, an error occurs
and the connection attempt fails.
Connect-Timeout ,
ConnectTimeout
Default: 10000
The length of time (in milliseconds) to wait for an X Protocol connection
to the server before terminating the attempt and generating an error.
You can disable the connection timeout by setting the value to zero.
This option can be specified as follows:
• URI-like connection string example
MySQLX.GetSession("mysqlx://test:test@localhost:33060?connect-timeout=2000");
• Connection string example
MySQLX.GetSession("server=localhost;user=test;port=33060;connect-timeout=2000");
• Anonymous object example
39

Options for X Protocol Only
MySQLX.GetSession(new { server="localhost", user="test", port=33060, connecttimeout=2000 });
• MySqlXConnectionStringBuilder class example
var builder = new MySqlXConnectionStringBuilder("server=localhost;user=test;port=33060");
builder.ConnectTimeout = 2000;
MySQLX.GetSession(builder.ConnectionString);
SslCrl , Ssl-Crl Default: null
Path to a local file containing certificate revocation lists.
Important
Although the SslCrl connection-string
option is valid for use, applying it raises a
NotSupportedException message.
40

Chapter 5 Connector/NET Programming
Table of Contents
5.1 Using GetSchema on a Connection ............................................................................................. 42
5.2 Using MySqlCommand ............................................................................................................... 44
5.3 Using Connector/NET with Table Caching ................................................................................... 47
5.4 Preparing Statements in Connector/NET ...................................................................................... 47
5.5 Creating and Calling Stored Procedures ...................................................................................... 48
5.6 Handling BLOB Data With Connector/NET ................................................................................... 52
5.6.1 Preparing the MySQL Server ........................................................................................... 53
5.6.2 Writing a File to the Database .......................................................................................... 53
5.6.3 Reading a BLOB from the Database to a File on Disk ....................................................... 55
5.7 Working with Partial Trust / Medium Trust .................................................................................... 56
5.7.1 Evolution of Partial Trust Support Across Connector/NET Versions ..................................... 57
5.7.2 Configuring Partial Trust with Connector/NET Library Installed in GAC ................................ 57
5.7.3 Configuring Partial Trust with Connector/NET Library Not Installed in GAC .......................... 59
5.8 Writing a Custom Authentication Plugin ....................................................................................... 60
5.9 Using the Connector/NET Interceptor Classes ............................................................................. 63
5.10 Handling Date and Time Information in Connector/NET .............................................................. 65
5.10.1 Fractional Seconds ........................................................................................................ 65
5.10.2 Problems when Using Invalid Dates ................................................................................ 65
5.10.3 Restricting Invalid Dates ................................................................................................. 66
5.10.4 Handling Invalid Dates ................................................................................................... 66
5.10.5 Handling NULL Dates .................................................................................................... 66
5.11 Using the MySqlBulkLoader Class ............................................................................................. 67
5.12 Connector/NET Tracing ............................................................................................................. 68
5.12.1 Enabling OpenTelemetry Tracing .................................................................................... 68
5.12.2 Using the Connector/NET Trace Source Object ............................................................... 69
5.13 Using Connector/NET with Crystal Reports ................................................................................ 74
5.13.1 Creating a Data Source ................................................................................................. 74
5.13.2 Creating the Report ....................................................................................................... 75
5.13.3 Displaying the Report ..................................................................................................... 76
5.14 Asynchronous Methods ............................................................................................................. 79
5.15 Binary and Nonbinary Issues ..................................................................................................... 85
5.16 Character Set Considerations for Connector/NET ....................................................................... 86
MySQL Connector/NET comprises several classes that are used to connect to the database, execute
queries and statements, and manage query results.
The following are the major classes of Connector/NET:
• MySqlConnection: Represents an open connection to a MySQL database (see Chapter 4, Connector/
NET Connections).
The MySqlConnectionStringBuilder class aids in the creation of a connection string by exposing
the connection options as properties.
• MySqlCommand: Represents an SQL statement to execute against a MySQL database.
• MySqlCommandBuilder: Automatically generates single-table commands used to reconcile changes
made to a DataSet with the associated MySQL database.
41

Using GetSchema on a Connection
• MySqlDataAdapter: Represents a set of data commands and a database connection that are used to
fill a data set and update a MySQL database.
• MySqlDataReader: Provides a means of reading a forward-only stream of rows from a MySQL
database.
• MySqlException: The exception that is thrown when MySQL returns an error.
• MySqlHelper: Helper class that makes it easier to work with the provider.
• MySqlTransaction: Represents an SQL transaction to be made in a MySQL database.
5.1 Using GetSchema on a Connection
The GetSchema() method of the connection object can be used to retrieve schema information about the
database currently connected to. The schema information is returned in the form of a DataTable. The
schema information is organized into a number of collections. Different forms of the GetSchema() method
can be used depending on the information required. There are three forms of the GetSchema() method:
• GetSchema() - This call will return a list of available collections.
• GetSchema(String) - This call returns information about the collection named in the string parameter.
If the string “MetaDataCollections” is used then a list of all available collections is returned. This is the
same as calling GetSchema() without any parameters.
• GetSchema(String, String[]) - In this call the first string parameter represents the collection
name, and the second parameter represents a string array of restriction values. Restriction values
limit the amount of data that will be returned. Restriction values are explained in more detail in the
Microsoft .NET documentation.
Collections
The collections can be broadly grouped into two types: collections that are common to all data providers,
and collections specific to a particular provider.
Common Collections. The following collections are common to all data providers:
• MetaDataCollections
• DataSourceInformation
• DataTypes
• Restrictions
• ReservedWords
Provider-Specific Collections. The following are the collections currently provided by Connector/NET,
in addition to the common collections shown previously:
• Databases
• Tables
• Columns
• Users
• Foreign Keys
42

Collections
• IndexColumns
• Indexes
• Foreign Key Columns
• UDF
• Views
• ViewColumns
• Procedure Parameters
• Procedures
• Triggers
C# Code Example. A list of available collections can be obtained using the following code:
using System;
using System.Data;
using System.Text;
using MySql.Data;
using MySql.Data.MySqlClient;
namespace ConsoleApplication2
{
class Program
{
private static void DisplayData(System.Data.DataTable table)
{
foreach (System.Data.DataRow row in table.Rows)
{
foreach (System.Data.DataColumn col in table.Columns)
{
Console.WriteLine("{0} = {1}", col.ColumnName, row[col]);
}
Console.WriteLine("============================");
}
}
static void Main(string[] args)
{
string connStr = "server=localhost;user=root;database=world;port=3306;password=******";
MySqlConnection conn = new MySqlConnection(connStr);
try
{
Console.WriteLine("Connecting to MySQL...");
conn.Open();
DataTable table = conn.GetSchema("MetaDataCollections");
//DataTable table = conn.GetSchema("UDF");
DisplayData(table);
conn.Close();
}
catch (Exception ex)
{
Console.WriteLine(ex.ToString());
}
Console.WriteLine("Done.");
}
43

Using MySqlCommand
}
}
Further information on the GetSchema() method and schema collections can be found in the
Microsoft .NET documentation.
5.2 Using MySqlCommand
The MySqlCommand class represents a SQL statement to execute against a MySQL database. Class
methods enable you to perform the following database operations:
• Query a database
• Insert, update, and delete data
• Return a single value
Command-based database operations can run within a transaction, if needed. For a short tutorial
demonstrating how and when to use the ExecuteReader, ExecuteNonQuery, and ExecuteScalar
methods, see Section 6.1.2, “The MySqlCommand Object”.
An instance of MySqlCommand can be organized to execute as a prepared statement for faster excecution
and reuse, or as a stored procedure. A flexible set of class properties permits you to package MySQL
commands in several forms. The remainder of this section describes following MySqlCommand properties:
• CommandText and CommandType Properties
• Parameters Property
• Attributes Property
• CommandTimeout Property
CommandText and CommandType Properties
The MySqlCommand class provides the CommandText and CommandType properties that you may
combine to create the type of SQL statements needed for your project. The CommandText property
is interpreted differently, depending on how you set the CommandType property. The following
CommandType types are permitted:
• Text - An SQL text command (default).
• StoredProcedure - Name of a stored procedure.
• TableDirect - Name of a table.
The default CommandType type, Text, is used for executing queries and other SQL commands. See
Section 6.1.2, “The MySqlCommand Object” for usage examples.
If CommandType is set to StoredProcedure, set CommandText to the name of the stored procedure
to access. For use-case examples of the CommandType property with type StoredProcedure, see
Section 5.5, “Creating and Calling Stored Procedures”.
If CommandType is set to TableDirect, all rows and columns of the named table are returned when you
call one of the execute methods. In effect, this command performs a SELECT * on the table specified. The
CommandText property is set to the name of the table to query. This usage is illustrated by the following
code snippet:
...
44

Parameters Property
MySqlCommand cmd = new MySqlCommand();
cmd.CommandText = "mytable";
cmd.Connection = someConnection;
cmd.CommandType = CommandType.TableDirect;
MySqlDataReader reader = cmd.ExecuteReader();
while (reader.Read())
{
Console.WriteLn(reader[0], reader[1]...);
}
...
Parameters Property
The Parameters property gives you control over the data you use to build a SQL query. Defining a
parameter is the preferred practice to reduce the risk of acquiring unwanted or malicous input. For usage
information and examples, see:
• Working with Parameters
• Accessing a Stored Procedure
• Preparing Statements in Connector/NET
Attributes Property
As of Connector/NET 8.0.26, an instance of MySqlCommand can be organized to execute simple Transact-
SQL statements or stored procedures, both can be used in a prepared statement for faster execution and
reuse. The query_attributes component must be installed on the server (see Prerequisites for Using
Query Attributes) before attributes can be searched for and used on the server side.
Query-attributes support varies by server version:
• Prior to MySQL Server 8.0.23: no support for query attributes.
• MySQL Server 8.0.23 to 8.0.24: support for query attributes in regular statements only.
• MySQL Server 8.0.25 and higher: support for query attributes in both regular and prepared statements.
If you send query attribute metadata to a server that does not support query attributes, the attempt is
logged by the connector but no error is emitted.
Like parameters, attributes must be named. Unlike a parameter, an attribute represents an object from the
underlying query, such as a field or table. Connector/NET does not check or enforce whether your attribute
names are unique. Parameters and attributes can be combined together in commands without restrictions.
You can declare an attritue name and value directly by using the SetAttribute method to create an
instance of MySqlAttribute that is exposed in a collection through the MySqlAttributeCollection
object within MySqlCommand. For example, to declare a single attribute named qa1, use the following C#
syntax:
myCommand.Attributes.SetAttribute("qa1", "qaValue");
Alternatively, you can declare a variable of type MySqlAttribute to hold your attribute name and
value. Both forms persist the attribute after the query is executed, until the Clear method is called on the
MySqlAttributeCollection object. The next snippet declares two attributes named qa1 and qa2 as
variables mySqlAttribute1 and mySqlAttribute2.
MySqlCommand myCommand = new MySqlCommand();
myCommand.Connection = myConnection;
45

CommandTimeout Property
MySqlAttribute mySqlAttribute1 = new MySqlAttribute("qa1", "qaValue");
MySqlAttribute mySqlAttribute2 = new MySqlAttribute("qa2", 2);
myCommand.Attributes.SetAttribute(mySqlAttribute1);
myCommand.Attributes.SetAttribute(mySqlAttribute2);
With attribute names and values defined, a statement specifying attributes can be sent to the server. The
following SELECT statement includes the mysql_query_attribute_string() loadable function that
is used to retrieve the two attributes decared previously and then prints the results. For more readable and
convenient syntax, the $ symbol is used in this example to identify string literals as interpolated strings.
myCommand.CommandText = $"SELECT mysql_query_attribute_string('{mySqlAttribute1.AttributeName}') AS attr1," +
$"mysql_query_attribute_string('{mySqlAttribute2.AttributeName}') AS attr2";
using (var reader = myCommand.ExecuteReader())
{
while (reader.Read())
{
Console.WriteLine($"Attribute1 Value: {reader.GetString(0)}");
Console.WriteLine($"Attribute2 Value: {reader.GetString(1)}");
}
}
/* Output:
Attribute1 Value: qaValue
Attribute2 Value: 2
*/
The following code block shows the same process for setting attributes and retrieving the results using
Visual Basic syntax.
Public Sub CreateMySqlCommandWithQueryAttributes(ByVal myConnection As MySqlConnection)
Dim myCommand As MySqlCommand = New MySqlCommand()
myCommand.Connection = myConnection
Dim mySqlAttribute1 As MySqlAttribute = New MySqlAttribute("qa1", "qaValue")
Dim mySqlAttribute2 As MySqlAttribute = New MySqlAttribute("qa2", 2)
myCommand.Attributes.SetAttribute(mySqlAttribute1)
myCommand.Attributes.SetAttribute(mySqlAttribute2)
myCommand.CommandText = $"SELECT mysql_query_attribute_string('{mySqlAttribute1.AttributeName}') AS attr1," &
$"mysql_query_attribute_string('{mySqlAttribute2.AttributeName}') AS attr2"
Using reader = myCommand.ExecuteReader()
While reader.Read()
Console.WriteLine($"Attribute1 Value: {reader.GetString(0)}")
Console.WriteLine($"Attribute2 Value: {reader.GetString(1)}")
End While
End Using
End Sub
CommandTimeout Property
Commands can have a timeout associated with them. This feature is useful as you may not want a
situation were a command takes up an excessive amount of time. A timeout can be set using the
CommandTimeout property. The following code snippet sets a timeout of one minute:
MySqlCommand cmd = new MySqlCommand();
cmd.CommandTimeout = 60;
The default value is 30 seconds. Avoid a value of 0, which indicates an indefinite wait. To change the
default command timeout, use the connection string option Default Command Timeout.
Connector/NET supports timeouts that are aligned with how Microsoft handles
SqlCommand.CommandTimeout. This property is the cumulative timeout for all network reads
and writes during command execution or processing of the results. A timeout can still occur in the
46

Using Connector/NET with Table Caching
MySqlReader.Read method after the first row is returned, and does not include user processing time,
only IO operations.
Further details on this can be found in the relevant Microsoft documentation.
5.3 Using Connector/NET with Table Caching
Table caching is a feature that can be used to cache slow-changing datasets on the client side. This is
useful for applications that are designed to use readers, but still want to minimize trips to the server for
slow-changing tables.
This feature is transparent to the application, and is disabled by default.
Configuration
• To enable table caching, add 'table cache = true' to the connection string.
• Optionally, specify the 'Default Table Cache Age' connection string option, which represents the
number of seconds a table is cached before the cached data is discarded. The default value is 60.
• You can turn caching on and off and set caching options at runtime, on a per-command basis.
5.4 Preparing Statements in Connector/NET
Prepared statements can provide significant performance improvements on queries that are executed
more than one time. Prepared execution is faster than direct execution for statements executed more
than once, primarily because the query is parsed only one time. In the case of direct execution, the query
is parsed every time it is executed. In addition, prepared execution can provide a reduction of network
traffic because for each execution of the prepared statement, it is necessary only to send the data for the
parameters.
Another advantage of prepared statements is that, with server-side prepared statements enabled, it uses a
binary protocol that makes data transfer between client and server more efficient.
To prepare a statement, use the following sequence of steps:
1. Create a MySqlCommand object and set the CommandText property to your query.
2. After entering your statement, call the Prepare method of the command object. When the statement is
prepared, add parameters for each of the dynamic elements in the query.
3. Execute the statement using the ExecuteNonQuery(), ExecuteScalar(), or ExecuteReader
methods.
For subsequent executions, you need only modify the values of the parameters and call the execute
method again, there is no need to set the CommandText property or redefine the parameters.
C# Code Example
MySql.Data.MySqlClient.MySqlConnection conn;
MySql.Data.MySqlClient.MySqlCommand cmd;
conn = new MySql.Data.MySqlClient.MySqlConnection();
cmd = new MySql.Data.MySqlClient.MySqlCommand();
conn.ConnectionString = strConnection;
try
{
47

Visual Basic Code Example
conn.Open();
cmd.Connection = conn;
cmd.CommandText = "INSERT INTO myTable VALUES(NULL, @number, @text)";
cmd.Prepare();
cmd.Parameters.AddWithValue("@number", 1);
cmd.Parameters.AddWithValue("@text", "One");
for (int i=1; i <= 1000; i++)
{
cmd.Parameters["@number"].Value = i;
cmd.Parameters["@text"].Value = "A string value";
cmd.ExecuteNonQuery();
}
}
catch (MySql.Data.MySqlClient.MySqlException ex)
{
MessageBox.Show("Error " + ex.Number + " has occurred: " + ex.Message,
"Error", MessageBoxButtons.OK, MessageBoxIcon.Error);
}
Visual Basic Code Example
Dim conn As New MySqlConnection
Dim cmd As New MySqlCommand
conn.ConnectionString = strConnection
Try
conn.Open()
cmd.Connection = conn
cmd.CommandText = "INSERT INTO myTable VALUES(NULL, @number, @text)"
cmd.Prepare()
cmd.Parameters.AddWithValue("@number", 1)
cmd.Parameters.AddWithValue("@text", "One")
For i = 1 To 1000
cmd.Parameters("@number").Value = i
cmd.Parameters("@text").Value = "A string value"
cmd.ExecuteNonQuery()
Next
Catch ex As MySqlException
MessageBox.Show("Error " & ex.Number & " has occurred: " &
ex.Message, "Error", MessageBoxButtons.OK, MessageBoxIcon.Error)
End Try
5.5 Creating and Calling Stored Procedures
A stored procedure is a set of SQL statements that is stored in the server. Clients make a single call to the
stored procedure, passing parameters that can influence the procedure logic and query conditions, rather
than issuing individual hardcoded SQL statements.
Stored procedures can be particularly useful in situations such as the following:
• Stored procedures can act as an API or abstraction layer, allowing multiple client applications to perform
the same database operations. The applications can be written in different languages and run on
different platforms. The applications do not need to hardcode table and column names, complicated
queries, and so on. When you extend and optimize the queries in a stored procedure, all the applications
that call the procedure automatically receive the benefits.
48

Creating a Stored Procedure
• When security is paramount, stored procedures keep applications from directly manipulating tables, or
even knowing details such as table and column names. Banks, for example, use stored procedures for
all common operations. This provides a consistent and secure environment, and procedures can ensure
that each operation is properly logged. In such a setup, applications and users would not get any access
to the database tables directly, but can only execute specific stored procedures.
This section does not provide in-depth information on creating stored procedures. For such information,
see Using Stored Routines.
Creating a Stored Procedure
Stored procedures in MySQL can be created using a variety of tools, such as:
• The mysql command-line client
• MySQL Workbench
• The MySqlCommand object
Unlike the command-line and GUI clients, you are not required to specify a special delimiter when creating
stored procedures in Connector/NET using the MySqlCommand class. For example, to create a stored
procedure named add_emp, use the CommandText property with the default command type (SQL text
commands) to execute each individual SQL statement in the context of your command that has an open
connection to a server.
cmd.CommandText = "DROP PROCEDURE IF EXISTS add_emp";
cmd.ExecuteNonQuery();
cmd.CommandText = "DROP TABLE IF EXISTS emp";
cmd.ExecuteNonQuery();
cmd.CommandText = "CREATE TABLE emp ( +
"empno INT UNSIGNED NOT NULL AUTO_INCREMENT PRIMARY KEY, first_name VARCHAR(20)," +
"last_name VARCHAR(20), birthdate DATE)";
cmd.ExecuteNonQuery();
cmd.CommandText = "CREATE PROCEDURE add_emp(" +
"IN fname VARCHAR(20), IN lname VARCHAR(20), IN bday DATETIME, OUT empno INT)" +
"BEGIN INSERT INTO emp(first_name, last_name, birthdate) " +
"VALUES(fname, lname, DATE(bday)); SET empno = LAST_INSERT_ID(); END";
cmd.ExecuteNonQuery();
Accessing a Stored Procedure
After the stored procedure is named, you define one MySqlCommand parameter for every parameter in the
stored procedure. IN parameters are defined with the parameter name and the object containing the value,
OUT parameters are defined with the parameter name and the data type that is expected to be returned. All
parameters need the parameter direction defined.
To call a stored procedure using Connector/NET, you create a MySqlCommand object and pass the
stored procedure name as the CommandText property. You then set the CommandType property to
CommandType.StoredProcedure. After defining the parameters, you call the stored procedure by using
the MySqlCommand.ExecuteNonQuery() method.
cmd.CommandText = "add_emp";
cmd.CommandType = CommandType.StoredProcedure;
cmd.Parameters.AddWithValue("@lname", "Jones");
cmd.Parameters["@lname"].Direction = ParameterDirection.Input;
cmd.Parameters.AddWithValue("@fname", "Tom");
cmd.Parameters["@fname"].Direction = ParameterDirection.Input;
49

Stored Procedure Code Example
cmd.Parameters.AddWithValue("@bday", "1940-06-07");
cmd.Parameters["@bday"].Direction = ParameterDirection.Input;
cmd.Parameters.Add("@empno", MySqlDbType.Int32);
cmd.Parameters["@empno"].Direction = ParameterDirection.Output;
cmd.ExecuteNonQuery();
Connector/NET supports the calling of stored procedures through the MySqlCommand object. Data can
be passed in and out of a MySQL stored procedure through use of the MySqlCommand.Parameters
collection.
After the stored procedure is called, the values of the output parameters can be retrieved by using the
.Value property of the MySqlCommand.Parameters collection.
Console.WriteLine("Employee number: "+cmd.Parameters["@empno"].Value);
Console.WriteLine("Birthday: " + cmd.Parameters["@bday"].Value);
Note
When a stored procedure is called using MySqlCommand.ExecuteReader, and
the stored procedure has output parameters, the output parameters are set only
after the MySqlDataReader returned by ExecuteReader is closed.
Stored Procedure Code Example
The following C# code example demonstrates the use of stored procedures. This example assumes the
'employees' database was created in advance:
using System;
using System.Collections.Generic;
using System.Linq;
using System.Text;
using System.Data;
using MySql.Data;
using MySql.Data.MySqlClient;
namespace UsingStoredProcedures
{
class Program
{
static void Main(string[] args)
{
MySqlConnection conn = new MySqlConnection();
conn.ConnectionString = "server=localhost;user=root;database=employees;port=3306;password=******";
MySqlCommand cmd = new MySqlCommand();
try
{
Console.WriteLine("Connecting to MySQL...");
conn.Open();
cmd.Connection = conn;
cmd.CommandText = "DROP PROCEDURE IF EXISTS add_emp";
cmd.ExecuteNonQuery();
cmd.CommandText = "DROP TABLE IF EXISTS emp";
cmd.ExecuteNonQuery();
cmd.CommandText = "CREATE TABLE emp (" +
"empno INT UNSIGNED NOT NULL AUTO_INCREMENT PRIMARY KEY," +
"first_name VARCHAR(20), last_name VARCHAR(20), birthdate DATE)";
cmd.ExecuteNonQuery();
cmd.CommandText = "CREATE PROCEDURE add_emp(" +
50

Stored Procedure Code Example
"IN fname VARCHAR(20), IN lname VARCHAR(20), IN bday DATETIME, OUT empno INT)" +
"BEGIN INSERT INTO emp(first_name, last_name, birthdate) " +
"VALUES(fname, lname, DATE(bday)); SET empno = LAST_INSERT_ID(); END";
cmd.ExecuteNonQuery();
}
catch (MySqlException ex)
{
Console.WriteLine ("Error " + ex.Number + " has occurred: " + ex.Message);
}
conn.Close();
Console.WriteLine("Connection closed.");
try
{
Console.WriteLine("Connecting to MySQL...");
conn.Open();
cmd.Connection = conn;
cmd.CommandText = "add_emp";
cmd.CommandType = CommandType.StoredProcedure;
cmd.Parameters.AddWithValue("@lname", "Jones");
cmd.Parameters["@lname"].Direction = ParameterDirection.Input;
cmd.Parameters.AddWithValue("@fname", "Tom");
cmd.Parameters["@fname"].Direction = ParameterDirection.Input;
cmd.Parameters.AddWithValue("@bday", "1940-06-07");
cmd.Parameters["@bday"].Direction = ParameterDirection.Input;
cmd.Parameters.Add("@empno", MySqlDbType.Int32);
cmd.Parameters["@empno"].Direction = ParameterDirection.Output;
cmd.ExecuteNonQuery();
Console.WriteLine("Employee number: "+cmd.Parameters["@empno"].Value);
Console.WriteLine("Birthday: " + cmd.Parameters["@bday"].Value);
}
catch (MySql.Data.MySqlClient.MySqlException ex)
{
Console.WriteLine("Error " + ex.Number + " has occurred: " + ex.Message);
}
conn.Close();
Console.WriteLine("Done.");
}
}
}
The following code shows the same application in Visual Basic:
Imports System
Imports System.Collections.Generic
Imports System.Linq
Imports System.Text
Imports System.Data
Imports MySql.Data
Imports MySql.Data.MySqlClient
Module Module1
Sub Main()
Dim conn As New MySqlConnection()
conn.ConnectionString = "server=localhost;user=root;database=world;port=3306;password=******"
Dim cmd As New MySqlCommand()
Try
51

Handling BLOB Data With Connector/NET
Console.WriteLine("Connecting to MySQL...")
conn.Open()
cmd.Connection = conn
cmd.CommandText = "DROP PROCEDURE IF EXISTS add_emp"
cmd.ExecuteNonQuery()
cmd.CommandText = "DROP TABLE IF EXISTS emp"
cmd.ExecuteNonQuery()
cmd.CommandText = "CREATE TABLE emp (" &
"empno INT UNSIGNED NOT NULL AUTO_INCREMENT PRIMARY KEY,
"first_name VARCHAR(20), last_name VARCHAR(20), birthdate DATE)"
cmd.ExecuteNonQuery()
cmd.CommandText = "CREATE PROCEDURE add_emp(" &
"IN fname VARCHAR(20), IN lname VARCHAR(20), IN bday DATETIME, OUT empno INT)" &
"BEGIN INSERT INTO emp(first_name, last_name, birthdate) " &
"VALUES(fname, lname, DATE(bday)); SET empno = LAST_INSERT_ID(); END"
cmd.ExecuteNonQuery()
Catch ex As MySqlException
Console.WriteLine(("Error " & ex.Number & " has occurred: ") + ex.Message)
End Try
conn.Close()
Console.WriteLine("Connection closed.")
Try
Console.WriteLine("Connecting to MySQL...")
conn.Open()
cmd.Connection = conn
cmd.CommandText = "add_emp"
cmd.CommandType = CommandType.StoredProcedure
cmd.Parameters.AddWithValue("@lname", "Jones")
cmd.Parameters("@lname").Direction = ParameterDirection.Input
cmd.Parameters.AddWithValue("@fname", "Tom")
cmd.Parameters("@fname").Direction = ParameterDirection.Input
cmd.Parameters.AddWithValue("@bday", "1940-06-07")
cmd.Parameters("@bday").Direction = ParameterDirection.Input
cmd.Parameters.Add("@empno", MySqlDbType.Int32)
cmd.Parameters("@empno").Direction = ParameterDirection.Output
cmd.ExecuteNonQuery()
Console.WriteLine("Employee number: " & cmd.Parameters("@empno").Value)
Console.WriteLine("Birthday: " & cmd.Parameters("@bday").Value)
Catch ex As MySql.Data.MySqlClient.MySqlException
Console.WriteLine(("Error " & ex.Number & " has occurred: ") + ex.Message)
End Try
conn.Close()
Console.WriteLine("Done.")
End Sub
End Module
5.6 Handling BLOB Data With Connector/NET
One common use for MySQL is the storage of binary data in BLOB columns. MySQL supports four different
BLOB data types: TINYBLOB, BLOB, MEDIUMBLOB, and LONGBLOB, all described in The BLOB and TEXT
Types and Data Type Storage Requirements.
Data stored in a BLOB column can be accessed using MySQL Connector/NET and manipulated using
client-side code. There are no special requirements for using Connector/NET with BLOB data.
52

Preparing the MySQL Server
Simple code examples will be presented within this section, and a full sample application can be found in
the Samples directory of the Connector/NET installation.
5.6.1 Preparing the MySQL Server
The first step is using MySQL with BLOB data is to configure the server. To start, create a table that can
be accessed. File tables often have four columns: an AUTO_INCREMENT column of appropriate size
(UNSIGNED SMALLINT) to serve as a primary key to identify the file, a VARCHAR column that stores the file
name, an UNSIGNED MEDIUMINT column that stores the size of the file, and a MEDIUMBLOB column that
stores the file itself. For this example, use the following table definition:
CREATE TABLE file(
file_id SMALLINT UNSIGNED AUTO_INCREMENT NOT NULL PRIMARY KEY,
file_name VARCHAR(64) NOT NULL,
file_size MEDIUMINT UNSIGNED NOT NULL,
file MEDIUMBLOB NOT NULL);
After creating a table, you might need to modify the max_allowed_packet system variable. This variable
determines how large of a packet (that is, a single row) can be sent to the MySQL server. By default, the
server only accepts a maximum size of 1MB from the client application. If you intend to exceed 1MB in
your file transfers, increase this number.
The max_allowed_packet option can be modified using the MySQL Workbench Server Administration
screen. Adjust the Maximum permitted option in the Data / Memory size section of the Networking
tab to an appropriate setting. After adjusting the value, click the Apply button and restart the server
using the Startup / Shutdown screen of MySQL Workbench. You can also adjust this value
directly in the my.cnf file (add a line that reads max_allowed_packet=xxM), or use the SET
max_allowed_packet=xxM; syntax from within MySQL.
Try to be conservative when setting max_allowed_packet, as transfers of BLOB data can take some
time to complete. Try to set a value that will be adequate for your intended use and increase the value if
necessary.
5.6.2 Writing a File to the Database
To write a file to a database, we need to convert the file to a byte array, then use the byte array as a
parameter to an INSERT query.
The following code opens a file using a FileStream object, reads it into a byte array, and inserts it into the
file table:
C# Code Example
MySql.Data.MySqlClient.MySqlConnection conn;
MySql.Data.MySqlClient.MySqlCommand cmd;
conn = new MySql.Data.MySqlClient.MySqlConnection();
cmd = new MySql.Data.MySqlClient.MySqlCommand();
string SQL;
UInt32 FileSize;
byte[] rawData;
FileStream fs;
conn.ConnectionString = "server=127.0.0.1;uid=root;" +
"pwd=12345;database=test";
try
{
fs = new FileStream(@"c:\image.png", FileMode.Open, FileAccess.Read);
53

Writing a File to the Database
FileSize = fs.Length;
rawData = new byte[FileSize];
fs.Read(rawData, 0, FileSize);
fs.Close();
conn.Open();
SQL = "INSERT INTO file VALUES(NULL, @FileName, @FileSize, @File)";
cmd.Connection = conn;
cmd.CommandText = SQL;
cmd.Parameters.AddWithValue("@FileName", strFileName);
cmd.Parameters.AddWithValue("@FileSize", FileSize);
cmd.Parameters.AddWithValue("@File", rawData);
cmd.ExecuteNonQuery();
MessageBox.Show("File Inserted into database successfully!",
"Success!", MessageBoxButtons.OK, MessageBoxIcon.Asterisk);
conn.Close();
}
catch (MySql.Data.MySqlClient.MySqlException ex)
{
MessageBox.Show("Error " + ex.Number + " has occurred: " + ex.Message,
"Error", MessageBoxButtons.OK, MessageBoxIcon.Error);
}
Visual Basic Code Example
Dim conn As New MySqlConnection
Dim cmd As New MySqlCommand
Dim SQL As String
Dim FileSize As UInt32
Dim rawData() As Byte
Dim fs As FileStream
conn.ConnectionString = "server=127.0.0.1;" _
& "uid=root;" _
& "pwd=12345;" _
& "database=test"
Try
fs = New FileStream("c:\image.png", FileMode.Open, FileAccess.Read)
FileSize = fs.Length
rawData = New Byte(FileSize) {}
fs.Read(rawData, 0, FileSize)
fs.Close()
conn.Open()
SQL = "INSERT INTO file VALUES(NULL, @FileName, @FileSize, @File)"
cmd.Connection = conn
cmd.CommandText = SQL
cmd.Parameters.AddWithValue("@FileName", strFileName)
cmd.Parameters.AddWithValue("@FileSize", FileSize)
cmd.Parameters.AddWithValue("@File", rawData)
cmd.ExecuteNonQuery()
MessageBox.Show("File Inserted into database successfully!", _
"Success!", MessageBoxButtons.OK, MessageBoxIcon.Asterisk)
54

Reading a BLOB from the Database to a File on Disk
conn.Close()
Catch ex As Exception
MessageBox.Show("There was an error: " & ex.Message, "Error", _
MessageBoxButtons.OK, MessageBoxIcon.Error)
End Try
The Read method of the FileStream object is used to load the file into a byte array which is sized
according to the Length property of the FileStream object.
After assigning the byte array as a parameter of the MySqlCommand object, the ExecuteNonQuery
method is called and the BLOB is inserted into the file table.
5.6.3 Reading a BLOB from the Database to a File on Disk
After a file is loaded into the file table, we can use the MySqlDataReader class to retrieve it.
The following code retrieves a row from the file table, then loads the data into a FileStream object to
be written to disk:
C# Code Example
MySql.Data.MySqlClient.MySqlConnection conn;
MySql.Data.MySqlClient.MySqlCommand cmd;
MySql.Data.MySqlClient.MySqlDataReader myData;
conn = new MySql.Data.MySqlClient.MySqlConnection();
cmd = new MySql.Data.MySqlClient.MySqlCommand();
string SQL;
UInt32 FileSize;
byte[] rawData;
FileStream fs;
conn.ConnectionString = "server=127.0.0.1;uid=root;" +
"pwd=12345;database=test";
SQL = "SELECT file_name, file_size, file FROM file";
try
{
conn.Open();
cmd.Connection = conn;
cmd.CommandText = SQL;
myData = cmd.ExecuteReader();
if (! myData.HasRows)
throw new Exception("There are no BLOBs to save");
myData.Read();
FileSize = myData.GetUInt32(myData.GetOrdinal("file_size"));
rawData = new byte[FileSize];
myData.GetBytes(myData.GetOrdinal("file"), 0, rawData, 0, (int)FileSize);
fs = new FileStream(@"C:\newfile.png", FileMode.OpenOrCreate, FileAccess.Write);
fs.Write(rawData, 0, (int)FileSize);
fs.Close();
MessageBox.Show("File successfully written to disk!",
"Success!", MessageBoxButtons.OK, MessageBoxIcon.Asterisk);
55

Working with Partial Trust / Medium Trust
myData.Close();
conn.Close();
}
catch (MySql.Data.MySqlClient.MySqlException ex)
{
MessageBox.Show("Error " + ex.Number + " has occurred: " + ex.Message,
"Error", MessageBoxButtons.OK, MessageBoxIcon.Error);
}
Visual Basic Code Example
Dim conn As New MySqlConnection
Dim cmd As New MySqlCommand
Dim myData As MySqlDataReader
Dim SQL As String
Dim rawData() As Byte
Dim FileSize As UInt32
Dim fs As FileStream
conn.ConnectionString = "server=127.0.0.1;" _
& "uid=root;" _
& "pwd=12345;" _
& "database=test"
SQL = "SELECT file_name, file_size, file FROM file"
Try
conn.Open()
cmd.Connection = conn
cmd.CommandText = SQL
myData = cmd.ExecuteReader
If Not myData.HasRows Then Throw New Exception("There are no BLOBs to save")
myData.Read()
FileSize = myData.GetUInt32(myData.GetOrdinal("file_size"))
rawData = New Byte(FileSize) {}
myData.GetBytes(myData.GetOrdinal("file"), 0, rawData, 0, FileSize)
fs = New FileStream("C:\newfile.png", FileMode.OpenOrCreate, FileAccess.Write)
fs.Write(rawData, 0, FileSize)
fs.Close()
MessageBox.Show("File successfully written to disk!", "Success!", MessageBoxButtons.OK, MessageBoxIcon.Asterisk)
myData.Close()
conn.Close()
Catch ex As Exception
MessageBox.Show("There was an error: " & ex.Message, "Error", MessageBoxButtons.OK, MessageBoxIcon.Error)
End Try
After connecting, the contents of the file table are loaded into a MySqlDataReader object. The
GetBytes method of the MySqlDataReader is used to load the BLOB into a byte array, which is then
written to disk using a FileStream object.
The GetOrdinal method of the MySqlDataReader can be used to determine the integer index of a
named column. Use of the GetOrdinal method prevents errors if the column order of the SELECT query is
changed.
5.7 Working with Partial Trust / Medium Trust
56

Evolution of Partial Trust Support Across Connector/NET Versions
.NET applications operate under a given trust level. Normal desktop applications operate under full
trust, while web applications that are hosted in shared environments are normally run under the partial
trust level (also known as “medium trust”). Some hosting providers host shared applications in their own
app pools and allow the application to run under full trust, but this configuration is relatively rare. The
MySQL Connector/NET support for partial trust has improved over time to simplify the configuration and
deployment process for hosting providers.
5.7.1 Evolution of Partial Trust Support Across Connector/NET Versions
The partial trust support for MySQL Connector/NET has improved rapidly throughout the 6.5.x and 6.6.x
versions. The latest enhancements do require some configuration changes in existing deployments. Here
is a summary of the changes for each version.
6.6.4 and Above: Library Can Be Inside or Outside GAC
Now you can install the MySql.Data.dll library in the Global Assembly Cache (GAC) as explained in
Section 5.7.2, “Configuring Partial Trust with Connector/NET Library Installed in GAC”, or in a bin or lib
folder inside the project or solution as explained in Section 5.7.3, “Configuring Partial Trust with Connector/
NET Library Not Installed in GAC”. If the library is not in the GAC, the only protocol supported is TCP/IP.
6.5.1 and Above: Partial Trust Requires Library in the GAC
Connector/NET 6.5 fully enables our provider to run in a partial trust environment when the library is
installed in the Global Assembly Cache (GAC). The new MySqlClientPermission class, derived from
the .NET DBDataPermission class, helps to simplify the permission setup.
5.0.8 / 5.1.3 and Above: Partial Trust Requires Socket Permissions
Starting with these versions, Connector/NET can be used under partial trust hosting that has been
modified to allow the use of sockets for communication. By default, partial trust does not include
SocketPermission. Connector/NET uses sockets to talk with the MySQL server, so the hosting provider
must create a new trust level that is an exact clone of partial trust but that has the following permissions
added:
• System.Net.SocketPermission
• System.Security.Permissions.ReflectionPermission
• System.Net.DnsPermission
• System.Security.Permissions.SecurityPermission
Prior to 5.0.8 / 5.1.3: Partial Trust Not Supported
Connector/NET versions prior to 5.0.8 and 5.1.3 were not compatible with partial trust hosting.
5.7.2 Configuring Partial Trust with Connector/NET Library Installed in GAC
If the library is installed in the GAC, you must include the connection option
includesecurityasserts=true in your connection string. This is a new requirement as of MySQL
Connector/NET 6.6.4.
The following list shows steps and code fragments needed to run a Connector/NET application in a partial
trust environment. For illustration purposes, we use the Pipe Connections protocol in this example.
1. Install Connector/NET: version 6.6.1 or later, or 6.5.4 or later.
2. After installing the library, make the following configuration changes:
57

Configuring Partial Trust with Connector/NET Library Installed in GAC
In the SecurityClasses section, add a definition for the MySqlClientPermission class, including
the version to use.
<configuration>
<mscorlib>
<security>
<policy>
<PolicyLevel version="1">
<SecurityClasses>
....
<SecurityClass Name="MySqlClientPermission" Description="MySql.Data.MySqlClient.MySqlClientPermission,
MySql.Data, Version=6.6.4.0, Culture=neutral, PublicKeyToken=c5687fc88969c44d" />
Scroll down to the ASP.Net section:
<PermissionSet class="NamedPermissionSet" version="1" Name="ASP.Net">
Add a new entry for the detailed configuration of the MySqlClientPermission class:
<IPermission class="MySqlClientPermission" version="1" Unrestricted="true"/>
Note
This configuration is the most generalized way that includes all keywords.
3. Configure the MySQL server to accept pipe connections, by adding the --enable-named-pipe
option on the command line. If you need more information about this, see Installing MySQL on
Microsoft Windows.
4. Confirm that the hosting provider has installed the Connector/NET library (MySql.Data.dll) in the
GAC.
5. Optionally, the hosting provider can avoid granting permissions globally by using
the new MySqlClientPermission class in the trust policies. (The alternative
is to globally enable the permissions System.Net.SocketPermission,
System.Security.Permissions.ReflectionPermission, System.Net.DnsPermission,
and System.Security.Permissions.SecurityPermission.)
6. Create a simple web application using Visual Studio 2010.
7. Add the reference in your application for the MySql.Data.MySqlClient library.
8. Edit your web.config file so that your application runs using a Medium trust level:
<system.web>
<trust level="Medium"/>
</system.web>
9. Add the MySql.Data.MySqlClient namespace to your server-code page.
10. Define the connection string, in slightly different ways depending on the Connector/NET version.
Only for 6.6.4 or later: To use the connections inside any web application that will run in
Medium trust, add the new includesecurityasserts option to the connection string.
includesecurityasserts=true that makes the library request the following permissions
when required: SocketPermissions, ReflectionPermissions, DnsPermissions,
SecurityPermissions among others that are not granted in Medium trust levels.
For Connector/NET 6.6.3 or earlier: No special setting for security is needed within the connection
string.
58

Configuring Partial Trust with Connector/NET Library Not Installed in GAC
MySqlConnectionStringBuilder myconnString = new MySqlConnectionStringBuilder("server=localhost;User Id=root;database=test");
myconnString.PipeName = "MySQL55";
myconnString.ConnectionProtocol = MySqlConnectionProtocol.Pipe;
// Following attribute is a new requirement when the library is in the GAC.
// Could also be done by adding includesecurityasserts=true; to the string literal
// in the constructor above.
// Not needed with Connector/NET 6.6.3 and earlier.
myconnString.IncludeSecurityAsserts = true;
11. Define the MySqlConnection to use:
MySqlConnection myconn = new MySqlConnection(myconnString.ConnectionString);
myconn.Open();
12. Retrieve some data from your tables:
MySqlCommand cmd = new MySqlCommand("Select * from products", myconn);
MySqlDataAdapter da = new MySqlDataAdapter(cmd);
DataSet1 tds = new DataSet1();
da.Fill(tds, tds.Tables[0].TableName);
GridView1.DataSource = tds;
GridView1.DataBind();
myconn.Close()
13. Run the program. It should execute successfully, without requiring any special code or encountering
any security problems.
5.7.3 Configuring Partial Trust with Connector/NET Library Not Installed in
GAC
When deploying a web application to a Shared Hosted environment, where this environment is configured
to run all their .NET applications under a partial or medium trust level, you might not be able to install the
MySQL Connector/NET library in the GAC. Instead, you put a reference to the library in the bin or lib
folder inside the project or solution. In this case, you configure the security in a different way than when the
library is in the GAC.
Connector/NET is commonly used by applications that run in Windows environments where the default
communication for the protocol is used via sockets or by TCP/IP. For this protocol to operate is necessary
have the required socket permissions in the web configuration file as follows:
1. Open the medium trust policy web configuration file, which should be under this folder:
%windir%\Microsoft.NET\Framework\{version}\CONFIG\web_mediumtrust.config
Use Framework64 in the path instead of Framework if you are using a 64-bit installation of the
framework.
2. Locate the SecurityClasses tag:
<SecurityClass Name="SocketPermission"
Description="System.Net.SocketPermission, System, Version=4.0.0.0,
Culture=neutral, PublicKeyToken=b77a5c561934e089"/>
3. Scroll down and look for the following PermissionSet:
<PermissionSet version="1" Name="ASP.Net">
4. Add the following inside this PermissionSet:
<IPermission class="SocketPermission" version="1" Unrestricted="true" />
59

Writing a Custom Authentication Plugin
This configuration lets you use the driver with the default Windows protocol TCP/IP without having any
security issues. This approach only supports the TCP/IP protocol, so you cannot use any other type of
connection.
Also, since the MySQLClientPermissions class is not added to the medium trust policy, you cannot
use it. This configuration is the minimum required in order to work with Connector/NET without the
GAC.
5.8 Writing a Custom Authentication Plugin
Advanced users with special security requirements can create their own authentication plugins for
MySQL Connector/NET applications. You can extend the handshake protocol, adding custom logic. For
background and usage information about MySQL authentication plugins, see Authentication Plugins and
Writing Authentication Plugins.
To write a custom authentication plugin, you will need a reference to the assembly MySql.Data.dll.
The classes relevant for writing authentication plugins are available at the namespace
MySql.Data.MySqlClient.Authentication.
How the Custom Authentication Plugin Works
At some point during handshake, the internal method
void Authenticate(bool reset)
of MySqlAuthenticationPlugin is called. This method in turns calls several overridable methods of
the current plugin.
Creating the Authentication Plugin Class
You put the authentication plugin logic inside a new class derived from
MySql.Data.MySqlClient.Authentication.MySqlAuthenticationPlugin. The following
methods are available to be overridden:
protected virtual void CheckConstraints()
protected virtual void AuthenticationFailed(Exception ex)
protected virtual void AuthenticationSuccessful()
protected virtual byte[] MoreData(byte[] data)
protected virtual void AuthenticationChange()
public abstract string PluginName { get; }
public virtual string GetUsername()
public virtual object GetPassword()
protected byte[] AuthData;
The following is a brief explanation of each one:
/// <summary>
/// This method must check authentication method specific constraints in the
environment and throw an Exception
/// if the conditions are not met. The default implementation does nothing.
/// </summary>
protected virtual void CheckConstraints()
/// <summary>
/// This method, called when the authentication failed, provides a chance to
plugins to manage the error
/// the way they consider decide (either showing a message, logging it, etc.).
/// The default implementation wraps the original exception in a MySqlException
with an standard message and rethrows it.
60

Authentication Plugin Example
/// </summary>
/// <param name="ex">The exception with extra information on the error.</param>
protected virtual void AuthenticationFailed(Exception ex)
/// <summary>
/// This method is invoked when the authentication phase was successful accepted
by the server.
/// Derived classes must override this if they want to be notified of such
condition.
/// </summary>
/// <remarks>The default implementation does nothing.</remarks>
protected virtual void AuthenticationSuccessful()
/// <summary>
/// This method provides a chance for the plugin to send more data when the
server requests so during the
/// authentication phase. This method will be called at least once, and more
than one depending upon whether the
/// server response packets have the 0x01 prefix.
/// </summary>
/// <param name="data">The response data from the server, during the
authentication phase the first time is called is null, in
subsequent calls contains the server response.</param>
/// <returns>The data generated by the plugin for server consumption.</returns>
/// <remarks>The default implementation always returns null.</remarks>
protected virtual byte[] MoreData(byte[] data)
/// <summary>
/// The plugin name.
/// </summary>
public abstract string PluginName { get; }
/// <summary>
/// Gets the user name to send to the server in the authentication phase.
/// </summary>
/// <returns>An string with the user name</returns>
/// <remarks>Default implementation returns the UserId passed from the
connection string.</remarks>
public virtual string GetUsername()
/// <summary>
/// Gets the password to send to the server in the authentication phase. This
can be a string or a
/// </summary>
/// <returns>An object, can be byte[], string or null, with the password.
</returns>
/// <remarks>Default implementation returns null.</remarks>
public virtual object GetPassword()
/// <summary>
/// The authentication data passed when creating the plugin.
/// For example in mysql_native_password this is the seed to encrypt the
password.
/// </summary>
protected byte[] AuthData;
Authentication Plugin Example
This example shows how to create the authentication plugin and then enable it by means of a configuration
file.
1. Create a console app, adding a reference to MySql.Data.dll.
2. Design the main C# program as follows:
using System;
61

Authentication Plugin Example
using System.Collections.Generic;
using System.Linq;
using System.Text;
using MySql.Data.MySqlClient;
namespace AuthPluginTest
{
class Program
{
static void Main(string[] args)
{
// Customize the connection string as necessary.
MySqlConnection con = new MySqlConnection("server=localhost;
database=test; user id=myuser; password=mypass");
con.Open();
con.Close();
}
}
}
3. Create your plugin class. In this example, we add an “alternative” implementation of the Native
password plugin by just using the same code from the original plugin.
Note
The mysql_native_password plugin is disabled by default as of MySQL Server
8.4.0 and removed as of MySQL Server 9.0.0.
We name our class MySqlNativePasswordPlugin2:
using System.IO;
using System;
using System.Text;
using System.Security.Cryptography;
using MySql.Data.MySqlClient.Authentication;
using System.Diagnostics;
namespace AuthPluginTest
{
public class MySqlNativePasswordPlugin2 : MySqlAuthenticationPlugin
{
public override string PluginName
{
get { return "mysql_native_password"; }
}
public override object GetPassword()
{
Debug.WriteLine("Calling MySqlNativePasswordPlugin2.GetPassword");
return Get411Password(Settings.Password, AuthData);
}
/// <summary>
/// Returns a byte array containing the proper encryption of the
/// given password/seed according to the new 4.1.1 authentication scheme.
/// </summary>
/// <param name="password"></param>
/// <param name="seed"></param>
/// <returns></returns>
private byte[] Get411Password(string password, byte[] seedBytes)
{
// if we have no password, then we just return 1 zero byte
if (password.Length == 0) return new byte[1];
SHA1 sha = new SHA1CryptoServiceProvider();
62

Using the Connector/NET Interceptor Classes
byte[] firstHash = sha.ComputeHash(Encoding.Default.GetBytes(password));
byte[] secondHash = sha.ComputeHash(firstHash);
byte[] input = new byte[seedBytes.Length + secondHash.Length];
Array.Copy(seedBytes, 0, input, 0, seedBytes.Length);
Array.Copy(secondHash, 0, input, seedBytes.Length, secondHash.Length);
byte[] thirdHash = sha.ComputeHash(input);
byte[] finalHash = new byte[thirdHash.Length + 1];
finalHash[0] = 0x14;
Array.Copy(thirdHash, 0, finalHash, 1, thirdHash.Length);
for (int i = 1; i < finalHash.Length; i++)
finalHash[i] = (byte)(finalHash[i] ^ firstHash[i - 1]);
return finalHash;
}
}
}
Notice that the plugin implementation just overrides GetPassword, and provides an implementation
to encrypt the password using the 4.1 protocol. Add the following line in the GetPassword body to
provide confirmation that the plugin was effectively used.
Debug.WriteLine("Calling MySqlNativePasswordPlugin2.GetPassword");
Tip
You could also put a breakpoint on that method.
4. Enable the new plugin in the configuration file:
<?xml version="1.0"?>
<configuration>
<configSections>
<section name="MySQL" type="MySql.Data.MySqlClient.MySqlConfiguration,
MySql.Data"/>
</configSections>
<MySQL>
<AuthenticationPlugins>
<add name="mysql_native_password"
type="AuthPluginTest.MySqlNativePasswordPlugin2, AuthPluginTest"></add>
</AuthenticationPlugins>
</MySQL>
<startup><supportedRuntime version="v4.0" sku=".NETFramework,Version=v4.0"/>
</startup></configuration>
5. Run the application. In Visual Studio, you will see the message Calling
MySqlNativePasswordPlugin2.GetPassword in the debug window.
Continue enhancing the authentication logic, overriding more methods if you required.
5.9 Using the Connector/NET Interceptor Classes
An interceptor is a software design pattern that provides a transparent way to extend or modify some
aspect of a program, similar to a user exit. No recompiling is required. With MySQL Connector/NET,
the interceptors are enabled and disabled by updating the connection string to refer to different sets of
interceptor classes that you instantiate.
Note
The classes and methods presented in this section do not apply to Connector/NET
applications developed with the .NET Core 1.1 framework.
63

Using the Connector/NET Interceptor Classes
Connector/NET includes the following interceptor classes:
• The BaseCommandInterceptor lets you perform additional operations when a program issues a
SQL command. For example, you can examine the SQL statement for logging or debugging purposes,
substitute your own result set to implement a caching mechanism, and so on. Depending on the use
case, your code can supplement the SQL command or replace it entirely.
The BaseCommandInterceptor class has these methods that you can override:
public virtual bool ExecuteScalar(string sql, ref object returnValue);
public virtual bool ExecuteNonQuery(string sql, ref int returnValue);
public virtual bool ExecuteReader(string sql, CommandBehavior behavior, ref MySqlDataReader returnValue);
public virtual void Init(MySqlConnection connection);
If your interceptor overrides one of the Execute... methods, set the returnValue output parameter
and return true if you handled the event, or false if you did not handle the event. The SQL command
is processed normally only when all command interceptors return false.
The connection passed to the Init method is the connection that is attached to this interceptor.
• The BaseExceptionInterceptor lets you perform additional operations when a program encounters
an SQL exception. The exception interception mechanism is modeled after the Connector/J model. You
can code an interceptor class and connect it to an existing program without recompiling, and intercept
exceptions when they are created. You can then change the exception type and optionally attach
information to it. This capability lets you turn on and off logging and debugging code without hardcoding
anything in the application. This technique applies to exceptions raised at the SQL level, not to lower-
level system or I/O errors.
You develop an exception interceptor first by creating a subclass of the BaseExceptionInterceptor
class. You must override the InterceptException() method. You can also override the Init()
method to do some one-time initialization.
Each exception interceptor has 2 methods:
public abstract Exception InterceptException(Exception exception,
MySqlConnection connection);
public virtual void Init(MySqlConnection connection);
The connection passed to Init() is the connection that is attached to this interceptor.
Each interceptor is required to override InterceptException and return an exception. It can return
the exception it is given, or it can wrap it in a new exception. We currently do not offer the ability to
suppress the exception.
Here are examples of using the FQN (fully qualified name) on the connection string:
MySqlConnection c1 = new MySqlConnection(@"server=localhost;pooling=false;
commandinterceptors=CommandApp.MyCommandInterceptor,CommandApp");
MySqlConnection c2 = new MySqlConnection(@"server=localhost;pooling=false;
exceptioninterceptors=ExceptionStackTraceTest.MyExceptionInterceptor,ExceptionStackTraceTest");
In this example, the command interceptor is called CommandApp.MyCommandInterceptor
and exists in the CommandApp assembly. The exception interceptor is called
ExceptionStackTraceTest.MyExceptionInterceptor and exists in the
ExceptionStackTraceTest assembly.
To shorten the connection string, you can register your exception interceptors in your app.config or
web.config file like this:
64

Handling Date and Time Information in Connector/NET
<configSections>
<section name="MySQL" type="MySql.Data.MySqlClient.MySqlConfiguration,MySql.Data"/>
</configSections>
<MySQL>
<CommandInterceptors>
<add name="myC" type="CommandApp.MyCommandInterceptor,CommandApp" />
</CommandInterceptors>
</MySQL>
<configSections>
<section name="MySQL" type="MySql.Data.MySqlClient.MySqlConfiguration,
MySql.Data"/>
</configSections>
<MySQL>
<ExceptionInterceptors>
<add name="myE"
type="ExceptionStackTraceTest.MyExceptionInterceptor,ExceptionStackTraceTest" />
</ExceptionInterceptors>
</MySQL>
After you have done that, your connection strings can look like these:
MySqlConnection c1 = new MySqlConnection(@"server=localhost;pooling=false;
commandinterceptors=myC");
MySqlConnection c2 = new MySqlConnection(@"server=localhost;pooling=false;
exceptioninterceptors=myE");
5.10 Handling Date and Time Information in Connector/NET
MySQL and the .NET languages handle date and time information differently, with MySQL allowing dates
that cannot be represented by a .NET data type, such as '0000-00-00 00:00:00'. These differences
can cause problems if not properly handled.
The following sections demonstrate how to properly handle date and time information when using MySQL
Connector/NET.
5.10.1 Fractional Seconds
MySQL Connector/NET supports the fractional seconds feature in MySQL, where the fractional seconds
part of temporal values is preserved in data stored and retrieved through SQL. For fractional second
handling in MySQL 5.6.4 and higher, see Fractional Seconds in Time Values.
To use the more precise date and time types, specify a value from 1 to 6 when creating the table
column, for example TIME(3) or DATETIME(6), representing the number of digits of precision after
the decimal point. Specifying a precision of 0 leaves the fractional part out entirely. In your C# or
Visual Basic code, refer to the Millisecond member to retrieve the fractional second value from the
MySqlDateTime object returned by the GetMySqlDateTime function. The DateTime object returned by
the GetDateTime function also contains the fractional value, but only the first 3 digits.
For related code examples, see the following blog post: https://blogs.oracle.com/MySqlOnWindows/entry/
milliseconds_value_support_on_datetime
5.10.2 Problems when Using Invalid Dates
The differences in date handling can cause problems for developers who use invalid dates. Invalid MySQL
dates cannot be loaded into native .NET DateTime objects, including NULL dates.
Because of this issue, .NET DataSet objects cannot be populated by the Fill method of the
MySqlDataAdapter class as invalid dates will cause a System.ArgumentOutOfRangeException
exception to occur.
65

Restricting Invalid Dates
5.10.3 Restricting Invalid Dates
The best solution to the date problem is to restrict users from entering invalid dates. This can be done on
either the client or the server side.
Restricting invalid dates on the client side is as simple as always using the .NET DateTime class to
handle dates. The DateTime class will only allow valid dates, ensuring that the values in your database
are also valid. The disadvantage of this is that it is not useful in a mixed environment where .NET and
non .NET code are used to manipulate the database, as each application must perform its own date
validation.
Users of MySQL 5.0.2 and higher can use the new traditional SQL mode to restrict invalid date
values. For information on using the traditional SQL mode, see Server SQL Modes.
5.10.4 Handling Invalid Dates
Although it is strongly recommended that you avoid the use of invalid dates within your .NET application, it
is possible to use invalid dates by means of the MySqlDateTime data type.
The MySqlDateTime data type supports the same date values that are supported by the MySQL
server. The default behavior of Connector/NET is to return a .NET DateTime object for valid date values,
and return an error for invalid dates. This default can be modified to cause Connector/NET to return
MySqlDateTime objects for invalid dates.
To instruct Connector/NET to return a MySqlDateTime object for invalid dates, add the following line to
your connection string:
Allow Zero Datetime=True
The MySqlDateTime class can still be problematic. The following are some known issues:
• Data binding for invalid dates can still cause errors (zero dates like 0000-00-00 do not seem to have this
problem).
• The ToString method return a date formatted in the standard MySQL format (for example,
2005-02-23 08:50:25). This differs from the ToString behavior of the .NET DateTime class.
• The MySqlDateTime class supports NULL dates, while the .NET DateTime class does not. This can
cause errors when trying to convert a MySQLDateTime to a DateTime if you do not check for NULL first.
Because of the known issues, the best recommendation is still to use only valid dates in your application.
5.10.5 Handling NULL Dates
The .NET DateTime data type cannot handle NULL values. As such, when assigning values from a query
to a DateTime variable, you must first check whether the value is in fact NULL.
When using a MySqlDataReader, use the .IsDBNull method to check whether a value is NULL before
making the assignment:
C# Code Example
if (! myReader.IsDBNull(myReader.GetOrdinal("mytime")))
myTime = myReader.GetDateTime(myReader.GetOrdinal("mytime"));
else
myTime = DateTime.MinValue;
66

Using the MySqlBulkLoader Class
Visual Basic Code Example
If Not myReader.IsDBNull(myReader.GetOrdinal("mytime")) Then
myTime = myReader.GetDateTime(myReader.GetOrdinal("mytime"))
Else
myTime = DateTime.MinValue
End If
NULL values will work in a data set and can be bound to form controls without special handling.
5.11 Using the MySqlBulkLoader Class
MySQL Connector/NET features a bulk loader class that wraps the MySQL statement LOAD DATA
INFILE. This gives Connector/NET the ability to load a data file from a local or remote host to the server,
or a stream to a database (from Connector/NET 8.0.32).
The class concerned is MySqlBulkLoader. This class has various methods, the main overloaded method
being load, which permits a stream object to be loaded directly to a database (8.0.32) or the specified file
to the server. Various parameters can be set to control how the data file is processed. This is achieved
through setting various properties of the class. For example, the field separator used, such as comma or
tab, can be specified, along with the record terminator, such as newline.
The following code shows a simple example of using the MySqlBulkLoader class. First an empty table
needs to be created, in this case in the test database.
CREATE TABLE Career (
Name VARCHAR(100) NOT NULL,
Age INTEGER,
Profession VARCHAR(200)
);
A simple tab-delimited data file is also created (it could use any other field delimiter such as comma).
Table Career in Test Database
Name Age Profession
Tony 47 Technical Writer
Ana 43 Nurse
Fred 21 IT Specialist
Simon 45 Hairy Biker
The first three lines need to be ignored with this test file, as they do not contain table data. This task is
accomplished in the following C# code example by setting the NumberOfLinesToSkip property . The file
can then be loaded and used to populate the Career table in the test database.
Note
As of Connector/NET 8.0.15, the Local property must be set to True explicitly to
enable the local-infile capability. Previous versions set this value to True by default.
using System;
using System.Text;
using MySql.Data;
using MySql.Data.MySqlClient;
namespace ConsoleApplication1
{
class Program
{
static void Main(string[] args)
{
67

Connector/NET Tracing
string connStr = "server=localhost;user=root;database=test;port=3306;password=******";
MySqlConnection conn = new MySqlConnection(connStr);
MySqlBulkLoader bl = new MySqlBulkLoader(conn);
bl.Local = true;
bl.TableName = "Career";
bl.FieldTerminator = "\t";
bl.LineTerminator = "\n";
bl.FileName = "c:/career_data.txt";
bl.NumberOfLinesToSkip = 3;
try
{
Console.WriteLine("Connecting to MySQL...");
conn.Open();
// Upload data from file
int count = bl.Load();
Console.WriteLine(count + " lines uploaded.");
string sql = "SELECT Name, Age, Profession FROM Career";
MySqlCommand cmd = new MySqlCommand(sql, conn);
MySqlDataReader rdr = cmd.ExecuteReader();
while (rdr.Read())
{
Console.WriteLine(rdr[0] + " -- " + rdr[1] + " -- " + rdr[2]);
}
rdr.Close();
conn.Close();
}
catch (Exception ex)
{
Console.WriteLine(ex.ToString());
}
Console.WriteLine("Done.");
}
}
}
Further information on LOAD DATA INFILE can be found in LOAD DATA Statement. Further information
on MySqlBulkLoader can be found in the reference documentation that was included with your
connector.
5.12 Connector/NET Tracing
5.12.1 Enabling OpenTelemetry Tracing
OpenTelementry (OTel) standardizes instrumentation, generation, collecting and exporting telemetry data
to be consumed by an Observability backend. For more details on OpenTelemetry, visit its official site.
Starting in Connector/NET 8.1.0, support for OTel is encapsulated in the MySQL.Data.OpenTelemetry
NuGet package. This package implements the functionality to add the connector to the tracer provider
using OpenTelementry.Api. Connector/NET neither creates nor provides the means to create an OTel
exporter. Instead, it relies on the default exporter supplied by your application.
Note
OTel context forwarding works only with MySQL Enterprise Edition, a commercial
product. To learn more about commercial products, see https://www.mysql.com/
products/.
68

Using the Connector/NET Trace Source Object
Requirements for Enabling Tracing
• .NET 5 and later.
• Connector/NET MySQL.Data.OpenTelemetry and MySQL.Data NuGet packages.
Note
The Connector/NET MSI file does not include support for this OTel
implementation.
• An OpenTelemetry SDK of your choosing and an appropriate exporter package.
• MySQL Enterprise Edition server with the query attributes enabled. If the server does not support query
attributes or has them disabled, then Connector/NET skips the entire context propagation flow.
• Code that uses OTel instrumentation. If your code does not use instrumentation, then the connector
does not forward the current OTel context for each executed statement.
Enabling OpenTelemetry
To enable OTel tracing using the Connector/NET implementation, add the connector to the trace provider
builder as follows:
var tracerProvider = sdk.TraceProviderBuilder().AddConnectorNet().Build();
When you build code that links to Connector/NET and uses OTel instrumentation, the additional spans
generated by the connector appear in the traces generated by your code. Spans generated by the
connector are sent to the same destination (trace exporter) where other spans generated by the user code
are sent as configured by user code. It is not possible to send spans generated by the connector to any
other destination.
5.12.2 Using the Connector/NET Trace Source Object
The .NET tracing architecture consists of four main parts:
• Source - This is the originator of the trace information. The source is used to send trace messages. The
name of the source provided by Connector/NET is mysql.
• Switch - This defines the level of trace information to emit. Typically, this is specified in the app.config
file, so that it is not necessary to recompile an application to change the trace level.
• Listener - Trace listeners define where the trace information will be written to. Supported listeners
include, for example, the Visual Studio Output window, the Windows Event Log, and the console.
• Filter - Filters can be attached to listeners. Filters determine the level of trace information that will be
written. While a switch defines the level of information that will be written to all listeners, a filter can be
applied on a per-listener basis, giving finer grained control of trace information.
To use tracing MySql.Data.MySqlClient.MySqlTrace can be used as a TraceSource for Connector/NET
and the connection string must include "Logging=True".
To enable trace messages, configure a trace switch. Trace switches have associated with them a trace
level enumeration, these are Off, Error, Warning, Info, and Verbose.
MySqlTrace.Switch.Level = SourceLevels.Verbose;
This sets the trace level to Verbose, meaning that all trace messages will be written.
69

Using the Connector/NET Trace Source Object
It is convenient to be able to change the trace level without having to recompile the code. This is achieved
by specifying the trace level in application configuration file, app.config. You then simply need to specify
the desired trace level in the configuration file and restart the application. The trace source is configured
within the system.diagnostics section of the file. The following XML snippet illustrates this:
<configuration>
...
<system.diagnostics>
<sources>
<source name="mysql" switchName="MySwitch"
switchType="System.Diagnostics.SourceSwitch" />
...
</sources>
<switches>
<add name="MySwitch" value="Verbose"/>
...
</switches>
</system.diagnostics>
...
</configuration>
By default, trace information is written to the Output window of Microsoft Visual Studio. There are a
wide range of listeners that can be attached to the trace source, so that trace messages can be written
out to various destinations. You can also create custom listeners to allow trace messages to be written
to other destinations as mobile devices and web services. A commonly used example of a listener is
ConsoleTraceListener, which writes trace messages to the console.
To add a listener at runtime, use code such as the following:
ts.Listeners.Add(new ConsoleTraceListener());
Then, call methods on the trace source object to generate trace information. For example, the
TraceInformation(), TraceEvent(), or TraceData() methods can be used.
5.12.2.1 Viewing MySQL Trace Information
This section describes how to set up your application to view MySQL trace information.
The first thing you need to do is create a suitable app.config file for your application. For example:
<?xml version="1.0" encoding="utf-8" ?>
<configuration>
<system.diagnostics>
<sources>
<source name="mysql" switchName="SourceSwitch"
switchType="System.Diagnostics.SourceSwitch" >
<listeners>
<add name="console" />
<remove name ="Default" />
</listeners>
</source>
</sources>
<switches>
<!-- You can set the level at which tracing is to occur -->
<add name="SourceSwitch" value="Verbose" />
<!-- You can turn tracing off -->
<!--add name="SourceSwitch" value="Off" -->
</switches>
<sharedListeners>
<add name="console"
type="System.Diagnostics.ConsoleTraceListener"
initializeData="false"/>
</sharedListeners>
</system.diagnostics>
70

Using the Connector/NET Trace Source Object
</configuration>
This configuration ensures that a suitable trace source is created, along with a switch. The switch level in
this case is set to Verbose to display the maximum amount of information.
Next, add logging=true to the connection string in your C# application. For example:
using System;
using System.Collections.Generic;
using System.Linq;
using System.Text;
using System.Diagnostics;
using MySql.Data;
using MySql.Data.MySqlClient;
using MySql.Web;
namespace ConsoleApplication1
{
class Program
{
static void Main(string[] args)
{
string connStr = "server=localhost;user=root;database=world;port=3306;password=******;logging=true";
MySqlConnection conn = new MySqlConnection(connStr);
try
{
Console.WriteLine("Connecting to MySQL...");
conn.Open();
string sql = "SELECT Name, HeadOfState FROM Country WHERE Continent='Oceania'";
MySqlCommand cmd = new MySqlCommand(sql, conn);
MySqlDataReader rdr = cmd.ExecuteReader();
while (rdr.Read())
{
Console.WriteLine(rdr[0] + " -- " + rdr[1]);
}
rdr.Close();
conn.Close();
}
catch (Exception ex)
{
Console.WriteLine(ex.ToString());
}
Console.WriteLine("Done.");
}
}
}
This simple application then generates the following output:
Connecting to MySQL...
mysql Information: 1 : 1: Connection Opened: connection string = 'server=localhost;User Id=root;database=world;port=3306
;password=******;logging=True'
mysql Information: 3 : 1: Query Opened: SHOW VARIABLES
mysql Information: 4 : 1: Resultset Opened: field(s) = 2, affected rows = -1, inserted id = -1
mysql Information: 5 : 1: Resultset Closed. Total rows=272, skipped rows=0, size (bytes)=7058
mysql Information: 6 : 1: Query Closed
mysql Information: 3 : 1: Query Opened: SHOW COLLATION
mysql Information: 4 : 1: Resultset Opened: field(s) = 6, affected rows = -1, inserted id = -1
mysql Information: 5 : 1: Resultset Closed. Total rows=127, skipped rows=0, size (bytes)=4102
mysql Information: 6 : 1: Query Closed
71

Using the Connector/NET Trace Source Object
mysql Information: 3 : 1: Query Opened: SET character_set_results=NULL
mysql Information: 4 : 1: Resultset Opened: field(s) = 0, affected rows = 0, inserted id = 0
mysql Information: 5 : 1: Resultset Closed. Total rows=0, skipped rows=0, size (bytes)=0
mysql Information: 6 : 1: Query Closed
mysql Information: 10 : 1: Set Database: world
mysql Information: 3 : 1: Query Opened: SELECT Name, HeadOfState FROM Country WHERE Continent='Oceania'
mysql Information: 4 : 1: Resultset Opened: field(s) = 2, affected rows = -1, inserted id = -1
American Samoa -- George W. Bush
Australia -- Elisabeth II
...
Wallis and Futuna -- Jacques Chirac
Vanuatu -- John Bani
United States Minor Outlying Islands -- George W. Bush
mysql Information: 5 : 1: Resultset Closed. Total rows=28, skipped rows=0, size (bytes)=788
mysql Information: 6 : 1: Query Closed
Done.
mysql Information: 2 : 1: Connection Closed
The first number displayed in the trace message corresponds to the MySQL event type. The second
number displayed in the trace message is the connection count. The following table describes each
MySQL event type.
Event Type Description
1 ConnectionOpened: connection string
2 ConnectionClosed:
3 QueryOpened: mysql server thread id, query text
4 ResultOpened: field count, affected rows (-1 if select), inserted id (-1 if
select)
5 ResultClosed: total rows read, rows skipped, size of result set in bytes
6 QueryClosed:
7 StatementPrepared: prepared sql, statement id
8 StatementExecuted: statement id, mysql server thread id
9 StatementClosed: statement id
10 NonQuery: [varies]
11 UsageAdvisorWarning: usage advisor flag. NoIndex = 1, BadIndex = 2,
SkippedRows = 3, SkippedColumns = 4, FieldConversion = 5.
12 Warning: level, code, message
13 Error: error number, error message
Although this example uses the ConsoleTraceListener, any of the other standard listeners can
be used. Another possibility is to create a custom listener that uses the information passed in with the
TraceEvent method. For example, a custom trace listener can be created to perform active monitoring of
the MySQL event messages, rather than simply writing these to an output device.
It is also possible to add listeners to the MySQL Trace Source at runtime. This can be done with the
following code:
MySqlTrace.Listeners.Add(new ConsoleTraceListener());
Connector/NET provides the ability to switch tracing on and off at runtime. This can be achieved using
the calls MySqlTrace.EnableQueryAnalyzer(string host, int postInterval) and
MySqlTrace.DisableQueryAnalyzer(). The parameter host is the URL of the MySQL Enterprise
Monitor server to monitor. The parameter postInterval is how often to post the data to MySQL
Enterprise Monitor, in seconds.
72

Using the Connector/NET Trace Source Object
5.12.2.2 Building Custom Listeners
To build custom listeners that work with the MySQL Connector/NET Trace Source, it is necessary to
understand the key methods used, and the event data formats used.
The main method involved in passing trace messages is the TraceSource.TraceEvent method. This
has the prototype:
public void TraceEvent(
TraceEventType eventType,
int id,
string format,
params Object[] args
)
This trace source method will process the list of attached listeners and call the listener's
TraceListener.TraceEvent method. The prototype for the TraceListener.TraceEvent method is
as follows:
public virtual void TraceEvent(
TraceEventCache eventCache,
string source,
TraceEventType eventType,
int id,
string format,
params Object[] args
)
The first three parameters are used in the standard as defined by Microsoft. The last three parameters
contain MySQL-specific trace information. Each of these parameters is now discussed in more detail.
int id
This is a MySQL-specific identifier. It identifies the MySQL event type that has occurred, resulting in a trace
message being generated. This value is defined by the MySqlTraceEventType public enum contained in
the Connector/NET code:
public enum MySqlTraceEventType : int
{
ConnectionOpened = 1,
ConnectionClosed,
QueryOpened,
ResultOpened,
ResultClosed,
QueryClosed,
StatementPrepared,
StatementExecuted,
StatementClosed,
NonQuery,
UsageAdvisorWarning,
Warning,
Error
}
The MySQL event type also determines the contents passed using the parameter params Object[]
args. The nature of the args parameters are described in further detail in the following material.
string format
This is the format string that contains zero or more format items, which correspond to objects in the args
array. This would be used by a listener such as ConsoleTraceListener to write a message to the
output device.
params Object[] args
73

Using Connector/NET with Crystal Reports
This is a list of objects that depends on the MySQL event type, id. However, the first parameter passed
using this list is always the driver id. The driver id is a unique number that is incremented each time
the connector is opened. This enables groups of queries on the same connection to be identified. The
parameters that follow driver id depend on the MySQL event id, and are as follows:
MySQL-specific event type Arguments (params Object[] args)
ConnectionOpened Connection string
ConnectionClosed No additional parameters
QueryOpened mysql server thread id, query text
ResultOpened field count, affected rows (-1 if select), inserted id (-1 if select)
ResultClosed total rows read, rows skipped, size of result set in bytes
QueryClosed No additional parameters
StatementPrepared prepared sql, statement id
StatementExecuted statement id, mysql server thread id
StatementClosed statement id
NonQuery Varies
UsageAdvisorWarning usage advisor flag. NoIndex = 1, BadIndex = 2, SkippedRows = 3,
SkippedColumns = 4, FieldConversion = 5.
Warning level, code, message
Error error number, error message
This information allows you to create custom trace listeners that can actively monitor the MySQL-specific
events.
5.13 Using Connector/NET with Crystal Reports
Crystal Reports is a common tool used by Windows application developers to perform reporting and
document generation. In this section we will show how to use Crystal Reports XI with MySQL and MySQL
Connector/NET.
5.13.1 Creating a Data Source
When creating a report in Crystal Reports there are two options for accessing the MySQL data while
designing your report.
The first option is to use Connector/ODBC as an ADO data source when designing your report. You will be
able to browse your database and choose tables and fields using drag and drop to build your report. The
disadvantage of this approach is that additional work must be performed within your application to produce
a data set that matches the one expected by your report.
The second option is to create a data set in VB.NET and save it as XML. This XML file can then be used
to design a report. This works quite well when displaying the report in your application, but is less versatile
at design time because you must choose all relevant columns when creating the data set. If you forget a
column you must re-create the data set before the column can be added to the report.
The following code can be used to create a data set from a query and write it to disk:
C# Code Example
DataSet myData = new DataSet();
MySql.Data.MySqlClient.MySqlConnection conn;
MySql.Data.MySqlClient.MySqlCommand cmd;
74

Creating the Report
MySql.Data.MySqlClient.MySqlDataAdapter myAdapter;
conn = new MySql.Data.MySqlClient.MySqlConnection();
cmd = new MySql.Data.MySqlClient.MySqlCommand();
myAdapter = new MySql.Data.MySqlClient.MySqlDataAdapter();
conn.ConnectionString = "server=127.0.0.1;uid=root;" +
"pwd=12345;database=test";
try
{
cmd.CommandText = "SELECT city.name AS cityName, city.population AS CityPopulation, " +
"country.name, country.population, country.continent " +
"FROM country, city ORDER BY country.continent, country.name";
cmd.Connection = conn;
myAdapter.SelectCommand = cmd;
myAdapter.Fill(myData);
myData.WriteXml(@"C:\dataset.xml", XmlWriteMode.WriteSchema);
}
catch (MySql.Data.MySqlClient.MySqlException ex)
{
MessageBox.Show(ex.Message, "Report could not be created",
MessageBoxButtons.OK, MessageBoxIcon.Error);
}
Visual Basic Code Example
Dim myData As New DataSet
Dim conn As New MySqlConnection
Dim cmd As New MySqlCommand
Dim myAdapter As New MySqlDataAdapter
conn.ConnectionString = "server=127.0.0.1;" _
& "uid=root;" _
& "pwd=12345;" _
& "database=world"
Try
conn.Open()
cmd.CommandText = "SELECT city.name AS cityName, city.population AS CityPopulation, " _
& "country.name, country.population, country.continent " _
& "FROM country, city ORDER BY country.continent, country.name"
cmd.Connection = conn
myAdapter.SelectCommand = cmd
myAdapter.Fill(myData)
myData.WriteXml("C:\dataset.xml", XmlWriteMode.WriteSchema)
Catch ex As Exception
MessageBox.Show(ex.Message, "Report could not be created", MessageBoxButtons.OK, MessageBoxIcon.Error)
End Try
The resulting XML file can be used as an ADO.NET XML datasource when designing your report.
If you choose to design your reports using Connector/ODBC, it can be downloaded from dev.mysql.com.
5.13.2 Creating the Report
For most purposes, the Standard Report wizard helps with the initial creation of a report. To start the
wizard, open Crystal Reports and choose the New > Standard Report option from the File menu.
The wizard first prompts you for a data source. If you use Connector/ODBC as your data source, use the
OLEDB provider for ODBC option from the OLE DB (ADO) tree instead of the ODBC (RDO) tree when
75

Displaying the Report
choosing a data source. If using a saved data set, choose the ADO.NET (XML) option and browse to your
saved data set.
The remainder of the report creation process is done automatically by the wizard.
After the report is created, choose the Report Options entry from the File menu. Un-check the Save
Data With Report option. This prevents saved data from interfering with the loading of data within our
application.
5.13.3 Displaying the Report
To display a report we first populate a data set with the data needed for the report, then load the report and
bind it to the data set. Finally we pass the report to the crViewer control for display to the user.
The following references are needed in a project that displays a report:
• CrystalDecisions.CrystalReports.Engine
• CrystalDecisions.ReportSource
• CrystalDecisions.Shared
• CrystalDecisions.Windows.Forms
The following code assumes that you created your report using a data set saved using the code shown in
Section 5.13.1, “Creating a Data Source”, and have a crViewer control on your form named myViewer.
C# Code Example
using CrystalDecisions.CrystalReports.Engine;
using System.Data;
using MySql.Data.MySqlClient;
ReportDocument myReport = new ReportDocument();
DataSet myData = new DataSet();
MySql.Data.MySqlClient.MySqlConnection conn;
MySql.Data.MySqlClient.MySqlCommand cmd;
MySql.Data.MySqlClient.MySqlDataAdapter myAdapter;
conn = new MySql.Data.MySqlClient.MySqlConnection();
cmd = new MySql.Data.MySqlClient.MySqlCommand();
myAdapter = new MySql.Data.MySqlClient.MySqlDataAdapter();
conn.ConnectionString = "server=127.0.0.1;uid=root;" +
"pwd=12345;database=test";
try
{
cmd.CommandText = "SELECT city.name AS cityName, city.population AS CityPopulation, " +
"country.name, country.population, country.continent " +
"FROM country, city ORDER BY country.continent, country.name";
cmd.Connection = conn;
myAdapter.SelectCommand = cmd;
myAdapter.Fill(myData);
myReport.Load(@".\world_report.rpt");
myReport.SetDataSource(myData);
myViewer.ReportSource = myReport;
}
catch (MySql.Data.MySqlClient.MySqlException ex)
{
MessageBox.Show(ex.Message, "Report could not be created",
MessageBoxButtons.OK, MessageBoxIcon.Error);
76

Displaying the Report
}
Visual Basic Code Example
Imports CrystalDecisions.CrystalReports.Engine
Imports System.Data
Imports MySql.Data.MySqlClient
Dim myReport As New ReportDocument
Dim myData As New DataSet
Dim conn As New MySqlConnection
Dim cmd As New MySqlCommand
Dim myAdapter As New MySqlDataAdapter
conn.ConnectionString = _
"server=127.0.0.1;" _
& "uid=root;" _
& "pwd=12345;" _
& "database=test"
Try
conn.Open()
cmd.CommandText = "SELECT city.name AS cityName, city.population AS CityPopulation, " _
& "country.name, country.population, country.continent " _
& "FROM country, city ORDER BY country.continent, country.name"
cmd.Connection = conn
myAdapter.SelectCommand = cmd
myAdapter.Fill(myData)
myReport.Load(".\world_report.rpt")
myReport.SetDataSource(myData)
myViewer.ReportSource = myReport
Catch ex As Exception
MessageBox.Show(ex.Message, "Report could not be created", MessageBoxButtons.OK, MessageBoxIcon.Error)
End Try
A new data set it generated using the same query used to generate the previously saved data set. Once
the data set is filled, a ReportDocument is used to load the report file and bind it to the data set. The
ReportDocument is the passed as the ReportSource of the crViewer.
This same approach is taken when a report is created from a single table using Connector/ODBC. The
data set replaces the table used in the report and the report is displayed properly.
When a report is created from multiple tables using Connector/ODBC, a data set with multiple tables must
be created in our application. This enables each table in the report data source to be replaced with a report
in the data set.
We populate a data set with multiple tables by providing multiple SELECT statements in our
MySqlCommand object. These SELECT statements are based on the SQL query shown in Crystal Reports
in the Database menu's Show SQL Query option. Assume the following query:
SELECT `country`.`Name`, `country`.`Continent`, `country`.`Population`, `city`.`Name`, `city`.`Population`
FROM `world`.`country` `country` LEFT OUTER JOIN `world`.`city` `city` ON `country`.`Code`=`city`.`CountryCode`
ORDER BY `country`.`Continent`, `country`.`Name`, `city`.`Name`
This query is converted to two SELECT queries and displayed with the following code:
C# Code Example
using CrystalDecisions.CrystalReports.Engine;
using System.Data;
using MySql.Data.MySqlClient;
77

Displaying the Report
ReportDocument myReport = new ReportDocument();
DataSet myData = new DataSet();
MySql.Data.MySqlClient.MySqlConnection conn;
MySql.Data.MySqlClient.MySqlCommand cmd;
MySql.Data.MySqlClient.MySqlDataAdapter myAdapter;
conn = new MySql.Data.MySqlClient.MySqlConnection();
cmd = new MySql.Data.MySqlClient.MySqlCommand();
myAdapter = new MySql.Data.MySqlClient.MySqlDataAdapter();
conn.ConnectionString = "server=127.0.0.1;uid=root;" +
"pwd=12345;database=test";
try
{
cmd.CommandText = "SELECT name, population, countrycode FROM city ORDER " +
"BY countrycode, name; SELECT name, population, code, continent FROM " +
"country ORDER BY continent, name";
cmd.Connection = conn;
myAdapter.SelectCommand = cmd;
myAdapter.Fill(myData);
myReport.Load(@".\world_report.rpt");
myReport.Database.Tables(0).SetDataSource(myData.Tables(0));
myReport.Database.Tables(1).SetDataSource(myData.Tables(1));
myViewer.ReportSource = myReport;
}
catch (MySql.Data.MySqlClient.MySqlException ex)
{
MessageBox.Show(ex.Message, "Report could not be created",
MessageBoxButtons.OK, MessageBoxIcon.Error);
}
Visual Basic Code Example
Imports CrystalDecisions.CrystalReports.Engine
Imports System.Data
Imports MySql.Data.MySqlClient
Dim myReport As New ReportDocument
Dim myData As New DataSet
Dim conn As New MySqlConnection
Dim cmd As New MySqlCommand
Dim myAdapter As New MySqlDataAdapter
conn.ConnectionString = "server=127.0.0.1;" _
& "uid=root;" _
& "pwd=12345;" _
& "database=world"
Try
conn.Open()
cmd.CommandText = "SELECT name, population, countrycode FROM city ORDER BY countrycode, name; " _
& "SELECT name, population, code, continent FROM country ORDER BY continent, name"
cmd.Connection = conn
myAdapter.SelectCommand = cmd
myAdapter.Fill(myData)
myReport.Load(".\world_report.rpt")
myReport.Database.Tables(0).SetDataSource(myData.Tables(0))
myReport.Database.Tables(1).SetDataSource(myData.Tables(1))
myViewer.ReportSource = myReport
Catch ex As Exception
MessageBox.Show(ex.Message, "Report could not be created", MessageBoxButtons.OK, MessageBoxIcon.Error)
End Try
78

Asynchronous Methods
It is important to order the SELECT queries in alphabetic order, as this is the order the report will expect its
source tables to be in. One SetDataSource statement is needed for each table in the report.
This approach can cause performance problems because Crystal Reports must bind the tables together on
the client-side, which will be slower than using a pre-saved data set.
5.14 Asynchronous Methods
The Task-based Asynchronous Pattern (TAP) is a pattern for asynchrony in the .NET Framework. It is
based on the Task and Task<TResult> types in the System.Threading.Tasks namespace, which
are used to represent arbitrary asynchronous operations.
Async-Await are new keywords introduced to work with the TAP. The Async modifier is used to specify
that a method, lambda expression, or anonymous method is asynchronous. The Await operator is applied
to a task in an asynchronous method to suspend the execution of the method until the awaited task
completes.
Requirements
• Async-Await support requires .NET Framework 4.5 or later
• TAP support requires .NET Framework 4.0 or later
• MySQL Connector/NET 6.9 or later
Methods
The following methods can be used with either TAP or Async-Await.
• Namespace MySql.Data.Entity
• Class EFMySqlCommand
• Task PrepareAsync()
• Task PrepareAsync(CancellationToken)
• Namespace MySql.Data
• Class MySqlBulkLoader
• Task<int> LoadAsync()
• Task<int> LoadAsync(CancellationToken
• Class MySqlConnection
• Task<MySqlTransaction> BeginTransactionAsync()
• Task<MySqlTransaction> BeginTransactionAsync (CancellationToken)
• Task<MySqlTransaction> BeginTransactionAsync(IsolationLevel)
• Task<MySqlTransaction> BeginTransactionAsync (IsolationLevel ,
CancellationToken)
• Task ChangeDatabaseAsync(string)
79

Methods
• Task ChangeDatabaseAsync(string, CancellationToken)
• Task CloseAsync()
• Task CloseAsync(CancellationToken)
• Task ClearPoolAsync(MySqlConnection)
• Task ClearPoolAsync(MySqlConnection, CancellationToken)
• Task ClearAllPoolsAsync()
• Task ClearAllPoolsAsync(CancellationToken)
• Task<MySqlSchemaCollection> GetSchemaCollection(string, string[])
• Task<MySqlSchemaCollection> GetSchemaCollection(string, string[],
CancellationToken)
• Class MySqlDataAdapter
• Task<int> FillAsync(DataSet)
• Task<int> FillAsync(DataSet, CancellationToken)
• Task<int> FillAsync(DataTable)
• Task<int> FillAsync(DataTable, CancellationToken)
• Task<int> FillAsync(DataSet, string)
• Task<int> FillAsync(DataSet, string, CancellationToken)
• Task<int> FillAsync(DataTable, IDataReader)
• Task<int> FillAsync(DataTable, IDataReader, CancellationToken)
• Task<int> FillAsync(DataTable, IDbCommand, CommandBehavior)
• Task<int> FillAsync(DataTable, IDbCommand, CommandBehavior,
CancellationToken)
• Task<int> FillAsync(int, int, params DataTable[])
• Task<int> FillAsync(int, int, params DataTable[], CancellationToken)
• Task<int> FillAsync(DataSet, int, int, string)
• Task<int> FillAsync(DataSet, int, int, string, CancellationToken)
• Task<int> FillAsync(DataSet, string, IDataReader, int, int)
• Task<int> FillAsync(DataSet, string, IDataReader, int, int,
CancellationToken)
• Task<int> FillAsync(DataTable[], int, int, IDbCommand, CommandBehavior)
80

Methods
• Task<int> FillAsync(DataTable[], int, int, IDbCommand, CommandBehavior,
CancellationToken)
• Task<int> FillAsync(DataSet, int, int, string, IDbCommand,
CommandBehavior)
• Task<int> FillAsync(DataSet, int, int, string, IDbCommand,
CommandBehavior, CancellationToken)
• Task<DataTable[]> FillSchemaAsync(DataSet, SchemaType)
• Task<DataTable[]> FillSchemaAsync(DataSet, SchemaType, CancellationToken)
• Task<DataTable[]> FillSchemaAsync(DataSet, SchemaType, string)
• Task<DataTable[]> FillSchemaAsync(DataSet, SchemaType, string,
CancellationToken)
• Task<DataTable[]> FillSchemaAsync(DataSet, SchemaType, string,
IDataReader)
• Task<DataTable[]> FillSchemaAsync(DataSet, SchemaType, string,
IDataReader, CancellationToken)
• Task<DataTable[]> FillSchemaAsync(DataSet, SchemaType, IDbCommand, string,
CommandBehavior)
• Task<DataTable[]> FillSchemaAsync(DataSet, SchemaType, IDbCommand, string,
CommandBehavior, CancellationToken)
• Task<DataTable> FillSchemaAsync(DataTable, SchemaType)
• Task<DataTable> FillSchemaAsync(DataTable, SchemaType, CancellationToken)
• Task<DataTable> FillSchemaAsync(DataTable, SchemaType, IDataReader)
• Task<DataTable> FillSchemaAsync(DataTable, SchemaType, IDataReader,
CancellationToken)
• Task<DataTable> FillSchemaAsync(DataTable, SchemaType, IDbCommand,
CommandBehavior)
• Task<DataTable> FillSchemaAsync(DataTable, SchemaType, IDbCommand,
CommandBehavior, CancellationToken)
• Task<int> UpdateAsync(DataRow[])
• Task<int> UpdateAsync(DataRow[], CancellationToken)
• Task<int> UpdateAsync(DataSet)
• Task<int> UpdateAsync(DataSet, CancellationToken)
• Task<int> UpdateAsync(DataTable)
• Task<int> UpdateAsync(DataTable, CancellationToken)
81

Methods
• Task<int> UpdateAsync(DataRow[], DataTableMapping, CancellationToken)
• Task<int> UpdateAsync(DataSet, string)
• Task<int> UpdateAsync(DataSet, string, CancellationToken)
• Class MySqlHelper
• Task<DataRow> ExecuteDataRowAsync(string, string, params MySqlParameter[])
• Task<DataRow> ExecuteDataRowAsync(string, string, CancellationToken,
params MySqlParameter[])
• Task<int> ExecuteNonQueryAsync(MySqlConnection, string, params
MySqlParameter[])
• Task<int> ExecuteNonQueryAsync(MySqlConnection, string, CancellationToken,
params MySqlParameter[])
• Task<int> ExecuteNonQueryAsync(string, string, params MySqlParameter[])
• Task<int> ExecuteNonQueryAsync(string, string, CancellationToken, params
MySqlParameter[])
• Task<DataSet> ExecuteDatasetAsync(string, string)
• Task<DataSet> ExecuteDatasetAsync(string, string, CancellationToken)
• Task<DataSet> ExecuteDatasetAsync(string, string, CancellationToken,
params MySqlParameter[])
• Task<DataSet> ExecuteDatasetAsync(MySqlConnection, string)
• Task<DataSet> ExecuteDatasetAsync(MySqlConnection, string,
CancellationToken)
• Task<DataSet> ExecuteDatasetAsync(MySqlConnection, string, params
MySqlParameter[])
• Task<DataSet> ExecuteDatasetAsync(MySqlConnection, string,
CancellationToken, params MySqlParameter[])
• Task UpdateDataSetAsync(string, string, DataSet, string)
• Task UpdateDataSetAsync(string, string, DataSet, string,
CancellationToken)
• Task<MySqlDataReader> ExecuteReaderAsync(MySqlConnection,
MySqlTransaction, string, MySqlParameter[], bool)
• Task<MySqlDataReader> ExecuteReaderAsync(MySqlConnection,
MySqlTransaction, string, MySqlParameter[], bool, CancellationToken)
• Task<MySqlDataReader> ExecuteReaderAsync(string, string)
82

Methods
• Task<MySqlDataReader> ExecuteReaderAsync(string, string,
CancellationToken)
• Task<MySqlDataReader> ExecuteReaderAsync(MySqlConnection, string)
• Task<MySqlDataReader> ExecuteReaderAsync(MySqlConnection, string,
CancellationToken)
• Task<MySqlDataReader> ExecuteReaderAsync(string, string, params
MySqlParameter[])
• Task<MySqlDataReader> ExecuteReaderAsync(string, string,
CancellationToken, params MySqlParameter[])
• Task<MySqlDataReader> ExecuteReaderAsync(MySqlConnection, string, params
MySqlParameter[])
• Task<MySqlDataReader> ExecuteReaderAsync(MySqlConnection, string,
CancellationToken, params MySqlParameter[])
• Task<object> ExecuteScalarAsync(string, string)
• Task<object> ExecuteScalarAsync(string, string, CancellationToken)
• Task<object> ExecuteScalarAsync(string, string, params MySqlParameter[])
• Task<object> ExecuteScalarAsync(string, string, CancellationToken, params
MySqlParameter[])
• Task<object> ExecuteScalarAsync(MySqlConnection, string)
• Task<object> ExecuteScalarAsync(MySqlConnection, string,
CancellationToken)
• Task<object> ExecuteScalarAsync(MySqlConnection, string, params
MySqlParameter[])
• Task<object> ExecuteScalarAsync(MySqlConnection, string,
CancellationToken, params MySqlParameter[])
• Class MySqlScript
• Task<int> ExecuteAsync()
• Task<int> ExecuteAsync(CancellationToken)
In addition to the methods listed above, the following are methods inherited from the .NET Framework:
• Namespace MySql.Data.Entity
• Class EFMySqlCommand
• Task<DbDataReader> ExecuteDbDataReaderAsync(CommandBehaviour,
CancellationToken)
• Task<int> ExecuteNonQueryAsync()
83

Methods
• Task<int> ExecuteNonQueryAsync(CancellationToken)
• Task<DbDataReader> ExecuteReaderAsync()
• Task<DbDataReader> ExecuteReaderAsync(CancellationToken)
• Task<DbDataReader> ExecuteReaderAsync(CommandBehaviour)
• Task<DbDataReader> ExecuteReaderAsync(CommandBehaviour, CancellationToken)
• Task<object> ExecuteScalarAsync()
• Task<object> ExecuteScalarAsync(CancellationToken)
• Namespace MySql.Data
• Class MySqlCommand
• Task<DbDataReader> ExecuteDbDataReaderAsync(CommandBehaviour,
CancellationToken)
• Task<int> ExecuteNonQueryAsync()
• Task<int> ExecuteNonQueryAsync(CancellationToken)
• Task<DbDataReader> ExecuteReaderAsync()
• Task<DbDataReader> ExecuteReaderAsync(CancellationToken)
• Task<DbDataReader> ExecuteReaderAsync(CommandBehaviour)
• Task<DbDataReader> ExecuteReaderAsync(CommandBehaviour, CancellationToken)
• Task<object> ExecuteScalarAsync()
• Task<object> ExecuteScalarAsync(CancellationToken)
• Class MySqlConnection
• Task OpenAsync()
• Task OpenAsync(CancellationToken)
• Class MySqlDataReader
• Task<T> GetFieldValueAsync<T>(int)
• Task<T> GetFieldValueAsync<T>(int, CancellationToken)
• Task<bool> IsDBNullAsync(int)
• Task<bool> IsDBNullAsync(int, CancellationToken)
• Task<bool> NextResultAsync()
• Task<bool> NextResultAsync(CancellationToken)
• Task<bool> ReadAsync()
84

Examples
• Task<bool> ReadAsync(CancellationToken)
Examples
The following C# code examples demonstrate how to use the asynchronous methods:
In this example, a method has the async modifier because the method await call made applies to the
method LoadAsync. The method returns a Task object that contains information about the result of the
awaited method. Returning Task is like having a void method, but you should not use async void if your
method is not a top-level access method like an event.
public async Task BulkLoadAsync()
{
MySqlConnection myConn = new MySqlConnection("MyConnectionString");
MySqlBulkLoader loader = new MySqlBulkLoader(myConn);
loader.TableName = "BulkLoadTest";
loader.FileName = @"c:\MyPath\MyFile.txt";
loader.Timeout = 0;
var result = await loader.LoadAsync();
}
In this example, an "async void" method is used with "await" for the ExecuteNonQueryAsync method, to
correspond to the onclick event of a button. This is why the method does not return a Task.
private async void myButton_Click()
{
MySqlConnection myConn = new MySqlConnection("MyConnectionString");
MySqlCommand proc = new MySqlCommand("MyAsyncSpTest", myConn);
proc.CommandType = CommandType.StoredProcedure;
int result = await proc.ExecuteNonQueryAsync();
}
5.15 Binary and Nonbinary Issues
There are certain situations where MySQL will return incorrect metadata about one or more columns. More
specifically, the server can sometimes report that a column is binary when it is not (and the reverse). In
these situations, it becomes practically impossible for the connector to be able to correctly identify the
correct metadata.
Some examples of situations that may return incorrect metadata are:
• Execution of SHOW PROCESSLIST. Some of the columns are returned as binary even though they only
hold string data.
• When a temporary table is used to process a result set, some columns may be returned with incorrect
binary flags.
• Some server functions such DATE_FORMAT return the column incorrectly as binary.
With the availability of BINARY and VARBINARY data types, it is important to respect the metadata returned
by the server. However, some existing applications may encounter issues with this change and can use
a connection string option to enable or disable it. By default, Connector/NET respects the binary flags
returned by the server. You might need to make small changes to your application to accommodate this
change.
85

Character Set Considerations for Connector/NET
In the event that the changes required to your application are too large, adding 'respect binary
flags=false' to your connection string causes the connector to use the prior behavior: any column that
is marked as string, regardless of binary flags, will be returned as string. Only columns that are specifically
marked as a BLOB will be returned as BLOB.
5.16 Character Set Considerations for Connector/NET
Treating Binary Blobs As UTF8
Before the introduction of 4-byte UTF-8 character set, MySQL did not support 4-byte UTF8 sequences.
This makes it difficult to represent some multibyte languages such as Japanese. To try and alleviate this,
MySQL Connector/NET supports a mode where binary blobs can be treated as strings.
To do this, you set the 'Treat Blobs As UTF8' connection string keyword to true. This is
all that needs to be done to enable conversion of all binary blobs to UTF8 strings. To convert only
some of your BLOB columns, you can make use of the 'BlobAsUTF8IncludePattern' and
'BlobAsUTF8ExcludePattern' keywords. Set these to a regular expression pattern that matches the
column names to include or exclude respectively.
When the regular expression patterns both match a single column, the include pattern is applied before the
exclude pattern. The result, in this case, is that the column is excluded. Also, be aware that this mode does
not apply to columns of type BINARY or VARBINARY and also do not apply to nonbinary BLOB columns.
This mode only applies to reading strings out of MySQL. To insert 4-byte UTF8 strings into blob columns,
use the .NET Encoding.GetBytes function to convert your string to a series of bytes. You can then set
this byte array as a parameter for a BLOB column.
86

Chapter 6 Connector/NET Tutorials
Table of Contents
6.1 Tutorial: An Introduction to Connector/NET Programming ............................................................. 87
6.1.1 The MySqlConnection Object ........................................................................................... 87
6.1.2 The MySqlCommand Object ............................................................................................. 88
6.1.3 Working with Decoupled Data .......................................................................................... 91
6.1.4 Working with Parameters ................................................................................................. 94
6.1.5 Working with Stored Procedures ....................................................................................... 95
6.2 ASP.NET Provider Model and Tutorials ....................................................................................... 97
6.2.1 Tutorial: Connector/NET ASP.NET Membership and Role Provider ..................................... 99
6.2.2 Tutorial: Connector/NET ASP.NET Profile Provider .......................................................... 102
6.2.3 Tutorial: Web Parts Personalization Provider ................................................................... 105
6.2.4 Tutorial: Simple Membership Web Provider ..................................................................... 109
6.3 Tutorial: Using an Entity Framework Entity as a Windows Forms Data Source .............................. 114
6.4 Tutorial: Data Binding in ASP.NET Using LINQ on Entities ......................................................... 122
6.5 Tutorial: Generating MySQL DDL from an Entity Framework Model ............................................. 125
6.6 Tutorial: Basic CRUD Operations with Connector/NET ................................................................ 126
6.7 Tutorial: Configuring SSL with Connector/NET ........................................................................... 129
6.7.1 Using PEM Certificates in Connector/NET ....................................................................... 130
6.7.2 Using PFX Certificates in Connector/NET ....................................................................... 131
6.8 Tutorial: Using MySqlScript ....................................................................................................... 133
The following MySQL Connector/NET tutorials illustrate how to develop MySQL programs using
technologies such as Visual Studio, C#, ASP.NET, and the .NET, .NET Core, and Mono frameworks. Work
through the first tutorial to verify that you have the right software components installed and configured, then
choose other tutorials to try depending on the features you intend to use in your applications.
6.1 Tutorial: An Introduction to Connector/NET Programming
This section provides a gentle introduction to programming with MySQL Connector/NET. The code
example is written in C#, and is designed to work on both Microsoft .NET Framework and Mono.
This tutorial is designed to get you up and running with Connector/NET as quickly as possible, it does not
go into detail on any particular topic. However, the following sections of this manual describe each of the
topics introduced in this tutorial in more detail. In this tutorial you are encouraged to type in and run the
code, modifying it as required for your setup.
This tutorial assumes you have MySQL and Connector/NET already installed. It also assumes that you
have installed the world database sample, which can be downloaded from the MySQL Documentation
page. You can also find details on how to install the database on the same page.
Note
Before compiling the code example, make sure that you have added References to
your project as required. The References required are System, System.Data and
MySql.Data.
6.1.1 The MySqlConnection Object
For your MySQL Connector/NET application to connect to a MySQL database, it must establish a
connection by using a MySqlConnection object.
87

The MySqlCommand Object
The MySqlConnection constructor takes a connection string as one of its parameters. The connection
string provides necessary information to make the connection to the MySQL database. The connection
string is discussed more fully in Chapter 4, Connector/NET Connections. For a list of supported connection
string options, see Section 4.5, “Connector/NET Connection Options Reference”.
The following code shows how to create a connection object/
using System;
using System.Data;
using MySql.Data;
using MySql.Data.MySqlClient;
public class Tutorial1
{
public static void Main()
{
string connStr = "server=localhost;user=root;database=world;port=3306;password=******";
MySqlConnection conn = new MySqlConnection(connStr);
try
{
Console.WriteLine("Connecting to MySQL...");
conn.Open();
// Perform database operations
}
catch (Exception ex)
{
Console.WriteLine(ex.ToString());
}
conn.Close();
Console.WriteLine("Done.");
}
}
When the MySqlConnection constructor is invoked, it returns a connection object, which is used for
subsequent database operations. Open the connection before any other operations take place. Before the
application exits, close the connection to the database by calling Close on the connection object.
Sometimes an attempt to perform an Open on a connection object can fail, generating an exception that
can be handled using standard exception handling code.
In this section you have learned how to create a connection to a MySQL database, and open and close the
corresponding connection object.
6.1.2 The MySqlCommand Object
When a connection has been established with the MySQL database, the next step enables you to perform
database operations. This task can be achieved through the use of the MySqlCommand object.
After it has been created, there are three main methods of interest that you can call:
• ExecuteReader to query the database. Results are usually returned in a MySqlDataReader object,
created by ExecuteReader.
• ExecuteNonQuery to insert, update, and delete data.
• ExecuteScalar to return a single value.
After the MySqlCommand object is created, you can call one of the previous methods on it to carry out a
database operation, such as perform a query. The results are usually returned into a MySqlDataReader
88

The MySqlCommand Object
object, and then processed. For example, the results might be displayed as the following code example
demonstrates.
using System;
using System.Data;
using MySql.Data;
using MySql.Data.MySqlClient;
public class Tutorial2
{
public static void Main()
{
string connStr = "server=localhost;user=root;database=world;port=3306;password=******";
MySqlConnection conn = new MySqlConnection(connStr);
try
{
Console.WriteLine("Connecting to MySQL...");
conn.Open();
string sql = "SELECT Name, HeadOfState FROM Country WHERE Continent='Oceania'";
MySqlCommand cmd = new MySqlCommand(sql, conn);
MySqlDataReader rdr = cmd.ExecuteReader();
while (rdr.Read())
{
Console.WriteLine(rdr[0]+" -- "+rdr[1]);
}
rdr.Close();
}
catch (Exception ex)
{
Console.WriteLine(ex.ToString());
}
conn.Close();
Console.WriteLine("Done.");
}
}
When a connection has been created and opened, the code then creates a MySqlCommand object.
Then the SQL query to be executed is passed to the MySqlCommand constructor. The ExecuteReader
method is then used to generate a MySqlReader object. The MySqlReader object contains the results
generated by the SQL executed on the MySqlCommand object. When the results have been obtained in a
MySqlReader object, the results can be processed. In this case, the information is printed out by a while
loop. Finally, the MySqlReader object is disposed of by invoking the Close method.
The next example shows how to use the ExecuteNonQuery method.
The procedure for performing an ExecuteNonQuery method call is simpler, as there is no need to create
an object to store results. This is because ExecuteNonQuery is only used for inserting, updating and
deleting data. The following example illustrates a simple update to the Country table:
using System;
using System.Data;
using MySql.Data;
using MySql.Data.MySqlClient;
public class Tutorial3
{
public static void Main()
{
string connStr = "server=localhost;user=root;database=world;port=3306;password=******";
MySqlConnection conn = new MySqlConnection(connStr);
89

The MySqlCommand Object
try
{
Console.WriteLine("Connecting to MySQL...");
conn.Open();
string sql = "INSERT INTO Country (Name, HeadOfState, Continent) VALUES ('Disneyland','Mickey Mouse', 'North America')";
MySqlCommand cmd = new MySqlCommand(sql, conn);
cmd.ExecuteNonQuery();
}
catch (Exception ex)
{
Console.WriteLine(ex.ToString());
}
conn.Close();
Console.WriteLine("Done.");
}
}
The query is constructed, the MySqlCommand object created and the ExecuteNonQuery method called
on the MySqlCommand object. You can access your MySQL database with mysql and verify that the
update was carried out correctly.
Finally, you can use the ExecuteScalar method to return a single value. Again, this is straightforward, as
a MySqlDataReader object is not required to store results, a variable is used instead. The following code
illustrates how to use the ExecuteScalar method:
using System;
using System.Data;
using MySql.Data;
using MySql.Data.MySqlClient;
public class Tutorial4
{
public static void Main()
{
string connStr = "server=localhost;user=root;database=world;port=3306;password=******";
MySqlConnection conn = new MySqlConnection(connStr);
try
{
Console.WriteLine("Connecting to MySQL...");
conn.Open();
string sql = "SELECT COUNT(*) FROM Country";
MySqlCommand cmd = new MySqlCommand(sql, conn);
object result = cmd.ExecuteScalar();
if (result != null)
{
int r = Convert.ToInt32(result);
Console.WriteLine("Number of countries in the world database is: " + r);
}
}
catch (Exception ex)
{
Console.WriteLine(ex.ToString());
}
conn.Close();
Console.WriteLine("Done.");
}
}
This example uses a simple query to count the rows in the Country table. The result is obtained by calling
ExecuteScalar on the MySqlCommand object.
90

Working with Decoupled Data
6.1.3 Working with Decoupled Data
Previously, when using MySqlDataReader, the connection to the database was continually maintained
unless explicitly closed. It is also possible to work in a manner where a connection is only established
when needed. For example, in this mode, a connection could be established to read a chunk of data, the
data could then be modified by the application as required. A connection could then be reestablished only
if and when the application writes data back to the database. This decouples the working data set from the
database.
This decoupled mode of working with data is supported by MySQL Connector/NET. There are several
parts involved in allowing this method to work:
• Data Set. The Data Set is the area in which data is loaded to read or modify it. A DataSet object is
instantiated, which can store multiple tables of data.
• Data Adapter. The Data Adapter is the interface between the Data Set and the database itself. The
Data Adapter is responsible for efficiently managing connections to the database, opening and closing
them as required. The Data Adapter is created by instantiating an object of the MySqlDataAdapter
class. The MySqlDataAdapter object has two main methods: Fill which reads data into the Data
Set, and Update, which writes data from the Data Set to the database.
• Command Builder. The Command Builder is a support object. The Command Builder works in
conjunction with the Data Adapter. When a MySqlDataAdapter object is created, it is typically given
an initial SELECT statement. From this SELECT statement the Command Builder can work out the
corresponding INSERT, UPDATE and DELETE statements that would be required to update the database.
To create the Command Builder, an object of the class MySqlCommandBuilder is created.
The remaining sections describe each of these classes in more detail.
Instantiating a DataSet Object
A DataSet object can be created simply, as shown in the following code-snippet:
DataSet dsCountry;
...
dsCountry = new DataSet();
Although this creates the DataSet object, it has not yet filled it with data. For that, a Data Adapter is
required.
Instantiating a MySqlDataAdapter Object
The MySqlDataAdapter can be created as illustrated by the following example:
MySqlDataAdapter daCountry;
...
string sql = "SELECT Code, Name, HeadOfState FROM Country WHERE Continent='North America'";
daCountry = new MySqlDataAdapter (sql, conn);
Note
The MySqlDataAdapter is given the SQL specifying the data to work with.
Instantiating a MySqlCommandBuilder Object
Once the MySqlDataAdapter has been created, it is necessary to generate the additional statements
required for inserting, updating and deleting data. There are several ways to do this, but in this tutorial
91

Working with Decoupled Data
you will see how this can most easily be done with MySqlCommandBuilder. The following code snippet
illustrates how this is done:
MySqlCommandBuilder cb = new MySqlCommandBuilder(daCountry);
Note
The MySqlDataAdapter object is passed as a parameter to the command builder.
Filling the Data Set
To do anything useful with the data from your database, you need to load it into a Data Set. This is one of
the jobs of the MySqlDataAdapter object, and is carried out with its Fill method. The following code
example illustrates this point.
DataSet dsCountry;
...
dsCountry = new DataSet();
...
daCountry.Fill(dsCountry, "Country");
The Fill method is a MySqlDataAdapter method, and the Data Adapter knows how to establish a
connection with the database and retrieve the required data, and then populate the Data Set when the
Fill method is called. The second parameter “Country” is the table in the Data Set to update.
Updating the Data Set
The data in the Data Set can now be manipulated by the application as required. At some point, changes
to data will need to be written back to the database. This is achieved through a MySqlDataAdapter
method, the Update method.
daCountry.Update(dsCountry, "Country");
Again, the Data Set and the table within the Data Set to update are specified.
Working Example
The interactions between the DataSet, MySqlDataAdapter and MySqlCommandBuilder classes can
be a little confusing, so their operation can perhaps be best illustrated by working code.
In this example, data from the world database is read into a Data Grid View control. Here, the data can
be viewed and changed before clicking an update button. The update button then activates code to write
changes back to the database. The code uses the principles explained previously. The application was
built using the Microsoft Visual Studio to place and create the user interface controls, but the main code
that uses the key classes described previously is shown in the next code example, and is portable.
using System;
using System.Collections.Generic;
using System.ComponentModel;
using System.Data;
using System.Drawing;
using System.Linq;
using System.Text;
using System.Windows.Forms;
using MySql.Data;
using MySql.Data.MySqlClient;
92

Working with Decoupled Data
namespace WindowsFormsApplication5
{
public partial class Form1 : Form
{
MySqlDataAdapter daCountry;
DataSet dsCountry;
public Form1()
{
InitializeComponent();
}
private void Form1_Load(object sender, EventArgs e)
{
string connStr = "server=localhost;user=root;database=world;port=3306;password=******";
MySqlConnection conn = new MySqlConnection(connStr);
try
{
label2.Text = "Connecting to MySQL...";
string sql = "SELECT Code, Name, HeadOfState FROM Country WHERE Continent='North America'";
daCountry = new MySqlDataAdapter (sql, conn);
MySqlCommandBuilder cb = new MySqlCommandBuilder(daCountry);
dsCountry = new DataSet();
daCountry.Fill(dsCountry, "Country");
dataGridView1.DataSource = dsCountry;
dataGridView1.DataMember = "Country";
}
catch (Exception ex)
{
label2.Text = ex.ToString();
}
}
private void button1_Click(object sender, EventArgs e)
{
daCountry.Update(dsCountry, "Country");
label2.Text = "MySQL Database Updated!";
}
}
}
The following figure shows the application started. The World Database Application updated data in three
columns: Code, Name, and HeadOfState.
93

Working with Parameters
Figure 6.1 World Database Application
6.1.4 Working with Parameters
This part of the tutorial shows you how to use parameters in your MySQL Connector/NET application.
Although it is possible to build SQL query strings directly from user input, this is not advisable as it does
not prevent erroneous or malicious information being entered. It is safer to use parameters as they will be
processed as field data only. For example, imagine the following query was constructed from user input:
string sql = "SELECT Name, HeadOfState FROM Country WHERE Continent = "+user_continent;
If the string user_continent came from a Text Box control, there would potentially be no control over
the string entered by the user. The user could enter a string that generates a runtime error, or in the worst
case actually harms the system. When using parameters it is not possible to do this because a parameter
is only ever treated as a field parameter, rather than an arbitrary piece of SQL code.
The same query written using a parameter for user input is:
string sql = "SELECT Name, HeadOfState FROM Country WHERE Continent = @Continent";
Note
The parameter is preceded by an '@' symbol to indicate it is to be treated as a
parameter.
As well as marking the position of the parameter in the query string, it is necessary to add a parameter to
the MySqlCommand object. This is illustrated by the following code snippet:
cmd.Parameters.AddWithValue("@Continent", "North America");
In this example the string "North America" is supplied as the parameter value statically, but in a more
practical example it would come from a user input control.
94

Working with Stored Procedures
A further example illustrates the complete process:
using System;
using System.Data;
using MySql.Data;
using MySql.Data.MySqlClient;
public class Tutorial5
{
public static void Main()
{
string connStr = "server=localhost;user=root;database=world;port=3306;password=******";
MySqlConnection conn = new MySqlConnection(connStr);
try
{
Console.WriteLine("Connecting to MySQL...");
conn.Open();
string sql = "SELECT Name, HeadOfState FROM Country WHERE Continent=@Continent";
MySqlCommand cmd = new MySqlCommand(sql, conn);
Console.WriteLine("Enter a continent e.g. 'North America', 'Europe': ");
string user_input = Console.ReadLine();
cmd.Parameters.AddWithValue("@Continent", user_input);
MySqlDataReader rdr = cmd.ExecuteReader();
while (rdr.Read())
{
Console.WriteLine(rdr["Name"]+" --- "+rdr["HeadOfState"]);
}
rdr.Close();
}
catch (Exception ex)
{
Console.WriteLine(ex.ToString());
}
conn.Close();
Console.WriteLine("Done.");
}
}
In this part of the tutorial you have see how to use parameters to make your code more secure.
6.1.5 Working with Stored Procedures
This section illustrates how to work with stored procedures. Putting database-intensive operations into
stored procedures lets you define an API for your database application. You can reuse this API across
multiple applications and multiple programming languages. This technique avoids duplicating database
code, saving time and effort when you make updates due to schema changes, tune the performance of
queries, or add new database operations for logging, security, and so on. Before working through this
tutorial, familiarize yourself with the CREATE PROCEDURE and CREATE FUNCTION statements that create
different kinds of stored routines.
For the purposes of this tutorial, you will create a simple stored procedure to see how it can be called from
MySQL Connector/NET. In the MySQL Client program, connect to the world database and enter the
following stored procedure:
DELIMITER //
CREATE PROCEDURE country_hos
(IN con CHAR(20))
95

Working with Stored Procedures
BEGIN
SELECT Name, HeadOfState FROM Country
WHERE Continent = con;
END //
DELIMITER ;
Test that the stored procedure works as expected by typing the following into the mysql command
interpreter:
CALL country_hos('Europe');
Note
The stored routine takes a single parameter, which is the continent to restrict your
search to.
Having confirmed that the stored procedure is present and correct, you can see how to access it from
Connector/NET.
Calling a stored procedure from your Connector/NET application is similar to techniques you have seen
earlier in this tutorial. A MySqlCommand object is created, but rather than taking an SQL query as a
parameter, it takes the name of the stored procedure to call. Set the MySqlCommand object to the type of
stored procedure, as shown by the following code snippet:
string rtn = "country_hos";
MySqlCommand cmd = new MySqlCommand(rtn, conn);
cmd.CommandType = CommandType.StoredProcedure;
In this case, the stored procedure requires you to pass a parameter. This can be achieved using the
techniques seen in the previous section on parameters, Section 6.1.4, “Working with Parameters”, as
shown in the following code snippet:
cmd.Parameters.AddWithValue("@con", "Europe");
The value of the parameter @con could more realistically have come from a user input control, but for
simplicity it is set as a static string in this example.
At this point, everything is set up and you can call the routine using techniques also learned in earlier
sections. In this case, the ExecuteReader method of the MySqlCommand object is used.
The following code shows the complete stored procedure example.
using System;
using System.Data;
using MySql.Data;
using MySql.Data.MySqlClient;
public class Tutorial6
{
public static void Main()
{
string connStr = "server=localhost;user=root;database=world;port=3306;password=******";
MySqlConnection conn = new MySqlConnection(connStr);
try
{
Console.WriteLine("Connecting to MySQL...");
conn.Open();
string rtn = "country_hos";
MySqlCommand cmd = new MySqlCommand(rtn, conn);
cmd.CommandType = CommandType.StoredProcedure;
96

ASP.NET Provider Model and Tutorials
cmd.Parameters.AddWithValue("@con", "Europe");
MySqlDataReader rdr = cmd.ExecuteReader();
while (rdr.Read())
{
Console.WriteLine(rdr[0] + " --- " + rdr[1]);
}
rdr.Close();
}
catch (Exception ex)
{
Console.WriteLine(ex.ToString());
}
conn.Close();
Console.WriteLine("Done.");
}
}
In this section, you have seen how to call a stored procedure from Connector/NET. For the moment, this
concludes our introductory tutorial on programming with Connector/NET.
6.2 ASP.NET Provider Model and Tutorials
MySQL Connector/NET includes a provider model for use with ASP.NET applications. This model enables
developers to focus on the business logic of their application instead of having to recreate such boilerplate
items as membership and roles support.
Connector/NET supports the following web providers:
• Membership provider
• Roles provider
• Profiles provider
• Session state provider
The following tables show the supported providers, their default provider and the corresponding MySQL
provider.
Membership Provider
Default Provider System.Web.Security.SqlMembershipProvider
MySQL Provider MySql.Web.Security.MySQLMembershipProvider
Role Provider
Default Provider System.Web.Security.SqlRoleProvider
MySQL Provider MySql.Web.Security.MySQLRoleProvider
Profile Provider
Default Provider System.Web.Profile.SqlProfileProvider
97

Session State Provider
MySQL Provider MySql.Web.Profile.MySQLProfileProvider
Session State Provider
Default Provider System.Web.SessionState.InProcSessionStateStore
MySQL Provider MySql.Web.SessionState.MySqlSessionStateStore
Note
The MySQL session state provider uses slightly different capitalization on the class
name compared to the other MySQL providers.
Installing the Providers
The installation of Connector/NET installs the providers and registers them in the .NET configuration file
(machine.config) on your computer. The additional entries modify the system.web section of the file,
which appears similar to the following example after the installation.
<system.web>
<processModel autoConfig="true" />
<httpHandlers />
<membership>
<providers>
<add name="AspNetSqlMembershipProvider" type="System.Web.Security.SqlMembershipProvider, System.Web, Version=2.0.0.0, Culture=neutral, PublicKeyToken=b03f5f7f11d50a3a" connectionStringName="LocalSqlServer" enablePasswordRetrieval="false" enablePasswordReset="true" requiresQuestionAndAnswer="true" applicationName="/" requiresUniqueEmail="false" passwordFormat="Hashed" maxInvalidPasswordAttempts="5" minRequiredPasswordLength="7" minRequiredNonalphanumericCharacters="1" passwordAttemptWindow="10" passwordStrengthRegularExpression="" />
<add name="MySQLMembershipProvider" type="MySql.Web.Security.MySQLMembershipProvider, MySql.Web, Version=6.1.1.0, Culture=neutral, PublicKeyToken=c5687fc88969c44d" connectionStringName="LocalMySqlServer" enablePasswordRetrieval="false" enablePasswordReset="true" requiresQuestionAndAnswer="true" applicationName="/" requiresUniqueEmail="false" passwordFormat="Clear" maxInvalidPasswordAttempts="5" minRequiredPasswordLength="7" minRequiredNonalphanumericCharacters="1" passwordAttemptWindow="10" passwordStrengthRegularExpression="" />
</providers>
</membership>
<profile>
<providers>
<add name="AspNetSqlProfileProvider" connectionStringName="LocalSqlServer" applicationName="/" type="System.Web.Profile.SqlProfileProvider, System.Web, Version=2.0.0.0, Culture=neutral, PublicKeyToken=b03f5f7f11d50a3a" />
<add name="MySQLProfileProvider" type="MySql.Web.Profile.MySQLProfileProvider, MySql.Web, Version=6.1.1.0, Culture=neutral, PublicKeyToken=c5687fc88969c44d" connectionStringName="LocalMySqlServer" applicationName="/" />
</providers>
</profile>
<roleManager>
<providers>
<add name="AspNetSqlRoleProvider" connectionStringName="LocalSqlServer" applicationName="/" type="System.Web.Security.SqlRoleProvider, System.Web, Version=2.0.0.0, Culture=neutral, PublicKeyToken=b03f5f7f11d50a3a" />
<add name="AspNetWindowsTokenRoleProvider" applicationName="/" type="System.Web.Security.WindowsTokenRoleProvider, System.Web, Version=2.0.0.0, Culture=neutral, PublicKeyToken=b03f5f7f11d50a3a" />
<add name="MySQLRoleProvider" type="MySql.Web.Security.MySQLRoleProvider, MySql.Web, Version=6.1.1.0, Culture=neutral, PublicKeyToken=c5687fc88969c44d" connectionStringName="LocalMySqlServer" applicationName="/" />
</providers>
</roleManager>
</system.web>
Each provider type can have multiple provider implementations. The default provider can also be set here
using the defaultProvider attribute, but usually this is set in the web.config file either manually or by
using the ASP.NET configuration tool.
At time of writing, the MySqlSessionStateStore is not added to machine.config at install time, and
so add the following:
<sessionState>
<providers>
<add name="MySqlSessionStateStore" type="MySql.Web.SessionState.MySqlSessionStateStore, MySql.Web, Version=6.1.1.0, Culture=neutral, PublicKeyToken=c5687fc88969c44d" connectionStringName="LocalMySqlServer" applicationName="/" />
</providers>
</sessionState>
The session state provider uses the customProvider attribute, rather than defaultProvider, to set
the provider as the default. A typical web.config file might contain:
<system.web>
98

Working with MySQL Providers
<membership defaultProvider="MySQLMembershipProvider" />
<roleManager defaultProvider="MySQLRoleProvider" />
<profile defaultProvider="MySQLProfileProvider" />
<sessionState customProvider="MySqlSessionStateStore" />
<compilation debug="false">
...
This sets the MySQL Providers as the defaults to be used in this web application.
The providers are implemented in the file mysql.web.dll and this file can be found in your Connector/
NET installation folder. There is no need to run any type of SQL script to set up the database schema, as
the providers create and maintain the proper schema automatically.
Working with MySQL Providers
The easiest way to start using the providers is to use the ASP.NET configuration tool that is available on
the Solution Explorer toolbar when you have a website project loaded.
In the web pages that open, you can select the MySQL membership and roles providers by picking a
custom provider for each area.
When the provider is installed, it creates a dummy connection string named LocalMySqlServer.
Although this has to be done so that the provider will work in the ASP.NET configuration tool, you override
this connection string in your web.config file. You do this by first removing the dummy connection string
and then adding in the proper one, as shown in the following example:
<connectionStrings>
<remove name="LocalMySqlServer"/>
<add name="LocalMySqlServer" connectionString="server=xxx;uid=xxx;pwd=xxx;database=xxx"/>
</connectionStrings>
Note
You must specify the database in this connection.
A tutorial demonstrating how to use the membership and role providers can be found in the following
section Section 6.2.1, “Tutorial: Connector/NET ASP.NET Membership and Role Provider”.
Deployment
To use the providers on a production server, distribute the MySql.Data and the MySql.Web assemblies,
and either register them in the remote systems Global Assembly Cache or keep them in the bin directory
of your application.
6.2.1 Tutorial: Connector/NET ASP.NET Membership and Role Provider
Many websites feature the facility for the user to create a user account. They can then log into the website
and enjoy a personalized experience. This requires that the developer creates database tables to store
user information, along with code to gather and process this data. This represents a burden on the
developer, and there is the possibility for security issues to creep into the developed code. However,
ASP.NET introduced the membership system. This system is designed around the concept of membership,
profile, and role providers, which together provide all of the functionality to implement a user system, that
previously would have to have been created by the developer from scratch.
Currently, MySQL Connector/NET includes web providers for membership (or simple membership), roles,
profiles, session state, site map, and web personalization.
99

Tutorial: Connector/NET ASP.NET Membership and Role Provider
This tutorial shows you how to set up your ASP.NET web application to use the Connector/NET
membership and role providers. It assumes that you have MySQL Server installed, along with Connector/
NET and Microsoft Visual Studio. This tutorial was tested with Connector/NET 6.0.4 and Microsoft Visual
Studio 2008 Professional Edition. It is recommended you use 6.0.4 or above for this tutorial.
1. Create a new MySQL database using the MySQL Command-Line Client program (mysql), or other
suitable tool. It does not matter what name is used for the database, but record it. You specify it in the
connection string constructed later in this tutorial. This database contains the tables, automatically
created for you later, used to store data about users and roles.
2. Create a new ASP.NET website in Visual Studio. If you are not sure how to do this, refer to Section 6.4,
“Tutorial: Data Binding in ASP.NET Using LINQ on Entities”, which demonstrates how to create a
simple ASP.NET website.
3. Add References to MySql.Data and MySql.Web to the website project.
4. Locate the machine.config file on your system, which is the configuration file for the .NET
Framework.
5. Search the machine.config file to find the membership provider MySQLMembershipProvider.
6. Add the attribute autogenerateschema="true". The appropriate section should now resemble the
following example.
Note
For the sake of brevity, some information is excluded.
<membership>
<providers>
<add name="AspNetSqlMembershipProvider"
type="System.Web.Security.SqlMembershipProvider"
...
connectionStringName="LocalSqlServer"
... />
<add name="MySQLMembershipProvider"
autogenerateschema="true"
type="MySql.Web.Security.MySQLMembershipProvider,
MySql.Web, Version=6.0.4.0, Culture=neutral,
PublicKeyToken=c5687fc88969c44d"
connectionStringName="LocalMySqlServer"
... />
</providers>
</membership>
Note
The connection string, LocalMySqlServer, connects to the MySQL server
that contains the membership database.
The autogenerateschema="true" attribute will cause Connector/NET to silently create, or
upgrade, the schema on the database server, to contain the required tables for storing membership
information.
7. It is now necessary to create the connection string referenced in the previous step. Load the
web.config file for the website into Visual Studio.
8. Locate the section marked <connectionStrings>. Add the following connection string information.
<connectionStrings>
100

Tutorial: Connector/NET ASP.NET Membership and Role Provider
<remove name="LocalMySqlServer"/>
<add name="LocalMySqlServer"
connectionString="Datasource=localhost;Database=users;uid=root;pwd=password"
providerName="MySql.Data.MySqlClient"/>
</connectionStrings>
The database specified is the one created in the first step. You could alternatively have used an
existing database.
9. At this point build the solution to ensure no errors are present. This can be done by selecting Build,
Build Solution from the main menu, or pressing F6.
10. ASP.NET supports the concept of locally and remotely authenticated users. With local authentication
the user is validated using their Windows credentials when they attempt to access the website. This
can be useful in an Intranet environment. With remote authentication, a user is prompted for their
login details when accessing the website, and these credentials are checked against the membership
information stored in a database server such as MySQL Server. You will now see how to choose this
form of authentication.
Start the ASP.NET Website Administration Tool. This can be done quickly by clicking the small
hammer/Earth icon in the Solution Explorer. You can also launch this tool by selecting Website and
then ASP.NET Configuration from the main menu.
11. In the ASP.NET Website Administration Tool click the Security tab and do the following:
a. Click the User Authentication Type link.
b. Select the From the internet option. The website will now need to provide a form to allow the user
to enter their login details. The details will be checked against membership information stored in the
MySQL database.
12. You now need to specify the role and membership provider to be used. Click the Provider tab and do
the following:
a. Click the Select a different provider for each feature (advanced) link.
b. For membership provider, select the MySQLMembershipProvider option and for role provider,
select the MySQLRoleProvider option.
13. In Visual Studio, rebuild the solution by clicking Build and then Rebuild Solution from the main menu.
14. Check that the necessary schema has been created. This can be achieved using SHOW DATABASES;
and SHOW TABLES; the mysql command interpreter.
mysql> SHOW DATABASES;
+---------------------+
| Database |
+---------------------+
| information_schema |
| mysql |
| test |
| users |
| world |
+---------------------+
5 rows in set (0.01 sec)
mysql> SHOW TABLES;
+---------------------------+
| Tables_in_users |
+---------------------------+
| my_aspnet_applications |
101

Tutorial: Connector/NET ASP.NET Profile Provider
| my_aspnet_membership |
| my_aspnet_profiles |
| my_aspnet_roles |
| my_aspnet_schemaversion |
| my_aspnet_users |
| my_aspnet_usersinroles |
+---------------------------+
7 rows in set (0.00 sec)
15. Assuming all is present and correct, you can now create users and roles for your web application.
The easiest way to do this is with the ASP.NET Website Administration Tool. However, many web
applications contain their own modules for creating roles and users. For simplicity, the ASP.NET
Website Administration Tool will be used in this tutorial.
16. In the ASP.NET Website Administration Tool, click the Security tab. Now that both the membership
and role provider are enabled, you will see links for creating roles and users. Click the Create or
Manage Roles link.
17. You can now enter the name of a new Role and click Add Role to create the new Role. Create new
Roles as required.
18. Click the Back button.
19. Click the Create User link. You can now fill in information about the user to be created, and also
allocate that user to one or more Roles.
20. Using the mysql command interpreter, you can check that your database has been correctly populated
with the membership and role data.
mysql> SELECT * FROM my_aspnet_users;
mysql> SELECT * FROM my_aspnet_roles;
In this tutorial, you have seen how to set up the Connector/NET membership and role providers for use in
your ASP.NET web application.
6.2.2 Tutorial: Connector/NET ASP.NET Profile Provider
This tutorial shows you how to use the MySQL Profile Provider to store user profile information in a MySQL
database. The tutorial uses MySQL Connector/NET 6.9.9, MySQL Server 5.7.21 and Microsoft Visual
Studio 2017 Professional Edition.
Many modern websites allow the user to create a personal profile. This requires a significant amount of
code, but ASP.NET reduces this considerable by including the functionality in its Profile classes. The
Profile Provider provides an abstraction between these classes and a data source. The MySQL Profile
Provider enables profile data to be stored in a MySQL database. This enables the profile properties to be
written to a persistent store, and be retrieved when required. The Profile Provider also enables profile data
to be managed effectively, for example it enables profiles that have not been accessed since a specific
date to be deleted.
The following steps show you how you can select the MySQL Profile Provider:
1. Create a new ASP.NET web project.
2. Select the MySQL Application Configuration tool.
3. In the MySQL Application Configuration tool navigate through the tool to the Profiles page.
4. Select the Use MySQL to manage my profiles check box.
102

Tutorial: Connector/NET ASP.NET Profile Provider
5. Select the Autogenerate Schema check box.
6. Click Edit and then configure a connection string for the database that will be used to store user profile
information.
7. Navigate to the last page of the tool and click Finish to save your changes and exit the tool.
At this point you are now ready to start using the MySQL Profile Provider. With the following steps you can
carry out a preliminary test of your installation.
1. Open your web.config file.
2. Add a simple profile such as the following example.
<system.web>
<anonymousIdentification enabled="true"/>
<profile defaultProvider="MySQLProfileProvider">
...
<properties>
<add name="Name" allowAnonymous="true"/>
<add name="Age" allowAnonymous="true" type="System.UInt16"/>
<group name="UI">
<add name="Color" allowAnonymous="true" defaultValue="Blue"/>
<add name="Style" allowAnonymous="true" defaultValue="Plain"/>
</group>
</properties>
</profile>
...
Setting anonymousIdentification to true enables unauthenticated users to use profiles. They are
identified by a GUID in a cookie rather than by a user name.
Now that the simple profile has been defined in web.config, the next step is to write some code to test
the profile.
1. In Design View, design a simple page with the added controls. The following figure shows the
Default.aspx tab open with various text box, list, and button controls.
103

Tutorial: Connector/NET ASP.NET Profile Provider
Figure 6.2 Simple Profile Application
These will allow the user to enter some profile information. The user can also use the buttons to save
their profile, clear the page, and restore their profile data.
2. In the Code View add the following code snippet.
...
protected void Page_Load(object sender, EventArgs e)
{
if (!IsPostBack)
{
TextBox1.Text = Profile.Name;
TextBox2.Text = Profile.Age.ToString();
Label1.Text = Profile.UI.Color;
}
}
// Store Profile
protected void Button1_Click(object sender, EventArgs e)
{
Profile.Name = TextBox1.Text;
Profile.Age = UInt16.Parse(TextBox2.Text);
}
// Clear Form
protected void Button2_Click(object sender, EventArgs e)
{
TextBox1.Text = "";
TextBox2.Text = "";
Label1.Text = "";
}
// Retrieve Profile
protected void Button3_Click(object sender, EventArgs e)
104

Tutorial: Web Parts Personalization Provider
{
TextBox1.Text = Profile.Name;
TextBox2.Text = Profile.Age.ToString();
Label1.Text = Profile.UI.Color;
}
protected void DropDownList1_SelectedIndexChanged(object sender, EventArgs e)
{
Profile.UI.Color = DropDownList1.SelectedValue;
}
...
3. Save all files and build the solution to check that no errors have been introduced.
4. Run the application.
5. Enter your name, age, and select a color from the list. Now store this information in your profile by
clicking Store Profile.
Not selecting a color from the list uses the default color, Blue, that was specified in the web.config
file.
6. Click Clear Form to clear text from the text boxes and the label that displays your chosen color.
7. Now click Retrieve Profile to restore your profile data from the MySQL database.
8. Now exit the browser to terminate the application.
9. Run the application again, which also restores your profile information from the MySQL database.
In this tutorial you have seen how to using the MySQL Profile Provider with Connector/NET.
6.2.3 Tutorial: Web Parts Personalization Provider
MySQL Connector/NET provides a web parts personalization provider that allows you to use a MySQL
server to store personalization data.
Note
This feature was added in Connector/NET 6.9.0.
This tutorial demonstrates how to configure the web parts personalization provider using Connector/NET.
Minimum Requirements
• An ASP.NET website or web application with a membership provider
• .NET Framework 3.0
• MySQL 5.5
Configuring MySQL Web Parts Personalization Provider
To configure the provider, do the following:
1. Add References to MySql.Data and MySql.Web to the website or web application project.
2. Include a Connector/NET personalization provider into the system.web section in the web.config
file.
<webParts>
<personalization defaultProvider="MySQLPersonalizationProvider">
<providers>
105

Tutorial: Web Parts Personalization Provider
<clear/>
<add name="MySQLPersonalizationProvider"
type="MySql.Web.Personalization.MySqlPersonalizationProvider,
MySql.Web, Version=6.9.3.0, Culture=neutral,
PublicKeyToken=c5687fc88969c44d"
connectionStringName="LocalMySqlServer"
applicationName="/" />
</providers>
<authorization>
<allow verbs="modifyState" users="*" />
<allow verbs="enterSharedScope" users="*"/>
</authorization>
</personalization>
</webParts>
Creating Web Part Controls
To create the web part controls, follow these steps:
1. Create a web application using Connector/NET ASP.NET Membership. For information about doing
this, see Section 6.2.1, “Tutorial: Connector/NET ASP.NET Membership and Role Provider”.
2. Create a new ASP.NET page and then change to the Design view.
3. From the Toolbox, drag a WebPartManager control to the page.
4. Now define an HTML table with three columns and one row.
5. From the WebParts Toolbox, drag and drop a WebPartZone control into both the first and second
columns.
6. From the WebParts Toolbox, drag and drop a CatalogZone with PageCatalogPart and
EditorZone controls into the third column.
7. Add controls to the WebPartZone, which should look similar to the following example:
<table>
<tr>
<td>
<asp:WebPartZone ID="LeftZone" runat="server" HeaderText="Left Zone">
<ZoneTemplate>
<asp:Label ID="Label1" runat="server" title="Left Zone">
<asp:BulletedList ID="BulletedList1" runat="server">
<asp:ListItem Text="Item 1"></asp:ListItem>
<asp:ListItem Text="Item 2"></asp:ListItem>
<asp:ListItem Text="Item 3"></asp:ListItem>
</asp:BulletedList>
</asp:Label>
</ZoneTemplate>
</asp:WebPartZone>
</td>
<td>
<asp:WebPartZone ID="MainZone" runat="server" HeaderText="Main Zone">
<ZoneTemplate>
<asp:Label ID="Label11" runat="server" title="Main Zone">
<h2>This is the Main Zone</h2>
</asp:Label>
</ZoneTemplate>
</asp:WebPartZone>
</td>
<td>
<asp:CatalogZone ID="CatalogZone1" runat="server">
<ZoneTemplate>
<asp:PageCatalogPart ID="PageCatalogPart1" runat="server" />
</ZoneTemplate>
106

Tutorial: Web Parts Personalization Provider
</asp:CatalogZone>
<asp:EditorZone ID="EditorZone1" runat="server">
<ZoneTemplate>
<asp:LayoutEditorPart ID="LayoutEditorPart1" runat="server" />
<asp:AppearanceEditorPart ID="AppearanceEditorPart1" runat="server" />
</ZoneTemplate>
</asp:EditorZone>
</td>
</tr>
</table>
8. Outside of the HTML table, add a drop-down list, two buttons, and a label as follows.
<asp:DropDownList ID="DisplayModes" runat="server" AutoPostBack="True"
OnSelectedIndexChanged="DisplayModes_SelectedIndexChanged">
</asp:DropDownList>
<asp:Button ID="ResetButton" runat="server" Text="Reset"
OnClick="ResetButton_Click" />
<asp:Button ID="ToggleButton" runat="server" OnClick="ToggleButton_Click"
Text="Toggle Scope" />
<asp:Label ID="ScopeLabel" runat="server"></asp:Label>
9. The following code fills the list for the display modes, shows the current scope, resets the
personalization state, toggles the scope (between user and the shared scope), and changes the display
mode.
public partial class WebPart : System.Web.UI.Page
{
protected void Page_Load(object sender, EventArgs e)
{
if (!IsPostBack)
{
foreach (WebPartDisplayMode mode in WebPartManager1.SupportedDisplayModes)
{
if (mode.IsEnabled(WebPartManager1))
{
DisplayModes.Items.Add(mode.Name);
}
}
}
ScopeLabel.Text = WebPartManager1.Personalization.Scope.ToString();
}
protected void ResetButton_Click(object sender, EventArgs e)
{
if (WebPartManager1.Personalization.IsEnabled &&
WebPartManager1.Personalization.IsModifiable)
{
WebPartManager1.Personalization.ResetPersonalizationState();
}
}
protected void ToggleButton_Click(object sender, EventArgs e)
{
WebPartManager1.Personalization.ToggleScope();
}
protected void DisplayModes_SelectedIndexChanged(object sender, EventArgs e)
{
var mode = WebPartManager1.SupportedDisplayModes[DisplayModes.SelectedValue];
if (mode != null && mode.IsEnabled(WebPartManager1))
{
WebPartManager1.DisplayMode = mode;
}
}
}
107

Tutorial: Web Parts Personalization Provider
Testing Web Part Changes
Use the following steps to validate your changes:
1. Run the application and open the web part page. The page should look like similar to the example
shown in the following figure in which the Toggle Scope button is set to Shared. The page also
includes the drop-down list, the Reset button, and the Left Zone and Main Zone controls.
Figure 6.3 Web Parts Page
Initially when the user account is not authenticated, the scope is Shared by default. The user account
must be authenticated to change settings on the web-part controls. The following figure shows an
example in which an authenticated user is able to customize the controls by using the Browse drop-
down list. The options in the list are Design, Catalog, and Edit.
Figure 6.4 Authenticated User Controls
2. Click Toggle Scope to switch the application back to the shared scope.
3. Now you can personalize the zones using the Edit or Catalog display modes at a specific user or
all-users level. The next figure shows Catalog selected from the drop-down list, which include the
Catalog Zone control that was added previously.
108

Tutorial: Simple Membership Web Provider
Figure 6.5 Personalize Zones
6.2.4 Tutorial: Simple Membership Web Provider
This section documents the ability to use a simple membership provider on MVC 4 templates. The
configuration OAuth compatible for the application to login using external credentials from third-party
providers like Google, Facebook, Twitter, or others.
This tutorial creates an application using a simple membership provider and then adds third-party (Google)
OAuth authentication support.
Note
This feature was added in MySQL Connector/NET 6.9.0.
Requirements
• Connector/NET 6.9.x or later
• .NET Framework 4.0 or later
• Visual Studio 2012 or later
• MVC 4
Creating and Configuring a New Project
To get started with a new project, do the following:
1. Open Visual Studio, create a new project of ASP.NET MVC 4 Web Application type, and configure
the project to use .NET Framework 4.5. The following figure shows and example of the New Project
window with the items selected.
109

Tutorial: Simple Membership Web Provider
Figure 6.6 Simple Membership: New Project
2. Choose the template and view engine that you like. This tutorial uses the Internet Application
Template with the Razor view engine (see the next figure). Optionally, you can add a unit test project
by selecting Create a unit test project.
Figure 6.7 Simple Membership: Choose Template and Engine
3. Add references to the MySql.Data, MySql.Data.Entities, and MySql.Web assemblies. The
assemblies chosen must match the .NET Framework and Entity Framework versions added to the
project by the template.
110

Tutorial: Simple Membership Web Provider
4. Add a valid MySQL connection string to the web.config file, similar to the following example.
<add
name="MyConnection"
connectionString="server=localhost;
UserId=root;
password=pass;
database=MySqlSimpleMembership;
logging=true;port=3305"
providerName="MySql.Data.MySqlClient"/>
5. Under the <system.data> node, add configuration information similar to the following example.
<membership defaultProvider="MySqlSimpleMembershipProvider">
<providers>
<clear/>
<add
name="MySqlSimpleMembershipProvider"
type="MySql.Web.Security.MySqlSimpleMembershipProvider,MySql.Web,
Version=6.9.2.0,Culture=neutral,PublicKeyToken=c5687fc88969c44d"
applicationName="MySqlSimpleMembershipTest"
description="MySQLdefaultapplication"
connectionStringName="MyConnection"
userTableName="MyUserTable"
userIdColumn="MyUserIdColumn"
userNameColumn="MyUserNameColumn"
autoGenerateTables="True"/>
</providers>
</membership>
6. Update the configuration with valid values for the following properties: connectionStringName,
userTableName, userIdColumn, userNameColumn, and autoGenerateTables.
• userTableName: Name of the table to store the user information. This table is independent from the
schema generated by the provider, and it can be changed in the future.
• userId: Name of the column that stores the ID for the records in the userTableName.
• userName: Name of the column that stores the name/user for the records in the userTableName.
• connectionStringName: This property must match a connection string defined in web.config
file.
• autoGenerateTables: This must be set to false if the table to handle the credentials already
exists.
7. Update your DBContext class with the connection string name configured.
8. Open the InitializeSimpleMembershipAttribute.cs file from the Filters/
folder and locate the SimpleMembershipInitializer class. Then find the
WebSecurity.InitializeDatabaseConnection method call and update the parameters
with the configuration for connectionStringName, userTableName, userIdColumn, and
userNameColumn.
9. If the database configured in the connection string does not exist, then create it.
111

Tutorial: Simple Membership Web Provider
10. After running the web application, the generated home page is displayed on success (see the figure
that follows).
Figure 6.8 Simple Membership: Generated Home Page
11. If the application executed with success, then the generated schema will be similar to the following
figure showing an object browser open to the tables.
Figure 6.9 Simple Membership: Generated Schema and Tables
12. To create a user login, click Register on the generated web page. Type the user name and password,
and then execute the registration form. This action redirects you to the home page with the newly
created user logged in.
The data for the newly created user can be located in the UserProfile and Webpages_Membership
tables.
112

Tutorial: Simple Membership Web Provider
Adding OAuth Authentication to a Project
OAuth is another authentication option for websites that use the simple membership provider. A user can
be validated using an external account like Facebook, Twitter, Google, and others.
Use the following steps to enable authentication using a Google account in the application:
1. Locate the AuthConfig.cs file in the App_Start folder.
2. As this tutorial uses Google, find the RegisterAuth method and uncomment the last line where it
calls OauthWebSecurity.RegisterGoogleClient.
3. Run the application. When the application is running, click Log in to open the log in page. Then, click
Google under Use another service to log in (shown in the figure that follows).
Figure 6.10 Simple Membership with OAuth: Google Service
4. This action redirects to the Google login page (at google.com), and requests you to sign in with your
Google account information.
5. After submitting the correct credentials, a message requests permission for your application to access
the user's information. Read the description and then click Accept to allow the quoted actions, and to
redirect back to the login page of the application.
6. The application now can register the account. The User name field will be filled in with the appropriate
information (in this case, the email address that is associated with the Google account). Click Register
to register the user with your application.
Now the new user is logged into the application from an external source using OAuth. Information about
the new user is stored in the UserProfile and Webpages_OauthMembership tables.
To use another external option to authenticate users, you must enable the client in the same class where
we enabled the Google provider in this tutorial. Typically, providers require you to register your application
before allowing OAuth authentication, and once registered they typically provide a token/key and an ID that
must be used when registering the provider in the application.
113

Tutorial: Using an Entity Framework Entity as a Windows Forms Data Source
6.3 Tutorial: Using an Entity Framework Entity as a Windows Forms
Data Source
This tutorial describes how to create a Windows Forms Data Source from an Entity in an Entity Data Model
using Microsoft Visual Studio. The steps are:
• Creating a New Windows Forms Application
• Adding an Entity Data Model
• Adding a New Data Source
• Using the Data Source in a Windows Form
• Adding Code to Populate the Data Grid View
• Adding Code to Save Changes to the Database
To perform the steps in this tutorial, first install the world database sample, which you may download from
the MySQL Documentation page. You can also find details on how to install the database on the same
page.
Creating a New Windows Forms Application
The first step is to create a new Windows Forms application.
1. In Visual Studio, select File, New, and then Project from the main menu.
2. Choose the Windows Forms Application installed template. Click OK. The solution is created.
To acquire the latest Entity Framework assembly for MySQL, download the NuGet package.
Adding an Entity Data Model
To add an Entity Data Model to your solution, do the following:
1. In the Solution Explorer, right-click your application and select Add and then New Item. From Visual
Studio installed templates, select ADO.NET Entity Data Model (see the figure that follows). Click
Add.
114
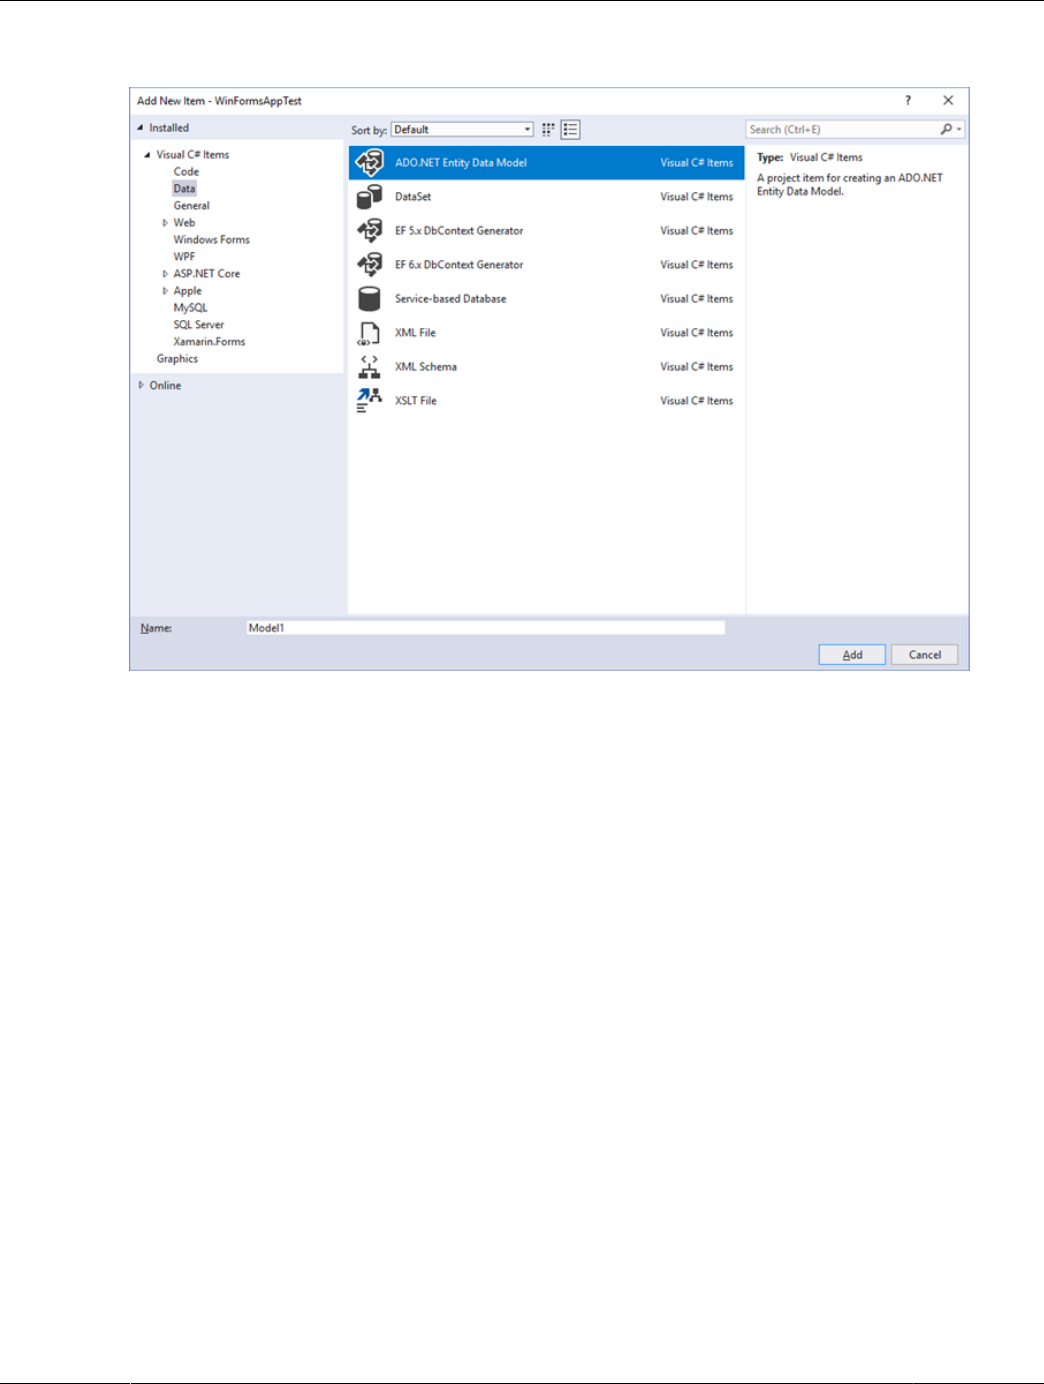
Adding an Entity Data Model
Figure 6.11 Add Entity Data Model
2. You will now see the Entity Data Model Wizard. You will use the wizard to generate the Entity Data
Model from the world database sample. Select the icon EF Designer from database (or Generate
from database in older versions of Visual Studio). Click Next.
115

Adding an Entity Data Model
3. You can now select the localhost(world) connection you made earlier to the database. Select the
following items:
• Yes, include the sensitive data in the connection string.
• Save entity connection settings in App.config as:
worldEntities
If you have not already done so, you can create the new connection at this time by clicking New
Connection (see the figure that follows).
Figure 6.12 Entity Data Model Wizard - Connection
Make a note of the entity connection settings to be used in App.Config, as these will be used later to
write the necessary control code. Click Next.
4. The Entity Data Model Wizard connects to the database.
As the next figure shows, you are then presented with a tree structure of the database. From here you
can select the object you would like to include in your model. If you also created Views and Stored
116

Adding an Entity Data Model
Routines, these items will be displayed along with any tables. In this example you just need to select
the tables. Click Finish to create the model and exit the wizard.
Figure 6.13 Entity Data Model Wizard - Objects and Settings
Visual Studio generates a model with three tables (city, country, and countrylanguage) and then display
it, as the following figure shows.
117

Adding a New Data Source
Figure 6.14 Entity Data Model Diagram
5. From the Visual Studio main menu, select Build and then Build Solution to ensure that everything
compiles correctly so far.
Adding a New Data Source
You will now add a new Data Source to your project and see how it can be used to read and write to the
database.
1. From the Visual Studio main menu select Data and then Add New Data Source. You will be presented
with the Data Source Configuration Wizard.
2. Select the Object icon. Click Next.
3. Select the object to bind to. Expand the tree as the next figure shows.
In this tutorial, you will select the city table. After the city table has been selected click Next.
118

Using the Data Source in a Windows Form
Figure 6.15 Data Source Configuration Wizard
4. The wizard will confirm that the city object is to be added. Click Finish.
5. The city object will now appear in the Data Sources panel. If the Data Sources panel is not displayed,
select Data and then Show Data Sources from the Visual Studio main menu. The docked panel will
then be displayed.
Using the Data Source in a Windows Form
This step describes how to use the Data Source in a Windows Form.
1. In the Data Sources panel select the Data Source you just created and drag and drop it onto the Form
Designer. By default, the Data Source object will be added as a Data Grid View control as the following
figure shows.
Note
The Data Grid View control is bound to cityBindingSource, and the
Navigator control is bound to cityBindingNavigator.
119

Adding Code to Populate the Data Grid View
Figure 6.16 Data Form Designer
2. Save and rebuild the solution before continuing.
Adding Code to Populate the Data Grid View
You are now ready to add code to ensure that the Data Grid View control will be populated with data from
the city database table.
1. Double-click the form to access its code.
2. Add the following code to instantiate the Entity Data Model EntityContainer object and retrieve
data from the database to populate the control.
using System.Windows.Forms;
namespace WindowsFormsApplication4
{
public partial class Form1 : Form
{
worldEntities we;
public Form1()
{
InitializeComponent();
}
private void Form1_Load(object sender, EventArgs e)
{
we = new worldEntities();
cityBindingSource.DataSource = we.city.ToList();
}
}
}
3. Save and rebuild the solution.
4. Run the solution. Confirm that the grid is populated (see the next figure for an example) and that you
can navigate the database.
120

Adding Code to Save Changes to the Database
Figure 6.17 The Populated Grid Control
Adding Code to Save Changes to the Database
This step explains how to add code that enables you to save changes to the database.
The Binding source component ensures that changes made in the Data Grid View control are also made to
the Entity classes bound to it. However, that data needs to be saved back from the entities to the database
itself. This can be achieved by the enabling of the Save button in the Navigator control, and the addition of
some code.
1. In the Form Designer, click the save icon in the form toolbar and confirm that its Enabled property is
set to True.
2. Double-click the save icon in the form toolbar to display its code.
3. Add the following (or similar) code to ensure that data is saved to the database when a user clicks the
save button in the application.
public Form1()
{
InitializeComponent();
}
private void Form1_Load(object sender, EventArgs e)
{
we = new worldEntities();
cityBindingSource.DataSource = we.city.ToList();
}
private void cityBindingNavigatorSaveItem_Click(object sender, EventArgs e)
{
we.SaveChanges();
}
}
}
4. When the code has been added, save the solution and then rebuild it. Run the application and verify
that changes made in the grid are saved.
121

Tutorial: Data Binding in ASP.NET Using LINQ on Entities
6.4 Tutorial: Data Binding in ASP.NET Using LINQ on Entities
In this tutorial you create an ASP.NET web page that binds LINQ queries to entities using the Entity
Framework mapping with MySQL Connector/NET.
If you have not already done so, install the world database sample prior to attempting this tutorial. See
the tutorial Section 6.3, “Tutorial: Using an Entity Framework Entity as a Windows Forms Data Source” for
instructions on downloading and installing this database.
Creating an ASP.NET Website
In this part of the tutorial, you create an ASP.NET website. The website uses the world database. The
main web page features a drop-down list from which you can select a country. Data about the cities of that
country is then displayed in a GridView control.
1. From the Visual Studio main menu select File, New, and then Web Site.
2. From the Visual Studio installed templates select ASP.NET Web Site. Click OK. You will be presented
with the Source view of your web page by default.
3. Click the Design view tab situated underneath the Source view panel.
4. In the Design view panel, enter some text to decorate the blank web page.
5. Click Toolbox. From the list of controls, select DropDownList. Drag and drop the control to a location
beneath the text on your web page.
6. From the DropDownList control context menu, ensure that the Enable AutoPostBack check box
is enabled. This will ensure the control's event handler is called when an item is selected. The user's
choice will in turn be used to populate the GridView control.
7. From the Toolbox select the GridView control. Drag and drop the GridView control to a location just
below the drop-down list you already placed.
The following figure shows an example of the decorative text and two controls in the Design view tab.
The added GridView control produced a grid with three columns (Column0, Column1, and Column3)
and the string abc in each cell of the grid.
122

Creating an ADO.NET Entity Data Model
Figure 6.18 Placed GridView Control
8. At this point it is recommended that you save your solution, and build the solution to ensure that there
are no errors.
9. If you run the solution you will see that the text and drop down list are displayed, but the list is empty.
Also, the grid view does not appear at all. Adding this functionality is described in the following sections.
At this stage you have a website that will build, but further functionality is required. The next step will be to
use the Entity Framework to create a mapping from the world database into entities that you can control
programmatically.
Creating an ADO.NET Entity Data Model
In this stage of the tutorial you will add an ADO.NET Entity Data Model to your project, using the world
database at the storage level. The procedure for doing this is described in the tutorial Section 6.3, “Tutorial:
Using an Entity Framework Entity as a Windows Forms Data Source”, and so will not be repeated here.
Populating a List Box by Using the Results of a Entity LINQ Query
In this part of the tutorial you will write code to populate the DropDownList control. When the web page
loads the data to populate the list will be achieved by using the results of a LINQ query on the model
created previously.
1. In the Design view panel, double-click any blank area. This brings up the Page_Load method.
2. Modify the relevant section of code according to the following listing example.
...
public partial class _Default : System.Web.UI.Page
{
worldModel.worldEntities we;
protected void Page_Load(object sender, EventArgs e)
{
123

Populating a Grid View Control by Using an Entity LINQ Query
we = new worldModel.worldEntities();
if (!IsPostBack)
{
var countryQuery = from c in we.country
orderby c.Name
select new { c.Code, c.Name };
DropDownList1.DataValueField = "Code";
DropDownList1.DataTextField = "Name";
DropDownList1.DataSource = countryQuery.ToList();
DataBind();
}
}
...
The list control only needs to be populated when the page first loads. The conditional code ensures
that if the page is subsequently reloaded, the list control is not repopulated, which would cause the user
selection to be lost.
3. Save the solution, build it and run it. You should see that the list control has been populated. You can
select an item, but as yet the GridView control does not appear.
At this point you have a working Drop Down List control, populated by a LINQ query on your entity data
model.
Populating a Grid View Control by Using an Entity LINQ Query
In the last part of this tutorial you will populate the Grid View Control using a LINQ query on your entity
data model.
1. In the Design view, double-click the DropDownList control. This action causes its
SelectedIndexChanged code to be displayed. This method is called when a user selects an item in
the list control and thus generates an AutoPostBack event.
2. Modify the relevant section of code accordingly to the following listing example.
...
protected void DropDownList1_SelectedIndexChanged(object sender, EventArgs e)
{
var cityQuery = from c in we.city
where c.CountryCode == DropDownList1.SelectedValue
orderby c.Name
select new { c.Name, c.Population, c.CountryCode };
GridView1.DataSource = cityQuery;
DataBind();
}
...
The grid view control is populated from the result of the LINQ query on the entity data model.
3. Save, build, and run the solution. As you select a country you will see its cities are displayed in the
GridView control. The following figure shows Belgium selected from the list box and a table with three
columns: Name, Population, and CountryCode.
124

Tutorial: Generating MySQL DDL from an Entity Framework Model
Figure 6.19 The Working Website
In this tutorial you have seen how to create an ASP.NET website, you have also seen how you can access
a MySQL database using LINQ queries on an entity data model.
6.5 Tutorial: Generating MySQL DDL from an Entity Framework
Model
This tutorial demonstrates how to create MySQL DDL from an Entity Framework model. Minimally, you will
need Microsoft Visual Studio 2017 and MySQL Connector/NET 6.10 to perform this tutorial.
1. Create a new console application in Visual Studio 2017.
2. Using the Solution Explorer, add a reference to MySql.Data.Entity.
3. From the Solution Explorer select Add, New Item. In the Add New Item dialog select Online
Templates. Select ADO.NET Entity Data Model and click Add to open the Entity Data Model dialog.
4. In the Entity Data Model dialog select Empty Model. Click Finish to create a blank model.
5. Create a simple model. A single Entity will do for the purposes of this tutorial.
6. In the Properties panel select ConceptualEntityModel from the drop-down list.
7. In the Properties panel, locate the DDL Generation Template in the category Database Script
Generation.
8. For the DDL Generation property select SSDLToMySQL.tt(VS) from the drop-down list.
9. Save the solution.
10. Right-click an empty space in the model design area to open the context-sensitive menu. From the
menu select Generate Database from Model to open the Generate Database Wizard dialog.
125

Tutorial: Basic CRUD Operations with Connector/NET
11. In the Generate Database Wizard dialog select an existing connection, or create a new connection to
a server. Select an appropriate option to show or hide sensitive data. For the purposes of this tutorial,
you can select Yes, although you might skip this for commercial applications.
12. Click Next to generate MySQL compatible DDL code and then click Finish to exit the wizard.
You have seen how to create MySQL DDL code from an Entity Framework model.
6.6 Tutorial: Basic CRUD Operations with Connector/NET
This tutorial provides instructions to get you started using MySQL as a document store with MySQL
Connector/NET.
• Minimum Requirements
• Import the Document Store Sample
• Add References to Required DLLs
• Import Namespaces
• Create a Session
• Find a Row Within a Collection
• Insert a New Document into a Collection
• Update an Existing Document
• Delete a Specific Document
• Close the Session
• Complete Code Example
For concepts and additional usage examples, see X DevAPI User Guide.
Minimum Requirements
• MySQL Server 8.0.11 with X Protocol enabled
• Connector/NET 8.0.11
• Visual Studio 2013/2015/2017
• world_x database sample
Import the Document Store Sample
A MySQL script is provided with data and a JSON collection. The sample contains the following:
• Collection
• countryinfo: Information about countries in the world.
• Tables
• country: Minimal information about countries of the world.
126

Add References to Required DLLs
• city: Information about some of the cities in those countries.
• countrylanguage: Languages spoken in each country.
To install the world_x database sample, follow these steps:
1. Download world_x.zip from http://dev.mysql.com/doc/index-other.html.
2. Extract the installation archive to a temporary location such as /tmp/.
Unpacking the archive results in two files, one of them named world_x.sql.
3. Connect to the MySQL server using the MySQL Client with the following command:
$> mysql -u root -p
Enter your password when prompted. A non-root account can be used as long as the account has
privileges to create new databases. For more information about using the MySQL Client, see mysql —
The MySQL Command-Line Client.
4. Execute the world_x.sql script to create the database structure and insert the data as follows:
mysql> SOURCE /temp/world_x.sql;
Replace /temp/ with the path to the world_x.sql file on your system.
Add References to Required DLLs
Create a new Visual Studio Console Project targeting .NET Framework 4.6.2 (or later), .NET Core 1.1,
or .NET Core 2.0. The code examples in this tutorial are shown in the C# language, but you can use
any .NET language.
Add a reference in your project to the following DLLs:
• MySql.Data.dll
• Google.Protobuf.dll
Import Namespaces
Import the required namespaces by adding the following statements:
using MySqlX.XDevAPI;
using MySqlX.XDevAPI.Common;
using MySqlX.XDevAPI.CRUD;
Create a Session
A session in the X DevAPI is a high-level database session concept that is different from working with
traditional low-level MySQL connections. It is important to understand that this session is not the same as a
traditional MySQL session. Sessions encapsulate one or more actual MySQL connections.
The following example opens a session, which you can use later to retrieve a schema and perform basic
CRUD operations.
string schemaName = "world_x";
// Define the connection string
127

Find a Row Within a Collection
string connectionURI = "mysqlx://test:test@localhost:33060";
Session session = MySQLX.GetSession(connectionURI);
// Get the schema object
Schema schema = session.GetSchema(schemaName);
Find a Row Within a Collection
After the session is instantiated, you can execute a find operation. The next example uses the session
object that you created:
// Use the collection 'countryinfo'
var myCollection = schema.GetCollection("countryinfo");
var docParams = new DbDoc(new { name1 = "Albania", _id1 = "ALB" });
// Find a document
DocResult foundDocs = myCollection.Find("Name = :name1 || _id = :_id1").Bind(docParams).Execute();
while (foundDocs.Next())
{
Console.WriteLine(foundDocs.Current["Name"]);
Console.WriteLine(foundDocs.Current["_id"]);
}
Insert a New Document into a Collection
//Insert a new document with an identifier
var obj = new { _id = "UKN", Name = "Unknown" };
Result r = myCollection.Add(obj).Execute();
Update an Existing Document
// using the same docParams object previously created
docParams = new DbDoc(new { name1 = "Unknown", _id1 = "UKN" });
r = myCollection.Modify("_id = :Id").Bind("id", "UKN").Set("GNP", "3308").Execute();
if (r.AffectedItemsCount == 1)
{
foundDocs = myCollection.Find("Name = :name1|| _id = :_id1").Bind(docParams).Execute();
while (foundDocs.Next())
{
Console.WriteLine(foundDocs.Current["Name"]);
Console.WriteLine(foundDocs.Current["_id"]);
Console.WriteLine(foundDocs.Current["GNP"]);
}
}
Delete a Specific Document
r = myCollection.Remove("_id = :id").Bind("id", "UKN").Execute();
Close the Session
session.Close();
Complete Code Example
The following example shows the basic operations that you can perform with a collection.
using MySqlX.XDevAPI;
using MySqlX.XDevAPI.Common;
using MySqlX.XDevAPI.CRUD;
using System;
128

Tutorial: Configuring SSL with Connector/NET
namespace MySQLX_Tutorial
{
class Program
{
static void Main(string[] args)
{
string schemaName = "world_x";
string connectionURI = "mysqlx://test:test@localhost:33060";
Session session = MySQLX.GetSession(connectionURI);
Schema schema = session.GetSchema(schemaName);
// Use the collection 'countryinfo'
var myCollection = schema.GetCollection("countryinfo");
var docParams = new DbDoc(new { name1 = "Albania", _id1 = "ALB" });
// Find a document
DocResult foundDocs = myCollection.Find("Name = :name1 || _id = :_id1").Bind(docParams).Execute();
while (foundDocs.Next())
{
Console.WriteLine(foundDocs.Current["Name"]);
Console.WriteLine(foundDocs.Current["_id"]);
}
//Insert a new document with an id
var obj = new { _id = "UKN", Name = "Unknown" };
Result r = myCollection.Add(obj).Execute();
//update an existing document
docParams = new DbDoc(new { name1 = "Unknown", _id1 = "UKN" });
r = myCollection.Modify("_id = :Id").Bind("id", "UKN").Set("GNP", "3308").Execute();
if (r.AffectedItemsCount == 1)
{
foundDocs = myCollection.Find("Name = :name1|| _id = :_id1").Bind(docParams).Execute();
while (foundDocs.Next())
{
Console.WriteLine(foundDocs.Current["Name"]);
Console.WriteLine(foundDocs.Current["_id"]);
Console.WriteLine(foundDocs.Current["GNP"]);
}
}
// delete a row in a document
r = myCollection.Remove("_id = :id").Bind("id", "UKN").Execute();
//close the session
session.Close();
Console.ReadKey();
}
}
}
6.7 Tutorial: Configuring SSL with Connector/NET
In this tutorial you will learn how you can use MySQL Connector/NET to connect to a MySQL server
configured to use SSL. Support for SSL client PFX certificates was added to the Connector/NET 6.2
release series. PFX is the native format of certificates on Microsoft Windows. More recently, support for
SSL client PEM certificates was added in the Connector/NET 8.0.16 release.
MySQL Server uses the PEM format for certificates and private keys. Connector/NET enables the use of
either PEM or PFX certificates with both classic MySQL protocol and X Protocol. This tutorial uses the test
129

Using PEM Certificates in Connector/NET
certificates from the server test suite by way of example. You can obtain the MySQL Server source code
from MySQL Downloads. The certificates can be found in the ./mysql-test/std_data directory.
To apply the server-side startup configuration for SSL connections:
1. In the MySQL Server configuration file, set the SSL parameters as shown in the follow PEM format
example. Adjust the directory paths according to the location in which you installed the MySQL source
code.
ssl-ca=path/to/repo/mysql-test/std_data/cacert.pem
ssl-cert=path/to/repo/mysql-test/std_data/server-cert.pem
ssl-key=path/to/repo/mysql-test/std_data/server-key.pem
The SslCa connection option accepts both PEM and PFX format certificates, using the file extension to
determine how to process certificates. Change cacert.pem to cacert.pfx if you intend to continue
with the PFX portion of this tutorial.
For a description of the connection string options used in this tutorial, see Section 4.5, “Connector/NET
Connection Options Reference”.
2. Create a test user account to use in this tutorial and set the account to require SSL. Using the MySQL
Command-Line Client, connect as root and create the user sslclient (with test as the account
password). Then, grant all privileges to the new user account as follows:
CREATE USER sslclient@'%' IDENTIFIED BY 'test' REQUIRE SSL;
GRANT ALL PRIVILEGES ON *.* TO sslclient@'%';
For detailed information about account-management strategies, see Access Control and Account
Management.
Now that the server-side configuration is finished, you can begin the client-side configuration using either
PEM or PFX format certificates in Connector/NET.
6.7.1 Using PEM Certificates in Connector/NET
The direct use of PEM format certificates was introduced to simplify certificate management in
multiplatform environments that include similar MySQL products. In previous versions of Connector/NET,
your only choice was to use platform-dependent PFX format certificates.
For this example, use the test client certificates from the MySQL server repository (server-
repository-root/mysql-test/std_data). In your application, add a connection string using the
test database and the sslclient user account (created previously). For example:
1. Set the SslMode connection option to the level of security needed. PEM certificates are only validated
for VerifyCA and VerifyFull SSL mode values. All other mode values ignore certificates even if
they are provided.
using (MySqlConnection connection = new MySqlConnection(
"database=test;user=sslclient;" +
"SslMode=VerifyFull"
2. Add the appropriate SSL certificates. Because this tutorial sets the SslMode option to VerifyFull,
you must also provide values for the SslCa, SslCert, and SslKey connection options. Each option
must point to a file with the .pem file extension.
"SslCa=ca.pem;" +
"SslCert=client-cert.pem;" +
130

Using PFX Certificates in Connector/NET
"SslKey=client-key.pem;"))
Alternatively, if you set the SSL mode to VerifyCA, only the SslCa connection option is required.
3. Open a connection. The following example opens a connection using the classic MySQL protocol, but
you can perform a similar test using X Protocol.
using (MySqlConnection connection = new MySqlConnection(
"database=test;user=sslclient;" +
"SslMode=VerifyFull" +
"SslCa=ca.pem;" +
"SslCert=client-cert.pem;" +
"SslKey=client-key.pem;"))
{
connection.Open();
}
Errors found when processing the PEM certificates will result in an exception being thrown. For additional
information, see Command Options for Encrypted Connections.
6.7.2 Using PFX Certificates in Connector/NET
.NET does not provide native support the PEM format. Instead, Windows includes a certificate store that
provides platform-dependent certificates in PFX format. For the purposes of this example, use test client
certificates from the MySQL server repository (./mysql-test/std_data). Convert these to PFX format
first. This format is also known as PKCS#12.
To complete the steps in this tutorial for PFX certificates, you must have Open SSL installed. This can be
downloaded for Microsoft Windows at no charge from Shining Light Productions.
Creating a Certificate File to Use with the .NET Client
1. From the directory server-repository-root/mysql-test/std_data, issue the following
command.
openssl pkcs12 -export -in client-cert.pem -inkey client-key.pem -certfile cacert.pem -out client.pfx
2. When asked for an export password, enter the password “pass”. The file client.pfx will be
generated. This file is used in the remainder of the tutorial.
Connecting to the Server Using a File-Based Certificate
1. Use the client.pfx file that you created in the previous step to authenticate the client. The
following example demonstrates how to connect using the SslMode, CertificateFile, and
CertificatePassword connection string options.
using (MySqlConnection connection = new MySqlConnection(
"database=test;user=sslclient;" +
"CertificateFile=H:\\git\\mysql-trunk\\mysql-test\\std_data\\client.pfx;" +
"CertificatePassword=pass;" +
"SslMode=Required "))
{
connection.Open();
}
The path to the certificate file needs to be changed to reflect your individual installation. When using
PFX format certificates, the SslMode connection option validates certificates for all SSL mode values,
except Disabled or None (deprecated in Connector/NET 8.0.29).
131

Using PFX Certificates in Connector/NET
Connecting to the Server Using a Store-Based Certificate
1. The first step is to import the PFX file, client.pfx, into the Personal Store. Double-click the file in
Windows explorer. This launches the Certificate Import Wizard.
2. Follow the steps dictated by the wizard, and when prompted for the password for the PFX file, enter
“pass”.
3. Click Finish to close the wizard and import the certificate into the personal store.
Examining Certificates in the Personal Store
1. Start the Microsoft Management Console by entering mmc.exe at a command prompt.
2. Select Add/Remove snap-in from the File menu. Click Add. Select Certificates from the list of
available snap-ins.
3. In the dialog, click Add and then select the My user account option. This option is used for personal
certificates.
4. Click Finish.
5. Click OK to close the Add/Remove Snap-in dialog.
6. You now have Certificates – Current User displayed in the left panel of the Microsoft Management
Console. Expand the Certificates - Current User tree item and select Personal, Certificates. The right
panel displays a certificate issued to MySQL that was previously imported. Double-click the certificate
to display its details.
7. After you have imported the certificate to the Personal Store, you can use a more succinct connection
string to connect to the database, as illustrated by the following code:
using (MySqlConnection connection = new MySqlConnection(
"database=test;user=sslclient;" +
"Certificate Store Location=CurrentUser;" +
"SslMode=Required"))
{
connection.Open();
}
Certificate Thumbprint Parameter
If you have a large number of certificates in your store, and many have the same Issuer, this can be a
source of confusion and result in the wrong certificate being used. To alleviate this situation, there is an
optional Certificate Thumbprint parameter that can additionally be specified as part of the connection
string. As mentioned before, you can double-click a certificate in the Microsoft Management Console to
display the certificate's details. When the Certificate dialog is displayed click the Details tab and scroll
down to see the thumbprint. The thumbprint will typically be a number such as 47 94 36 00 9a 40 f3
01 7a 14 5c f8 47 9e 76 94 d7 aa de f0. This thumbprint can be used in the connection string,
as the following code illustrates:
using (MySqlConnection connection = new MySqlConnection(
"database=test;user=sslclient;" +
"Certificate Store Location=CurrentUser;" +
"Certificate Thumbprint=479436009a40f3017a145cf8479e7694d7aadef0;"+
"SSL Mode=Required"))
{
connection.Open();
}
132

Tutorial: Using MySqlScript
Spaces in the thumbprint parameter are optional and the value is not case-sensitive.
6.8 Tutorial: Using MySqlScript
This tutorial teaches you how to use the MySqlScript class. This class enables you to execute a
series of statements. Depending on the circumstances, this can be more convenient than using the
MySqlCommand approach.
Further details of the MySqlScript class can be found in the reference documentation supplied with
MySQL Connector/NET.
To run the example programs in this tutorial, set up a simple test database and table using the mysql
Command-Line Client or MySQL Workbench. Commands for the mysql Command-Line Client are given
here:
CREATE DATABASE TestDB;
USE TestDB;
CREATE TABLE TestTable (id INT NOT NULL PRIMARY KEY
AUTO_INCREMENT, name VARCHAR(100));
The main method of the MySqlScript class is the Execute method. This method causes the script
(sequence of statements) assigned to the Query property of the MySqlScript object to be executed.
The Query property can be set through the MySqlScript constructor or by using the Query property.
Execute returns the number of statements executed.
The MySqlScript object will execute the specified script on the connection set using the Connection
property. Again, this property can be set directly or through the MySqlScript constructor. The following
code snippets illustrate this:
string sql = "SELECT * FROM TestTable";
...
MySqlScript script = new MySqlScript(conn, sql);
...
MySqlScript script = new MySqlScript();
script.Query = sql;
script.Connection = conn;
...
script.Execute();
The MySqlScript class has several events associated with it. There are:
1. Error - generated if an error occurs.
2. ScriptCompleted - generated when the script successfully completes execution.
3. StatementExecuted - generated after each statement is executed.
It is possible to assign event handlers to each of these events. These user-provided routines are called
back when the connected event occurs. The following code shows how the event handlers are set up.
script.Error += new MySqlScriptErrorEventHandler(script_Error);
script.ScriptCompleted += new EventHandler(script_ScriptCompleted);
script.StatementExecuted += new MySqlStatementExecutedEventHandler(script_StatementExecuted);
In VisualStudio, you can save typing by using tab completion to fill out stub routines. Start by typing, for
example, “script.Error +=”. Then press TAB, and then press TAB again. The assignment is completed, and
a stub event handler created. A complete working example is shown below:
using System;
using System.Collections.Generic;
using System.Linq;
133

Tutorial: Using MySqlScript
using System.Text;
using System.Data;
using MySql.Data;
using MySql.Data.MySqlClient;
namespace MySqlScriptTest
{
class Program
{
static void Main(string[] args)
{
string connStr = "server=localhost;user=root;database=TestDB;port=3306;password=******";
MySqlConnection conn = new MySqlConnection(connStr);
try
{
Console.WriteLine("Connecting to MySQL...");
conn.Open();
string sql = "INSERT INTO TestTable(name) VALUES ('Superman');" +
"INSERT INTO TestTable(name) VALUES ('Batman');" +
"INSERT INTO TestTable(name) VALUES ('Wolverine');" +
"INSERT INTO TestTable(name) VALUES ('Storm');";
MySqlScript script = new MySqlScript(conn, sql);
script.Error += new MySqlScriptErrorEventHandler(script_Error);
script.ScriptCompleted += new EventHandler(script_ScriptCompleted);
script.StatementExecuted += new MySqlStatementExecutedEventHandler(script_StatementExecuted);
int count = script.Execute();
Console.WriteLine("Executed " + count + " statement(s).");
Console.WriteLine("Delimiter: " + script.Delimiter);
}
catch (Exception ex)
{
Console.WriteLine(ex.ToString());
}
conn.Close();
Console.WriteLine("Done.");
}
static void script_StatementExecuted(object sender, MySqlScriptEventArgs args)
{
Console.WriteLine("script_StatementExecuted");
}
static void script_ScriptCompleted(object sender, EventArgs e)
{
/// EventArgs e will be EventArgs.Empty for this method
Console.WriteLine("script_ScriptCompleted!");
}
static void script_Error(Object sender, MySqlScriptErrorEventArgs args)
{
Console.WriteLine("script_Error: " + args.Exception.ToString());
}
}
}
In the script_ScriptCompleted event handler, the EventArgs parameter e will be
EventArgs.Empty. In the case of the ScriptCompleted event there is no additional data to be
obtained, which is why the event object is EventArgs.Empty.
134

Using Delimiters with MySqlScript
Using Delimiters with MySqlScript
Depending on the nature of the script, you may need control of the delimiter used to separate the
statements that will make up a script. The most common example of this is where you have a multi-
statement stored routine as part of your script. In this case if the default delimiter of “;” is used you will get
an error when you attempt to execute the script. For example, consider the following stored routine:
CREATE PROCEDURE test_routine()
BEGIN
SELECT name FROM TestTable ORDER BY name;
SELECT COUNT(name) FROM TestTable;
END
This routine actually needs to be executed on the MySQL Server as a single statement. However, with
the default delimiter of “;”, the MySqlScript class would interpret the above as two statements, the first
being:
CREATE PROCEDURE test_routine()
BEGIN
SELECT name FROM TestTable ORDER BY name;
Executing this as a statement would generate an error. To solve this problem MySqlScript supports
the ability to set a different delimiter. This is achieved through the Delimiter property. For example, you
could set the delimiter to “??”, in which case the above stored routine would no longer generate an error
when executed. Multiple statements can be delimited in the script, so for example, you could have a three
statement script such as:
string sql = "DROP PROCEDURE IF EXISTS test_routine??" +
"CREATE PROCEDURE test_routine() " +
"BEGIN " +
"SELECT name FROM TestTable ORDER BY name;" +
"SELECT COUNT(name) FROM TestTable;" +
"END??" +
"CALL test_routine()";
You can change the delimiter back at any point by setting the Delimiter property. The following code shows
a complete working example:
using System;
using System.Collections.Generic;
using System.Linq;
using System.Text;
using MySql.Data;
using MySql.Data.MySqlClient;
namespace ConsoleApplication8
{
class Program
{
static void Main(string[] args)
{
string connStr = "server=localhost;user=root;database=TestDB;port=3306;password=******";
MySqlConnection conn = new MySqlConnection(connStr);
try
{
Console.WriteLine("Connecting to MySQL...");
conn.Open();
string sql = "DROP PROCEDURE IF EXISTS test_routine??" +
"CREATE PROCEDURE test_routine() " +
"BEGIN " +
135

Using Delimiters with MySqlScript
"SELECT name FROM TestTable ORDER BY name;" +
"SELECT COUNT(name) FROM TestTable;" +
"END??" +
"CALL test_routine()";
MySqlScript script = new MySqlScript(conn);
script.Query = sql;
script.Delimiter = "??";
int count = script.Execute();
Console.WriteLine("Executed " + count + " statement(s)");
script.Delimiter = ";";
Console.WriteLine("Delimiter: " + script.Delimiter);
Console.WriteLine("Query: " + script.Query);
}
catch (Exception ex)
{
Console.WriteLine(ex.ToString());
}
conn.Close();
Console.WriteLine("Done.");
}
}
}
136

Chapter 7 Connector/NET for Entity Framework
Table of Contents
7.1 Entity Framework 6 Support ...................................................................................................... 137
7.2 Entity Framework Core Support ................................................................................................ 143
7.2.1 Creating a Database with Code First in EF Core ............................................................. 145
7.2.2 Scaffolding an Existing Database in EF Core .................................................................. 148
7.2.3 Configuring Character Sets and Collations in EF Core ..................................................... 151
Entity Framework is the name given to a set of technologies that support the development of data-oriented
software applications. MySQL Connector/NET supports Entity Framework 6.0 (EF6 or EF 6.4) and Entity
Framework Core (EF Core), which is the most recent framework available to .NET developers who work
with MySQL data using .NET objects.
The following table identifies each Entity Framework release and shows which Connector/NET series
supports the release. Backward compatibility of each feature set is determined by the framework rather
than by Connector/NET.
Table 7.1 Entity Framework Support by Connector/NET Version
Framework Type Connector/NET Support
EF Core • EF Core 8.0: Full support with 8.3.0 and later on platforms that
support .NET 8.
• EF Core 6.0: Full support with 8.0.28 and later on platforms that
support .NET 6.
EF6 | EF 6.4 • EF 6.4: Full cross-platform support in 8.0.22 and later.
• EF6: Full support on Windows only in 8.0.11 and later.
7.1 Entity Framework 6 Support
MySQL Connector/NET integrates support for Entity Framework 6 (EF6), which now includes support for
cross-platform application deployment with the EF 6.4 version. This chapter describes how to configure
and use the EF6 features that are implemented in Connector/NET.
In this section:
• Minimum Requirements for EF6 on Windows Only
• Minimum Requirements for EF 6.4 with Cross-Platform Support
• Configuration
• EF6 Features
• Code First Features
• Example for Using EF6
Minimum Requirements for EF6 on Windows Only
• Connector/NET 6.10 or 8.0.11
137

Minimum Requirements for EF 6.4 with Cross-Platform Support
• MySQL Server 5.6
• Entity Framework 6 assemblies
• .NET Framework 4.6.2
Minimum Requirements for EF 6.4 with Cross-Platform Support
• Connector/NET 8.0.22
• MySQL Server 5.6
• Entity Framework 6.4 assemblies
• .NET Standard 2.1 (.NET Core SDK 3.1 and Visual Studio 2019 version 16.5)
Configuration
Note
The MySQL Connector/NET 8.0 release series has a naming scheme for EF6
assemblies and NuGet packages that differs from the scheme used with previous
release series, such as 6.9 and 6.10. To configure Connector/NET 6.9 or 6.10 for
use with EF6, substitute the assembly and package names in this section with the
following:
• Assembly: MySql.Data.Entity.EF6
• NuGet package: MySql.Data.Entity
For more information about the MySql.Data.Entity NuGet package and its
uses, see https://www.nuget.org/packages/MySql.Data.Entity/.
To configure Connector/NET support for EF6:
1. Edit the configuration sections in the app.config file to add the connection string and the Connector/
NET provider.
<connectionStrings>
<add name="MyContext" providerName="MySql.Data.MySqlClient"
connectionString="server=localhost;port=3306;database=mycontext;uid=root;password=********"/>
</connectionStrings>
<entityFramework>
<defaultConnectionFactory type="System.Data.Entity.Infrastructure.SqlConnectionFactory, EntityFramework"/>
<providers>
<provider invariantName="MySql.Data.MySqlClient"
type="MySql.Data.MySqlClient.MySqlProviderServices, MySql.Data.EntityFramework"/>
<provider invariantName="System.Data.SqlClient"
type="System.Data.Entity.SqlServer.SqlProviderServices, EntityFramework.SqlServer"/>
</providers>
</entityFramework>
2. Apply the assembly reference using one of the following techniques:
• NuGet package. Install the NuGet package to add this reference automatically to the
app.config or web.config file during the installation. For example, to install the package for
Connector/NET 8.0.22, use one of the following installation options:
• Command Line Interface (CLI)
dotnet add package MySql.Data.EntityFramework -Version 8.0.22
138

EF6 Features
• Package Manager Console (PMC)
Install-Package MySql.Data.EntityFramework -Version 8.0.22
• Visual Studio with NuGet Package Manager. For this option, select nuget.org
as the package source, search for mysql.data, and install a stable version of
MySql.Data.EntityFramework.
• MySQL Connector/NET MSI file. Install MySQL Connector/NET and then add a reference for the
MySql.Data.EntityFramework assembly to your project. Depending on the .NET Framework
version used, the assembly is taken from the v4.0, v4.5, or v4.8 folder.
• MySQL Connector/NET source code. Build Connector/NET from source and then insert the
following data provider information into the app.config or web.config file:
<system.data>
<DbProviderFactories>
<remove invariant="MySql.Data.MySqlClient" />
<add name="MySQL Data Provider" invariant="MySql.Data.MySqlClient" description=".Net Framework Data Provider for MySQL"
type="MySql.Data.MySqlClient.MySqlClientFactory, MySql.Data, Version=8.0.22.0, Culture=neutral, PublicKeyToken=c5687fc88969c44d" />
</DbProviderFactories>
</system.data>
Important
Always update the version number to match the one in the MySql.Data.dll
assembly.
3. Set the new DbConfiguration class for MySQL. This step is optional but highly recommended,
because it adds all the dependency resolvers for MySQL classes. This can be done in three ways:
• Adding the DbConfigurationTypeAttribute on the context class:
[DbConfigurationType(typeof(MySqlEFConfiguration))]
• Calling DbConfiguration.SetConfiguration(new MySqlEFConfiguration()) at the
application start up.
• Set the DbConfiguration type in the configuration file:
<entityFramework codeConfigurationType="MySql.Data.Entity.MySqlEFConfiguration, MySql.Data.EntityFramework">
It is also possible to create a custom DbConfiguration class and add the dependency resolvers
needed.
EF6 Features
Following are the new features in Entity Framework 6 implemented in Connector/NET:
• Cross-platform support in Connector/NET 8.0.22 implements EF 6.4 as the initial provider version to
include Linux and macOS compatibility with .NET Standard 2.1 from Microsoft.
• Async Query and Save adds support for the task-based asynchronous patterns that have been available
since .NET 4.5. The new asynchronous methods supported by Connector/NET are:
• ExecuteNonQueryAsync
• ExecuteScalarAsync
139

EF6 Features
• PrepareAsync
• Connection Resiliency / Retry Logic enables automatic recovery from transient connection failures. To
use this feature, add to the OnCreateModel method:
SetExecutionStrategy(MySqlProviderInvariantName.ProviderName, () => new MySqlExecutionStrategy());
• Code-Based Configuration gives you the option of performing configuration in code, instead of
performing it in a configuration file, as it has been done traditionally.
• Dependency Resolution introduces support for the Service Locator. Some pieces of functionality that can
be replaced with custom implementations have been factored out. To add a dependency resolver, use:
AddDependencyResolver(new MySqlDependencyResolver());
The following resolvers can be added:
• DbProviderFactory -> MySqlClientFactory
• IDbConnectionFactory -> MySqlConnectionFactory
• MigrationSqlGenerator -> MySqlMigrationSqlGenerator
• DbProviderServices -> MySqlProviderServices
• IProviderInvariantName -> MySqlProviderInvariantName
• IDbProviderFactoryResolver -> MySqlProviderFactoryResolver
• IManifestTokenResolver -> MySqlManifestTokenResolver
• IDbModelCacheKey -> MySqlModelCacheKeyFactory
• IDbExecutionStrategy -> MySqlExecutionStrategy
• Interception/SQL logging provides low-level building blocks for interception of Entity Framework
operations with simple SQL logging built on top:
myContext.Database.Log = delegate(string message) { Console.Write(message); };
• DbContext can now be created with a DbConnection that is already opened, which enables scenarios
where it would be helpful if the connection could be open when creating the context (such as sharing a
connection between components when you cannot guarantee the state of the connection)
[DbConfigurationType(typeof(MySqlEFConfiguration))]
class JourneyContext : DbContext
{
public DbSet<MyPlace> MyPlaces { get; set; }
public JourneyContext()
: base()
{
}
public JourneyContext(DbConnection existingConnection, bool contextOwnsConnection)
: base(existingConnection, contextOwnsConnection)
{
}
}
140

Code First Features
using (MySqlConnection conn = new MySqlConnection("<connectionString>"))
{
conn.Open();
...
using (var context = new JourneyContext(conn, false))
{
...
}
}
• Improved Transaction Support provides support for a transaction external to the framework as
well as improved ways of creating a transaction within the Entity Framework. Starting with Entity
Framework 6, Database.ExecuteSqlCommand() will wrap by default the command in a transaction
if one was not already present. There are overloads of this method that allow users to override this
behavior if wished. Execution of stored procedures included in the model through APIs such as
ObjectContext.ExecuteFunction() does the same. It is also possible to pass an existing
transaction to the context.
• DbSet.AddRange/RemoveRange provides an optimized way to add or remove multiple entities from a
set.
Code First Features
Following are new Code First features supported by Connector/NET:
• Code First Mapping to Insert/Update/Delete Stored Procedures supported:
modelBuilder.Entity<EntityType>().MapToStoredProcedures();
• Idempotent migrations scripts allow you to generate an SQL script that can upgrade a database
at any version up to the latest version. To do so, run the Update-Database -Script -
SourceMigration: $InitialDatabase command in Package Manager Console.
• Configurable Migrations History Table allows you to customize the definition of the migrations history
table.
Example for Using EF6
The following C# code example represents the structure of an Entity Framework 6 model.
using MySql.Data.Entity;
using System.Data.Common;
using System.Data.Entity;
namespace EF6
{
// Code-Based Configuration and Dependency resolution
[DbConfigurationType(typeof(MySqlEFConfiguration))]
public class Parking : DbContext
{
public DbSet<Car> Cars { get; set; }
public Parking()
: base()
{
}
// Constructor to use on a DbConnection that is already opened
141

Example for Using EF6
public Parking(DbConnection existingConnection, bool contextOwnsConnection)
: base(existingConnection, contextOwnsConnection)
{
}
protected override void OnModelCreating(DbModelBuilder modelBuilder)
{
base.OnModelCreating(modelBuilder);
modelBuilder.Entity<Car>().MapToStoredProcedures();
}
}
public class Car
{
public int CarId { get; set; }
public string Model { get; set; }
public int Year { get; set; }
public string Manufacturer { get; set; }
}
}
The C# code example that follows shows how to use the entities from the previous model in an application
that stores the data within a MySQL table.
using MySql.Data.MySqlClient;
using System;
using System.Collections.Generic;
namespace EF6
{
class Example
{
public static void ExecuteExample()
{
string connectionString = "server=localhost;port=3305;database=parking;uid=root";
using (MySqlConnection connection = new MySqlConnection(connectionString))
{
// Create database if not exists
using (Parking contextDB = new Parking(connection, false))
{
contextDB.Database.CreateIfNotExists();
}
connection.Open();
MySqlTransaction transaction = connection.BeginTransaction();
try
{
// DbConnection that is already opened
using (Parking context = new Parking(connection, false))
{
// Interception/SQL logging
context.Database.Log = (string message) => { Console.WriteLine(message); };
// Passing an existing transaction to the context
context.Database.UseTransaction(transaction);
// DbSet.AddRange
List<Car> cars = new List<Car>();
cars.Add(new Car { Manufacturer = "Nissan", Model = "370Z", Year = 2012 });
142

Entity Framework Core Support
cars.Add(new Car { Manufacturer = "Ford", Model = "Mustang", Year = 2013 });
cars.Add(new Car { Manufacturer = "Chevrolet", Model = "Camaro", Year = 2012 });
cars.Add(new Car { Manufacturer = "Dodge", Model = "Charger", Year = 2013 });
context.Cars.AddRange(cars);
context.SaveChanges();
}
transaction.Commit();
}
catch
{
transaction.Rollback();
throw;
}
}
}
}
}
7.2 Entity Framework Core Support
MySQL Connector/NET integrates support for Entity Framework Core (EF Core). The requirements and
configuration of EF Core depend on the version of Connector/NET installed and the features that you
require. Use the table that follows to evaluate the minimum requirements.
Table 7.2 Connector/NET Versions and Entity Framework Core Support
Connector/NET EF Core 9.0 EF Core 8.0 EF Core 7.0 EF Core 6.0
9.1.0 .NET 9
preview, .NET
8, .NET 6
Not supported .NET 6
9.0.0 .NET 8, .NET 6 Not supported .NET 6
8.3.0 and 8.4.0 Not supported .NET 8, .NET
7, .NET 6
.NET 7, .NET 6
.NET 6
8.2.0 Not supported .NET 8 preview .NET 7 .NET 6
8.1.0 Not supported Not supported .NET 7 .NET 6
8.0.33 Not supported Not supported .NET 7 .NET 6
8.0.28 Not supported Not supported Not supported .NET 6
8.0.23 to 8.0.27 Not supported Not supported Not supported EF Core 6.0
preview
In this section:
• General Requirements for EF Core Support
• Configuration with MySQL
• Limitations
• Maximum String Length
General Requirements for EF Core Support
• Server version: MySQL 8.0 or later
143

Configuration with MySQL
• Entity Framework Core packages (replace n with a valid number to complete the full version of the
package):
• MySql.EntityFrameworkCore 8.0.n+MySQL8.n
• MySql.EntityFrameworkCore 6.0.n+MySQL8.n
• An implementation of .NET Standard or .NET Framework that is supported by Connector/NET (see
Table 7.2, “Connector/NET Versions and Entity Framework Core Support”)
• .NET | .NET Core SDK
• .NET 8.0 for all supported platforms: https://dotnet.microsoft.com/es-es/download/dotnet/8.0
• .NET 6.0 for all supported platforms: https://dotnet.microsoft.com/download/dotnet/6.0
• .NET Core for Microsoft Windows: https://www.microsoft.com/net/core#windowscmd
• .NET Core for Linux: https://www.microsoft.com/net/core#linuxredhat
• .NET Core for macOS: https://www.microsoft.com/net/core#macos
• Docker: https://www.microsoft.com/net/core#dockercmd
• Optional: Microsoft Visual Studio 2017, 2019, 2022, or Code
Note
For the minimum version of Visual Studio to use with Connector/NET, see
Table 2.1, “Connector/NET Requirements for Related Products”.
Configuration with MySQL
To use Entity Framework Core with a MySQL database, do the following:
1. Install the NuGet package.
When you install either the MySql.EntityFrameworkCore or
MySql.Data.EntityFrameworkCore package, all of the related packages required to run your
application are installed for you. For instructions on adding a NuGet package, see the relevant
Microsoft documentation.
2. In the class that derives from the DbContext class, override the OnConfiguring method to set the
MySQL data provider with UseMySQL. The following example shows how to set the provider using a
generic connection string in C#.
protected override void OnConfiguring(DbContextOptionsBuilder optionsBuilder)
{
#warning To protect potentially sensitive information in your connection string,
you should move it out of source code. See http://go.microsoft.com/fwlink/?LinkId=723263
for guidance on storing connection strings.
optionsBuilder.UseMySQL("server=localhost;database=library;user=user;password=password");
}
Limitations
The Connector/NET implementation of EF Core has the following limitations:
144

Maximum String Length
• Memory-Optimized Tables is not supported.
Maximum String Length
The following table shows the maximum length of string types supported by the Connector/NET
implementation of EF Core. Length values are in bytes for nonbinary and binary string types, depending on
the character set used.
Table 7.3 Maximum Length of strings used with Entity Framework Core
Data Type Maximum Length .NET Type
CHAR 255 string
BINARY 255 byte[]
VARCHAR, VARBINARY 65,535 string, byte[]
TINYBLOB, TINYTEXT 255 byte[]
BLOB, TEXT 65,535 byte[]
MEDIUMBLOB, MEDIUMTEXT 16,777,215 byte[]
LONGBLOB, LONGTEXT 4,294,967,295 byte[]
ENUM 65,535 string
SET 65,535 string
For additional information about the storage requirements of the string types, see String Type Storage
Requirements.
7.2.1 Creating a Database with Code First in EF Core
The Code First approach enables you to define an entity model in code, create a database from the model,
and then add data to the database. MySQL Connector/NET is compatible with multiple versions of Entity
Framework Core. For specific compatibility information, see Table 7.2, “Connector/NET Versions and
Entity Framework Core Support”.
The following example shows the process of creating a database from existing code. Although this
example uses the C# language, you can use any .NET language and run the resulting application on
Windows, macOS, or Linux.
1. Create a console application for this example.
a. Initialize a valid .NET Core project and console application using the .NET Core command-line
interface (CLI) and then switch to the newly created folder (mysqlefcore).
dotnet new console –o mysqlefcore
cd mysqlefcore
b. Add the MySql.EntityFrameworkCore package to the application by using the dotnet CLI or the
Package Manager Console in Visual Studio.
dotnet CLI
Enter the following command to add the MySQL EF Core 7.0 package for use with Connector/NET
8.0.33 and later.
dotnet add package MySql.EntityFrameworkCore --version 7.0.2
145

Creating a Database with Code First in EF Core
Package Manager Console
Enter the following command to add the MySQL EF Core 7.0 package for use with Connector/NET
8.0.33 and later.
Install-Package MySql.EntityFrameworkCore -Version 7.0.2
c. Restore dependencies and project-specific tools that are specified in the project file as follows:
dotnet restore
2. Create the model and run the application.
The model in this example is to be used by the console application. It consists of two entities related to
a book library that are configured in the LibraryContext class (or database context).
a. Create a new file named LibraryModel.cs and then add the following Book and Publisher
classes to the mysqlefcore namespace.
namespace mysqlefcore
{
public class Book
{
public string ISBN { get; set; }
public string Title { get; set; }
public string Author { get; set; }
public string Language { get; set; }
public int Pages { get; set; }
public virtual Publisher Publisher { get; set; }
}
public class Publisher
{
public int ID { get; set; }
public string Name { get; set; }
public virtual ICollection<Book> Books { get; set; }
}
}
b. Create a new file named LibraryContext.cs and add the code that follows. Replace the generic
connection string with one that is appropriate for your MySQL server configuration.
Note
The MySQL.EntityFrameworkCore.Extensions namespace applies
to Connector/NET 8.0.23 and later. Earlier connector versions require the
MySQL.Data.EntityFrameworkCore.Extensions namespace.
using Microsoft.EntityFrameworkCore;
using MySQL.EntityFrameworkCore.Extensions;
namespace mysqlefcore
{
public class LibraryContext : DbContext
{
public DbSet<Book> Book { get; set; }
public DbSet<Publisher> Publisher { get; set; }
protected override void OnConfiguring(DbContextOptionsBuilder optionsBuilder)
{
optionsBuilder.UseMySQL("server=localhost;database=library;user=user;password=password");
146

Creating a Database with Code First in EF Core
}
protected override void OnModelCreating(ModelBuilder modelBuilder)
{
base.OnModelCreating(modelBuilder);
modelBuilder.Entity<Publisher>(entity =>
{
entity.HasKey(e => e.ID);
entity.Property(e => e.Name).IsRequired();
});
modelBuilder.Entity<Book>(entity =>
{
entity.HasKey(e => e.ISBN);
entity.Property(e => e.Title).IsRequired();
entity.HasOne(d => d.Publisher)
.WithMany(p => p.Books);
});
}
}
}
The LibraryContex class contains the entities to use and it enables the configuration of specific
attributes of the model, such as Key, required columns, references, and so on.
c. Insert the following code into the existing Program.cs file, replacing the default C# code.
using Microsoft.EntityFrameworkCore;
using System;
using System.Text;
namespace mysqlefcore
{
class Program
{
static void Main(string[] args)
{
InsertData();
PrintData();
}
private static void InsertData()
{
using(var context = new LibraryContext())
{
// Creates the database if not exists
context.Database.EnsureCreated();
// Adds a publisher
var publisher = new Publisher
{
Name = "Mariner Books"
};
context.Publisher.Add(publisher);
// Adds some books
context.Book.Add(new Book
{
ISBN = "978-0544003415",
Title = "The Lord of the Rings",
Author = "J.R.R. Tolkien",
Language = "English",
Pages = 1216,
Publisher = publisher
});
147

Scaffolding an Existing Database in EF Core
context.Book.Add(new Book
{
ISBN = "978-0547247762",
Title = "The Sealed Letter",
Author = "Emma Donoghue",
Language = "English",
Pages = 416,
Publisher = publisher
});
// Saves changes
context.SaveChanges();
}
}
private static void PrintData()
{
// Gets and prints all books in database
using (var context = new LibraryContext())
{
var books = context.Book
.Include(p => p.Publisher);
foreach(var book in books)
{
var data = new StringBuilder();
data.AppendLine($"ISBN: {book.ISBN}");
data.AppendLine($"Title: {book.Title}");
data.AppendLine($"Publisher: {book.Publisher.Name}");
Console.WriteLine(data.ToString());
}
}
}
}
}
d. Use the following CLI commands to restore the dependencies and then run the application.
dotnet restore
dotnet run
The output from running the application is represented by the following example:
ISBN: 978-0544003415
Title: The Lord of the Rings
Publisher: Mariner Books
ISBN: 978-0547247762
Title: The Sealed Letter
Publisher: Mariner Books
7.2.2 Scaffolding an Existing Database in EF Core
Scaffolding a database produces an Entity Framework model from an existing database. The resulting
entities are created and mapped to the tables in the specified database. For an overview of the
requirements to use EF Core with MySQL, see Table 7.2, “Connector/NET Versions and Entity Framework
Core Support”).
NuGet packages have the ability to select the best target for a project, which means that NuGet installs the
libraries related to that specific framework version.
There are two different ways to scaffold an existing database:
• Scaffolding a Database Using .NET Core CLI
148

Scaffolding an Existing Database in EF Core
• Scaffolding a Database Using Package Manager Console in Visual Studio
This section shows how to scaffold the sakila database using both approaches. Additional scaffolding
techniques are:
• Scaffolding a Database by Filtering Tables
• Scaffolding with Multiple Schemas
Requirements
For the components needed to reproduce each scaffolding approach, see General Requirements for EF
Core Support. With the Package Manager Console approach, determine which version of Visual Studio is
recommended for the version of .NET or .NET Core in use (see Table 2.1, “Connector/NET Requirements
for Related Products”).
To download sakila database, see https://dev.mysql.com/doc/sakila/en/.
Note
When upgrading ASP.NET Core applications to a newer framework, be sure to use
the appropriate EF Core version (see https://docs.microsoft.com/en-us/aspnet/core/
migration/30-to-31?view=aspnetcore-3.1).
Scaffolding a Database Using .NET Core CLI
1. Initialize a valid .NET Core project and console application using the .NET Core command-line interface
(CLI) and then change to the newly created folder (sakilaConsole).
dotnet new console –o sakilaConsole
cd sakilaConsole
2. Add the MySQL NuGet package for EF Core using the CLI. For example, use the following command to
add the MySQL EF Core 7.0 package for use with Connector/NET 8.0.33 and later.
dotnet add package MySql.EntityFrameworkCore --version 7.0.2
3. Add the following Microsoft.EntityFrameworkCore.Design Nuget package:
dotnet add package Microsoft.EntityFrameworkCore.Tools
4. Restore dependencies and project-specific tools that are specified in the project file as follows:
dotnet restore
5. Create the Entity Framework Core model by executing the following command. The connection string
for this example must include database=sakila. For information about using connection strings, see
Section 4.1, “Creating a Connector/NET Connection String”.
Note
If you are using a connector version earlier than Connector/
NET 8.0.23, replace MySql.EntityFrameworkCore with
MySql.Data.EntityFrameworkCore.
dotnet ef dbcontext scaffold "connection-string" MySql.EntityFrameworkCore -o sakila -f
149

Scaffolding an Existing Database in EF Core
To validate that the model has been created, open the new sakila folder. You should see files
corresponding to all tables mapped to entities. In addition, look for the sakilaContext.cs file, which
contains the DbContext for this database.
Scaffolding a Database Using Package Manager Console in Visual Studio
1. Open Visual Studio and create a new Console App (.NET Core) for C#.
2. Add the MySQL NuGet package for EF Core using the Package Manager Console. For example, use
the following command to add the MySQL EF Core 7.0 package for use the Connector/NET 8.0.33 and
later.
Install-Package MySql.EntityFrameworkCore -Version 7.0.2
3. Install the following NuGet package by selecting either Package Manager Console (or Manage
NuGet Packages for Solution and then NuGet Package Manager) from the Tools menu:
Microsoft.EntityFrameworkCore.Tools.
4. Open Package Manager Console and enter the following command at the prompt to create the
entities and DbContext for the sakila database. The connection string for this example must include
database=sakila. For information about using connection strings, see Section 4.1, “Creating a
Connector/NET Connection String”.
Note
If you are using a connector version earlier than Connector/
NET 8.0.23, replace MySql.EntityFrameworkCore with
MySql.Data.EntityFrameworkCore.
Scaffold-DbContext "connection-string" MySql.EntityFrameworkCore -OutputDir sakila -f
Visual Studio creates a new sakila folder inside the project, which contains all the tables mapped to
entities and the sakilaContext.cs file.
Scaffolding a Database by Filtering Tables
It is possible to specify the exact tables in a schema to use when scaffolding database and to omit the rest.
The command-line examples that follow show the parameters needed for filtering tables. The connection
string for this example must include database=sakila.
If you are using a connector version earlier than Connector/NET 8.0.23, replace
MySql.EntityFrameworkCore with MySql.Data.EntityFrameworkCore.
.NET Core CLI:
dotnet ef dbcontext scaffold "connection-string" MySql.EntityFrameworkCore -o sakila -t actor -t film -t film_actor -t language -f
Package Manager Console in Visual Studio:
Scaffold-DbContext "connection-string" MySql.EntityFrameworkCore -OutputDir Sakila -Tables actor,film,language -f
Scaffolding with Multiple Schemas
When scaffolding a database, you can use more than one schema or database. Note that the account
used to connect to the MySQL server must have access to each schema to be included within the context.
150

Configuring Character Sets and Collations in EF Core
The following command-line examples show how to incorporate the sakila and world schemas
within a single context. If you are using a connector version earlier than Connector/NET 8.0.23, replace
MySql.EntityFrameworkCore with MySql.Data.EntityFrameworkCore.
.NET Core CLI:
dotnet ef dbcontext scaffold "connection-string" MySql.EntityFrameworkCore -o sakila --schema sakila --schema world -f
Package Manager Console in Visual Studio:
Scaffold-DbContext "connection-string" MySql.EntityFrameworkCore -OutputDir Sakila -Schemas sakila,world -f
7.2.3 Configuring Character Sets and Collations in EF Core
This section describes how to change the character set, collation, or both at the entity and entity-property
level in an Entity Framework (EF) Core model. Modifications made to the model affect the tables and
columns generated from your code.
There are two distinct approaches available for configuring character sets and collations in code-first
scenarios. Data annotation enables you to apply attributes directly to your EF Core model. Alternatively,
you can override the OnModelCreating method on your derived DbContext class and use the code-first
fluent API to configure specific characteristics of the model. An example of each approach follows.
For more information about supported character sets and collations, see Character Sets and Collations in
MySQL.
Using Data Annotation
Before you can annotate an EF Core model with character set and collation attributes, add a reference to
the following namespace in the file that contains your entity model.
Note
The MySQL.EntityFrameworkCore.DataAnnotations namespace applies
to Connector/NET 8.0.23 and later. Earlier connector versions require the
MySQL.Data.EntityFrameworkCore.DataAnnotations namespace.
using MySql.EntityFrameworkCore.DataAnnotations;
Add one or more [MySqlCharset] attributes to store data using a variety of character sets and one
or more [MySqlCollation] attributes to perform comparisons according to a variety of collations.
In the following example, the ComplexKey class represents an entity (or table) and Key1, Key2, and
CollationColumn represent entity properties (or columns).
[MySqlCharset("utf8")]
public class ComplexKey
{
[MySqlCharset("latin1")
public string Key1 { get; set; }
[MySqlCharset("latin1")]
public string Key2 { get; set; }
[MySqlCollation("latin1_spanish_ci")]
public string CollationColumn { get; set; }
}
Using the Code-First Fluent API
Add the following directive to reference the methods related to character set and collation configuration.
151

Configuring Character Sets and Collations in EF Core
Note
The MySQL.EntityFrameworkCore.Extensions namespace applies
to Connector/NET 8.0.23 and later. Earlier connector versions require the
MySQL.Data.EntityFrameworkCore.Extensions namespace.
using MySQL.EntityFrameworkCore.Extensions;
When using the fluent API approach, the EF Core model remains unchanged. Fluent API overrides any
rule set by an attribute.
public class ComplexKey
{
public string Key1 { get; set; }
public string Key2 { get; set; }
public string CollationColumn { get; set; }
}
In this example, the entity and various entity properties are reconfigured, including the conventional
mappings to character sets and collations. This approach uses the ForMySQLHasCharset and
ForMySQLHasCollation methods.
public class MyContext : DbContext
{
public DbSet<ComplexKey> ComplexKeys { get; set; }
protected override void OnModelCreating(ModelBuilder modelBuilder)
{
modelBuilder.Entity<ComplexKey>(e =>
{
e.HasKey(p => new { p.Key1, p.Key2 });
e.ForMySQLHasCollation("ascii_bin"); // defining collation at Entity level
e.Property(p => p.Key1).ForMySQLHasCharset("latin1"); // defining charset in a property
e.Property(p => p.CollationColumnFA).ForMySQLHasCollation("utf8_bin"); // defining collation in a property
});
}
}
152

Chapter 8 Connector/NET API Reference
Table of Contents
8.1 MySql.Data.Common.DnsClient ................................................................................................. 153
8.2 MySql.Data.MySqlClient Namespace ......................................................................................... 153
8.3 MySql.Data.MySqlClient.Authentication Namespace ................................................................... 156
8.4 MySql.Data.MySqlClient.Interceptors Namespace ....................................................................... 157
8.5 MySql.Data.MySqlClient.Replication Namespace ........................................................................ 157
8.6 MySql.Data.Types Namespace .................................................................................................. 157
8.7 MySql.Data.EntityFramework Namespace .................................................................................. 157
8.8 Microsoft.EntityFrameworkCore Namespace ............................................................................... 159
8.9 MySql.EntityFrameworkCore Namespace ................................................................................... 159
8.10 MySql.Web Namespace .......................................................................................................... 161
This chapter provides a high-level reference to the ADO.NET and .NET Core components that are
implemented in the most recent version of Connector/NET. For a complete API listing, visit MySQL
Documentation to locate the Connector/NET 8.0 API reference guide that is generated from embedded
documentation.
8.1 MySql.Data.Common.DnsClient
Enumerations
Enumeration Description
OPCode DNS Record OpCode. A four bit field that specifies
kind of query in this message. This value is set
by the originator of a query and copied into the
response.
8.2 MySql.Data.MySqlClient Namespace
Classes
Class Description
AuthenticationPluginConfigurationElementRetrieves the authentication plugin configuration
from the configuration file.
BaseCommandInterceptor Provides a means of enhancing or replacing SQL
commands through the connection string rather than
recompiling.
BaseTableCache Provides a base class used for the table cache.
CharacterSet Specifies a character set.
GenericConfigurationElementCollection<T>Retrieves an element collection from the
configuration file.
InterceptorConfigurationElement Class used in the configuration file to get
configuration details for interceptors.
MySqlAttribute Represents a query attribute to a MySqlCommand.
153

Classes
Class Description
MySqlAttributeCollection Represents a collection of query attributes relevant
to a MySqlCommand.
MySqlBaseConnectionStringBuilder Abstract class that provides common functionality
for connection options that apply for all protocols.
MySqlBulkLoader Load many rows into the database.
MySqlClientFactory Represents the DBProviderFactory
implementation for MySqlClient.
MySqlClientPermission Derived from the .NET DBDataPermission class.
For usage information, see Section 5.7, “Working
with Partial Trust / Medium Trust”.
MySqlClientPermissionAttribute Associates a security action with a custom security
attribute.
MySqlCommand Represents an SQL statement to execute against a
MySQL database. This class cannot be inherited.
MySqlCommandBuilder Automatically generates single-table commands
used to reconcile changes made to a data set with
the associated MySQL database. This class cannot
be inherited.
MySqlConfiguration Defines a configuration section that contains the
information specific to MySQL.
MySqlConnection Represents an open connection to a MySQL Server
database. This class cannot be inherited.
MySqlConnectionStringBuilder Defines all of the connection string options that can
be used.
MySqlDataAdapter Represents a set of data commands and a database
connection that are used to fill a data set and update
a MySQL database. This class cannot be inherited.
MySqlDataReader Provides a means of reading a forward-only stream
of rows from a MySQL database. This class cannot
be inherited.
MySqlError Collection of error codes that can be returned by the
server
MySqlException The exception that is thrown when MySQL returns
an error. This class cannot be inherited.
MySqlHelper Helper class that makes it easier to work with the
provider.
MySqlInfoMessageEventArgs Provides data for the InfoMessage event. This
class cannot be inherited.
MySqlParameter Represents a parameter to a
MySql.Data.MySqlClient.MySqlCommand, and
optionally, its mapping to columns in a dataset. This
class cannot be inherited.
MySqlParameterCollection Represents a collection of parameters relevant to a
MySql.Data.MySqlClient.MySqlCommand as
154

Delegates
Class Description
well as their respective mappings to columns in a
dataset. This class cannot be inherited.
MySqlRowUpdatedEventArgs Provides data for the RowUpdated event. This class
cannot be inherited.
MySqlRowUpdatingEventArgs Provides data for the RowUpdating event. This
class cannot be inherited.
MySqlSchemaCollection Contains information about a schema.
MySqlSchemaRow Represents a row within a schema.
MySqlScript Provides a class capable of executing an SQL
script containing multiple SQL statements including
CREATE PROCEDURE statements that require
changing the delimiter.
MySqlScriptErrorEventArgs Provides an error event argument used in
MySqlScript.
MySqlScriptEventArgs Provides an event argument used in MySqlScript.
MySqlSecurityPermission Creates permission sets.
MySqlTrace Logs events in a defined listener.
MySqlTransaction Represents an SQL transaction to be made in a
MySQL database. This class cannot be inherited.
ReplicationConfigurationElement Defines a replication configuration element in the
configuration file.
ReplicationServerConfigurationElement Defines a replication server in the configuration file.
ReplicationServerGroupConfigurationElementDefines a replication server group in the
configuration file
SchemaColumn Represents a column object within a schema.
Delegates
Delegate Description
FidoActionCallback Represents the method to handle the
FidoActionRequested event of a
MySqlConnection.
MySqlInfoMessageEventHandler Represents the method to handle the
InfoMessage event of a MySqlConnection.
MySqlRowUpdatedEventHandler Represents the method to handle the
RowUpdatedevent of a MySqlDataAdapter.
MySqlRowUpdatingEventHandler Represents the method to handle the
RowUpdatingevent of a MySqlDataAdapter.
MySqlScriptErrorEventHandler Represents the method to handle an error in
MySqlScript.
MySqlStatementExecutedEventHandler Represents the method to be called after the
execution of a statement in MySqlScript.
155

Enumerations
Enumerations
Enumeration Description
CloseNotification The warnings that cause a connection to close.
CompressionAlgorithms Defines the compression algorithms that can be
used.
CompressionType Defines the type of compression used when data is
exchanged between client and server.
KerberosAuthMode Defines the different modes that can be used for
Kerberos authentication.
LockContention Defines waiting options that may be used with row
locking options.
MySqlAuthenticationMode Specifies the authentication mechanism that should
be used.
MySqlBulkLoaderConflictOption Defines the action to perform when a conflict is
found.
MySqlBulkLoaderPriority Defines the load priority.
MySqlCertificateStoreLocation Defines the certificate store location.
MySqlConnectionProtocol Specifies the type of connection to use.
MySqlDbType Specifies the MySQL data type
of a field or property for use in a
MySql.Data.MySqlClient.MySqlParameter.
MySqlDriverType Specifies the connection types that are supported.
MySqlErrorCode Provides a reference to error codes returned by
MySQL.
MySQLGuidFormat Specifies the stored type for a MySQL GUID data
type.
MySqlSslMode Provides the SSL options for a connection.
MySqlTraceEventType Defines the log event type in MySqlTrace.
UsageAdvisorWarningFlags Defines the usage advisor warning type.
8.3 MySql.Data.MySqlClient.Authentication Namespace
Classes
Class Description
MySqlAuthenticationPlugin Abstract class used to define an authentication
plugin.
MySqlClearPasswordPlugin Allows connections to a user account set with the
mysql_clear_password authentication plugin.
MySqlNativePasswordPlugin Implements the mysql_native_password
authentication plugin.
MySqlPemReader Provides functionality to read, decode, and convert
PEM files into objects supported in .NET.
156

MySql.Data.MySqlClient.Interceptors Namespace
8.4 MySql.Data.MySqlClient.Interceptors Namespace
Classes
Class Description
BaseExceptionInterceptor Represents the base class for all user-defined
exception interceptors.
8.5 MySql.Data.MySqlClient.Replication Namespace
The MySql.Data.MySqlClient.Replication namespace contains members for replication and load-
balancing components.
Classes
Class Description
ReplicationRoundRobinServerGroup Class that implements round-robin load balancing.
ReplicationServer Represents a server in the replication environment.
ReplicationServerGroup Base class used to implement load-balancing
features.
8.6 MySql.Data.Types Namespace
The MySql.Data.Types namespace contains members for converting MySQL types.
Classes
Class Description
MySqlConversionException Represents exceptions returned during the
conversion of MySQL types.
Structures
Structure Description
MySqlDateTime Defines operations that apply to MySqlDateTime
objects.
MySqlDecimal Defines operations that apply to MySqlDecimal
objects.
MySqlGeometry Defines operations that apply to MySqlGeometry
objects.
8.7 MySql.Data.EntityFramework Namespace
Classes
Class Description
BackoffAlgorithm Represents the base class for backoff algorithms.
157

Enumerations
Class Description
BackoffAlgorithmErr1040 Backoff algorithm customized for the MySQL error
code 1040 - Too many connections.
BackoffAlgorithmErr1205 Backoff algorithm customized for the MySQL
error code 1205 - Lock wait timeout exceeded; try
restarting transaction.
BackoffAlgorithmErr1213 Backoff algorithm customized for MySQL error code
1213 - Deadlock found when trying to get lock; try
restarting transaction.
BackoffAlgorithmErr1614 Backoff algorithm for the MySQL error code 1614 -
Transaction branch was rolled back: deadlock was
detected.
BackoffAlgorithmErr2006 Backoff algorithm customized for MySQL error code
2006 - MySQL server has gone away.
BackoffAlgorithmErr2013 Backoff algorithm customized for MySQL error code
2013 - Lost connection to MySQL server during
query.
BackoffAlgorithmNdb Backoff algorithm customized for MySQL Cluster
(NDB) errors.
MySqlConnectionFactory Used for creating connections in Code First 4.3.
MySqlDependencyResolver Class used to resolve implementation of services.
MySqlEFConfiguration Class used to define the MySQL services used in
Entity Framework.
MySqlExecutionStrategy Provided an execution strategy tailored for handling
MySQL server transient errors.
MySqlHistoryContext Class used by code first migrations to read and write
migration history from the database.
MySqlLogger Provides the logger class for use with Entity
Framework.
MySqlManifestTokenResolver Represents a service for getting a provider manifest
token given a connection.
MySqlMigrationCodeGenerator Class used to customized code generation to avoid
the dbo. prefix added on table names.
MySqlMigrationSqlGenerator Implements the MySQL SQL generator for EF 4.3
data migrations.
MySqlModelCacheKey Represents a key value that uniquely identifies an
Entity Framework model that has been loaded into
memory.
MySqlProviderFactoryResolver Represents a service for obtaining the correct
MySQL DbProviderFactory from a connection.
MySqlProviderInvariantName Defines the MySQL provider name.
Enumerations
Enumeration Description
OpType Represents a set of database operations.
158

Microsoft.EntityFrameworkCore Namespace
8.8 Microsoft.EntityFrameworkCore Namespace
Enables access to .NET Core command-line interface (CLI) tools.
Classes
Class Description
MySQLDbContextOptionsExtensions Represents the context-option extensions
implemented for MySQL.
8.9 MySql.EntityFrameworkCore Namespace
Namespaces in this section:
• MySql.EntityFrameworkCore.DataAnnotations Namespace
• MySQL.EntityFrameworkCore.Diagnostics Namespace
• MySql.EntityFrameworkCore.Extensions Namespace
• MySql.EntityFrameworkCore.Infrastructure Namespace
• MySql.EntityFrameworkCore.Infrastructure.Internal Namespace
• MySql.EntityFrameworkCore.Metadata Namespace
• MySql.EntityFrameworkCore.Migrations.Operations Namespace
• MySql.EntityFrameworkCore.Query Namespace
MySql.EntityFrameworkCore.DataAnnotations Namespace
Classes
Class Description
MySqlCharsetAttribute Establishes the character set of an entity property.
MySqlCollationAttribute Sets the collation in an entity property.
MySQL.EntityFrameworkCore.Diagnostics Namespace
Classes
Class Description
MySQLEventId Event IDs for MySQL events that correspond to
messages logged to an ILogger and events
sent to a DiagnosticSource. The IDs are also
used with WarningsConfigurationBuilder to
configure the behavior of warnings.
MySql.EntityFrameworkCore.Extensions Namespace
159

MySql.EntityFrameworkCore.Infrastructure Namespace
Classes
Class Description
MySQLDatabaseFacadeExtensions MySQL specific extension methods for
Database().
MySQLDbFunctionsExtensions Provides CLR methods that get translated to
database functions when used in LINQ to Entities
queries. The methods on this class are accessed via
Functions().
MySQLEntityTypeExtensions MySQL specific extension methods for entity types.
MySqlIndexBuilderExtensions Inheritance
MySQLIndexExtensions Extension methods for IIndex for SQL Server-
specific metadata.
MySQLKeyBuilderExtensions Inheritance
MySQLKeyExtensions Extension methods for IKey for MySQL-specific
metadata.
MySQLMigrationBuilderExtensions MySQL specific extension methods for
MigrationBuilder.
MySQLModelBuilderExtensions Inheritance
MySQLPropertyBuilderExtensions Represents the implementation of MySQL property-
builder extensions used in Fluent API.
MySQLPropertyExtensions Extension methods for IProperty for MySQL
Server-specific metadata.
MySQLServiceCollectionExtensions MySQL extension class for IServiceCollection.
Enumerations
Enumeration Description
MySQLMatchSearchMode Performs a search against a text collection.
MySql.EntityFrameworkCore.Infrastructure Namespace
Classes
Class Description
MySQLDbContextOptionsBuilder Represents the
RelationalDbContextOptionsBuilder type
implemented for MySQL.
Delegates
Delegate Description
MySQLSchemaNameTranslator Translates the specified schema and object to an
output object name whenever a schema is being
used.
160

MySql.EntityFrameworkCore.Infrastructure.Internal Namespace
Enumerations
Enumeration Description
MySqlSchemaBehavior Represents the behavior of the schema.
MySql.EntityFrameworkCore.Infrastructure.Internal Namespace
Classes
Class Description
MySQLOptionsExtension Represents the RelationalOptionsExtension
type implemented for MySQL.
Interfaces
Interface Description
IMySQLOptions Represents options to set on the provider.
MySql.EntityFrameworkCore.Metadata Namespace
Enumerations
Enumeration Description
MySQLValueGenerationStrategy An internal enumeration that supports the Entity
Framework Core infrastructure.
MySql.EntityFrameworkCore.Migrations.Operations Namespace
Classes
Class Description
MySQLDropPrimaryKeyAndRecreateForeignKeysOperationA migration operation for dropping a primary key
and recreating foreign keys.
MySQLDropUniqueConstraintAndRecreateForeignKeysOperationA migration operation for dropping a unique
constraint and recreating foreign keys.
MySql.EntityFrameworkCore.Query Namespace
Classes
Class Description
MySQLJsonString Represents a string that contains valid JSON data.
To mark a string as containing JSON data, just cast
the string to MySQLJsonString.
8.10 MySql.Web Namespace
The MySql.Web namespace includes a set of subordinate namespaces that represent the features
managed by various MySQL providers and available for use within ASP.NET applications.
161

MySql.Web.Common Namespace
Namespaces in this section:
• MySql.Web.Common Namespace
• MySql.Web.Personalization Namespace
• MySql.Web.Profile Namespace
• MySql.Web.Security Namespace
• MySql.Web.SessionState Namespace
• MySql.Web.SiteMap Namespace
MySql.Web.Common Namespace
Classes
Class Description
SchemaManager Manages schema-related operations.
MySql.Web.Personalization Namespace
Classes
Class Description
MySqlPersonalizationProvider Implements a personalization provider enabling the
use of web parts at ASP.NET websites.
MySql.Web.Profile Namespace
Classes
Class Description
MySQLProfileProvider Implements a profile provider for the MySQL
database.
MySql.Web.Security Namespace
Classes
Class Description
MySQLMembershipProvider Manages storage of membership information for an
ASP.NET application in a MySQL database.
MySQLRoleProvider Manages storage of role membership information for
an ASP.NET application in a MySQL database.
MySqlSimpleMembershipProvider Provides support for website membership tasks,
such as creating accounts, deleting accounts, and
managing passwords.
MySqlSimpleRoleProvider Provides basic role-management functionality.
162

MySql.Web.SessionState Namespace
Class Description
MySqlWebSecurity Provides security and authentication features for
ASP.NET Web Pages applications, including the
ability to create user accounts, log users in and out,
reset or change passwords, and perform related
tasks.
MySql.Web.SessionState Namespace
Classes
Class Description
MySqlSessionStateStore Enables ASP.NET applications to store and manage
session state information in a MySQL database.
Expired session data is periodically deleted from the
database.
MySql.Web.SiteMap Namespace
Classes
Class Description
MySqlSiteMapProvider Implements a site-map provider for the MySQL
database.
163

164

Chapter 9 Connector/NET Support
Table of Contents
9.1 Connector/NET Community Support .......................................................................................... 165
9.2 How to Report Connector/NET Problems or Bugs ...................................................................... 165
The developers of MySQL Connector/NET greatly value the input of our users in the software development
process. If you find Connector/NET lacking some feature important to you, or if you discover a bug and
need to file a bug report, please use the instructions in How to Report Bugs or Problems.
9.1 Connector/NET Community Support
• Community support for MySQL Connector/NET can be found through the forums at http://
forums.mysql.com.
• Paid support is available from Oracle. Additional information is available at http://dev.mysql.com/
support/.
9.2 How to Report Connector/NET Problems or Bugs
If you encounter difficulties or problems with MySQL Connector/NET, contact the Connector/NET
community, as explained in Section 9.1, “Connector/NET Community Support”.
First try to execute the same SQL statements and commands from the mysql client program. This helps
you determine whether the error is in Connector/NET or MySQL.
If reporting a problem, ideally include the following information with the email:
• Operating system and version.
• Connector/NET version.
• MySQL server version.
• Copies of error messages or other unexpected output.
• Simple reproducible sample.
Remember that the more information you can supply to us, the more likely it is that we can fix the problem.
If you believe the problem to be a bug, then you must report the bug through http://bugs.mysql.com/.
165

166

Chapter 10 Connector/NET FAQ
Questions
• 10.1: Are all commands executed after a transaction begins automatically enlisted in the transaction?
• 10.2: How do I obtain the value of an auto-incremented column?
Questions and Answers
10.1: Are all commands executed after a transaction begins automatically enlisted in the
transaction?
Yes. When a client begins a transaction in classic MySQL, all subsequent commands (on that connection)
are part of that transaction until the client commits or rolls back the transaction. To execute a command
outside of that transaction, you must open a separate connection.
10.2: How do I obtain the value of an auto-incremented column?
When using CommandBuilder, setting ReturnGeneratedIdentifiers property to true no longer
works, as CommandBuilder does not add last_insert_id() by default.
CommandBuilder hooks up to the DataAdapter.RowUpdating event handler, which means it is called
for every row. It examines the command object and, if it is the same referenced object, it essentially
rebuilds the object, thereby destroying your command text changes.
One approach to solving this problem is to clone the command object so you have a different actual
reference:
dataAdapter.InsertCommand = cb.GetInsertCommand().Clone()
This works, but since the CommandBuilder is still connected to the DataAdapter, the RowUpdating event
still fires, adversely affecting performance. To stop that, once all your commands have been added you
need to disconnect the CommandBuilder from the DataAdapter:
cb.DataAdapter = null;
The last requirement is to make sure the id that is returned by last_insert_id() has the correct
name. For example:
SELECT last_insert_id() AS id
A complete working example is shown here:
using System;
using System.Collections.Generic;
using System.Linq;
using System.Text;
using System.Data;
using MySql.Data;
using MySql.Data.MySqlClient;
namespace GetAutoIncId
{
class Program
{
static void Main(string[] args)
{
string connStr = "server=localhost;user=root;database=TestDB;port=3306;password=******;";
167

MySqlConnection conn = new MySqlConnection(connStr);
try
{
Console.WriteLine("Connecting to MySQL...");
conn.Open();
string sql = "SELECT * FROM TestTable";
MySqlDataAdapter da = new MySqlDataAdapter(sql, conn);
MySqlCommandBuilder cb = new MySqlCommandBuilder(da);
MySqlCommand cmd = new MySqlCommand();
cmd.Connection = conn;
cmd.CommandText = sql;
// use Cloned object to avoid .NET rebuilding the object, and
// thereby throwing away our command text additions.
MySqlCommand insertCmd = cb.GetInsertCommand().Clone();
insertCmd.CommandText = insertCmd.CommandText + ";SELECT last_insert_id() AS id";
insertCmd.UpdatedRowSource = UpdateRowSource.FirstReturnedRecord;
da.InsertCommand = insertCmd;
cb.DataAdapter = null; // Unhook RowUpdating event handler
DataTable dt = new DataTable();
da.Fill(dt);
DataRow row = dt.NewRow();
row["name"] = "Joe Smith";
dt.Rows.Add(row);
da.Update(dt);
System.Console.WriteLine("ID after update: " + row["id"]);
}
catch (Exception ex)
{
Console.WriteLine(ex.ToString());
}
conn.Close();
Console.WriteLine("Done.");
}
}
}
168
