
PDF Creation Guidelines
From InDesign
General Tab
Compatibility should be set to Acrobat 5. This
gives us the smallest file sizes while still allowing
us to use some transparency.
Select the pages you wish to export to PDF
Select Optimize for Fast Web View
If you built bookmarks, added hyperlinks
(URLs), or other interactive elements, check the
appropriate box in the Include area.
Compression Tab
Color Images
Use 120 pixels per inch for images because
the default line screen for a 300 dpi laser
printer is 60 lines per inch. Multiply this by
2 to get the optimal image resolution of
120 ppi. Users viewing PDF files on screen
can’t tell the difference between high- and
medium-quality JPEG compression. Print
output quality follows suit.
Grayscale Images
Use the same specifications as Color
Images.
Monochrome Images
Choose 300 pixels per inch. CCITT Group 4
is the best, general-purpose compression
technique for monochrome images. Most
Fax machines use Group 3.
Compress Text and Line Art and Crop Image
Data to Frames should be checked.
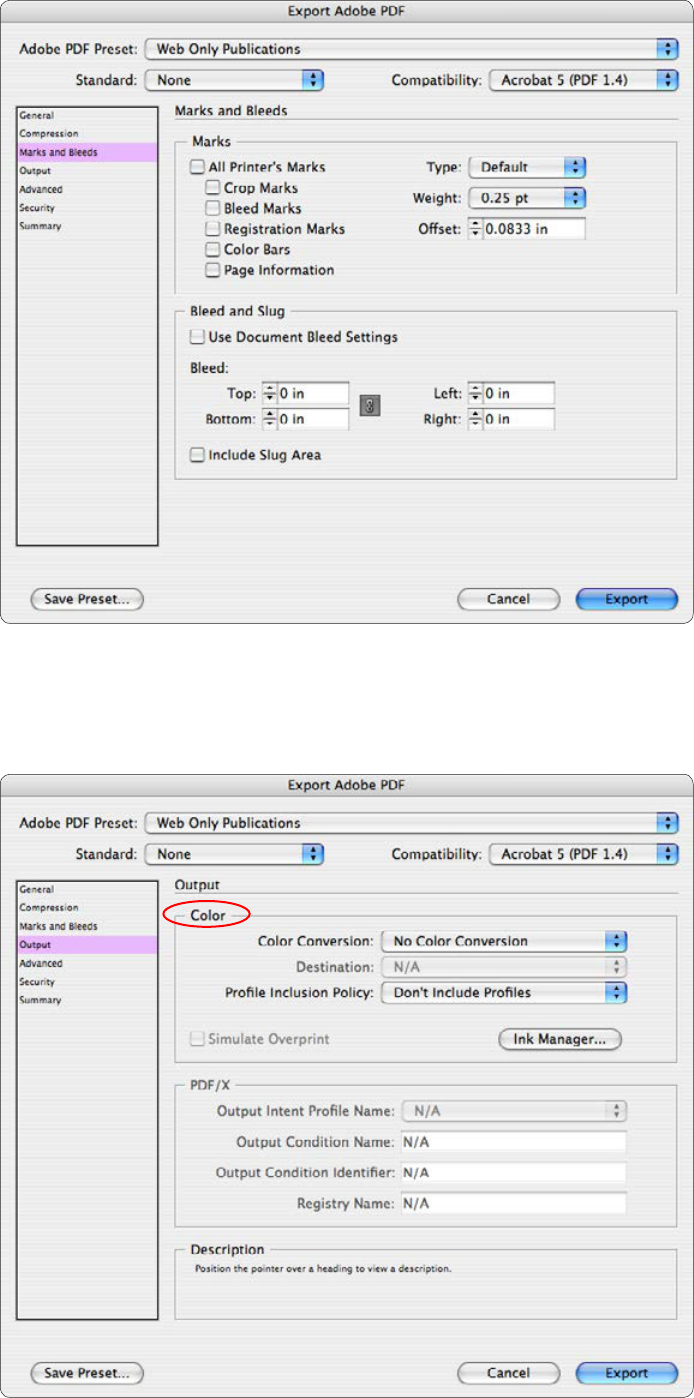
Marks and Bleeds Tab
Unless you are sending this PDF off to be
printed at a commercial printer, you can leave
this page blank with no changes.
Output Tab
Color
Color Conversion is not really needed except
for specific cases such as a commercial
printer.
Don’t Include Profiles should be selected
except for specific cases such as going to
a commercial printer and you know what
profile to include for all images.
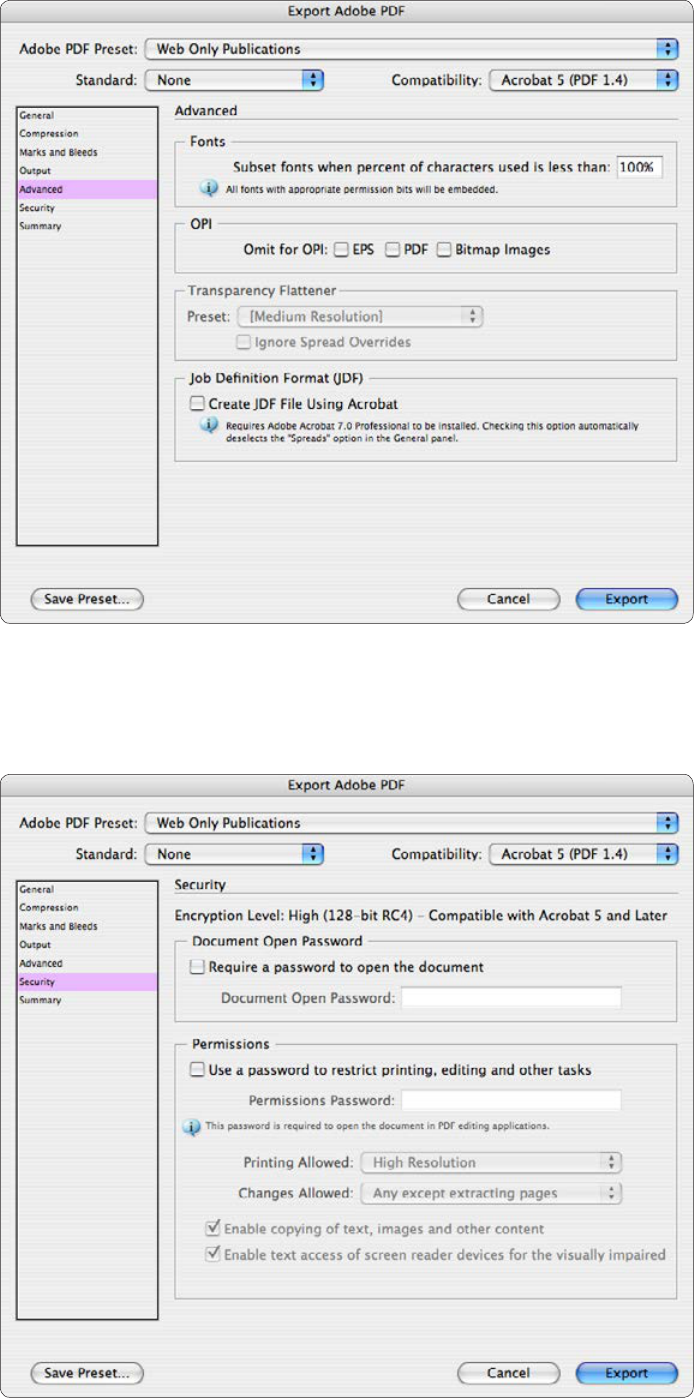
Advanced Tab
Embed all fonts for best results and future
manipulation by us if needed.
OPI can be ignored as it refers to prepress
functions at a commercial printer and
generally will never be used.
Everything else can be left blank/unchecked.
Security Tab
Set the settings here as needed based on
usage and client specification. Remember
that there are programs that can bypass the
security settings in a PDF file so absolute
security does not exist.
Save Preset
Save the settings with a name like what
appears in the Adobe PDF Preset box at the top
left. You will not have to adjust the settings
every time you make a file that way. There will
be times when you can adjust a setting such as
when you know the only place these files will
be used is on a CD. Then you could increase the
compression to 170 pixels per inch. (This is the
setting for 600 dpi printers)

Setting to Adjust
in Adobe Acrobat
Description Tab
Title
The title is important.
Author
Enter the publication’s author here.
Subject
This can be the same as the title if no other
information is available. It is the descriptive
summary of the publication.
Keywords
Keywords should be specific and descriptive.
Use lower case. Separate words with
commas but no spaces (e.g: pesticides,
chemicals,methods,study). Phrases (Purdue
University Agricultural Communication)
can be used as one keyword. There is a
maximum of 255 characters that can be
used. Several search engines look at the
Keywords field so it is important.
Security Tab
Normally, no changes are necessary here. You
can password protect the document to restrict
modifying, copying, or printing. Like most
security, it can be broken so it is not fail-safe.
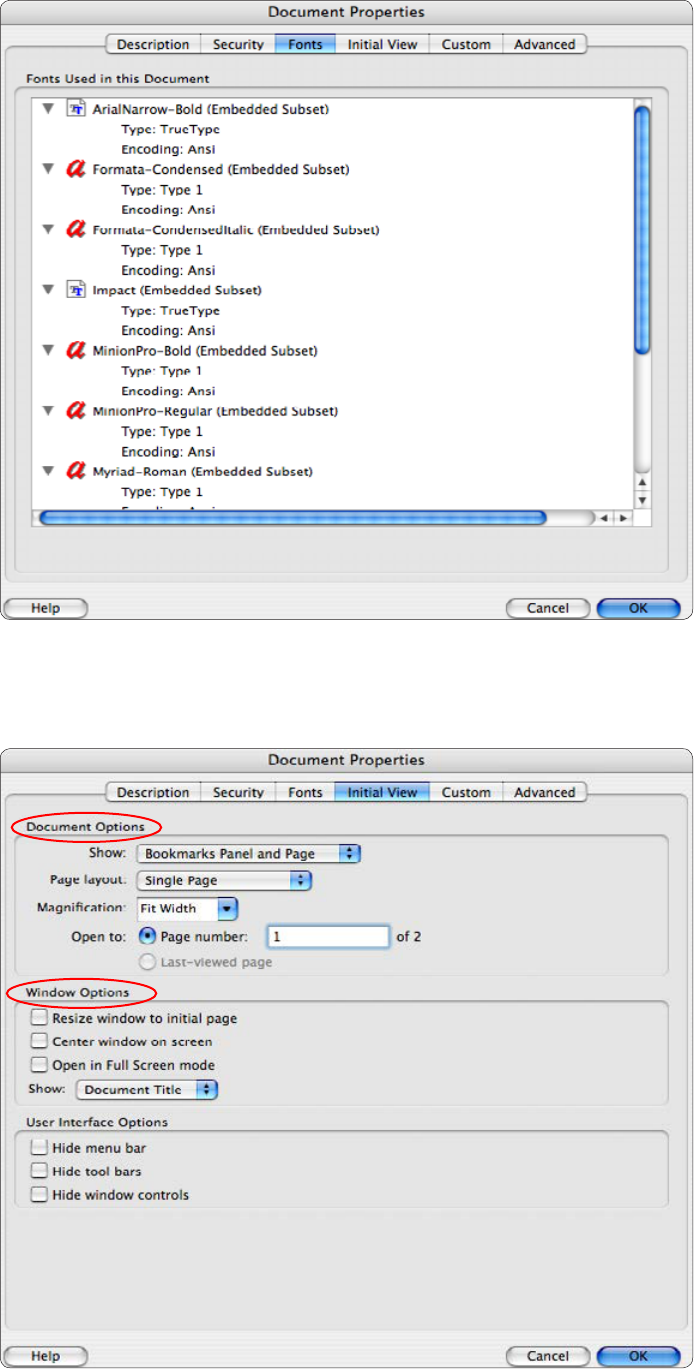
Fonts Tab
This shows what fonts are actually embedded
in the document. The more fonts listed here, the
larger the file size. Sometimes InDesign includes
fonts not actually used in the publication so
you will have to remove them. This can be
accomplished by using PDF Optimizer and
selecting what fonts to remove.
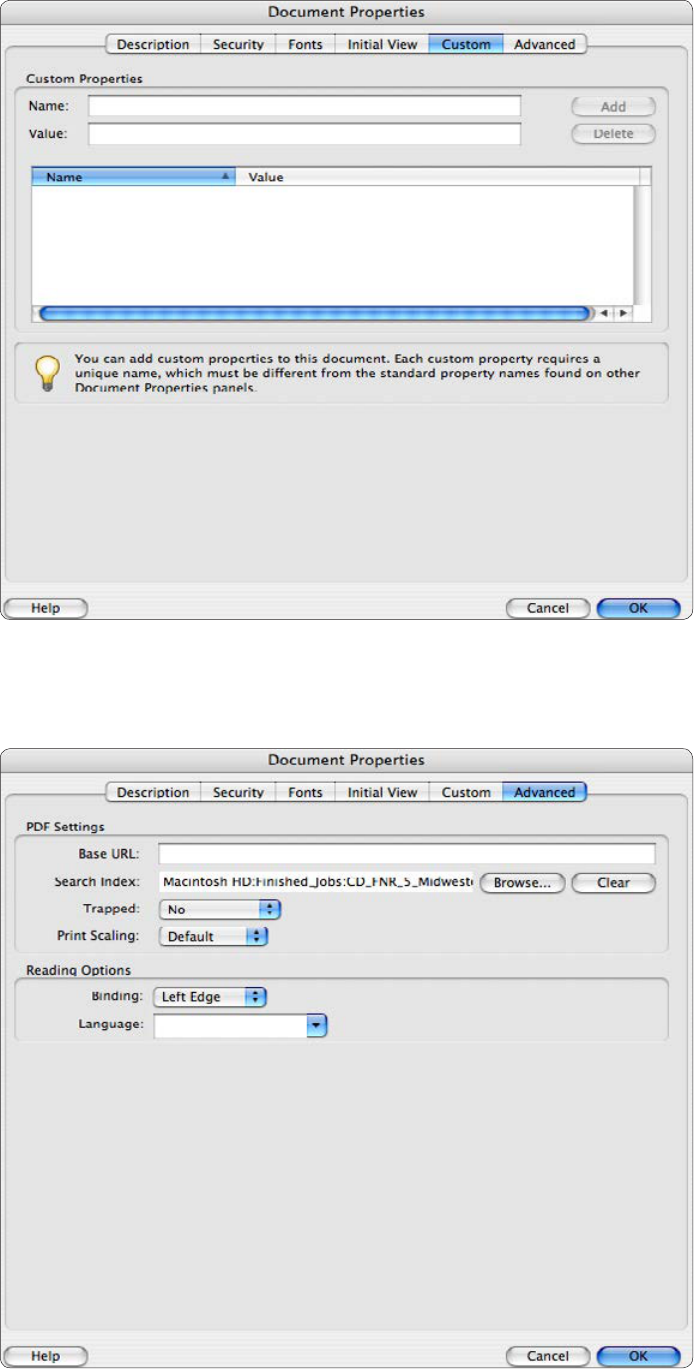
Initial View Tab
Document Options
Show: Decide wether to show the Bookmark
panel or other panels automatically when
the PDF is opened.
Page Layout: Decide weather a PDF
document should open as a single page or
continuous, running pages. Set as Single.
Magnification: Set to Fit Width.
Window Options
Show: Set to Document Title. That is
why setting the title under Description is
so important. If this was set to File Name,
then the PDF would get a title that looked
like FNR_277_Prices.indd. This is not very
descriptive or professional looking.
Custom Tab
For Web PDF files, there is not any reason to add
anything here.
You can add custom document properties
to store specific types of metadata, such as
the Extension number, in a PDF document.
Properties you create appear in the Document
Properties dialog box. Properties you make must
have unique names that do not appear on the
other tabs in the Document Properties dialog
box.
Advanced Tab
The only setting that might be changed here is
if you are adding a Search Index. This is typically
only used for CDs or if you have a database of pdf
files set up online. If the publications are online,
this should not be needed based on the fact that
most search engines can search inside PDF files.

PDF Optimizer Images Tab
Most of the time, the PDF is already optimized
when you do a Save As.
These are the same settings used when you
make a PDF out of InDesign. Doing this again will
not effect the images.
PDF Optimizer Scanned Pages Tab
These settings usually will not have to be
adjusted unless you have an entirely scanned
page. A PDF with entirely scanned pages will be
large in file size.
PDF Optimizer Fonts Tab
You can select fonts to Unembed if necessary.
Make sure they are not used in the document or
there will be future font compatibility issues.

Save Settings
You can save the setting for PDF Optimizer to
make future optimizations faster by clicking on
the Save icon near the top of the window.
PDF Optimizer Transparency Tab
No changes need to be made here. Do not flatten
transparency.
PDF Optimizer Discard Objects Tab
The safest options to select here are indicated
in the picture to the left. This has typically been
done behind the scenes in InDesign when the
PDF was made but if it was manipulated in
Acrobat, there might be a small amount of data
that has been added that can be removed.
PDF Optimizer Clean Up Tab
The safest options to select here are indicated
in the picture to the left. This has typically been
done behind the scenes in InDesign when the
PDF was made but if it was manipulated in
Acrobat, there might be a small amount of data
that has been added that can be removed.

Always do a Save As before you send the PDF to be posted online.
If you save a PDF multiple times, the files size can be bloated by several hundred percent.
1-8-2007
PDF Creation Guidelines
Web Links
Web links guidelines
The Purdue University logo is linked to the Purdue University Home Page.
The Purdue Extension mark is linked to the Purdue Extension Home Page.
The KTG logo links the Knowledge to Go Education Store page.
The KTG store ad on the back all links to the Education Store page.
In general, all URLs in the body of a document are to be blue.
