
User's Manual
TD Snap®

User's Manual
Version1.33
2024-06-14
All rights reserved.
Copyright © Dynavox Group AB (publ)
No part of this document may be reproduced, stored in a retrieval system, or transmitted in any form, by any means
(electronic, photocopying, recording, or otherwise) without the prior written permission of the publisher.
Copyright protection claimed includes all forms and matters of copyrightable material and information allowed by
statutory or judicial law or hereafter granted, including without limitation, material generated from the software programs
which are displayed on the screen such as screen displays, menus, etc.
The information contained in this document is proprietary to Dynavox Group AB. Any reproduction in part or whole
without prior written authorization by Dynavox Group AB is prohibited.
Products that are referred to in this document may be either trademarks and/or registered trademarks of the respective
owners. The publisher and the author make no claim to these trademarks.
While every precaution has been taken in the preparation of this document, the publisher and the author assume no
responsibility for errors or omissions, or for damages resulting from the use of information contained in this document or
from the use of programs and source code that may accompany it. In no event shall the publisher and the author be
liable for any loss of profit or any other commercial damage caused or alleged to have been caused directly or indirectly
by this document.
Content subject to change without notice.
Please check Tobii Dynavox website.
www.TobiiDynavox.com for updated versions of this document.
Contact Information:
Dynavox Group AB
Löjtnantsgatan 25
115 50 Stockholm
Sweden
+46 8 522 950 20
Tobii Dynavox LLC
2100 Wharton Street, Suite 400
Pittsburgh, PA 15203
USA
+1-800-344-1778
Tobii Dynavox Ltd.
Sheffield Technology Parks
Cooper Buildings
Arundel Street
Sheffield S1 2NS
United Kingdom
+44 (0)114 481 00 11
Tobii Dynavox (Suzhou) Co. Ltd
Unit 11/12, Floor 3, Building B, No.5 Xinghan Street, SIP,
Suzhou
P.R.China 215021
+86 512 69362880
Table of Contents
1 Welcome............................................................................................................................ 9
1.1 System Requirements......................................................................................................... 9
1.2 Supported Languages......................................................................................................... 10
1.3 Where to get TD Snap®...................................................................................................... 10
1.3.1 Purchase Speaking Features............................................................................. 10
2 Resources and Support ................................................................................................... 11
2.1 Tobii Dynavox Pathways for Core First............................................................................... 11
2.2 Web Resources and Support.............................................................................................. 11
2.3 myTobiiDynavox ................................................................................................................. 11
2.4 Learning Hub ...................................................................................................................... 11
3 Getting Started.................................................................................................................. 12
3.1 Set Up a New User ............................................................................................................. 12
3.2 Restore an Existing User .................................................................................................... 12
3.3 Choose a Page Set............................................................................................................. 12
3.3.1 Core First ........................................................................................................... 12
3.3.2 Motor Plan Page Set*......................................................................................... 13
3.3.3 Core First Scanning Page Set* .......................................................................... 13
3.3.4 Text Page Set* ................................................................................................... 13
3.3.5 Aphasia Page Set* ............................................................................................. 14
3.4 Choose a Grid Size............................................................................................................. 14
4 Navigation ......................................................................................................................... 15
4.1 Eye Gaze Desktop Access ................................................................................................. 15
5 The Top Bar....................................................................................................................... 16
5.1 Back .................................................................................................................................... 16
5.2 Home .................................................................................................................................. 16
5.3 Dashboard .......................................................................................................................... 16
5.4 Search................................................................................................................................. 16
5.5 Partner Window Indicator.................................................................................................... 17
5.6 Vocabulary Filter ................................................................................................................. 17
5.7 Data Tracking...................................................................................................................... 18
5.8 Sync .................................................................................................................................... 18
5.9 Edit...................................................................................................................................... 18
6 The Message Bar .............................................................................................................. 19
6.1 Speak.................................................................................................................................. 19
6.2 Message Window................................................................................................................ 19
6.2.1 Editing Text in the Message Window ................................................................. 19
6.3 Clear ................................................................................................................................... 20
6.4 Delete.................................................................................................................................. 20
6.5 Undo ................................................................................................................................... 20
6.6 Redo ................................................................................................................................... 21
6.7 Chat .................................................................................................................................... 21
6.8 Copy to Button .................................................................................................................... 21
6.9 Share .................................................................................................................................. 21
6.10 Pause Access Method ........................................................................................................ 22
6.11 Toggle Vocabulary Filter (Motor Plan page sets only) ........................................................ 22
7 The Toolbar ....................................................................................................................... 23
7.1 Back .................................................................................................................................... 23
7.2 Core Words......................................................................................................................... 23
7.3 QuickFires........................................................................................................................... 24
7.4 Topics ................................................................................................................................. 24
7.4.1 Topic Words ....................................................................................................... 24
7.4.2 Supports............................................................................................................. 24
7.5 Keyboard............................................................................................................................. 26
7.6 Dashboard .......................................................................................................................... 27
7.7 Word Forms ........................................................................................................................ 27
7.8 Supported Navigation ......................................................................................................... 27
7.9 Current Boardmaker Activity ............................................................................................... 27
7.10 abc (German only) .............................................................................................................. 28
8 Vocabulary Filter .............................................................................................................. 29
8.1 Turn the Vocabulary Filter on or off .................................................................................... 29
8.2 Edit a Vocab List ................................................................................................................. 29
8.3 Choose a Vocab List........................................................................................................... 30
8.4 Create a New Vocab List .................................................................................................... 30
8.5 Import a Vocab List (.txt file) ............................................................................................... 31
8.6 Share a Vocab List.............................................................................................................. 31
8.7 Rename, Duplicate, or Delete a Vocab List ........................................................................ 31
9 Editing ............................................................................................................................... 32
9.1 The Editing Panel................................................................................................................ 32
9.2 Add a Button ....................................................................................................................... 32
9.3 Move a Button..................................................................................................................... 33
9.4 Resize a Button................................................................................................................... 33
9.5 Button Editing Tools............................................................................................................ 35
9.5.1 Undo and Redo .................................................................................................. 35
9.5.2 Copy and Paste a Button ................................................................................... 36
9.5.3 Select All Buttons ............................................................................................... 36
9.5.4 Select Multiple Buttons....................................................................................... 36
9.5.5 Marquee Select .................................................................................................. 37
9.5.6 Hide/Show a Button ........................................................................................... 37
9.5.7 Sort Buttons Alphabetically ................................................................................ 38
9.5.8 Delete a Button .................................................................................................. 38
9.5.9 Expand/Collapse Editing Tool Names................................................................ 38
9.6 Button Content .................................................................................................................... 39
9.6.1 Button Label ....................................................................................................... 39
9.6.2 Active Content.................................................................................................... 39
9.6.3 Button Message ................................................................................................. 41
9.6.4 Button Audio Cue ............................................................................................... 42
9.6.5 Button Image...................................................................................................... 43
9.6.6 Edit Symbol ........................................................................................................ 45
9.6.7 Button Type........................................................................................................ 46
9.7 Button Actions..................................................................................................................... 47
9.7.1 Delete an Action................................................................................................. 50
9.7.2 Reorder Button Actions ...................................................................................... 50
9.7.3 Whiteboard......................................................................................................... 50
9.7.4 AccessIT ............................................................................................................ 51
9.7.5 Play Boardmaker Activities in TD Snap®........................................................... 53
9.8 Button Style......................................................................................................................... 56
9.8.1 Button Background............................................................................................. 57
9.8.2 Button Border ..................................................................................................... 57
9.8.3 Button Label ....................................................................................................... 57
9.8.4 Button Layout ..................................................................................................... 58
9.8.5 Button Link Visualization .................................................................................... 59
9.9 Link to Page/Create New Page........................................................................................... 60
9.9.1 Create a Link Button in an Empty Cell ............................................................... 60
9.9.2 Create a Link From an Existing Button .............................................................. 60
9.9.3 Link to a New Page/Create New Page............................................................... 61
9.9.4 Link to Existing Page.......................................................................................... 61
9.9.5 Link to a New Copy of an Existing Page ............................................................ 61
9.9.6 Import and Link to Page ..................................................................................... 61
9.9.7 Visit Page ........................................................................................................... 62
9.10 Button Access Method Settings .......................................................................................... 63
9.11 Button Language Rules ...................................................................................................... 63
9.12 Suffixes and Prefixes .......................................................................................................... 63
9.13 Edit Supports ...................................................................................................................... 64
9.14 Remotes.............................................................................................................................. 64
9.14.1 Program a Remote Button ................................................................................. 64
9.14.2 Using Remotes................................................................................................... 65
9.15 Edit Page ............................................................................................................................ 65
9.15.1 Page Name ........................................................................................................ 65
9.15.2 Page Symbol...................................................................................................... 66
9.15.3 Page Language Rules........................................................................................ 68
9.15.4 Page Grid Size ................................................................................................... 68
9.15.5 Page Background Color ..................................................................................... 69
9.15.6 Show/Hide Message Bar.................................................................................... 69
9.15.7 Delete Page ....................................................................................................... 69
9.15.8 Import/Export Pages .......................................................................................... 70
9.16 Scan Groups ....................................................................................................................... 70
9.16.1 Scan Group Options........................................................................................... 72
9.17 Edit the Message Bar.......................................................................................................... 72
9.17.1 Move and Resize Objects in the Message Bar .................................................. 72
9.17.2 Add Buttons in the Message Bar........................................................................ 72
9.17.3 Remove Buttons in the Message Bar................................................................. 73
9.18 Edit the Toolbar................................................................................................................... 74
9.19 Custom Colors .................................................................................................................... 74
10 Page Set Settings ............................................................................................................. 76
10.1 Page Set ............................................................................................................................. 76
10.1.1 Choose Page Set ............................................................................................... 76
10.1.2 Create New Page Set ........................................................................................ 76
10.1.3 Rename Page Set and Edit Description............................................................. 76
10.1.4 Delete Page Set ................................................................................................. 77
10.1.5 Set Home Page.................................................................................................. 77
10.1.6 Set Keyboard Page ............................................................................................ 77
10.2 Grid Size ............................................................................................................................. 77
10.3 Page Set Style .................................................................................................................... 78
10.3.1 Symbol Skin Tone and Hair Color...................................................................... 78
10.3.2 Page Set Button Labels Font ............................................................................. 79
10.3.3 Page Set Button Labels Font Size ..................................................................... 79
10.3.4 Page Set Button Labels Bold ............................................................................. 79
10.3.5 Page Set Button Layout ..................................................................................... 79
10.3.6 Page Set Link Visualization................................................................................ 80
10.3.7 Page Set Grid Margin......................................................................................... 81
10.3.8 Page Set Default Background Colors ................................................................ 81
10.3.9 Page Set Message Window Font....................................................................... 81
10.3.10 Page Set Message Window Font Size............................................................... 82
10.3.11 Page Set Message Window Text Color ............................................................. 82
10.3.12 Page Set Message Window Background Color ................................................. 82
10.3.13 Page Set Message Window Speech Highlight Color ......................................... 82
10.3.14 Page Set Message Bar Background Color ........................................................ 82
10.3.15 Navigation Button Style...................................................................................... 83
10.4 Page Set Preferences......................................................................................................... 83
10.5 Adaptive Buttons................................................................................................................. 83
10.6 Page Set About................................................................................................................... 84
10.6.1 Page Set Content Developer Settings ............................................................... 84
11 Print ................................................................................................................................... 86
12 Google Assistant .............................................................................................................. 87
12.1 Connect your Google account ............................................................................................ 87
12.2 Set up your Google devices................................................................................................ 87
12.3 Google Assistant language support .................................................................................... 87
12.4 Talk to Google Assistant ..................................................................................................... 88
13 Sharing and Saving .......................................................................................................... 90
13.1 Users................................................................................................................................... 90
13.2 Page Sets ........................................................................................................................... 90
13.2.1 Import a Page Set .............................................................................................. 90
13.2.2 Save a Copy of a Page Set................................................................................ 91
13.2.3 Share a Copy of a Page Set (Through myTobiiDynavox) .................................. 91
13.2.4 Sync Page Set ................................................................................................... 92
13.3 Page Bundles...................................................................................................................... 94
13.3.1 Export Page Bundle ........................................................................................... 95
13.3.2 Import Page Bundle ........................................................................................... 96
14 User Settings .................................................................................................................... 97
14.1 Change User....................................................................................................................... 97
14.2 Create a New User ............................................................................................................. 97
14.3 Backup a User .................................................................................................................... 97
14.4 Restore a User.................................................................................................................... 98
14.5 Edit/Rename a User............................................................................................................ 99
14.6 Delete a User ...................................................................................................................... 100
14.7 myTobiiDynavox Account Log In ........................................................................................ 100
14.8 Voice ................................................................................................................................... 100
14.8.1 Speaking Voice .................................................................................................. 100
14.8.2 Voice Rate.......................................................................................................... 102
14.8.3 Voice Pitch ......................................................................................................... 102
14.8.4 Pronunciation Exceptions................................................................................... 102
14.9 Speech Output Device ........................................................................................................ 103
14.10 Language-specific Voices ................................................................................................... 103
14.11 Google Account .................................................................................................................. 104
14.12 User Preferences ................................................................................................................ 104
14.12.1 Speech Settings ................................................................................................. 104
14.12.2 Message Window Settings................................................................................. 104
14.12.3 Prediction Settings ............................................................................................. 105
14.12.4 Reset Word Prediction ....................................................................................... 105
14.12.5 Sync Settings ..................................................................................................... 105
14.13 Access Method ................................................................................................................... 105
14.13.1 Set the Access Method ...................................................................................... 106
14.13.2 Touch Options.................................................................................................... 106
14.13.3 Touch Enter Options .......................................................................................... 107
14.13.4 Touch Exit Options............................................................................................. 108
14.13.5 Auditory Touch Options...................................................................................... 109
14.13.6 Mouse Dwell Options ......................................................................................... 110
14.13.7 Eye Gaze Options .............................................................................................. 111
14.13.8 Scanning Options............................................................................................... 112
14.14 Data Tracking...................................................................................................................... 114
14.14.1 Track Button Usage ........................................................................................... 114
14.14.2 Show Top Bar Button ......................................................................................... 116
14.14.3 Show Button Usage Counts ............................................................................... 116
14.14.4 Show Modeling Counts ...................................................................................... 117
14.14.5 Manage Data...................................................................................................... 117
15 System Settings................................................................................................................ 119
15.1 Preferences......................................................................................................................... 119
15.1.1 Passcode ........................................................................................................... 119
15.1.2 Screen Setting (Windows only) .......................................................................... 120
15.1.3 Edit Mode Language .......................................................................................... 120
15.2 Device ................................................................................................................................. 120
15.2.1 Partner Window Settings.................................................................................... 120
15.3 Store ................................................................................................................................... 120
15.3.1 Make a Purchase (iPadOS only)........................................................................ 120
15.3.2 Restore Purchases (Windows only) ................................................................... 121
15.3.3 Deactivate Key (Windows only) ......................................................................... 121
15.4 Symbol Sets........................................................................................................................ 121
15.4.1 Search Settings.................................................................................................. 121
15.4.2 Installed and Downloadable Symbols ................................................................ 121
15.4.3 Reorder Symbol Sets ......................................................................................... 122
15.5 Help & Tutorials .................................................................................................................. 122
15.5.1 Videos ................................................................................................................ 122
15.5.2 Pathways for Core First...................................................................................... 122
15.5.3 Quick Tour.......................................................................................................... 122
15.5.4 External Help...................................................................................................... 122
15.6 About................................................................................................................................... 122
15.6.1 Send Feedback .................................................................................................. 122
15.6.2 Software Updates............................................................................................... 123

TD Snap® Users Manual v.1.33-en-US 1 Welcome
9
1 Welcome
Illustration1: Snap Core First — QuickFires
TD Snap® is the pinnacle in symbol-based communication software for symbol-supported communicators. It is designed
to be the easiest to use, most intuitive, and consistently arranged solution available on the market, for both the user and
the communication partner. TD Snap® is the ideal solution for individuals with Autism, Cerebral Palsy, Down syndrome,
Intellectual Disabilities, and Aphasia. With TD Snap®, we are providing the best symbol-based communication
experience available combined with the necessary components for a parent, teacher, or therapist to work together with
users to help them become successful communicators.
1.1 System Requirements
Table1: Windows OS
Operating
System
Architecture Memory Touch Camera
Minimum Windows 10
version 1803
x64 2 GB Not required Not required
Recommended Windows 10
version 20H2
x64 4 GB Integrated touch Integrated camera
Table2: iPadOS
Operating
System
Device Capacity Touch Camera
Minimum iPadOS 13 iPad Air 2
iPad Mini 4
32 GB Integrated touch Not required
Recommended iPadOS 17 iPad 8th
generation
64 GB Integrated touch Integrated camera

10
1 Welcome TD Snap® Users Manual v.1.33-en-US
1.2 Supported Languages
● Arabic (SA)
● Chinese (Simplified)
● Czech (CZ)
● Danish (DK)
● Dutch (NL)
● English (AU)
● English (CA)
● English (UK)
● English (US)
● Finnish (FI)
● French (CA)
● French (FR)
● German (DE)
● German (Switzerland)
● Hebrew (IL)
● Icelandic (IS)
● Italian (IT)
● Japanese (JP)
● Norwegian (NO)
● Portuguese (BR)
● Portuguese (PT)
● Spanish (ES)
● Spanish (Latin America)
● Spanish (US)
● Swedish (SE)
● Turkish (TR)
1.3 Where to get TD Snap®
TD Snap® is available on the Apple App Store for iPad and myTobiiDynavox.com for Windows devices. TD Snap®
comes pre-installed on Tobii Dynavox speech devices.
Speaking functionality in TD Snap® is included with Tobii Dynavox speech devices. When installing TD Snap® on a
device not manufactured by Tobii Dynavox, all non-speech features are available for free, including some content,
creating and editing pages, user creation and backup, restore, and Sync; however, speech functionality is limited. Full
speaking functionality is available for purchase.
Speaking functionality that is disabled in the free version of the app:
● Speaking the Message Window
● Any speech or recording output generated by a button action
● Any speech or recording output generated by a behavior support
● Audio cues
Speaking functionality that is available in the free version of the app:
● Audio recording (in Edit mode)
● Audio recording preview (in Edit mode)
● Voice preview
● Pronunciation exception preview (in Edit mode)
1.3.1 Purchase Speaking Features
iPadOS - In TD Snap® go to Edit > System > Store to purchase the speaking features of TD Snap® through the Apple
App Store.
Windows - Call Tobii Dynavox support to purchase the speaking features of TD Snap®. https://www.tobiidynavox.com/
pages/locations

TD Snap® Users Manual v.1.33-en-US 2 Resources and Support
11
2 Resources and Support
Tobii Dynavox offers several free resources to support and supplement your experience with TD Snap®. Don’t miss out
on these tools that will help you get the most out of your Tobii Dynavox software!
2.1 Tobii Dynavox Pathways for Core First
Pathways for Core First is a free resource that helps you to implement Tobii Dynavox products in the most effective and
efficient ways. You’ll learn the research-driven techniques that maximize engagement, ease of use, and much more!
Pathways for Core First walks with you as you get started using TD Snap® Core First and encourages growth in
engagement, language, and literacy. Pathways for Core First will:
● provide a clear, customized path for getting started.
● encourage growth for individuals of any age or skill level.
● teach you to build skills in a variety of areas, including use of core words, expanding vocabulary, using TD Snap®
Core First in daily activities, and more.
● show you how TD Snap® Core First can aid in social skills and situations, such as handling communication
breakdowns, navigation and operational skills, and encouraging positive behavior.
● build communication partner skills with Top Tips.
● support ongoing customization of Core First.
The full featured version of Pathways for Core First is available as a free app for Windows and iPadOS. Pathways for
Core First online is available through your web browser. Visit https://www.tobiidynavox.com/products/pathways-for-
core-first?tab=1 for more information.
2.2 Web Resources and Support
If you need support, your first stop should be the Training & Support section of the Tobii Dynavox website.
2.3 myTobiiDynavox
myTobiiDynavox is your personal online storage website and sharing portal. Upload your user backup files to
myTobiiDynavox for safekeeping and to share with your entire communication support team.
Go to myTobiiDynavox.com to register for a free account.
2.4 Learning Hub
The Learning Hub is currently English-only.
Visit learn.tobiidynavox.com for documentation, training, and other resources, including:
● answers to common questions
● training videos
● recorded webinars
● online courses

12
3 Getting Started TD Snap® Users Manual v.1.33-en-US
3 Getting Started
When you launch TD Snap® for the first time, you will be asked a few questions to help customize the software to suit
your needs. You can change any of these settings later if you want to.
3.1 Set Up a New User
Select Get Started and we’ll have you set up in less than a minute!
3.2 Restore an Existing User
Use this option if you already have a user backup file that you would like to restore.
Restore a user backup from myTobiiDynavox
1. Select Restore.
2. If you are not currently logged in to myTobiiDynavox, enter your email and password then select Next.
3. Choose a user backup file from the list, then select Next.
Restore a user backup from a local file
1. Select Restore.
2. Select Restore from a local file.
3. Browse to and select the user backup file, then select Open.
3.3 Choose a Page Set
The setup wizard automatically displays the Page Sets that match your device language setting, if it is available in TD
Snap®. Select Language to see the Page Sets available in other languages.
3.3.1 Core First
Core First is the premier Page Set available on TD Snap® software. It is designed to maximize engagement, literacy,
and growth through a variety of communication tools that are used together in a fluid and predictable manner.
Illustration2: Core First Page Set
The hallmark feature of Core First is our core word strategy. Research, clinical experience and user testing informed:
● Word selection for maximum use across environments.
● Word placement and user interface.
● Order of word introduction.
● Stable positioning of words as others are systemically added.
● Efficiency of navigation.
● Supports to teach users the meaning of the words and how to combine them to create unique messages.
Additional communication tools included in Core First include:
● QuickFires — fast, predictable messages that can be used alone or in combination.
● Keyboard — enter letters into the Message Window to create or modify words.
● Word Lists — organized by category for easy reference.
● Topics — support interactions in specific environments or around particular topics.

TD Snap® Users Manual v.1.33-en-US 3 Getting Started
13
● Supports — help users with behavior and social communication.
● Dashboard — remotes, volume controls, and more at your fingertips!
The Core First Page Set was designed to be the gold standard in augmentative-alternative communication (AAC)
content, giving users the most accessible experience in finding content quickly and having maximum ability to create
unique and specific messages. Core First allows its users to be engaged in quick, real-time conversation about the topics
that are most important to them. It also allows them the freedom to create novel messages that would be difficult to
predict ahead of time. By moving throughout the tools provided, communicators can stay actively a part of the situation
they are participating in and remain engaged with communication partners.
Literacy development is a critical skill that must be a part of a communication solution. Through use of keyboards, easy
links to research-tested programs on the device, and content designed to support communication interactions around
reading experiences, Core First will support literacy development for all its users.
Finally, Core First is not intended as a one-size-fits-all or stationary system. Continuity across grid sizes is a primary
guiding principle. As communicators grow in abilities and require additional options for language complexity, these new
options are added to Core First seamlessly, keeping content in predictable locations.
3.3.2 Motor Plan Page Set*
The TD Snap Motor Plan Page Set emphasizes language development and generative language production (say what
you want to say, how you want to say it). Users learn distinct motor patterns associated with each word, leading to
automaticity over time. This allows users to focus cognitive effort on language and communication, not software
navigation. The Vocabulary Filter tool allows facilitators to target specific words or grow the vocabulary incrementally. All
Motor Plan Page Sets offer the same number of words (approximately 2,700).
Illustration3: Motor Plan 30 Page Set Home page.
The two main principles of the Motor Plan Page Set are consistency and efficiency.
Consistency
● Always start from the home page and automatically
return home after selection.
● Words remain in the same place and appear only one
time in the Page Set.
Efficiency
● All of the 2,700 words are within 3 hits or less.†
● The most frequently used words are near the home
page.
Page Set grid size options vary by language: 30 position (5x6), 40 position (5x7), and 66 position (6x11)
* Not available in all languages.
† Vocabulary selection requires, on average, 2.3 hits on the 30–position Motor Plan Page Set and 2.0 hits on the 66–
position Motor Plan Page Set.
3.3.3 Core First Scanning Page Set*
In this Page Set, the Core First content has been redesigned for ease and efficiency with the Scanning access method.
The included Learn to Scan pages help users get comfortable using the Scanning access method.
Page Set grid sizes: 3x4, 6x4, 7x6, 9x8
* Not available in all languages.
3.3.4 Text Page Set*
This Page Set is designed for users who do not depend on symbols for communication. The Text Page Set is
recommended for communicators with strong reading and composition skills.

14
3 Getting Started TD Snap® Users Manual v.1.33-en-US
Page Set grid sizes: 7x10
* Not available in all languages.
3.3.5 Aphasia Page Set*
The Aphasia Page Set is designed for users with Aphasia. Features include the Whiteboard, Topics pages with grid or a
visual scene layout options, Calendar, Photo Album, and Google Assistant and Alexa pages. The symbols used in the
Aphasia Page Set are appropriate for adult users.
Page Set grid sizes: 6x5, 4x3, 3x3
* Not available in all languages.
3.4 Choose a Grid Size
Grid size choice will depend on several factors: selection accuracy is paramount, followed by visual or attention
limitations. If there are issues with the speed or accuracy of selection, start with a smaller grid size, so that the user has
bigger buttons to work with. It is easy to change the grid size in Page Set settings, so don’t worry about finding the ideal
grid size on your first try. You can increase or decrease the grid size based on the individual's changing language or
physical abilities.
If you would like to display the Message Bar and/or Toolbar, you must choose a grid size with at least 3 rows and
3 columns.
Table3: Sample grid sizes (not comprehensive)
2x3 3x4 6x6

TD Snap® Users Manual v.1.33-en-US 4 Navigation
15
4 Navigation
Read on to learn how to move through the content in TD Snap® and find everything you need to communicate.
Scrolling Depending on your settings and You can scroll up
and down in both the toolbar and the page. The page
indicators (dots on the left for the toolbar and on the
right for the page) show you when there’s more
content available above or below.
access method, you will scroll by swiping the touch
screen or by selecting a navigation button. See
section 14.13.2 Touch Options, page106.
Top Bar The buttons in the left side of the top bar include a
Back button, Home button, Dashboard button, and
Search button. See section 5 The Top Bar, page16.
Link button Link buttons take you to another page. See section
9.9 Link to Page/Create New Page, page60.
Visit button Visit buttons take you to another page, let you make
one selection on that page, then return you to the
previous page automatically. See section 9.9.7 Visit
Page, page62.
Back button The back button works like the back button on a web
browser. Select the back button once to return to the
previous page, or multiple times to continue moving
backward through the page history.
Boardmaker
button
Boardmaker buttons link to folders and activities
stored on Boardmaker Online. Browse and play the
activities right in TD Snap®! See section 9.7.5 Play
Boardmaker Activities in TD Snap®, page53.
4.1 Eye Gaze Desktop Access
Eye gaze users can navigate between TD Snap® and other apps and features on their device using desktop access.
Desktop access provides the accessibility tools necessary to use eye gaze on your device outside of TD Snap®. On
Windows devices, the desktop access solution is TD Control. On iPad-based devices, desktop access is available using
the iPadOS AssistiveTouch features. Follow the instructions that came with your device to configure your desktop access
solution prior to launching desktop access from TD Snap®.
There are two ways to create a button in TD Snap® that you can use to navigate away from TD Snap® and use desktop
access:
● Button Active Content type “Desktop Access State”. See section 9.6.2 Active Content, page39.
● Button Action “Toggle Desktop Access”. See section 9.7 Button Actions, page47.
16
5 The Top Bar TD Snap® Users Manual v.1.33-en-US
5 The Top Bar
5.1 Back
The Back button returns you to the previously visited page.
5.2 Home
The Home button takes you to your home page (the first page you see when you launch TD Snap®). This Home button
is a shortcut that you can use to get back to your home page from anywhere in the software. To change your Home
page, see section 10.1.5 Set Home Page, page77.
5.3 Dashboard
Use the Dashboard button to quickly access your Dashboard page. The Dashboard is a page for easy access to
frequently-used buttons, especially non-vocabulary buttons such as volume control or remotes.
5.4 Search
Search is only accessible with the Touch Access Method, but the highlighted path to the word can be followed
using any access method.
The Search tool shows you where to find any word in TD Snap®. Simply enter a search term, then follow the visual cues.
The visual cues lead you to the target word, so that you can find the word again later on your own.
1. Select the Search tool in the Top Bar.
2. Enter a search term.
3. If applicable, select Button Search Settings to refine your search preferences (not available in Motor Plan page
sets):
– Allow duplicate matches — enable to show all locations of identical buttons.
– Show hidden paths — enable to show paths that use buttons that are currently hidden.
– Accessible search path — enable to make the highlighted path to the target button accessible using any
access method.
4. Select the button that you are searching for in the search results.
5. Select the highlighted button on each page until you arrive at the target button. You may need to scroll to see the
next button, so watch for arrows telling you where to go!

TD Snap® Users Manual v.1.33-en-US 5 The Top Bar
17
Pay attention to each highlighted button so that you can remember the path on your own next time.
You can cancel your search at any point by selecting anywhere outside the highlighted path.
5.5 Partner Window Indicator
The Partner Window Indicator is only available on Tobii Dynavox I-13, I-16, and TD Pilot devices.
The Partner Window Indicator gives you information about the status of the Partner Window on the back of your device.
Table4: Partner Window Indicator styles
Mirror Style — displays the text currently in the Partner Window.
Icon Style — the icon indicates that the Partner Window is on. When the Partner Window
is off, the icon is not present.
To change the Partner Window Indicator Style, see section 15.2.1 Partner Window Settings, page120.
5.6 Vocabulary Filter
The Vocabulary Filter is only available in the Motor Plan Page Sets.
When enabled, the Vocabulary Filter limits the vocabulary buttons in the Page Set to only those specified in the selected
Vocab List. Vocabulary not in the Vocab List is hidden. For more information about the Vocabulary Filter, see section 8
Vocabulary Filter, page29.

18
5 The Top Bar TD Snap® Users Manual v.1.33-en-US
5.7 Data Tracking
Data Tracking is only accessible by touch or direct mouse click.
When enabled, the Data Tracking button gives quick access to the following settings: Modeling mode, Show button
usage counts, Show modeling counts, and Manage data. For more information about data tracking, see section 14.14
Data Tracking, page114.
5.8 Sync
Sync is only accessible by touch or direct mouse click.
The Sync button is used to start sharing a Page Set for Syncing or to update a Page Set that is already shared for
Syncing. For more information about Sync, see section 13.2.4 Sync Page Set, page92.
To hide the Sync button in Use Mode, see section 14.12.5 Sync Settings, page105.
5.9 Edit
Edit is only accessible by touch or direct mouse click.
Select the Edit button to make changes to your Page Set and access Settings.
For more information, see section 9 Editing, page32.

TD Snap® Users Manual v.1.33-en-US 6 The Message Bar
19
6 The Message Bar
The Message Bar displays the composed message text and the buttons for sharing it with the world!
If you would like to display the Message Bar, you must choose a grid size with at least 3 rows and 3 columns.
To edit the Message Bar, see 9.17 Edit the Message Bar, page72.
6.1 Speak
Select this button to speak the current contents of the Message Window.
On Windows devices, the physical keyboard shortcut Ctrl + Enter can be used to speak the Message Window.
6.2 Message Window
The Message Window displays the text that you would like to speak or send as a message. It can also display symbols.
You can send text to the Message Window from a button, type directly into the Message Window using a keyboard page
or physical keyboard, or paste text from the system clipboard.
For Message Window Settings, see section 14.12.2 Message Window Settings, page104.
6.2.1 Editing Text in the Message Window
When entering text into the Message Window, the cursor appears at the end of the text by default. To move the cursor in
the Message Window, use buttons programmed with the Move Cursor action.
Move the cursor in the Message Window
● Use the Move Cursor action to move the cursor in the following ways:
– Move up or down
– Move forward or backward by character
– Move forward or backward by word

20
6 The Message Bar TD Snap® Users Manual v.1.33-en-US
– Move forward or backward by sentence
– Move to the beginning or the end of the line
– Move to the beginning or end of the Message Window text
– Move up or down a page of text
To select text, use buttons programmed with the Select Text action. Selected Message Window text can be deleted,
formatted bold or italic, cut or copied, shared to another app, spoken, and more. See the Message Window section in 9.7
Button Actions, page47 to learn more about these actions.
Select text in the Message Window
● Use the Select Text action to select text, move the selection, or extend the selection in the following ways:
– Move selection up or down
– Move selection forward or backward by character
– Move selection forward or backward by word
– Move selection forward or backward by sentence
– Extend selection to the beginning or the end of the line
– Extend selection to the beginning or end of the Message Window text
– Extend selection up or down a page of text
– Extend selection up or down
– Extend selection forward or backward by character
– Extend selection forward or backward by word
– Extend selection forward or backward by sentence
– Select all
– Cancel selection
The easiest way to start editing text in the Message Window is to use our pre-programmed Message Window
Editing pages. These pages are included in several Page Sets. The Message Window Editing Pages are also
available on Page Set Central. www.mytobiidynavox.com/pagesetcentral
6.3 Clear
Remove all content from the Message Window.
6.4 Delete
Delete the current word or selected text in the Message Window.
6.5 Undo
Undo the last action in the Message Window.

TD Snap® Users Manual v.1.33-en-US 6 The Message Bar
21
6.6 Redo
Redo the last undone action in the Message Window.
6.7 Chat
Toggle Chat on and off. When you enable Chat, the current Message Window content is cached and then the Message
Window is cleared. While in Chat, you can insert new content into the Message Window and speak. When Chat is turned
off, the cached Message Window content is restored so that you can continue where you left off.
6.8 Copy to Button
Copy the text in the Message Window, then add it to a button. This is a user-accessible way to edit buttons on the fly!
6.9 Share
Use this handy, user-accessible feature to send text in the Message Window to an AccessIT 3 device (9.7.4 AccessIT,
page51 ), a button on the current page (6.8 Copy to Button, page21), the system clipboard, or Google Assistant.
Select Other to send Message Window text to an app of your choosing (such as Mail, Facebook, etc).
The Other button menu is only accessible via Touch.
Illustration4: Share menu

22
6 The Message Bar TD Snap® Users Manual v.1.33-en-US
6.10 Pause Access Method
Temporarily stop or start your access method. This button only works with the eye gaze, scanning, and mouse dwell
access methods.
6.11 Toggle Vocabulary Filter (Motor Plan page sets only)
Turn the Vocabulary Filter on or off. This button is only available when using a Motor Plan page set.

TD Snap® Users Manual v.1.33-en-US 7 The Toolbar
23
7 The Toolbar
To learn how to edit the toolbar, see 9.18 Edit the Toolbar, page74.
The toolbar options vary depending on your Page Set.
7.1 Back
Illustration5: Back button — toolbar
The Back button works like the back button on a browser. Use it to return to the previous page.
7.2 Core Words
Illustration6: Core Words button — Core First toolbar
This button opens the Core Words page. The hallmark feature of Core First is our core word strategy, which was
developed based on research, clinical experience and user testing. Key features of the Core Words page include:
● Word selection for maximum use across environments.
● Word placement.
● Order of word introduction.
● Stable positioning of words as others are systemically added.
● Efficiency of navigation.
● Supports that teach users the meaning of the words and how to combine them to create unique messages.

24
7 The Toolbar TD Snap® Users Manual v.1.33-en-US
7.3 QuickFires
Illustration7: QuickFires button — toolbar
QuickFires are fast, predictable messages that can be used alone or in combination. They are little words to keep
conversation going, gain attention, or comment. Also included are commonly-used messages that focus on Personal
Needs, Greetings, Social, Feelings, Questions, and Repairs. QuickFires speak immediately and do not insert text into the
Message Window.
7.4 Topics
Illustration8: Topics button — toolbar
Topics support interactions in specific environments or around particular themes. Select a Topic from the Topics Page to
see relevant words and phrases. Customize your Page Set by adding your own Topics!
7.4.1 Topic Words
These pages contain commonly-used words in the selected Topic.
7.4.2 Supports
Supports help users with self-regulation and social communication. To learn how to edit supports, see section 9.13 Edit
Supports, page64.

TD Snap® Users Manual v.1.33-en-US 7 The Toolbar
25
Illustration9: First, Then support - This support shows a two-step sequence of events, reinforcing cause and effect or
logical steps.
Illustration10: Mini Schedule support - The mini schedule shows a multi-step sequence of events, reinforcing the
concept of cause and effect or a series of logical steps.

26
7 The Toolbar TD Snap® Users Manual v.1.33-en-US
Illustration11: Script support - A script provides pre-made phrases that are commonly used around the given topic.
Scripts are used to create social narratives and help model appropriate conversation.
Illustration12: Visual Timer Support - The visual timer displays a countdown clock and animated colored bar in the Top
Bar. The number display counts down the specified amount of time and the colored bar recedes as the remaining time
diminishes. When the Alarm option is enabled, a sound will play when the time is up.
To cancel the visual timer, select the X on the right side of the top bar.
To change the countdown time or alarm preference, edit the button and select the Visual Timer action.
7.5 Keyboard
Illustration13: Keyboard button — toolbar
The Keyboard page provides single character buttons that behave like the keys on a keyboard. Use this page to
compose words that are not currently available in your Page Set or to add punctuation. To set your desired keyboard
page, see 10.1.6 Set Keyboard Page, page77.

TD Snap® Users Manual v.1.33-en-US 7 The Toolbar
27
7.6 Dashboard
Illustration14: Dashboard button — toolbar
The Dashboard is a page for easy access to frequently-used buttons, especially non-vocabulary buttons such as volume
control or remotes.
7.7 Word Forms
Illustration15: Word Forms button — Core First toolbar
The Word Forms page shows different forms (tense, number, etc.) of the last word in the Message Window. Select the
desired word form to update the word in the Message Window.
7.8 Supported Navigation
Illustration16: Supported Navigation — Core First toolbar
The Supported Navigation page is the home page for the early emergent grid sizes (<3x3). The Supported Navigation
button in the toolbar makes the page available to all grid sizes.
7.9 Current Boardmaker Activity
Illustration17: Current Boardmaker Activity — Core First toolbar
Open the Boardmaker activity that is currently in progress, if applicable. If there is no Boardmaker activity in progress,
this button is inactive. Button thumbnail and label update to reflect the Boardmaker Activity in progress.

28
7 The Toolbar TD Snap® Users Manual v.1.33-en-US
7.10 abc (German only)
This button opens the ABC vocabulary area known from “LiterAACy”. You’ll find more than 3,600 words from core and
fringe vocabulary, sorted by the first and second letter.
● The ABC area supports learning and usage of literacy skills.
● Phonetic feedback plays when a letter is selected.
● There are two versions of this feature, one using uppercase letters and one using lowercase letters. The lowercase
abc button is the default. To use uppercase letters, make the (uppercase) ABC Button in the toolbar visible and hide
the (lowercase) abc button. See section 9.5.6 Hide/Show a Button, page37.

TD Snap® Users Manual v.1.33-en-US 8 Vocabulary Filter
29
8 Vocabulary Filter
The Vocabulary Filter is only available in the Motor Plan Page Sets.
The Vocabulary Filter is a tool that allows the caregiver to quickly change which words are available to the user. When
the Vocabulary Filter is enabled, only the vocabulary in the active Vocab List is available. Vocabulary not on the list is
hidden.
You can use the Vocabulary Filter to incrementally grow the user’s vocabulary over time: start with a small number of
words and add more as the user becomes more confident using AAC and expands their vocabulary.
The Vocabulary Filter can also be used as a temporary mechanism to focus on specific words during therapy sessions.
At the start of a therapy session, apply a Vocab List containing only the words for the lesson or activity. When the
session is over, disable the Vocabulary Filter or return to their larger Vocab List.
8.1 Turn the Vocabulary Filter on or off
1. Select the Vocabulary Filter icon in the Top Bar.
2. Set the Vocabulary Filter toggle in the Top Bar to ON or OFF.
The name of the active Vocab List is shown in the Top Bar.
Vocabulary Filter disabled Vocabulary Filter enabled
8.2 Edit a Vocab List
There are several ways to add and remove vocabulary in your Vocab Lists.
1. Select the Vocabulary Filter icon in the Top Bar.
2. Modify your Vocab List using any of the methods below:

30
8 Vocabulary Filter TD Snap® Users Manual v.1.33-en-US
1. Select vocabulary buttons on the page to add or
remove them from the list.
3. Select Quick Add to open a text field at the bottom
of the page. Type vocabulary, separated by commas,
into the text field, then select Add.
2. Use the Remove... and Add.. buttons to make
changes to large groups of vocabulary all at one
time.
4. Select the Edit Vocab List icon to view and edit the
Vocab List as an alphabetized, searchable text list.
Buttons shown in full color are on the Vocab List. Buttons shown with a gray overlay are not on the Vocab List.
A link button becomes available when any vocabulary button on the linked page is added to the Vocab List. For
example, the Food & Drink link button will be gray (not available) if no food vocabulary is on the Vocab List. If you
add "Pizza" to the Vocab List, the Food & Drink button will automatically become available.
8.3 Choose a Vocab List
1. Select the Vocabulary Filter icon in the Top Bar.
2. Select the Edit Vocab List icon.
3. Select Manage Lists.
4. Select a Vocab List. The selected list is now active.
8.4 Create a New Vocab List
1. Select the Vocabulary Filter icon in the Top Bar.
2. Select the Edit Vocab List icon.
3. Select Manage Lists.
4. Select New List.
5. Select Empty List
6. Select Done.

TD Snap® Users Manual v.1.33-en-US 8 Vocabulary Filter
31
8.5 Import a Vocab List (.txt file)
1. Select the Vocabulary Filter icon in the Top Bar.
2. Select the Edit Vocab List icon.
3. Select Manage Lists.
4. Select New List.
5. Select Local Files
6. Select Browse.
7. Browse to the .txt file, select it, then select Open.
8. Enter a name for your new Vocab List, then select Done.
8.6 Share a Vocab List
1. Select the Vocabulary Filter icon in the Top Bar.
2. Select the Edit Vocab List icon.
3. Select Manage Lists.
4. Select the More button beside the list you wish to share.
5. Select Share, then choose a sharing method:
– Export to file — save the Vocab List as a .txt file.
– Copy to clipboard — copy the contents of the Vocab List to the clipboard so that you can paste it elsewhere
(e.g., an email, Word document, etc.)
– Other — share the Vocab List directly to another app. App options vary depending on your device configuration.
8.7 Rename, Duplicate, or Delete a Vocab List
1. Select the Vocabulary Filter icon in the Top Bar.
2. Select the Edit Vocab List icon.
3. Select Manage Lists.
4. Select the More button beside the list you wish to rename, duplicate, or delete.
5. Select the desired action:
– Rename — enter a new name for the Vocab List.
– Duplicate — create a copy of the Vocab List.
– Delete — delete the Vocab List. The active Vocab List (indicated by a check mark) cannot be deleted.

32
9 Editing TD Snap® Users Manual v.1.33-en-US
9 Editing
To make changes to a button, a page, settings, or users, the software must be in Edit Mode. You can enter Edit Mode at
any time by selecting the Edit button.
The Edit button and Edit Mode are only accessible using the Touch Access Method.
While in Edit Mode, you can double click most page buttons to see how they behave in Use Mode.
9.1 The Editing Panel
The Editing Panel contains all of the tools and tabs to make changes to your Page Set and software.
Illustration18: The Editing Panel (shown expanded)
Select to expand the Editing Panel.
Resize the Editing Panel to a custom size by dragging the up or down while the panel is expanded.
9.2 Add a Button
1. Select the Edit button.
2. Select the in any empty cell on the page to create a new button.

TD Snap® Users Manual v.1.33-en-US 9 Editing
33
Illustration19: Empty cell
9.3 Move a Button
Illustration20: Swap — When you drag the button directly on top of another button, the two buttons will swap positions
on the page. The black outline around the chosen location on the grid indicates a swap.
Illustration21: Insert — When you drag the selected button between two buttons, the buttons to the right and below will
move over to create a space for you to place the button. The buttons will maintain left to right, top to bottom sequence on
the page. Insert button placement is indicated by a vertical bar.
You can insert a button horizontally (as shown above) or vertically.
When you move a button, it only applies to the current grid size.
9.4 Resize a Button
You can resize a button to occupy as many grid cells within a Page section or Toolbar section as you like.
1. Select the Edit button.
2. Select a button on the Page or in the Toolbar. Button resizing is only available when a single button is selected.
3. Select and hold on one of the blue dots in the corners of the selected button, then drag to resize the button.

34
9 Editing TD Snap® Users Manual v.1.33-en-US
4. Wait for the button to completely fill the cells until it is the desired size, then release the selection. When making a
button larger, the button(s) being displaced will move to the nearest empty cell(s).
Resized buttons cannot span across Page sections or Toolbar sections.
You cannot resize or move a button into a cell occupied by a navigation (scroll) button.
When you resize a button, it only applies to the current grid size.
TD Snap® Users Manual v.1.33-en-US 9 Editing
35
9.5 Button Editing Tools
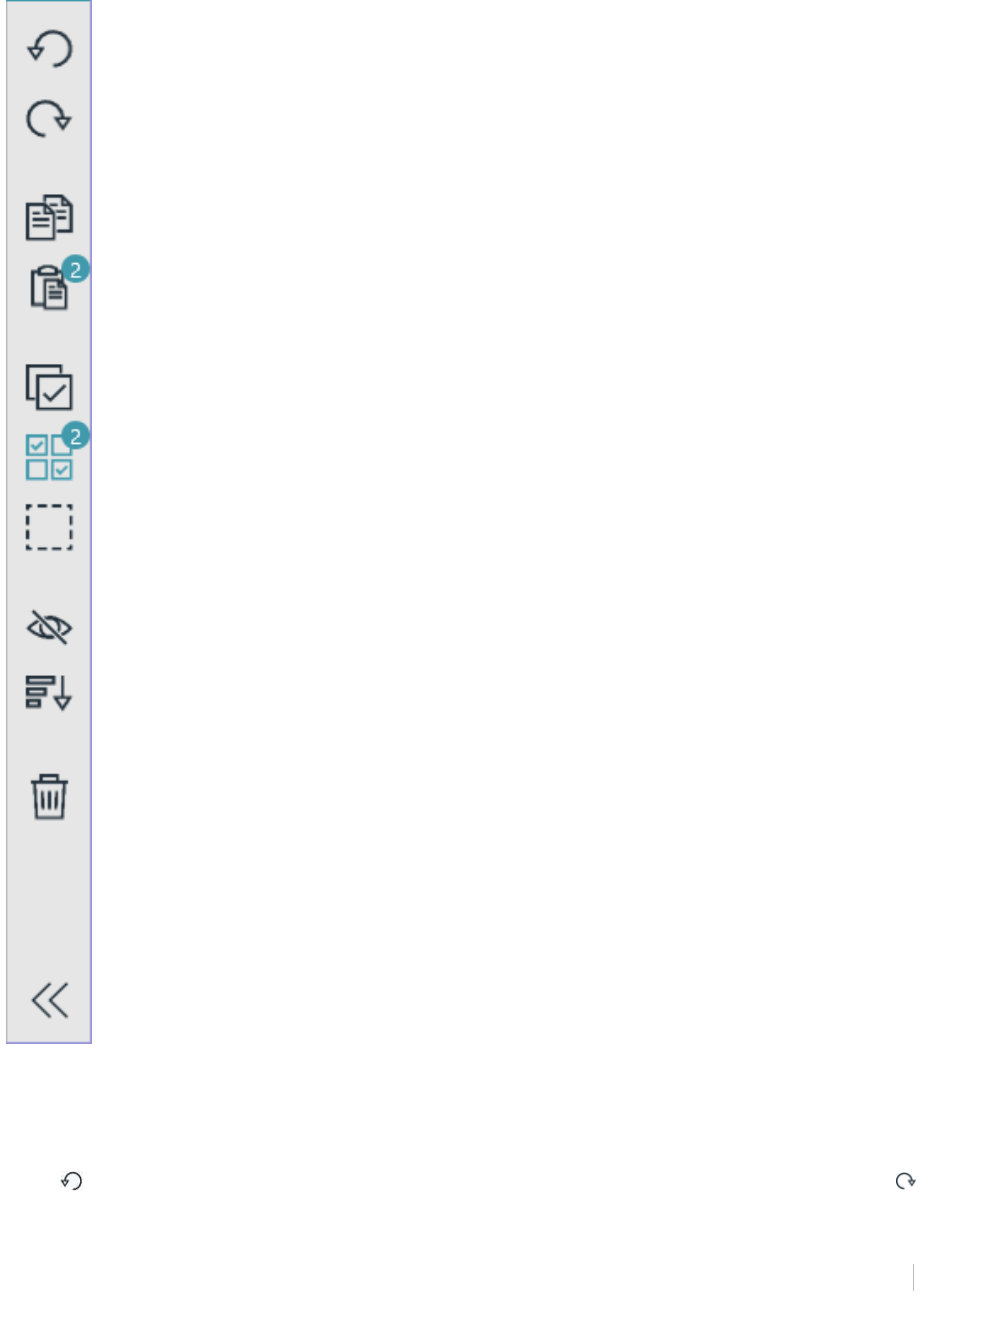
The tools found on the right side of the app window help you to edit the currently selected button(s).
Illustration22: Button editing tools — (from top to bottom) Undo, Redo, Copy, Paste, Select All, Multiselect, Marquee
Select, Hide/Show, Alphabetical Sort, Delete, Expand/Collapse Tool Names
9.5.1 Undo and Redo
The Undo tool allows you to reverse up to the last 100 edits made to the current user/Page Set. The
Redo tool will reinstate the last change you reversed with the Undo tool.

36
9 Editing TD Snap® Users Manual v.1.33-en-US
The Undo stack is reset when loading a different user, a different Page Set, and when the TD Snap® software is
closed.
9.5.2 Copy and Paste a Button
1. Select the Edit button.
2. Select a button.
3. Select the Copy tool.
Observe that the Paste tool displays the number of buttons you have copied.
4. Select the Paste tool.
The button will paste to the first available empty cell on the page.
9.5.3 Select All Buttons
The Select All tool automatically selects all of the buttons on the current page, so that you can perform bulk editing
operations.
1. Select the Edit button.
2. Select the Button tab.
3. Select the Select All tool.
After using Select All, you can click on individual buttons to deselect them; the other buttons will remain selected.
4. Make the desired changes to the buttons.
5. To deselect all buttons, select the Multiselect tool.
9.5.4 Select Multiple Buttons
The Multiselect tool allows you to (manually) select multiple buttons at once, so that you can perform bulk
editing operations.
1. Select the Edit button.
2. Select the Button tab.
3. Select the Multiselect tool.
The Multiselect tool is black when disabled and blue when enabled.
4. Select the buttons that you would like to edit simultaneously.
5. Make the desired changes to the buttons.
6. To deselect all buttons, select the Multiselect tool.

TD Snap® Users Manual v.1.33-en-US 9 Editing
37
Illustration23: Multiple selected buttons — Observe that the Multiselect tool shows how many buttons are currently
selected.
9.5.5 Marquee Select
The Marquee Select tool is an easy way to select multiple buttons. Just click and drag to draw a rectangle
around one or more buttons that you would like to select.
Illustration24: Using Marquee Select — Buttons do not need to be completely contained within the rectangle to be
selected.
1. Select the Edit button.
2. Select the Button tab.
3. Select the Marquee Select tool.
4. Click (or touch), then drag diagonally to draw a rectangle over all of the buttons that you would like to select.
5. Make the desired changes to the selected buttons.
6. To deselect all buttons, select the Multiselect tool.
Click on single buttons individually to select/deselect them.
Button selections can be made in the Toolbar or on the Page, but not both at the same time.
9.5.6 Hide/Show a Button
Buttons that are hidden are not visible in Use mode. Buttons that are temporarily too advanced or distracting, for
example, can be hidden, then shown (unhidden) later.
In Edit mode, hidden buttons are indicated by a gray overlay.
Illustration25: A hidden button next to a visible button, as viewed in Edit mode.

38
9 Editing TD Snap® Users Manual v.1.33-en-US
9.5.6.1 Hide
1. Select the Edit button.
2. Select a button that you would like to hide.
3. Select the Hide tool.
The default action for the Hide/Show tool is to set visibility on that button everywhere it appears in the Page Set.
To set the visibility for only the selected instance of the button, click and hold (long tap) on the Hide/Show tool and
choose Change Visibility Here.
9.5.6.2 Show
1. Select the Edit button.
2. Select a hidden button.
3. Select the Show tool.
The default action for the Hide/Show tool is to set visibility on that button everywhere it appears in the Page Set.
To set the visibility for only the selected instance of the button, click and hold (long tap) on the Hide/Show tool and
choose Change Visibility Here.
9.5.7 Sort Buttons Alphabetically
Use the Alphabetical Sort button to arrange the selected buttons alphabetically. Buttons are sorted in the following order:
alphabetically by label, then predictor buttons, then blank buttons.
1. Select the Edit button.
2. Select the Button tab.
3. Use the Multiselect or Marquee Select tool to select the buttons that you would like to sort.
4. Select the Alphabetical Sort tool.
9.5.8 Delete a Button
1. Select the Edit button.
2. Select a button.
3. Select the Delete tool.
9.5.9 Expand/Collapse Editing Tool Names
Select the double arrows to display the names of the editing tools. Select the double arrows again to
hide the tool names.
TD Snap® Users Manual v.1.33-en-US 9 Editing
39
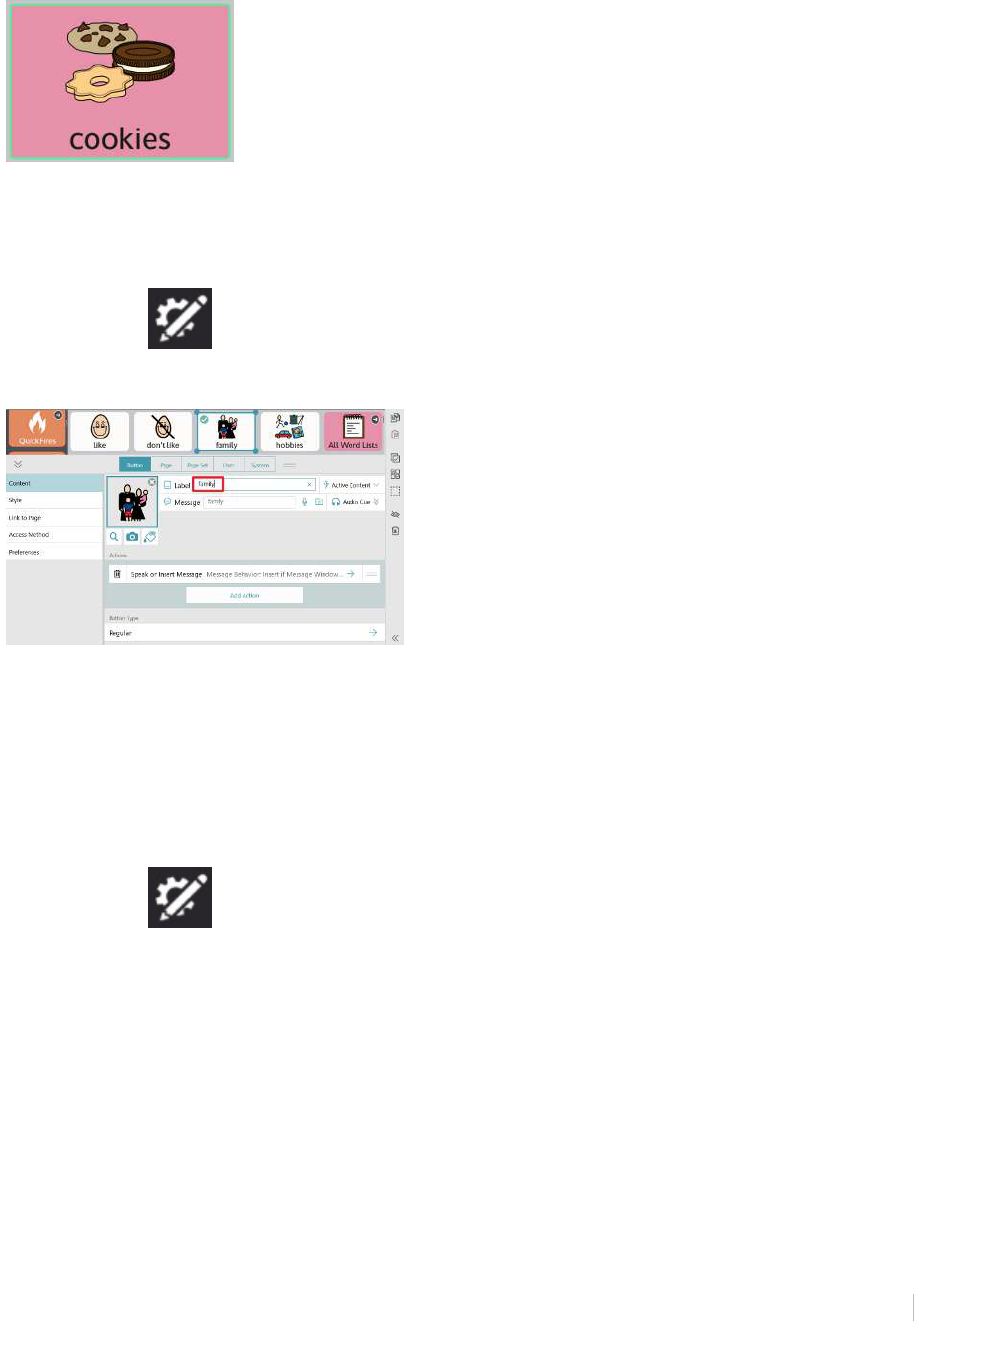
9.6 Button Content
Illustration26: Button with label, symbol, background color, and medium border.
9.6.1 Button Label
The button Label is the text that appears on a button.
1. Select the Edit button.
2. Select a button.
3. Type into the Label text field.
Illustration27: Button Label text field
If you would like to change other label characteristics (font, color, location, size, etc.) see section 9.8.3 Button Label,
page57.
9.6.2 Active Content
Active Content allows you to display dynamic information on a button. The button label and symbol change to reflect the
current information status.
1. Select the Edit button.
2. Select a button.
3. Select Active Content. (Only available if the Button type is set to Regular)
4. Select an Active Content type.

40
9 Editing TD Snap® Users Manual v.1.33-en-US
Illustration28: Active Content
Active Content Type Description
None Select None to remove the Active Content on the button.
Access Method Shows the current access method.
Access Method Pause
State
Note: Pause Access Method is only applicable to the following Access Methods: Gaze
Interaction, Mouse Dwell. When other Access Methods are in use, buttons using Access
Method Pause State Active Content are disabled.
If the Pause Access Method action is present on the button (default), the label displays the
action of the button: Start Access or Pause Access.
If the Pause Access Method action is not present on the button, the label displays the Access
Method pause state: Access Running or Access Paused.
Access Time Note: Access Time does not apply to the touch Access Method.
Shows the time setting value for the current Access Method. The actual time setting varies by
Access Method e.g. hold time, scan speed, dwell time etc.
For more information, see Error-Match-Reuse
AccessIT Connection
State
Displays the status of the AccessIT 3 device connection: Disconnected, Disconnecting,
Connecting, or Connected.
Can be paired with the Connect to AccessIT action to create a button that shows the status and,
when selected, connects to an AccessIT device.
Battery Level Shows the current battery level percentage: 0–100%. The symbol changes to reflect the battery
level and indicates when the device is plugged in and charging.
Chat Mode If the Toggle Chat Mode action is present on the button (default), the label displays the action of
the button: Chat or Stop Chat.
If the Toggle Chat Mode action is not present on the button, the button label displays the current
status of Chat Mode: Chat Mode On or Chat Mode Off.
Current Boardmaker
Activity
Shows the title and thumbnail of the Boardmaker activity currently in progress (if any).
Can be paired with the Open Current Boardmaker Activity action to create a button that opens
the Boardmaker Activity in progress and also displays the title and thumbnail of the activity.
Date Shows the current day, month, and year. Date formatting is dictated by the locale.
Day of the Week Displays the current day of the week.
Desktop Access State If the Toggle Desktop Access action is present on the button (default), the label displays the
action of the button: Windows — Start TD Control or Start Region Interaction. iPadOS — Start
AssistiveTouch or Start Region Interaction.
If the Toggle Desktop Access action is not present on the button, the button label displays the
current eye gaze mode: Windows — TD Control On or Region Interaction On. iPadOS —
AssistiveTouch On or Region Interaction On.
Feedback Mute State If the Audio Feedback Toggle Mute action is present on the button (default), the label displays
the action of the button: Mute Audio Feedback or Unmute Audio Feedback.
If the Audio Feedback Toggle Mute action is not present on the button, the button label displays
the current audio feedback mute status: Audio Feedback Muted or Audio Feedback Not Muted.

TD Snap® Users Manual v.1.33-en-US 9 Editing
41
Active Content Type Description
Feedback Volume Displays the audio feedback volume: 0–100%.
Can be paired with the Audio Feedback Up action or Audio Feedback Down action to create a
button that controls the volume and also displays the feedback volume level.
Partner Window
Brightness
Tobii Dynavox I-13 and I-16 devices only.
Displays the Partner Window brightness percentage: 0–100%.
Can be paired with the Partner Window Brightness Up action or Partner Window Brightness
Down action to create a button that controls the Partner Window brightness and also displays
the current Partner Window brightness.
Partner Window Power
State
Tobii Dynavox I-13 and I-16 devices only.
If the Toggle Partner Window Power action is present on the button (default), the label displays
the action of the button: Turn Partner Window On or Turn Partner Window Off.
If the Toggle Partner Window Power action is not present on the button, the button label
displays the current Partner Window power status: Partner Window On or Partner Window Off.
Speaking State If the Speak Message Window action is present on the button (default), the label displays the
action of the button: Speak or Stop.
If the Speak Message Window action is not present on the button, the button label displays the
current speaking status: Speaking or Not Speaking.
Speech Mute State If the Speech Toggle Mute action is present on the button (default), the label displays the action
of the button: Mute or Unmute.
If the Speech Toggle Mute action is not present on the button, the button label displays the
current speech mute status: Muted or Not Muted.
Speech Volume Displays the speech volume: 0–100%.
Can be paired with the Speech Volume Up action or Speech Volume Down action to create a
button that controls the volume and also displays the speech volume level.
Time Displays the current system time in hours and minutes. Time format is determined by the
operating system region setting.
Note: The symbol is a generic clock face that does not change with the time.
Vocabulary Filter State If the Toggle Vocabulary Filter action is present on the button (default), the label displays the
action of the button: Turn Vocabulary Filter On or Turn Vocabulary Filter Off.
If the Toggle Vocabulary Filter action is not present on the button, the button label displays the
current speaking Vocabulary Filter status: on or off.
Year Displays the current year.
9.6.3 Button Message
The Button Message can be text, recorded sound, or an audio file selected from your device. When the Button Message
is text, the text that is inserted into the Message Window when the button is selected. If the Message Window is not
present, the button Message text is spoken. Recorded sound and audio files in the Button Message are played when the
button is selected.
9.6.3.1 Change Button Message Text
1. Select the Edit button.
2. Select a button.
3. Type into the Message text field.

42
9 Editing TD Snap® Users Manual v.1.33-en-US
Illustration29: Button Message text field
Some Acapela voices support Vocal Smiley sounds, such as laughter, sighing, etc. Enter the Vocal Smiley sound
code for your Acapela voice in the Message field to hear it when the button is selected. At the following link find
your language and voice to view the Vocal Smiley sounds available for your Acapela voice:Acapela Vocal Smiley
codes. TD Snap does not support Acapela Vocal Smiley sounds appended with (S) or Vocal Smiley exclamations.
9.6.3.2 Make a Recording
1. Select Record. The Record Message dialog will open.
2. Select Record to start recording.
3. When you have finished recording, select Stop.
4. To hear your recording, select Play.
5. When you have finished creating your recording, select Save to save your recording. Select Cancel to close the
Record Message dialog without saving.
9.6.3.3 Add an Audio File to a Button Message
Add an audio file to create a button that plays a song or other audio track.
1. Select the Edit button.
2. Select a button.
3. Select Add Audio File.
4. Browse to and select an audio file on your device. Files must be <50MB.
Supported file types: .aac, .m4a, .mp3, .wav, .wma
5. Select Done.
9.6.4 Button Audio Cue
The Audio Cue can be used with the Touch Exit, Mouse Dwell, Gaze Interaction, and Scanning access methods. The
Audio Cue is a button preview that is spoken when the button is highlighted but not yet selected.
1. Select the Edit button.
2. Select a button.
3. Select Audio Cue to expand the row.

TD Snap® Users Manual v.1.33-en-US 9 Editing
43
4. Type into the Audio Cue field.
Illustration30: Button Audio Cue text field
If you would like to record a custom Audio Cue, see section 9.6.3.2 Make a Recording, page42.
9.6.5 Button Image
A button can display one symbol or image.
1. Select the Edit button.
2. Select a button.
3. Add an image to the button:
To search for a symbol in your symbol sets:
– Select the Symbol Search button.
The Symbol Search dialog will open.
– Type in the text field to refine your search terms.
Optional: To filter your search results, select the Symbol Filter button, then select the features you
would like to see in your symbol search results (Adult, Child, Female, Male).
– Choose the desired symbol.
– Select Done.
To search the web for an image (internet connection required):

44
9 Editing TD Snap® Users Manual v.1.33-en-US
– Select the Symbol Search button.
The Symbol Search dialog will open.
– Select the Web tab, then enter a search term in the text field.
– Choose the desired image.
– Select Done.
To use the camera to take a photo for the button image:
– Select the Camera button.
– Choose From Camera.
– Use the camera on your device to capture a photo.
To use an image stored on your local device:
– Select the Camera button.
– Choose From Photo Library.
– Use the file browser to navigate to the desired image file.
If you do not want to have a symbol on the button, select the X in the corner of the current symbol or set the Button
Layout to Label Only. See section 9.8.4 Button Layout, page58.

TD Snap® Users Manual v.1.33-en-US 9 Editing
45
9.6.6 Edit Symbol
You can change any of the colors in individual symbols using the Symbol Editor. Changes to a symbol using the Symbol
Editor are only applied to the single instance of that symbol (on the particular button you have selected) and are not
applied globally to other instances of that symbol. If you would like to make global changes to the hair color or skin color
of all symbols, use the Page Set Style Symbol Color settings. See section 10.3.1 Symbol Skin Tone and Hair Color,
page78.
1. Select the Edit button.
2. Select a button that contains a symbol.
3. Select the Symbol Editor button.
4. Edit the symbol colors using the tools described in simpletable.
5. To save your changes and close the Symbol Editor, select Accept. To discard your changes and close the Symbol
Editor, select Cancel.
Table5: Symbol Editor Tools
Tool Name Description
1 Color palette These are pre-defined colors and colors that you have used recently. Select a color to
make it the current color (position 3).
2 Custom color Create your own custom color. Custom colors are added to the color palette (position 1)
when you use them.
3 Current color Select a color in the symbol to replace it with the current color. The current color replaces
all instances of the color you select in the symbol, wherever it appears.
4 Color picker Select the color picker tool then select a color in the symbol to make that color the current
color (position 3).
5 Diversity presets Select a skin tone value on the left to see a variety of hair and skin color combinations
within that range applied to the small preview images. Select a preview image to apply
those colors to the symbol. If you don’t want to keep the change, just select Undo or
choose a different preview image.
6 Symbol feedback Send feedback about this symbol to Tobii Dynavox.
7 Undo Undo the last action.
8 Redo Redo the last undone action.
9 Symbol This is the symbol that you are currently editing.

46
9 Editing TD Snap® Users Manual v.1.33-en-US
9.6.7 Button Type
The Button Type setting determines the way a button behaves.
1. Select the Edit button.
2. Select a button.
3. Select Button Type.
4. Select a Button Type from the list:
● Regular — can contain a symbol, a label, message, and actions. The default action is Speak/Insert Message.
● Predictor — anticipates the next word based on the current composition in the Message Window. Select the button
to insert the currently displayed word into the Message Window.
● Keyboard — designed to insert a single character into the Message Window and respond appropriately to modifiers
such as the Shift key or Caps Lock. Keyboard buttons can also play a recorded sound or audio file when selected.
See sections 9.6.3.2 Make a Recording, page42 and 9.6.3.3 Add an Audio File to a Button Message, page42.
● Inflector — changes the target word to the specified word form i.e. plural, past tense, etc. The target is set to one of
two options: the last word in the Message Window or all Grammar buttons.
The Button Language Rules setting must be exactly the same for the Inflector button and the Grammar button for
inflection to work properly.
● Grammar — updates its own label to predict the desired grammatical form of the word based on the current content
of the Message Window, a selected Inflector button, or a selected Implied Subject button.
● Implied Subject — (Spanish only) when populated with an applicable pronoun, an Implied Subject button can be
used to inflect Grammar buttons and also insert its label into the Message Window. When selected once, the Implied
Subject button will inflect Grammar buttons to agree with the pronoun on the Implied Subject button. If selected a
second time, the label (pronoun) of the Implied Subject button is inserted into the Message Window.
If the Implied Subject button Language Rules are set to Spanish (Mexico, Spain, or United States) one of the
following pronouns may be used on the button:
– yo
– tú
– usted
– él
– ella
– nosotros
– nosotras
– vosotros
– vosotras
– ustedes

TD Snap® Users Manual v.1.33-en-US 9 Editing
47
– ellos
– ellas
The Button Language Rules setting must be exactly the same on the Implied Subject button and the Grammar
button for inflection to work properly.
9.7 Button Actions
Actions allow you to create buttons that do things!
Add or Edit Button Actions
1. Select the Edit button.
2. Select a button.
3. Select Add Action to choose an action to add to the button. (Only available if the Button type is set to Regular).
Type in the Search for Actions field to find actions related to your search. To see more details about what the
actions do, select the information icon in the section title.
Favorite actions appear first in the actions list for easy access. Select the outline star to add the action
to the favorites list. Select the solid star to remove the action from the favorites list.
Actions for Speaking Description
Speak Message Window Speak the contents of the Message Window.
Speak or Insert Message Speak or insert a button’s message.
Speak Sentence Speak the last sentence in the Message Window.
Stop All Sound Stop all speech and sounds that are currently playing or queued in TD
Snap®.
Actions for Message Window Description
Bold Make the selected Message Window text bold.
Clear Message Window Clear the contents of the Message Window.
Copy Message Window Text Copy the current Message Window text to the system clipboard.
Ⱡ
Copy Message Window to Button Copy the current Message Window text, then add it to the user-selected
button label.
Ⱡ
Cut Message Window Text Cut the current Message Window text to the system clipboard.
Ⱡ
Delete Text Delete the selected Message Window text, or the current word in the
Message Window.
Italic Make the selected Message Window text italic.
Move Cursor Move the cursor in the Message Window.
Paste Clipboard into Message Window Paste the contents of the system clipboard into the Message Window.
Redo Message Window Redo the last undone action in the Message Window.
Select Text Select text in the Message Window.
Share Message Window Text Share the current Message Window text.
Ⱡ
Toggle Chat Mode Toggle Chat on and off. When Chat is enabled, the current Message Window
content is cached, then the Message Window is cleared. While in Chat, you
can insert new content into the Message Window and speak. When Chat is
turned off, the cached Message Window content is restored so that you can
continue where you left off.
Undo Message Window Undo the last action in the Message Window.

48
9 Editing TD Snap® Users Manual v.1.33-en-US
Ⱡ
“Current text” refers to the selected text in the Message Window or, if there is no selection, all of the text in the
Message Window.
Actions for Navigation Description
Cancel Visit Cancels visit, so that you remain on the current page.
Extend Visit A button containing this action will not trigger return to the previous page
while visit is in effect.
Go Back Go back to the previous page.
Go Home Go to the Home page.
Link Link to another page.
Open Dashboard Open the Dashboard page.
Open Keyboard Open the Keyboard page.
Open Whiteboard*** Open the Whiteboard.
Return from Visit Return to the previous page, cancel Visit.
Switch Page Set Switch to a different Page Set.
*** See section 9.7.3 Whiteboard, page50
Actions for Boardmaker Activities Description
Open a Boardmaker Activity or Folder
‡
Open a Boardmaker activity or folder as a TD Snap® page or as a popup.
Open Boardmaker Activity Library
‡
Open the Boardmaker Activity Library in TD Snap®. From the Library, the
user can browse folders and play activities. The Boardmaker Activity Library
is the Snap Activities folder on myBoardmaker.com
Open Current Boardmaker Activity
‡
Open the Boardmaker activity that is in progress, if applicable.
‡
This action requires a myBoardmaker.com account and associated Boardmaker content. See section 9.7.5 Play
Boardmaker Activities in TD Snap®, page53
Actions for Behavior Support Description
First Then Display a First, Then sequence on a popup.
Mini-Schedule Display a Mini-Schedule on a popup.
Script Display a Script on a popup.
Visual Timer Display a timer in the Top Bar that counts down the specified time.
Actions for Access Method Description
Calibrate Eye Tracker Start eye tracker calibration.
Change Access Method If only Access Method 1 is set, the access method changes to the one
specified when the button is selected. If both Access Method 1 and Access
Method 2 are set, the button toggles between Access Method 1 and Access
Method 2. The button label dynamically displays “Change to [access method]”
to indicate what will happen when the button is selected.
Pause Access Method Pauses and resumes the access method. The button label text displays
whether the access method is currently paused or active. Applicable access
methods: Mouse Dwell, Gaze Interaction.
Set Access Time Sets the access method time variable to the specified value. The time
variable affected is determined by the active access method when the Set
Access Time action is activated
†
For example, you might add the action when the access method is set to
Touch, but later the user activates it with the Gaze Interaction access method
to change the gaze dwell time
Show Eye Tracker Status Display the track status window for the eye tracker.
Toggle Desktop Access Toggle between eye gaze desktop access and TD Snap region eye gaze. On
Windows devices, TD Control is used for desktop access. On iPad,
AssistiveTouch is used for desktop access.

TD Snap® Users Manual v.1.33-en-US 9 Editing
49
†
List of time variables affected by the Set Access Time action.
Actions for Vocabulary Filter Description
Toggle Vocabulary Filter Toggle the Vocabulary Filter on or off.
Actions for Volume Control Description
Audio Feedback Toggle Mute Mute or unmute the audio feedback volume.
Audio Feedback Volume Down Decrease the audio feedback volume.
Audio Feedback Volume Up Increase the audio feedback volume.
Set Volume Set the system volume to a specific level.
Speech Toggle Mute Mute or unmute the system volume.
Speech Volume Down Decrease the system volume.
Speech Volume Up Increase the system volume.
Actions for Environmental Control Description
Send Google Assistant Command Send a text command to Google Assistant. Options: Send button message
text or send Message Window text.
Send IR Signal Send the specified IR signal.
Actions for AccessIT Description
Connect to AccessIT* Disconnect the currently attached AccessIT device, then show the AccessIT
device picker.
Reset AccessIT* Stop the specified AccessIT actions: text transmissions, held keyboard keys,
clicks, and/or continuous mouse moves.
Send Button Text* Send a button’s label or message to the AccessIT device.
Send Keyboard Key* Send a keyboard key to the AccessIT device.
Send Message Window Text* Send the current Message Window text to the AccessIT device.
Ⱡ
Send Mouse Click* Send mouse clicks to the AccessIT device.
Send Mouse Movement* Send mouse movement to the AccessIT device.
Send Text* Send text to the AccessIT device.
* This action requires a Tobii Dynavox AccessIT 3 device. See section 9.7.4 AccessIT, page51
Ⱡ
“Current text” refers to the selected text in the Message Window or, if there is no selection, all of the text in the
Message Window.
Actions for Launch Other Applications Description
Launch Application Launch the specified application.
Actions for Device Description
Minimize Minimizes the TD Snap® app.
Restart Device Restarts the device.
Shut Down Device Shuts down the device.
Toggle Full Screen Mode Toggle the Full Screen Mode On or Off for the device.
Actions for Partner Window Description
Partner Window Brightness Down** Decreases the brightness of the Partner Window.
Partner Window Brightness Up** Increases the brightness of the Partner Window.
Toggle Partner Window Power** Toggles the Partner Window on or off.
** This action requires a Tobii Dynavox I-13, I-16, or TD Pilot device.
Table6: The Access Time Chart

50
9 Editing TD Snap® Users Manual v.1.33-en-US
Access Method Affected time variable
Gaze Interaction with dwell Dwell time
Gaze Interaction with switch Switch hold time
Gaze Interaction with blink Minimum blink time
Touch Enter/Touch Exit Hold time
1-switch autoscan Scan speed
1-Switch Scan Pause Time
1-Switch Dwell Scan Pause Time
Inverse Scan Speed
Mouse Dwell Dwell Time
Touch none
9.7.1 Delete an Action
1. Select the Edit button.
2. Select a button.
3. Select the Delete button beside an action.
4. Select the red Delete button to confirm delete.
9.7.2 Reorder Button Actions
1. Select the Edit button.
2. Select a button.
3. Select and hold on the handle of an Action, then drag it to a new position in the list of Actions.
9.7.3 Whiteboard
The Whiteboard is only accessible via the Touch access method.
The Whiteboard is an area where you can display pictures and create freehand drawings. Create as many boards as you
like. They will persist until you delete them.
To open the Whiteboard, use the Open Whiteboard action on a button. In many page sets an Open Whiteboard button is
available on the Dashboard page.

TD Snap® Users Manual v.1.33-en-US 9 Editing
51
1. Back — Return to the Page Set.
2. New whiteboard — Create a new whiteboard.
3. List of existing whiteboards — Select any whiteboard to view and edit.
4. Draw palette — Select any color, then draw freehand on the whiteboard.
5. Thickness — Choose the thickness of the drawing tool.
6. Erase tool — Erase drawings in specific areas.
7. Clear — Clear the current whiteboard of all drawings.
8. Edit images — Re-position, re-size, or delete images on the whiteboard.
9. Add image — Add an image to the whiteboard. Use your built—in camera to take a picture or browse for an image
stored on your device.
Actions for Add image
– Take a Photo
– Pick a Photo — Note: The dialog box for this action can only be accessed by Touch.
– Cancel
10. Selected image — Click and drag from the center of the image to re-position. Click and drag on a corner to re-size.
11. Delete Image — Delete the selected image.
12. Delete Whiteboard — Delete the current whiteboard.
9.7.4 AccessIT
TD Snap® supports the Tobii Dynavox AccessIT 3, a USB Bluetooth device used to send key strokes, mouse
movements, and mouse clicks to a standard Windows 10 computer from a device running the TD Snap® app. To learn
more about Tobii Dynavox AccessIT 3 visit http://www.tobiidynavox.com/AccessIT
AccessIT pages are included in the Core First Page Sets created with TD Snap® version 1.7 and later. AccessIT
page bundles are available for import into your existing Page Sets at https://www.mytobiidynavox.com/
PagesetCentral
Henceforth, this document will refer to the computer receiving commands as “the PC” and the device from which
commands will be sent as “the speech device.”
The AccessIT 3 uses Bluetooth® wireless technology. The PC (with connected AccessIT 3) and the speech device
must be within approximately 10 meters (32 feet) to establish and maintain Bluetooth pairing while the AccessIT 3
is in use.
Both the speech device and PC must be powered on and unlocked before beginning the steps below.

52
9 Editing TD Snap® Users Manual v.1.33-en-US
9.7.4.1 Set up AccessIT
Connect the AccessIT
1. (On the PC) Insert the AccessIT 3 into a USB port.
AccessIT 3 requires USB 2.0 or higher.
Enable Bluetooth
Windows Speech Devices iPadOS (iPad) Speech Devices
1. (On the speech device) Select the Start menu, then
choose Settings.
2. Select Devices.
3. Select Bluetooth.
4. Move the Bluetooth toggle to the ON position.
1. (On the speech device) Go to Settings > Bluetooth and
enable Bluetooth.
9.7.4.2 AccessIT Actions
The AccessIT actions are designed to be used in combination. Common PC operations such as click and drag will
require more than one action. Individual actions are described below.
If an AccessIT device is not connected when a button containing an AccessIT action is selected, the (accessible)
AccessIT device picker will open automatically.
Table7: AccessIT actions
Action Description
Connect to AccessIT Disconnect the current AccessIT device (if any) and display the AccessIT device picker. This
action is useful for switching from one AccessIT device to a different AccessIT device. It is not
necessary to use this action to start all AccessIT sessions, as all of the AccessIT actions
automatically open the AccessIT device picker if an AccessIT device is not currently connected.
Reset AccessIT Stop the specified command types that are currently being executed: keyboard keys, mouse
clicks, mouse movements, and/or text.
Send Button Text Send the button Message to the AccessIt device. If the button does not have a Message, send
the button Label.
Send Keyboard Key Send the specified keyboard key. Options: hold the key down and/or wait for a specified length
of time after sending the keyboard key (before performing the next action).
Send Message
Window Text
Send the current Message Window text to the AccessIT device. If the Message Window is
symbolated, the symbols are not sent.
Send Text Send the specified text to the AccessIT device.
Send Mouse Click Send the specified click type (left click, right click, middle click, left double click). Options: wait
for a specified length of time after sending the click (before performing the next action) and/or
hold the click down.
Send Mouse
Movement
Send a mouse movement to the AccessIT device. Mouse movements are made from the
current mouse position. Move the blue ball to the position on the circle that matches the
direction of the desired mouse movement, then enter a number into the distance field. The unit
of distance is the smallest detectable mouse movement, which is between 1/300 and 1/200
inches, depending on the equipment and mouse speed setting on the PC. Options: continuous
movement (the mouse will continue to move in the specified direction until another action stops/
redirects it or it runs into the edge of the screen) and/or wait for a specified length of time after
sending the mouse movement (before performing the next action).
Illustration31: Mouse movement direction — Position the blue ball on the circle to set the mouse movement direction.

TD Snap® Users Manual v.1.33-en-US 9 Editing
53
Some AccessIT users may find it helpful to enable the Windows setting “Show location of pointer when I press the
CTRL key” on the PC. Use the Send Keyboard Key action to send the CTRL keyboard key from TD Snap® and
animated circles will temporarily appear around the mouse pointer on the PC to make it more visible. To access
this Windows mouse setting, go to Settings > Devices > Mouse > Additional Mouse Options > Pointer Options tab.
9.7.4.3 PC Power Settings and AccessIT
Your PC can only receive AccessIT commands when it is powered on and awake. To ensure uninterrupted PC access,
adjust your PC energy settings to never put the computer (hard disk) to sleep when plugged in.
Your PC can still receive AccessIT commands if the screen (display) has gone into a power-saving mode. When an
AccessIT command (keyboard key, mouse movement, or mouse click) is sent from TD Snap® it will “wake” the PC
screen.
Windows power settings are found in Settings > System > Power & Sleep.
9.7.5 Play Boardmaker Activities in TD Snap®
Boardmaker activities are interactive and print materials designed for education, communication, and fun! You can play
your Boardmaker activities right in TD Snap®. Use the Open Boardmaker Library action to browse and play activities. Or,
use the Open Boardmaker Activity or Folder action to go straight to a specific activity or folder. You can even make
activities available for offline use.
Boardmaker activities played in TD Snap® are designed for a home use context, where the caregiver manages the
Tobii Dynavox account used for both TD Snap® and myBoardmaker. The caregiver in this situation will have direct
access to the Boardmaker Activities folder where they can place Boardmaker activities for the user.
In a classroom or therapy context, where an educator or therapist is assigning Boardmaker activities, the student
should complete their assignments using the Boardmaker 7 Student Center app. The Boardmaker 7 Student
Center app is free to install and use and is compatible with most devices that support TD Snap®. The student will
most likely require a separate login provided by the educator to access their assignments on the Boardmaker 7
Student Center app.
Some Boardmaker settings and actions are not supported in TD Snap®. See the Boardmaker 7 User’s Manual for
the list of unsupported features.
Illustration32: Boardmaker Activity Playing in TD Snap®

54
9 Editing TD Snap® Users Manual v.1.33-en-US
Item Description
1 Activity By default, Boardmaker activities play in the main TD Snap® page area. You can also
play Boardmaker activities in a popup window if you enable Play in popup when adding
one of the Boardmaker actions to a button.
2 Manage Offline Access Choose the activities in the current view to download and make available for offline
access. The selected activities will be available to play in TD Snap® even without an
internet connection.
3 Go to myBoardmaker Launch myBoardmaker.com in a browser window.
4 Boardmaker Activity
Menu Icon
Open the Boardmaker Activity Menu to access the following buttons:
● Back — Leave the activity and return to the previous page.
● Library — Go to the Boardmaker library in TD Snap®.
● Restart — Start over in the current activity.
● Move — Move the Boardmaker Activity Menu Icon to a different corner of the screen.
9.7.5.1 Manage Activities on myBoardmaker
To make Boardmaker activities available in TD Snap®, you must have an account on myBoardmaker.com. Community
level accounts are free. Visit myBoardmaker.com and log in using the Tobii Dynavox account credentials that you also
use in TD Snap® to create your free myBoardmaker Community account.
The myBoardmaker website is currently in English only. However, Boardmaker activities are available in numerous
languages.
Before you begin, make sure that you have an internet connection and you are logged in with your Tobii Dynavox
account in TD Snap®.
1. In TD Snap®, select Dashboard then select the Boardmaker Activities button.
If you do not have the Boardmaker Activities button on your Dashboard, you can create a button with the Open
Boardmaker Activity Library action, then select that button in use mode. The first time that the Open Boardmaker
Activity Library action is executed, it creates the necessary folder in your Boardmaker Online account.
2. Open a web browser and navigate to myBoardmaker.com
3. Select Log in, then enter your Tobii Dynavox account login credentials. If you have not logged in on
myBoardmaker.com before, you must sign up for a free Community account or start a subscription.
4. Select My Boardmaker.
5. Select the folder Snap Activities.
6. Add activities and folders to the Snap Activities folder to make them available through actions in TD Snap®.
The Snap Activities folder is pre-loaded with several free activities to get you started. Some of the more popular
activities are the calculator, dice, and spinner activities found in the Math Tools folder.
The Snap Activities folder on myBoardmaker is the Boardmaker Activity Library in TD Snap®.
9.7.5.2 Open Boardmaker Library
Use this action to allow the user to browse all of the Boardmaker activities in the Snap Activities folder on myBoardmaker
right in TD Snap®. From the Boardmaker Activity Library, they can select any activity to play.
All activities in the Library are available to play if there is an active internet connection on the device. When offline,
only activities that have been downloaded or previously cached will play. See section 9.7.5.5 Offline Boardmaker
Activity Access, page56.
1. Navigate to the page where you want to have a button linking to your Boardmaker Activity Library.
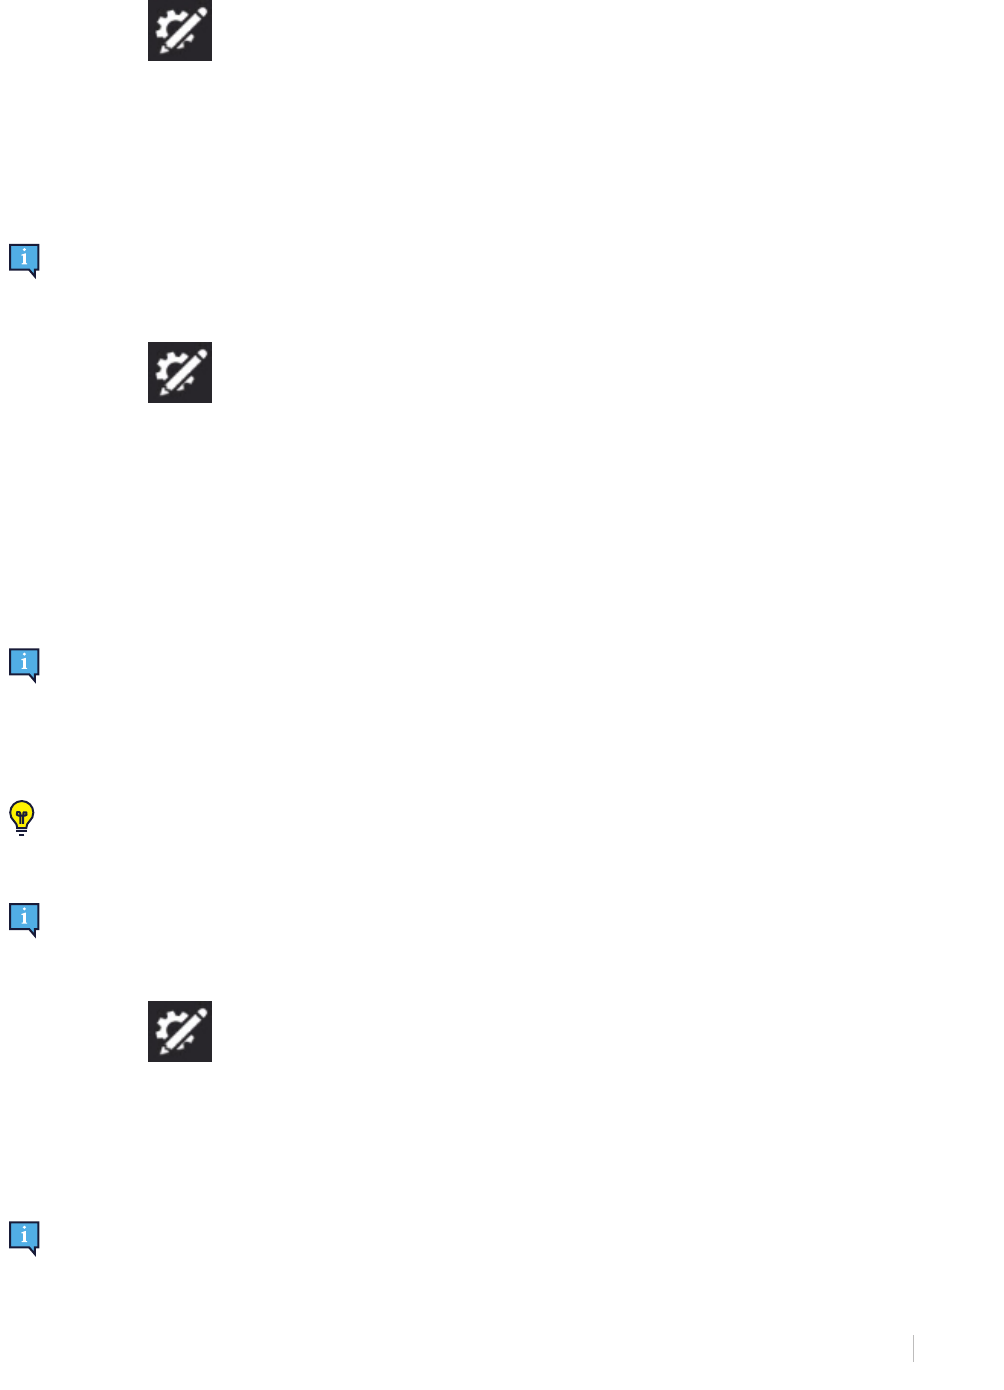
TD Snap® Users Manual v.1.33-en-US 9 Editing
55
2. Select the Edit button.
3. Select the button you would like to use to open the Boardmaker Activity Library.
4. Select Add Action.
5. Scroll down to the Boardmaker Activities section and select Open Boardmaker Activity Library.
9.7.5.3 Open Boardmaker Activity
Play a specific activity in the Boardmaker Library.
All activities in the Library are available to play if there is an active internet connection on the device. When offline,
only activities that have been downloaded or previously cached will play. See section 9.7.5.5 Offline Boardmaker
Activity Access, page56.
1. Navigate to the page where you want to have a button linking to the Boardmaker activity.
2. Select the Edit button.
3. Select the button you would like to use to open the Boardmaker activity.
4. Select Add Action.
5. Scroll down to Boardmaker Activities and select Open a Boardmaker Activity or Folder. The Snap Activities dialog
opens.
6. Navigate through the folders to the activity you would like to play. Select the activity.
7. If you would like the activity to open in a popup, enable Open in a popup. Otherwise, the activity will open as a page
in TD Snap®.
Activities opened in a popup do not allow the user to navigate away and then return to it to pick up where they left
off. Popups are best used for brief activities that are easy to restart from the beginning.
8. Select Select Activity. To exit without saving, select Cancel.
The button label automatically updates with the name of the linked activity.
9.7.5.4 Open Boardmaker Folder
Open a specific folder in your Boardmaker Library. From the folder, the user can select activities to play in TD Snap®.
You can assign Boardmaker activities to the user by creating a folder for them in your Snap Activities folder on
myBoardmaker.com, then linking to that folder in their TD Snap® Page Set. Move activities into the folder as
needed and the user will see the activities in TD Snap® (user must have an internet connection and be signed in
to the myTobiiDynavox account in TD Snap® to get the updated activities).
All activities in the Library are available to play if there is an active internet connection on the device. When offline,
only activities that have been downloaded or previously cached will play. See section 9.7.5.5 Offline Boardmaker
Activity Access, page56.
1. Navigate to the page where you want to have a button linking to the Boardmaker activity.
2. Select the Edit button.
3. Select the button you would like to use to open the Boardmaker folder.
4. Select Add Action.
5. Scroll down to Boardmaker Activities and select Open a Boardmaker Activity or Folder. The Snap Activities dialog
opens.
6. Navigate to the folder you would like to link to, so that you are within the desired folder.
7. Select Select Folder. To exit without saving, select Cancel.
The button label automatically updates with the name of the linked folder.

56
9 Editing TD Snap® Users Manual v.1.33-en-US
9.7.5.5 Offline Boardmaker Activity Access
You can download Boardmaker activities to your device so that they are available for playback when the device is offline.
Offline activities are downloaded per device. If the Page Set is synced or shared to a different device, the
download process must be repeated on that device to make the activities available offline.
1. Open your Boardmaker Library in TD Snap®. See section 9.7.5.2 Open Boardmaker Library, page54.
2. Open a folder to view the list of activities.
3. Select Manage Offline Access.
4. Check the box beside the activities that you would like to download to the device for offline playback.
Activities that display the icon are successfully downloaded and available on this device when offline.
5. Select the X to close the dialog when you have finished downloading activities in this folder.
6. Repeat the steps above for any folder containing activities that you would like to make available offline.
When an activity not marked for offline use is played while there is an internet connection, it is downloaded as a
temporary file. For that reason, some activities that have been played before but not explicitly marked for offline
use may still be available for play while offline. The offline availability of these files is not guaranteed.
9.7.5.6 Open Boardmaker Activity in Progress
If the user is playing a Boardmaker activity in TD Snap® and navigates away from the activity to a different page, they
can return to the Boardmaker activity in the same state they left it.
This action can only be used with activities played in the main TD Snap® window. It does not work with activities
opened as popups.
1. Navigate to the page where you want to have a button that takes the user back to the in-progress Boardmaker
activity.
2. Select the Edit button.
3. Select the button you would like to use to navigate to the in-progress Boardmaker activity.
4. Select Add Action.
5. Scroll down to Boardmaker Activities and select Open Current Boardmaker Activity.
If there is not a Boardmaker Activity currently in progress, the button is automatically disabled. When a
Boardmaker Activity is in progress, the button is automatically enabled and the label displays the name and
thumbnail of the activity.
9.8 Button Style
Change the look of a button in the Button Style category.

TD Snap® Users Manual v.1.33-en-US 9 Editing
57
9.8.1 Button Background
1. Select the Edit button.
2. Select a button.
3. Select the Style category.
4. Select Color under Button Background.
5. Select a color.
You can create your own custom colors! See section 9.19 Custom Colors, page74.
9.8.2 Button Border
9.8.2.1 Border Color
1. Select the Edit button.
2. Select a button.
3. Select the Style category.
4. Select Color under Button Border.
5. Select a color.
You can create your own custom colors! See section 9.19 Custom Colors, page74.
9.8.2.2 Border Thickness
1. Select the Edit button.
2. Select a button.
3. Select the Style category.
4. Select Thickness under Button Border.
5. Select a border thickness — None, Thin, Medium, or Heavy. You can also set a custom thickness using the slider or
by typing a numeric value between 0 and 12 in the Custom Thickness field.
Illustration33: Button borders: None, Thin, Medium, and Heavy.
9.8.3 Button Label
9.8.3.1 Color
1. Select the Edit button.
2. Select a button.
3. Select the Style category.
4. Select Color under Button Label.
5. Select a color.
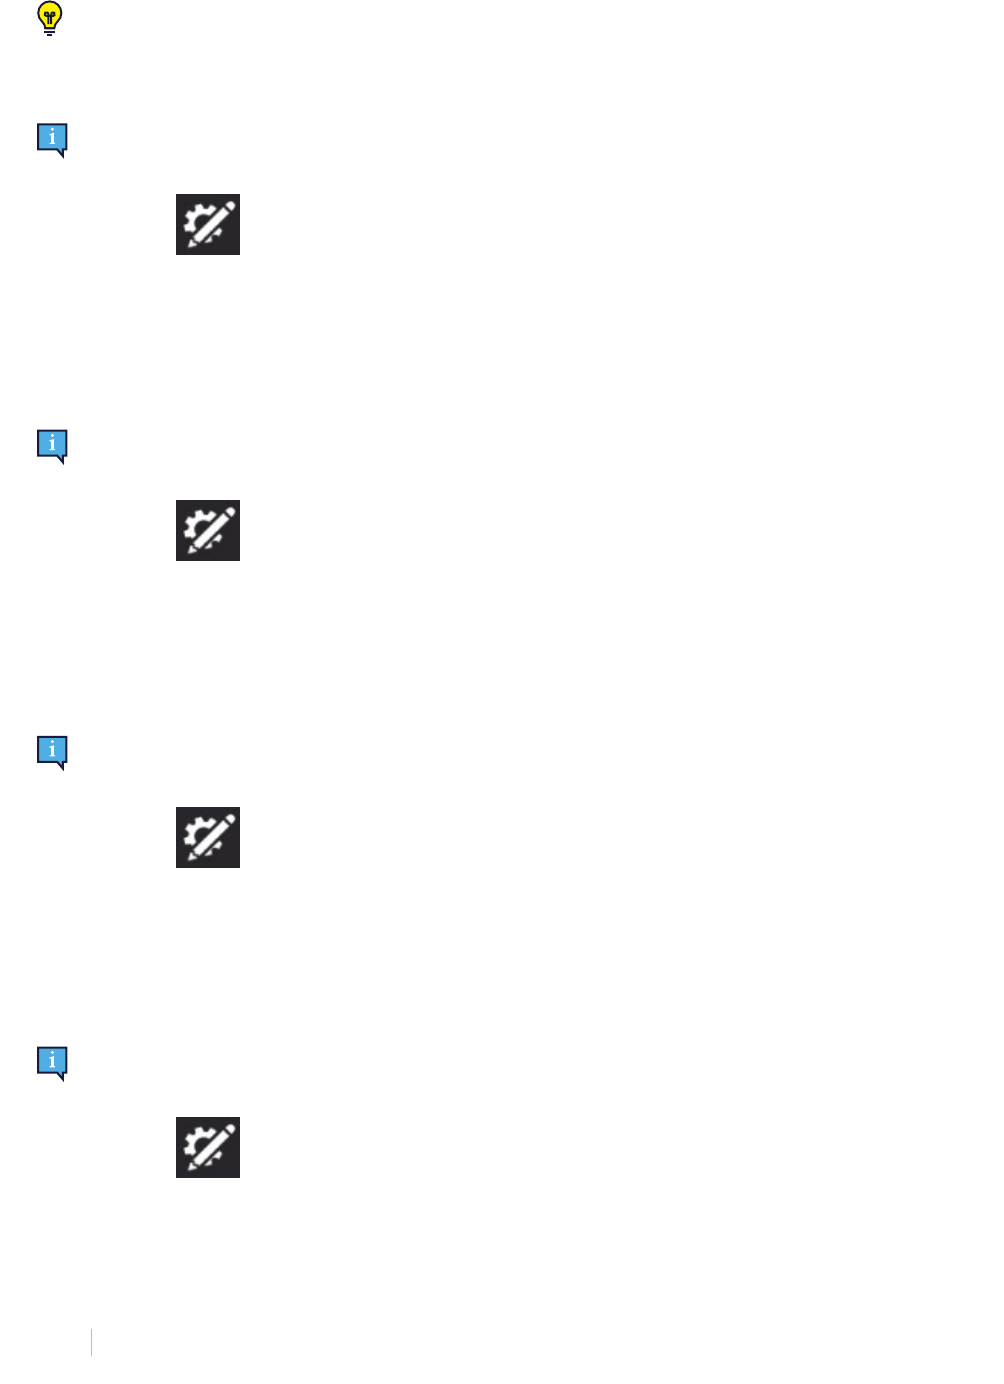
58
9 Editing TD Snap® Users Manual v.1.33-en-US
You can create your own custom colors! See section 9.19 Custom Colors, page74.
9.8.3.2 Font
This setting’s default is set on the Page Set tab. If you would like to override the Page Set default in this instance,
set Match Page Set setting to Off. To align this setting with the rest of the Page Set, set Match Page Set setting to
On.
1. Select the Edit button.
2. Select a button.
3. Select the Style category.
4. Select Font under Button Label.
5. Select a font.
9.8.3.3 Size
This setting’s default is set on the Page Set tab. If you would like to override the Page Set default in this instance,
set Match Page Set setting to Off. To align this setting with the rest of the Page Set, set Match Page Set setting to
On.
1. Select the Edit button.
2. Select a button.
3. Select the Style category.
4. Select Size under Button Label.
5. Select a size.
9.8.3.4 Bold
This setting’s default is set on the Page Set tab. If you would like to override the Page Set default in this instance,
set Match Page Set setting to Off. To align this setting with the rest of the Page Set, set Match Page Set setting to
On.
1. Select the Edit button.
2. Select a button.
3. Select the Style category.
4. Select Bold under Button Label.
5. Set bold to On or Off.
9.8.4 Button Layout
This setting’s default is set on the Page Set tab. If you would like to override the Page Set default in this instance,
set Match Page Set setting to Off. To align this setting with the rest of the Page Set, set Match Page Set setting to
On.
1. Select the Edit button.
2. Select a button.
3. Select the Style category.
4. Select Layout under Button Layout.
5. Select a layout from the list.

TD Snap® Users Manual v.1.33-en-US 9 Editing
59
Label Top, Image Bottom
Label Bottom, Image Top
Label Left, Image Right
Label Right, Image Left
Label Only
Image Only
9.8.5 Button Link Visualization
This setting’s default is set on the Page Set tab. If you would like to override the Page Set default in this instance,
set Match Page Set setting to Off. To align this setting with the rest of the Page Set, set Match Page Set setting to
On.
Set the link visualization style for the selected button.
1. Select the Edit button.
2. Select a button.
3. Select the Style category.
4. Select Link Visualization under Button Link Visualization.
5. Select a link visualization style from the list.
Table8: Link visualization styles
None Do not show a link visualization.
Navigation icon A small icon appears in the corner of the button
indicating what it does (link to another page,
visit page, or go back).

60
9 Editing TD Snap® Users Manual v.1.33-en-US
Folder for link Link button is shaped like a folder. Style
applies to Link buttons only, not Go Back or
Visit buttons.
Corner tab for link Link button has a gray triangle in one corner.
Style applies to Link buttons only, not Go Back
or Visit buttons.
9.9 Link to Page/Create New Page
Link buttons open a different page when selected. By default, link buttons are identified by this icon or the visit icon
. To change the appearance of link and visit buttons, see section 10.3.6 Page Set Link Visualization, page80.
9.9.1 Create a Link Button in an Empty Cell
1. Select the Edit button.
2. Select the link icon in an empty cell.
– To link to a brand new page, see section 9.9.3 Link to a New Page/Create New Page, page61.
– To link to an existing page, see section 9.9.4 Link to Existing Page, page61.
– To link to a (new) copy of an existing page, see section 9.9.5 Link to a New Copy of an Existing Page, page61.
– To import and link to a page, see section 9.9.6 Import and Link to Page, page61.
9.9.2 Create a Link From an Existing Button
1. Select the Edit button.
2. Select the button that you would like to create a link from.

TD Snap® Users Manual v.1.33-en-US 9 Editing
61
3. Select the Button tab.
4. Select the Action category.
5. Select Add Action.
6. Select Link.
– To link to a brand new page, see section 9.9.3 Link to a New Page/Create New Page, page61.
– To link to an existing page, see section 9.9.4 Link to Existing Page, page61.
– To link to a (new) copy of an existing page, see section 9.9.5 Link to a New Copy of an Existing Page, page61.
– To import and link to a page, see section 9.9.6 Import and Link to Page, page61.
9.9.3 Link to a New Page/Create New Page
1. Select Link to new page. The New Page dialog will open.
2. Type the page name into the Name field. Select a symbol, or select the X if you do not want to set a symbol for the
page.
3. Select Create to create the link and the new page. Select Cancel to return without saving.
9.9.4 Link to Existing Page
1. Select Link to Existing Page. The Link to Existing Page dialog will open.
2. Select a page from the list.
Type in the Search field to find a specific page, or select Recently Opened to find a page you’ve visited recently.
3. Select Save to create the link. Select Cancel to return without saving.
To learn about Visit Page see section 9.9.7 Visit Page, page62.
9.9.5 Link to a New Copy of an Existing Page
This linking method allows you to use a page as a template for the new page you create.
1. Select Link to Copy of Page. The Link to Copy of Page dialog will open.
2. Select a page from the list.
3. Enter a name for the new page in the Name field.
4. Select Save to create a copy of the selected page and the link. Select Cancel to return without saving.
Type in the Search field to find a specific page, or select Recently Opened to find a page you’ve visited recently.
To learn about Visit Page see 9.9.7 Visit Page, page62.
9.9.6 Import and Link to Page
If you have a page bundle file containing a page that you would like to link to, you can import the page and link to it all in
one step using Import and Link to Page.
1. Select Import and Link to Page. You may choose to import from myTobiiDynavox or from a local file:
From myTobiiDynavox
– Select From myTobiiDynavox.
You may be prompted to log in to myTobiiDynavox. The Select Page Bundle from myTobiiDynavox dialog
opens.
– Select the Page Bundle that you would like to import, then select Next.
– Select the page that you would like to link to, then select Import.
From a Local File
– Select From a Local File. The Import Page Bundle from a Local File dialog opens.
– Select Browse. Navigate to the desired Page Bundle (.spb) and then select Open.
– Select Next.
– Select the page that you would like to link to, then select Import.

62
9 Editing TD Snap® Users Manual v.1.33-en-US
Page conflicts occur when the page bundle contains one or more pages that already exist on your device, but are
not identical. Select each page conflict icon, then choose whether to keep the existing page or
overwrite with the imported page from the page bundle. You must resolve all page conflicts in this manner before
you can proceed with the Page Bundle import.
9.9.7 Visit Page
When enabled, the Visit Page setting sets a link to return the user to the previous page after a selection that triggers a
return has been made on the linked page. Link buttons that have Visit Page enabled display this icon:
How Visit Page Works
1. Select the Visit Page link button. The linked page opens.
2. Make a selection on the linked page.*
The previous page (containing the Visit Page link button) opens.
* In order to trigger return to the previous page, the selected button must either contain one of the following
actions:
● Speak or Insert Message
● Speak Sentence
● Return from Visit
Or, be one of the following button types, which also trigger return to the previous page:
● Grammar button
● Inflector button
● Predictor button
● On-screen keyboard button programmed with KeyType = space
The following actions and button types extend Visit mode and do not trigger return to the previous page:
● Extend Visit
● Go Back
● Link
● Implied Subject
● Pause Access Method
● Chat
If a button contains multiple actions (some that trigger return to the previous page and some that extend visit
mode) return to the previous page is not triggered unless the button also contains Return from Visit.
The following actions cancel a visit:
● Cancel Visit
● Go Home
● Open Dashboard
● Open Keyboard
9.9.7.1 Enable Visit Page on a Link Button
1. Select the Edit button.
2. Select the Link button.
3. Select the Action category.
4. Select the Link action.
5. Set Visit Page to On.

TD Snap® Users Manual v.1.33-en-US 9 Editing
63
9.9.7.2 Extend, Cancel, or Return from Visit
You can use actions to interrupt or prolong a page visit that occurs after selecting a Visit button. If a selected button on
the visited page contains one of the following actions, it will change normal Visit behavior in the specified way:
● Extend Visit — remain in Visit mode, despite the action(s) on this button.
● Cancel Visit — exit Visit mode, but stay on the current page.
● Return from Visit — exit Visit mode immediately (before executing subsequent actions on this button) and return to
the original page. All actions on the button are executed.
9.10 Button Access Method Settings
Customize certain access method settings on individual buttons.
1. Select the Edit button.
2. Select a button.
3. Select the Access Method category.
4. For each access method setting, opt to match the User setting or set a custom value for the currently selected
button:
Eye Gaze Options
– Dwell Time — set the dwell time required for eye gaze users to select this specific button.
9.11 Button Language Rules
The language rules setting allows you to specify the language that will be used for symbol search, symbolate, word
prediction, inflection, auto-morphing, and speaking voice (if a language-specific voice has been set for that language) for
that button.
Buttons inherit a default language rules setting from the Page Set level settings or Page level settings. You can manually
set the language rules for a button by following the steps below:
1. Select the Edit button.
2. Select a button.
3. Select the Preferences category.
4. Select Language Rules.
5. Select a language from the list:
– Fully Supported Languages — affects symbol search, symbolate, word prediction, inflection, auto-morphing,
and speaking voice (if a language-specific voice has been set for that language).
The Neutral language is primarily for use with proper nouns (for example, Harriet Tubman or Amsterdam).
When words tagged as Neutral are sent to the Message Window, they will be spoken according to the language
rules of the other words currently in the message window. If the message window is otherwise empty, the
Neutral words will be spoken according to the language rules setting of the current or most recent non-neutral
page.
– Other Languages — the languages in this category have varying levels of support within the TD Snap® app.
9.12 Suffixes and Prefixes
Use buttons containing a prefix or suffix immediately before or after another word to create a new word in the Message
Window.
Suffixes and prefixes currently only work in English languages.
The User setting “Automatically form contractions” must be enabled. See section 14.12.2 Message Window Settings,
page104.
● Create a separate button for each suffix or prefix.
64
9 Editing TD Snap® Users Manual v.1.33-en-US
● Add a hyphen where the suffix or prefix joins with the other word to create a new word without a hyphen. For
example, “sad” + “-ness” = “sadness”
● Add two hyphens where the suffix or prefix joins with the other word to create a new word with a hyphen. For
example, “anti” + “smoking” = “anti-smoking”
● Spelling rules are not applied, so misspelled words and non-existent words are possible. For example, "happy" + "-
ness" = “happyness” and "place" + "-ment" + "-ship" + "-tion" = "placementshiption"
● Both the prefix or suffix and the other word must be entered into the Message Window using standard buttons, not
keyboard buttons.
Illustration34: Prefix and suffix button examples
9.13 Edit Supports
Topics contain pre-made supports to help with self-regulation and social communication. You can edit supports to
customize them to your needs. To learn more about the types of supports, see section 7.4.2 Supports, page24.
1. Go to the page that contains the support that you wish to edit.
2. Select the Edit button.
3. Select the button for the support to be edited.
4. Select the action (Mini-Schedule, Visual Timer, First Then, or Script).
5. Select the pencil icon in any row to make changes.
6. Select the Preview button at the bottom of the support editing panel to preview your changes to the Support.
7. When finished editing, select Done.
9.14 Remotes
Some Tobii Dynavox devices, such as the Indi and I-110, are equipped with an IR transmitter that can be controlled
through the TD Snap® software, enabling these devices to be used as remote controls for equipment such as televisions
and stereos. The Core First Page Set comes with pre-made remotes pages in the Dashboard. These remotes pages
contain buttons that are ready for you to program with your remote commands.
TD Snap® remotes do not work on the Tobii Dynavox I-12(+) or I-15(+) devices.
9.14.1 Program a Remote Button
The remote programming process only needs to be done once per button.
Have your remote control on hand. You will need it to teach the IR command to your device.
1. Select the Edit button.
2. Select the on-screen button that you would like to program to send the IR command.
3. Select the Button tab.
4. Select the Action category.
5. Select Add Action.
6. Select Send IR Signal.

TD Snap® Users Manual v.1.33-en-US 9 Editing
65
7. Select Record, then point the remote control at the IR panel on your Tobii Dynavox device and press the button on
the remote.
8. If you see the message “Recording succeeded!” select Done.
If you see the message “No signal was detected. Please try again.” return to step 7.
9.14.2 Using Remotes
Remotes are only available for compatible Tobii Dynavox devices.
You must set up your remote in advance by programming each remote button with the correct IR command. See
9.14.1 Program a Remote Button, page64.
Illustration35: Dashboard — Remotes button
1. Navigate to the remote page that corresponds to the equipment (television, stereo, etc.) that you would like to
control.
2. Point the IR window of your Tobii Dynavox device toward the equipment you would like to control.
3. Select the button for the desired command.
9.15 Edit Page
Changes made in the Page tab will affect only the current page. You can use the settings on the Page tab to override
some Page Set settings. For example, if you want the Message Bar visible for most pages, but not your Dashboard
page, you would do the following: 1. Enable Message Bar in Page Set settings. 2. Go to the Dashboard page. 3. Select
the Page tab. 4. Select Preferences 5. In Page Message Bar Visibility, disable Match Page Set setting: On. 6. Set
Message Bar Visibility to Off.
9.15.1 Page Name
Illustration36: Page Name
1. Select the Edit button.
2. Select the Page tab.
3. Type in the Label field to edit the Page Name.

66
9 Editing TD Snap® Users Manual v.1.33-en-US
9.15.2 Page Symbol
Illustration37: Page Symbol
1. Select the Edit button.
2. Select the Page tab.
3. Add or change the Page Symbol:
To search for a symbol in your symbol sets:
– Select the Symbol Search button.
– The Symbol Search dialog will open.
– Type in the text field to refine your search terms.
Optional: To filter your search results, select the Symbol Filter button, then select the features you
would like to see in your symbol search results (Adult, Child, Female, Male).
– Choose the desired symbol.
– Select Done.

TD Snap® Users Manual v.1.33-en-US 9 Editing
67
To search the web for an image (internet connection required):
– Select the Symbol Search button.
The Symbol Search dialog will open.
– Select the Web tab, then enter a search term in the text field.
– Choose the desired image.
– Select Done.
To use the camera to take a photo for the page image:
– Select the Camera button.
– Choose From Camera.
– Use the camera on your device to capture a photo.
To use an image stored on your local device:
– Select the Camera button.
– Choose From Photo Library.
68
9 Editing TD Snap® Users Manual v.1.33-en-US
– Use the file browser to navigate to the desired image file.
If you do not want to use a page symbol, select the X on the Page Symbol.
9.15.3 Page Language Rules
The Page Language Rules setting sets the default language rules for buttons on the page. The language rules setting
controls the language that will be used for symbol search, symbolate, word prediction, inflection, auto-morphing, and
speaking voice (if a language-specific voice has been set for that language).
Buttons inherit a default language rules setting from the Page Set level settings or Page level settings. When you set the
Page Language Rules, all existing buttons on the page will take on that setting and new buttons created on the page will
also default to that setting. To change the language rules for specific buttons, see section 9.11 Button Language Rules,
page63.
1. Select the Edit button.
2. Select the Page tab.
3. Select Language Rules.
4. Select a language from the list:
– Fully Supported Languages — affects symbol search, symbolate, word prediction, inflection, auto-morphing,
and speaking voice (if a language-specific voice has been set for that language).
The Neutral language is primarily for use with proper nouns (for example Albert Einstein or Coca-Cola). When
words tagged as Neutral are sent to the Message Window, they will be spoken according to the language rules
of the other words currently in the message window. If the message window is otherwise empty, the Neutral
words will be spoken according to the language rules setting of the Page Set.
– Other Languages — the languages in this category have varying levels of support within the TD Snap® app.
9.15.4 Page Grid Size
This setting’s default is set on the Page Set tab. If you would like to override the Page Set default in this instance,
set Match Page Set setting to Off. To align this setting with the rest of the Page Set, set Match Page Set setting to
On.
9.15.4.1 Change Page Grid Size
1. Select the Edit button.
2. Select the Page tab.
3. Select the Grid Size category.
4. Set Match Page Set Setting to Off.
5. Select Grid Size.
6. Select a grid size from the Optimized Grid Sizes or set the number of rows and columns to create a custom grid size.
Unless you are creating a completely custom page, it is strongly recommended to use the Page Set Optimized
Grid Sizes. The optimized grid sizes will display the pre-populated page content as designed by our clinical team,
while other grid sizes may not.
If you would like to display the Message Bar and/or Toolbar, you must choose a grid size of 3x3 or larger.
To change the size of the spaces between buttons, see section 10.3.7 Page Set Grid Margin, page81.
Table9: Sample grid sizes (not comprehensive)

TD Snap® Users Manual v.1.33-en-US 9 Editing
69
2x3 3x4 6x6
9.15.5 Page Background Color
This setting’s default is set on the Page Set tab. If you would like to override the Page Set default in this instance,
set Match Page Set setting to Off. To align this setting with the rest of the Page Set, set Match Page Set setting to
On.
1. Navigate to the page that you would like to have a different background color.
2. Select the Edit button.
3. Select the Page tab.
4. Select the Style section.
5. Set the Page Background Color Match Page Set Setting to Off.
6. Select Color. The Page Background Color list will open.
7. Select a color.
You can create your own custom colors! See section 9.19 Custom Colors, page74.
9.15.6 Show/Hide Message Bar
This setting’s default is set on the Page Set tab. If you would like to override the Page Set default in this instance,
set Match Page Set setting to Off. To align this setting with the rest of the Page Set, set Match Page Set setting to
On.
9.15.6.1 Change Message Bar Visibility
1. Select the Edit button.
2. Select the Page tab.
3. Select the Preferences category.
4. Set Match Page Set Setting to On to match the indicated setting or Off to make the Message Bar visibility different
on this page from the rest of the Page Set.
9.15.7 Delete Page
Deletion is a permanent operation. Only delete a page if you are sure you will not want to use it again in the future.
1. Navigate to the page you would like to delete.
2. Select the Edit button.
3. Select the Page tab.
4. Select Delete. The Delete Page dialog will open.
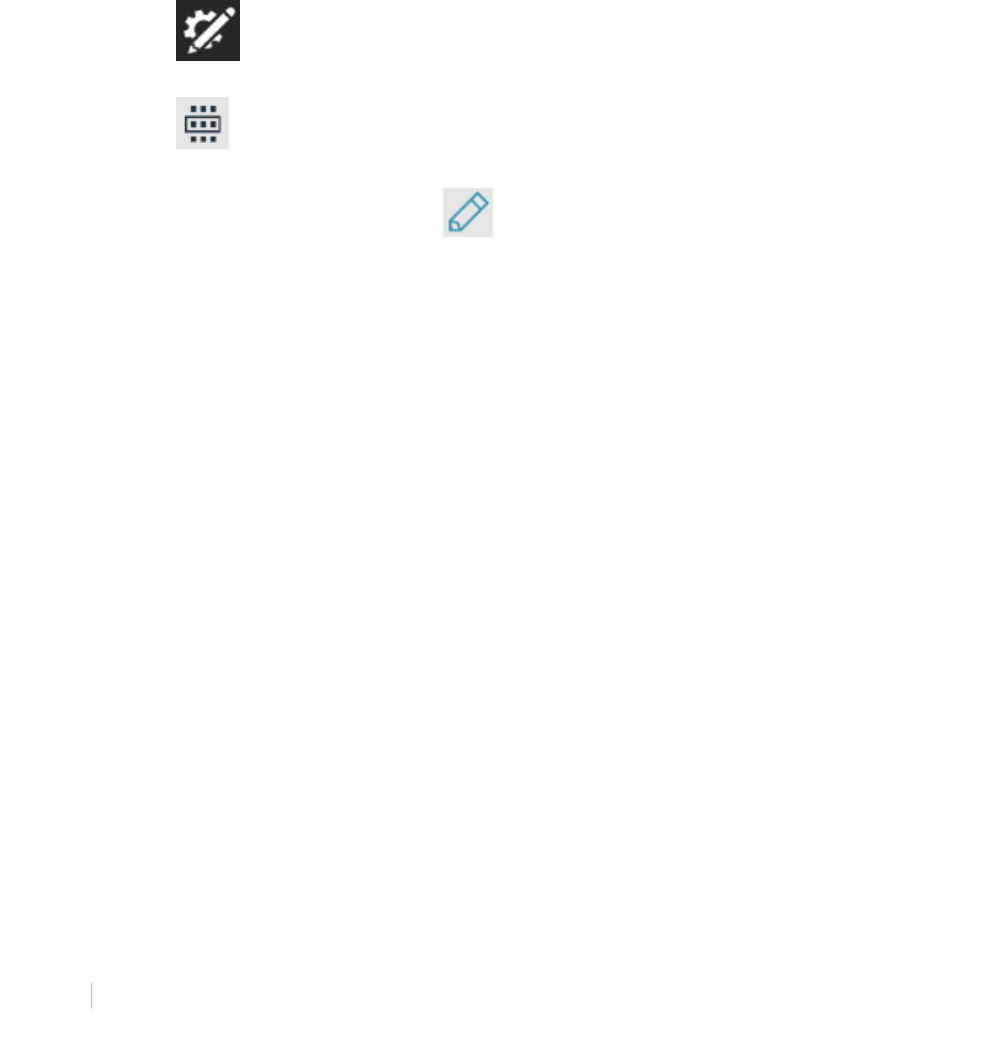
70
9 Editing TD Snap® Users Manual v.1.33-en-US
5. Select the Delete button to permanently delete the page, or select Cancel to return to Page settings without deleting
the page.
9.15.8 Import/Export Pages
See section 13.3 Page Bundles, page94.
9.16 Scan Groups
A scan group is an area containing buttons that scan as a single unit. When the scan group is selected, the buttons
within that area are then scanned. Using scan groups can make using the scanning access method much quicker.
To use scan groups, the Scanning access method must be active with the Group Scan setting enabled. For more
information see section 14.13.8 Scanning Options, page112.
Create and Edit Scan Groups
1. Select the Edit button.
2. Select the Page tab.
3. Select the Scan Groups tool.
The first scan group is created for you automatically.
4. To add areas to your scan group, select the Draw tool, then click on (or click and drag across) areas of
the page to add them to the scan group. The areas can be anywhere on the page, they do not need to touch each
other.

TD Snap® Users Manual v.1.33-en-US 9 Editing
71
5. To remove areas from the scan group, select the Erase tool, then click on each area you would like to
remove from the group.
You cannot add the Message Bar or Toolbar to a scan group. This is because the Message Bar and Toolbar are
always their own scan groups.
Scan groups are defined as areas of the page, not specific buttons. If you move a button, it may be in a different
scan group in the new position.
The scan sequence follows left to right, top to bottom progression. The scan group numbers are not related to scan
sequence.
Buttons on the page that are not in a scan group will scan individually.
Scan groups are specific to the grid size.
6. To create a new scan group, select the button in the lower left corner.
7. To navigate between scan groups, select the colored circle that matches the color of the scan group that you would
like to edit.
8. To delete a scan group, first select the scan group as described in the previous step, then select Delete
Scan Group.

72
9 Editing TD Snap® Users Manual v.1.33-en-US
Use the Scroll Up and Scroll Down arrows to scroll the page.
9.16.1 Scan Group Options
Scan Group Color
● Select the color tool to choose a color for the current scan group. The scan group colors only appear in
Edit mode, not in Use mode.
Scan Group Audio Cue
● Text entered into the Audio Cue field will be read when the group is scanned (if the Speak Audio Cue setting is
enabled).
● If you would like to record a custom Audio Cue track, see section 9.6.3.2 Make a Recording, page42.
Stay in Group
● When enabled, the scan will re-start within the scan group after a selection is made. This allows users to easily make
multiple selections within the same group. When Stay in Group is disabled, the scan sequence re-starts at the top of
the page after a selection is made.
9.17 Edit the Message Bar
Changes to the Message Bar apply to the entire Page Set.
9.17.1 Move and Resize Objects in the Message Bar
1. Select the Edit button.
2. Select the object (button or Message Window) in the Message Bar that you want to resize.
3. To resize the object, select and hold on one of the blue dots in the corners of the object, then drag to the desired
size.
To move the object, select and hold in the center of the object, then drag it left or right in the Message Bar.
The Message Window can only be resized larger into empty cells.
9.17.2 Add Buttons in the Message Bar
1. Select the Edit button.
2. Select an empty cell in the Message Bar.
If there are no empty cells in the Message Bar, you have three options:
– Make the Message Window smaller. See section 9.17.1 Move and Resize Objects in the Message Bar, page72.

TD Snap® Users Manual v.1.33-en-US 9 Editing
73
– Delete one or more buttons in the Message Bar. See section 9.17.3 Remove Buttons in the Message Bar,
page73.
– Increase the Grid Size. See section 10.2 Grid Size, page77.
3. Choose a button from the menu to add it to the Message Bar. To learn about the Message Bar buttons, see section
6 The Message Bar, page19.
Illustration38: Message Bar button menu
9.17.3 Remove Buttons in the Message Bar
1. Select the Edit button.
2. Select a button in the Message Bar.
3. Select Delete.
The Message Window cannot be deleted.

74
9 Editing TD Snap® Users Manual v.1.33-en-US
9.18 Edit the Toolbar
Illustration39: Core First toolbar, seen in Edit Mode, containing buttons, hidden buttons, and an empty cell.
1. Select the Edit button.
2. Select any button in the toolbar to edit it.
You may need to scroll to see the entire contents of the toolbar or to access the empty cells in the toolbar.
3. Click and hold, then drag buttons to reorder the buttons within the toolbar.
You cannot drag buttons between the page and the toolbar.
9.19 Custom Colors
You can create, edit, and save custom colors from any color menu in TD Snap®.
1. In Edit mode, select the object on which you would like to change the color.
2. Select Style.
3. Select the element color you would like to edit (border, background, text, etc).
4. Select the Edit color button.
5. Select Save to save your new color creation. Select Cancel to go back without saving.
6. Saved custom colors are available in the top section of the color menu each time you open the color menu.
To delete a saved custom color, select the color, then select Delete.

TD Snap® Users Manual v.1.33-en-US 9 Editing
75
To apply color changes to objects throughout the Page Set, select the Page Set tab.

76
10 Page Set Settings TD Snap® Users Manual v.1.33-en-US
10 Page Set Settings
10.1 Page Set
10.1.1 Choose Page Set
1. Select the Edit button.
2. Select the Page Set tab.
3. Select the row under Username’s Page Set.
4. Select a Page Set from the list.
10.1.2 Create New Page Set
Create Page Set from Pre-Installed, Copy of Existing User Page Set, or a Local File
1. Select the Edit button.
2. Select the Page Set tab.
3. Select the row under Username’s Page Set.
4. Select Create Page Set.
The Select Page Set dialog will open.
5. Choose a Page Set:
Pre-installed Page Sets tab
– These are pre-made Page Sets already installed in TD Snap® on your device.
User Page Sets
– Select one of your existing Page Sets to use as a template (create a copy).
Local Files
– Import a Page Set file (.sps) stored on your local device or a connected drive.
6. Select Next to create the new Page Set.
7. Enter a name for the new Page Set.
8. Select Create to create the Page Set. Select Cancel to return to Page Set settings without creating the new Page
Set.
Download Page Set From myTobiiDynavox
1. Select the Edit button.
2. Select the Page Set tab.
3. Select the current Page Set.
4. Select Download Page Set.
You may be prompted to log in to myTobiiDynavox.
5. Select a Page Set from the list, then select Download.
6. When the download is complete, enter a name for the Page Set, then select Save.
10.1.3 Rename Page Set and Edit Description
1. Select the Edit button.
2. Select the Page Set tab.

TD Snap® Users Manual v.1.33-en-US 10 Page Set Settings
77
3. In the list of User’s Page Sets, select the Edit button beside the name of the Page Set you would like
to rename. The Edit Page Set Info dialog will open.
4. Edit the text in the Name field and/or the Description field.
5. Select Save to save your changes. Select Cancel to return to the list of Page Sets without saving.
10.1.4 Delete Page Set
1. Select the Edit button.
2. Select the Page Set tab.
3. In the list of User’s Page Sets, select the Delete button beside the name of the Page Set you would like to
delete.
4. Select the red Delete button.
5. Select Delete to permanently remove the Page Set. Select Cancel to return to the list of Page Sets without deleting.
You cannot delete the currently active Page Set.
10.1.5 Set Home Page
1. Select the Edit button.
2. Select the Page Set tab.
3. Select Home page.
4. Select a page from the list.
Type in the Search field to find a specific page, or select Recently Opened to find a page you’ve visited recently.
The recommended Home Page for grid sizes 1x1 through 2x3 is Supported Navigation. For grid sizes 3x3 and
larger, Core Words is the suggested Home Page.
10.1.6 Set Keyboard Page
1. Select the Edit button.
2. Select the Page Set tab.
3. Select Keyboard page.
4. Select a page from the list.
Type in the Search field to find a specific page, or select Recently Opened to find a page you’ve visited recently.
Use the search term “keyboard” to help narrow your search results to Keyboard pages.
10.2 Grid Size
Some Page Sets, such as Motor Plan and P.O.D.D., tie specific grid sizes to specific versions of the Page Set. To
use a different grid size with those Page Sets, you must choose a different version of the Page Set.
The Grid Size selected in Page Set Settings is the default grid size for the user. All pages will default to the grid size
chosen in Page Set Settings unless otherwise specified in Page settings.

78
10 Page Set Settings TD Snap® Users Manual v.1.33-en-US
1. Select the Edit button.
2. Select the Page Set tab.
3. Select the Grid Size category.
4. Select a grid size from the list of Optimized Grid Sizes or select the number of rows and columns to create a custom
grid size.
Unless you are creating a completely custom page, it is strongly recommended to use the Page Set Optimized
Grid Sizes. The optimized grid sizes will display the pre-populated page content as designed by our clinical team,
while other grid sizes may not.
If you would like to display the Message Bar and/or Toolbar, you must choose a grid size of 3x3 or larger.
To change the size of the spaces between buttons, see section 10.3.7 Page Set Grid Margin, page81.
Table10: Sample grid sizes (not comprehensive)
2x3 3x4 6x6
10.3 Page Set Style
The settings made in Page Set Style define the look of the Page Set. All pages in the Page Set, including new pages, will
use these style settings unless they are manually overridden at the page or button level.
10.3.1 Symbol Skin Tone and Hair Color
Set the skin tones and hair colors used in symbols that depict people. The Diverse setting, which uses a variety of skin
tones and hair colors, is the default. If a specific skin tone or hair color is chosen, those selections are used for all
symbols.
Symbol skin tone and hair color settings do not apply to the following:
● Symbols depicting specific individuals (celebrities, historical figures, etc.)
● Symbols that are displayed within Boardmaker activities played in TD Snap
● The Snap Aphasia Photos symbol set
If METACOM symbols are used in the current Page Set, the hair color setting is not available.
1. Select the Edit button.
2. Select the Page Set tab.
3. Select the Style category.
4. Select Skin Tone or Hair Color under Style.
5. Select one of the following options:
– Not Set — Show the symbols as they were originally designed by the symbol artists.
– Diverse — Use a variety of colors in your symbols.
– New — Design a custom color to apply to all symbols.
– Color — Choose a color from the Colors section to apply to all symbols.

TD Snap® Users Manual v.1.33-en-US 10 Page Set Settings
79
Illustration40: Skin Tone and Hair Color not set
Illustration41: Skin Tone and Hair Color set to Diverse
Illustration42: Skin Tone and Hair Color set to specific colors
You can edit the colors in individual symbols using the Symbol Editor. See section 9.6.6 Edit Symbol, page45.
10.3.2 Page Set Button Labels Font
1. Select the Edit button.
2. Select the Page Set tab.
3. Select the Style category.
4. Select Font under Style.
5. Select a font.
10.3.3 Page Set Button Labels Font Size
1. Select the Edit button.
2. Select the Page Set tab.
3. Select the Style category.
4. Select Font under Style.
5. Select a font size.
10.3.4 Page Set Button Labels Bold
1. Select the Edit button.
2. Select the Page Set tab.
3. Select the Style category.
4. Select Bold under Style.
5. Set bold to On or Off.
10.3.5 Page Set Button Layout
1. Select the Edit button.
2. Select the Page Set tab.
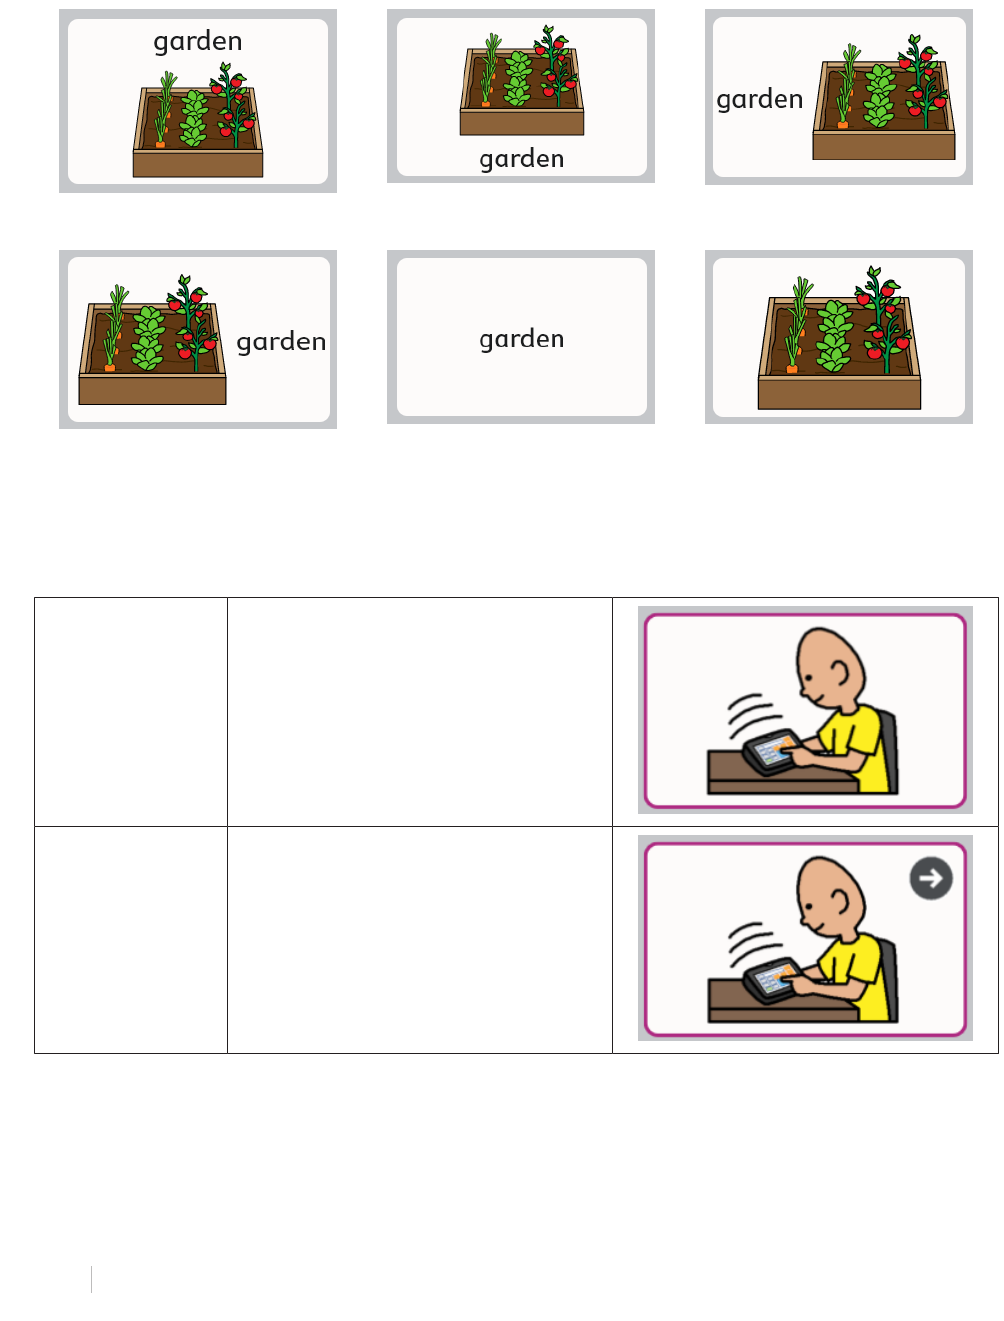
80
10 Page Set Settings TD Snap® Users Manual v.1.33-en-US
3. Select the Style category.
4. Select Button layout under Style.
5. Select a layout from the list.
Label Top, Image Bottom
Label Bottom, Image Top
Label Left, Image Right
Label Right, Image Left
Label Only
Image Only
10.3.6 Page Set Link Visualization
Set the appearance of buttons that go to other pages.
Table11: Link visualization styles
None Do not show a link visualization.
Navigation icon A small icon appears in the corner of the button
indicating what it does (link to another page,
visit page, or go back).
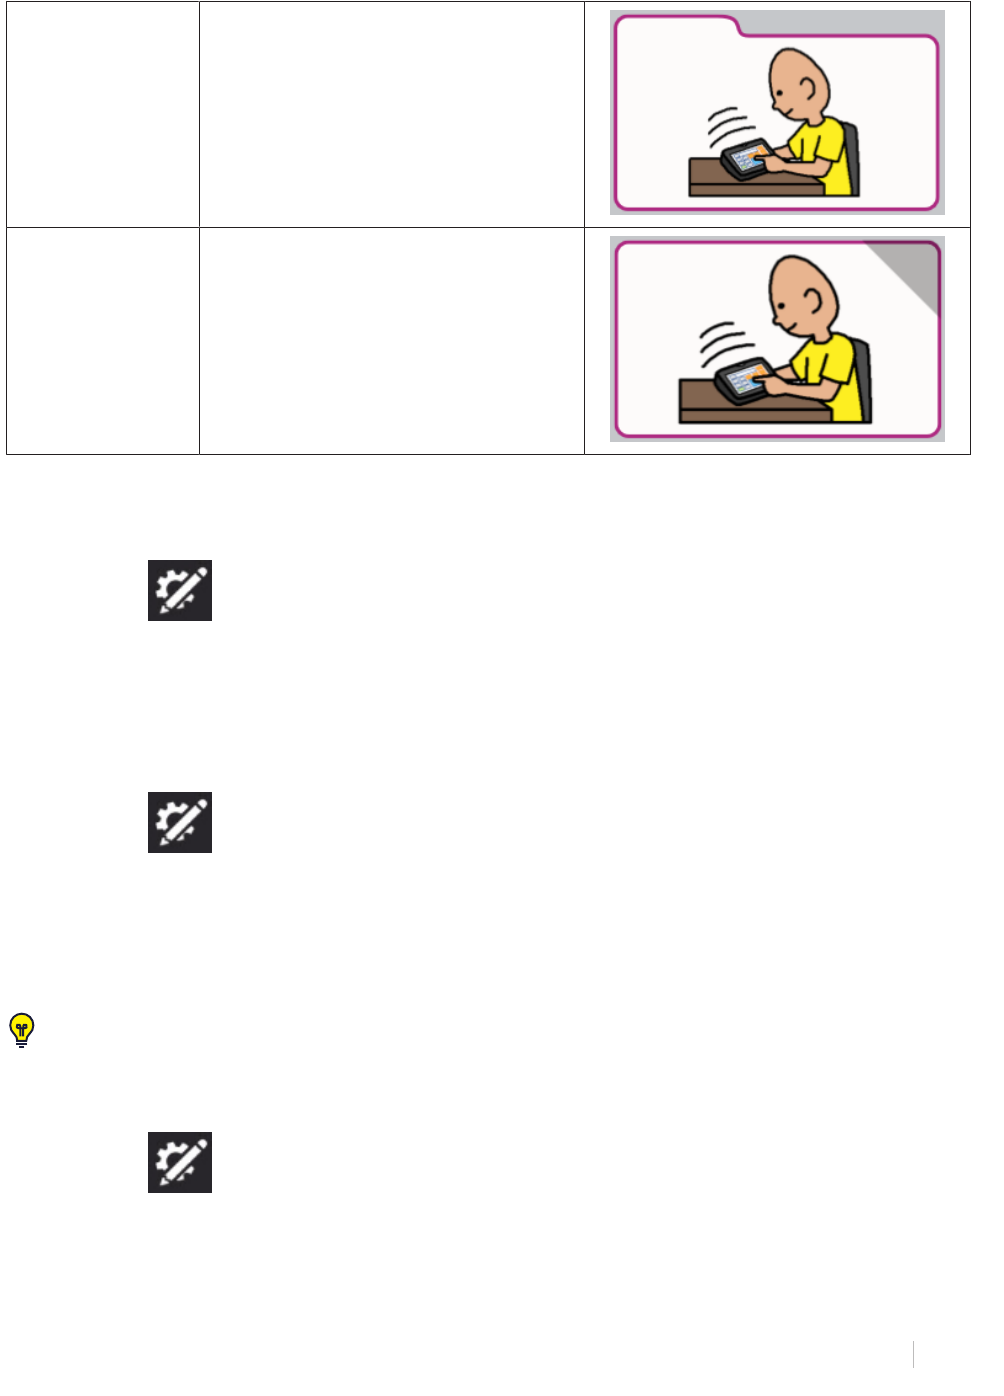
TD Snap® Users Manual v.1.33-en-US 10 Page Set Settings
81
Folder for link Link button is shaped like a folder. Style
applies to Link buttons only, not Go Back or
Visit buttons.
Corner tab for link Link button has a gray triangle in one corner.
Style applies to Link buttons only, not Go Back
or Visit buttons.
10.3.7 Page Set Grid Margin
Set the size of the gaps between buttons.
1. Select the Edit button.
2. Select the Page Set tab.
3. Select the Style category.
4. Select Grid Margin Factor under Grid Margin.
5. Choose a Grid Margin Factor size.
10.3.8 Page Set Default Background Colors
1. Select the Edit button.
2. Select the Page Set tab.
3. Select the Style category.
4. Select any of the following rows to change the specified background color:
– Page Background — Default color for the page background.
– Toolbar Background — Default color for the Toolbar background.
– Message Bar Background — Default color for the Message Bar (not the Message Window) background.
You can create your own custom colors! See section 9.19 Custom Colors, page74.
10.3.9 Page Set Message Window Font
1. Select the Edit button.
2. Select the Page Set tab.
3. Select the Style category.
4. Select Font under Message Window.
5. Choose a font.

82
10 Page Set Settings TD Snap® Users Manual v.1.33-en-US
10.3.10 Page Set Message Window Font Size
1. Select the Edit button.
2. Select the Page Set tab.
3. Select the Style category.
4. Select Font Size under Message Window.
5. Choose a font size.
10.3.11 Page Set Message Window Text Color
1. Select the Edit button.
2. Select the Page Set tab.
3. Select the Style category.
4. Select Text Color under Message Window.
5. Choose a text color.
You can create your own custom colors! See section 9.19 Custom Colors, page74.
10.3.12 Page Set Message Window Background Color
1. Select the Edit button.
2. Select the Page Set tab.
3. Select the Style category.
4. Select Background under Message Window.
5. Choose a color.
You can create your own custom colors! See section 9.19 Custom Colors, page74.
10.3.13 Page Set Message Window Speech Highlight Color
1. Select the Edit button.
2. Select the Page Set tab.
3. Select the Style category.
4. Select Speech highlight color under Message Window.
5. Choose a color.
You can create your own custom colors! See section 9.19 Custom Colors, page74.
10.3.14 Page Set Message Bar Background Color
1. Select the Edit button.
2. Select the Page Set tab.
3. Select the Style category.
4. Select Message Bar background under Message Window.
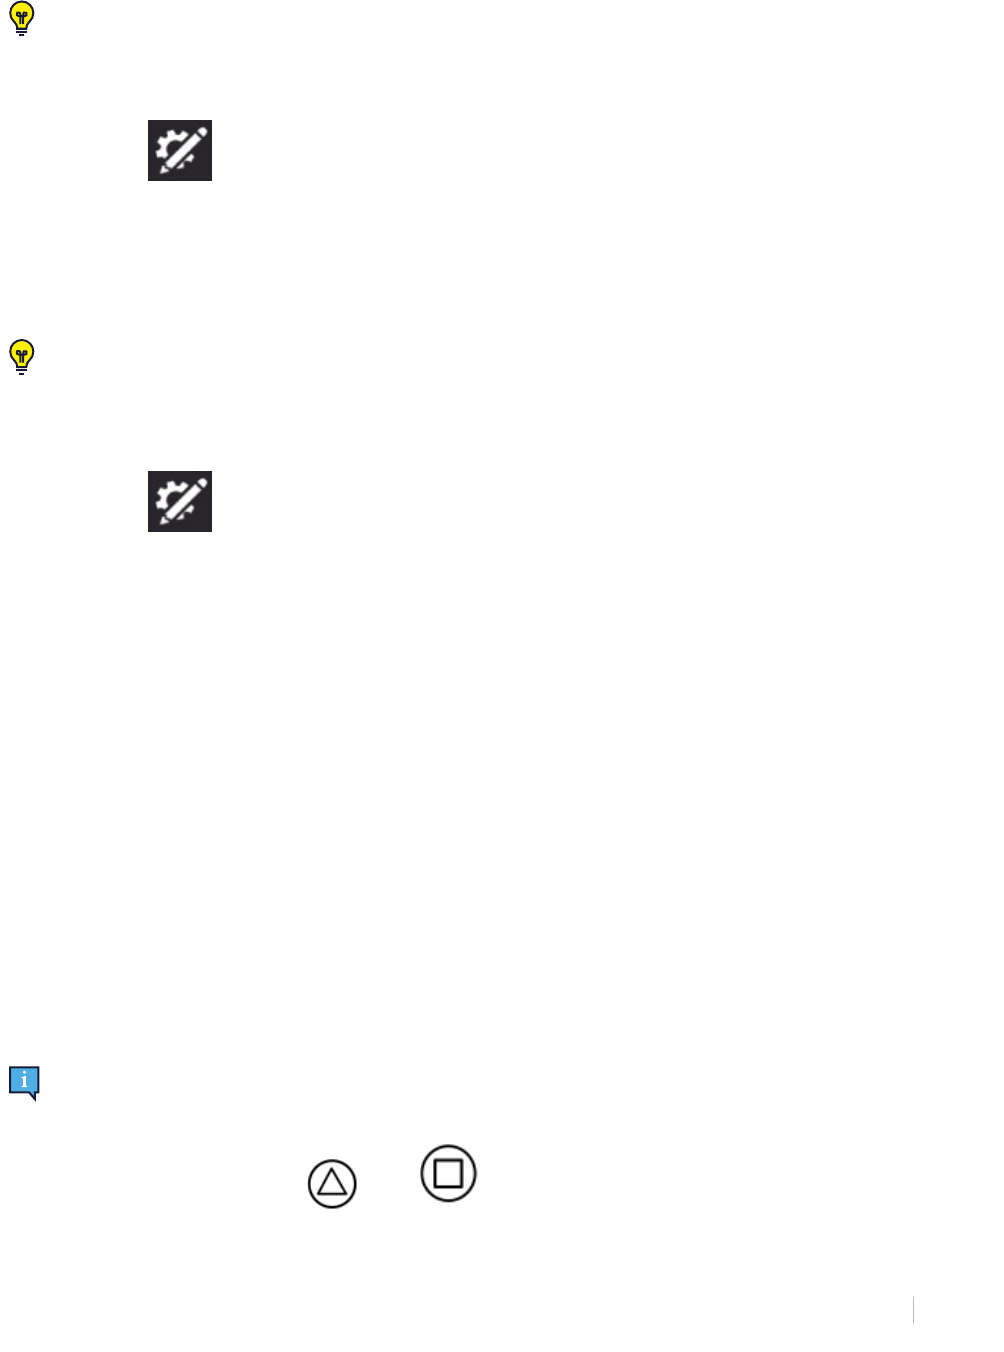
TD Snap® Users Manual v.1.33-en-US 10 Page Set Settings
83
5. Choose a color.
You can create your own custom colors! See section 9.19 Custom Colors, page74.
10.3.15 Navigation Button Style
1. Select the Edit button.
2. Select the Page Set tab.
3. Select the Style category.
4. Select Navigation Button Style under Navigation Buttons.
5. When Automatic is enabled, the colors are configured automatically for contrast and visibility in relation to the page
background color. When Automatic is disabled, you set the navigation button background color, border color, arrow
color, and border thickness to use throughout the page set.
You can create your own custom colors! See section 9.19 Custom Colors, page74.
10.4 Page Set Preferences
1. Select the Edit button.
2. Select the Page Set tab.
3. Select Preferences.
4. Select any of the following to change the specified setting:
Interface
– Message Bar On: When enabled, the Message Bar is displayed on each page by default.
– Toolbar Location: Choose to display the Toolbar on the left or the right side of each page or to turn off the
Toolbar.
Toolbar Rows
– Match Page Set Setting:When enabled, the number of rows available on the toolbar will match the number of
rows in the selected page set. To change the number of rows in the toolbar separately from the page set grid
size, disable this setting and set the desired number of rows.
Message Window
– Automatically Inflect Grammar buttons: When enabled, grammar buttons will dynamically update to match
the grammatical context of the contents of the Message Window.
– Automatically form contractions: When enabled, consecutive words will combine to form common
contractions or compound words.
Page Set Scan Groups
– 1. xxx, 2. yyy, 3. zzz: Set the orders for how the Page Set Scan groups; Page, Toolbar and Message bar,
should be scanned. Set the scan order, audio cues, and Stay in Group settings for the Page Set Scan groups;
Page, Toolbar and Message bar.
10.5 Adaptive Buttons
This section applies to Tobii Dynavox I-13 and I-16 devices only.
The adaptive buttons found on the front of the Tobii Dynavox I-13 and I-16 devices are selectable through Touch or Gaze
Interaction. Two of these buttons, the and buttons, can be programmed with TD Snap® actions that
will execute if selected using Gaze Interaction while using TD Snap®.

84
10 Page Set Settings TD Snap® Users Manual v.1.33-en-US
Set Adaptive Button Gaze Interaction Actions
1. Select the Edit button.
2. Select the Page Set tab.
3. Select Adaptive Buttons.
4. Select or from the list.
5. Select Add Action.
6. Select an action.
To add additional actions, repeat steps 5 and 6.
Set Adaptive Button Touch Actions
Adaptive Button Touch behavior is set in the Tobii Dynavox Hardware Settings app. You can launch this app
directly using the shortcut found on your desktop or through TD Snap® as described below.
1. Select the Edit button.
2. Select the Page Set tab.
3. Select Adaptive Buttons.
4. Select Set actions for touch. The Tobii Dynavox Hardware Settings app will launch.
5. Use the drop down menus in the Hardware Settings app to choose the actions for the adaptive buttons when they
are selected using Touch.
Adaptive Button Touch behavior is set in the Tobii Dynavox Hardware Settings app. You can launch this app
directly using the shortcut found on your desktop or through TD Snap® as described below.
10.6 Page Set About
This section displays the version number of the Page Set and Content Developer Settings.
10.6.1 Page Set Content Developer Settings
Special settings for advanced Page Set creators.
10.6.1.1 Set Optimized Grid Sizes
Set which grid sizes appear in the Optimized Grid Sizes list for this Page Set.
1. Select the Edit button.
2. Select the Page Set tab.
3. Select About.
4. Select Content developer settings.
5. Select Grid Sizes.
6. To add a grid size to the list, scroll to the right and select Add New Size. The Add Optimized Grid Size dialog will
open.
7. Choose the number of Rows and Columns for your new Optimized Grid Size (up to 15 x 15), then select Save.
8. To remove an Optimized Grid Size, select the Delete icon on the grid size in the list. The Delete Grid Size Warning
will appear. If you are sure you want to delete the grid size, select Delete. Otherwise, select Cancel to close the
warning without deleting.

TD Snap® Users Manual v.1.33-en-US 10 Page Set Settings
85
10.6.1.2 Page Set Language Rules
The Page Set Language Rules setting sets the default language rules for buttons and pages in the Page Set. The
language rules setting controls the language that will be used for symbol search, symbolate, word prediction, inflection,
auto-morphing, and speaking voice (if a language-specific voice has been set for that language).
Buttons inherit a default language rules setting from the Page Set level settings or Page level settings. When you set the
Page Set Language Rules, all existing buttons in the Page Set will take on that setting and new buttons created in the
Page Set will also default to that setting. To change the language rules for specific pages in the Page Set, see section
9.15.3 Page Language Rules, page68. To change the language rules for specific buttons, see section 9.11 Button
Language Rules, page63.
1. Select the Edit button.
2. Select the Page Set tab.
3. Select About.
4. Select Content developer settings.
5. Select Language Rules.
6. Select a language from the list:
– Fully Supported Languages — affects symbol search, symbolate, word prediction, inflection, auto-morphing,
and speaking voice (if a language-specific voice has been set for that language).
– Other Languages — the languages in this category have varying levels of support within the TD Snap® app.

86
11 Print TD Snap® Users Manual v.1.33-en-US
11 Print
Print one or more pages to paper or PDF.
1. Select the Edit button.
2. Select the Page tab.
3. Select Print in the editing toolbar on the right side of the screen. The Select Pages to Print dialog opens.
You can also print from the Print Pages section on the Page tab.
4. The current page is added to the print queue by default. Select additional pages from the list to add them to the print
queue.
– Type in the Search field to search by Page Name.
– To add all pages in the current search results to the print queue, check Select All.
– If you check Select All, then uncheck Select All, your print queue is reset.
– To remove pages from the print queue, select the X beside the page name.
5. When the desired pages have been added to the print queue, select Next.
6. Choose your print options. The page preview updates to reflect the current settings.
– Message Bar: Disable this setting to hide the Message Bar on the printed page(s).
– Toolbar: Disable this setting to hide the Toolbar on the printed page(s).
– Link visualization: Disable this setting to hide the link indicator icons on link buttons on the printed page(s).
– Button usage counts: Enable this setting to show the current button usage counts on the printed page(s).
Note: Data tracking must be enabled to see button usage counts.
7. When you have finished choosing your print options, select Print.
8. Choose your printer (or print to PDF), color setting, and page orientation. Paper size options are available under
More settings.
Note: This dialogue will vary depending on your platform and default printer setting.
When you have finished configuring your printer settings, select Print.

TD Snap® Users Manual v.1.33-en-US 12 Google Assistant
87
12 Google Assistant
Discover the benefits of having a smart assistant thanks to the Google Assistant integration in TD Snap®. Instantly
access information, entertainment, environmental control, and more directly through the software.
Contraindication: TD Snap®, Google Assistant, and any associated smart appliances should never be, for the
user, the only means of communicating important information.
TD Snap®, Google Assistant, and any associated smart appliances or speakers are not to be used as life
supporting devices or for other critical purposes, and shall not be relied upon in case of loss of function due to
power loss or other causes.
Tobii Dynavox assumes no responsibility for any user’s conduct, and disclaims all liability for loss and/or harm
(including, but not limited to, property damage, personal injury and death) associated with the use of TD Snap®,
Google Assistant, smart appliances, speakers, or any combination thereof.
If using any other equipment besides an external Google Speaker, you must have an open communication device.
For help opening the device, contact Tobii Dynavox Technical Support.
12.1 Connect your Google account
To use Google Assistant, smart speakers, and smart appliances, you must first sign in to your Google account in TD
Snap®. See section 14.11 Google Account, page104.
12.2 Set up your Google devices
Follow the instructions that came with your devices to complete set up before using them with TD Snap®.
12.3 Google Assistant language support
It is important that you set up your Google Assistant with the same languages spoken using TD Snap®.
Before you change your Google Assistant’s language, make sure your mobile device or tablet is connected to the
same Wi-Fi network or linked to the same account as your Google Nest, Google Home speaker, or other Google
Assistant enabled device.
To change your Google Assistant language:
1. On your mobile device, open the Google Home or Google Assistant app.
2. At the top right, select your account >Assistant settings.
3. Select Assistant > Languages.
4. Select your current language.
5. Choose a new language.
To add a second language to your Assistant:
1. On your mobile device,open the Google Home or Google Assistant app.
2. At the top right, select your account > Assistant settings.
3. Select Assistant > Languages > Add a language.
4. Choose another language.
You can talk to the Google Assistant in either language, but not a mix of both languages within the same
utterance.

88
12 Google Assistant TD Snap® Users Manual v.1.33-en-US
12.4 Talk to Google Assistant
We encourage you to start out with our Google Assistant pages*. These pages are found in the Dashboard of most page
sets or you can download and import the pages from mytobiidynavox.com/PagesetCentral. The Google Assistant pages
contain buttons to use Google Assistant for finding information, playing music, making phone calls, home controls, and
more.
*Google Assistant and the Google Assistant pages are not available in all locales and languages.
To create your own Google Assistant buttons, see below.
To use Google Assistant, you must have an internet connection and be logged in with your Google account in TD
Snap® and any Google Assistant connected devices that you plan to use.
Depending on your equipment, you’ll send Google Assistant commands in slightly different ways. Be sure to follow the
instructions for the equipment you are using. Look for the icons below to find the steps that apply to you.
Google Assistant account only, no additional equipment.
Google Nest Mini or other Google speaker.
Create a button that sends a pre-programmed Google Assistant command to a Google speaker
This option is best for Google Assistant commands that will be used more than once.
1. Select the Edit button.
2. Select a button.
3. In the Message field, type the command that you want to send to your Google Assistant.
The message must begin with “Ok Google,” followed by the question or command.
4. In the Actions section, select the action Speak or Insert Message.
5. Select Always Speak.
To send unique Google Assistant commands on the fly, follow the steps above to create a button that contains
only the message “Ok Google,” In Use Mode, compose your Google Assistant command in the Message Window,
select the Ok Google button, then speak the Message Window to send the command.
Create a button that sends the button message text to Google Assistant on your device
This option is best for Google Assistant commands that will be used more than once.
1. Select the Edit button.
2. Select a button.
3. In the Message field, type the question or command that you want to send to your Google Assistant. Do not
type “Ok Google,” before the question or command.
4. Select Add Action.
5. Scroll down to the Environmental Control section and select Send Google Assistant Command.
6. Select Send button message text to Google Assistant.
Create a button that sends the Message Window text to Google Assistant on your device

TD Snap® Users Manual v.1.33-en-US 12 Google Assistant
89
This type of button will allow the user to compose unique Google Assistant commands in the Message Window and then
send them to Google Assistant.
1. Select the Edit button.
2. Select a button.
3. Select Add Action.
4. Scroll down to the Environmental Control section and select Send Google Assistant Command.
5. Select Send Message Window text to Google Assistant.
If you don’t get the result you expected, try different wording. For example, “Ok Google, turn on the light” did not
turn on the smart bulb. Instead, “Ok Google, turn on the family room light” turned on the smart bulb because it had
been set up in family room in the Google Home app.

90
13 Sharing and Saving TD Snap® Users Manual v.1.33-en-US
13 Sharing and Saving
TD Snap® offers several convenient ways to share and save your users, Page Sets, and pages. Whether you want to
keep your Page Set consistent across all of your devices or send some new pages to a friend, we’ve got you covered!
● Export/Import Locally (User, Page Set, Page Bundle) — Use when storing the file on your local machine, sharing
on a USB drive, or with people who do not have a myTobiiDynavox account.
● Export/Import through myTobiiDynavox* (Page Set, Page Bundle) — Share Page Sets and Page Bundles with
other myTobiiDynavox users. Store and access files privately on your own myTobiiDynavox account.
● Sync* (Page Set) — Share ongoing changes to a Page Set across your devices and with specified myTobiiDynavox
users. A Page Set shared through sync keeps an up-to-date version of the Page Set in the cloud, so that changes
made to the Page Set on any approved device/account are shared across all synced devices/accounts for that Page
Set.
*These sharing methods require an active internet connection.
Table12: File Types for Sharing and Saving — What They Contain
File Type Pages Page
Preferences
Page Set
Preferences
User
Preferences
System
Preferences
User Yes Yes Yes Yes No
Page Set Yes Yes Yes No No
Page Bundle Yes (Specified
Pages)
Yes No No No
13.1 Users
User backup files contain the Page Sets and settings associated with that user. User backup files do not contain voices.
However, voice settings are preserved and the selected voice will download automatically if it is not available on the
device (internet connection required).
Backup a User
See section 14.3 Backup a User, page97.
Restore a User
See section 14.4 Restore a User, page98.
13.2 Page Sets
A Page Set file contains all of the pages associated with that Page Set. It does not contain any user information or user-
level settings.
13.2.1 Import a Page Set
From myTobiiDynavox
1. Select the Edit button.
2. Select the Page Set tab.
3. Select the current Page Set.
4. Select Download Page Set.
You may be prompted to log in to myTobiiDynavox.
5. Select a Page Set from the list, then select Download.
6. When the download is complete, enter a name for the Page Set, then select Save.
From a Local File
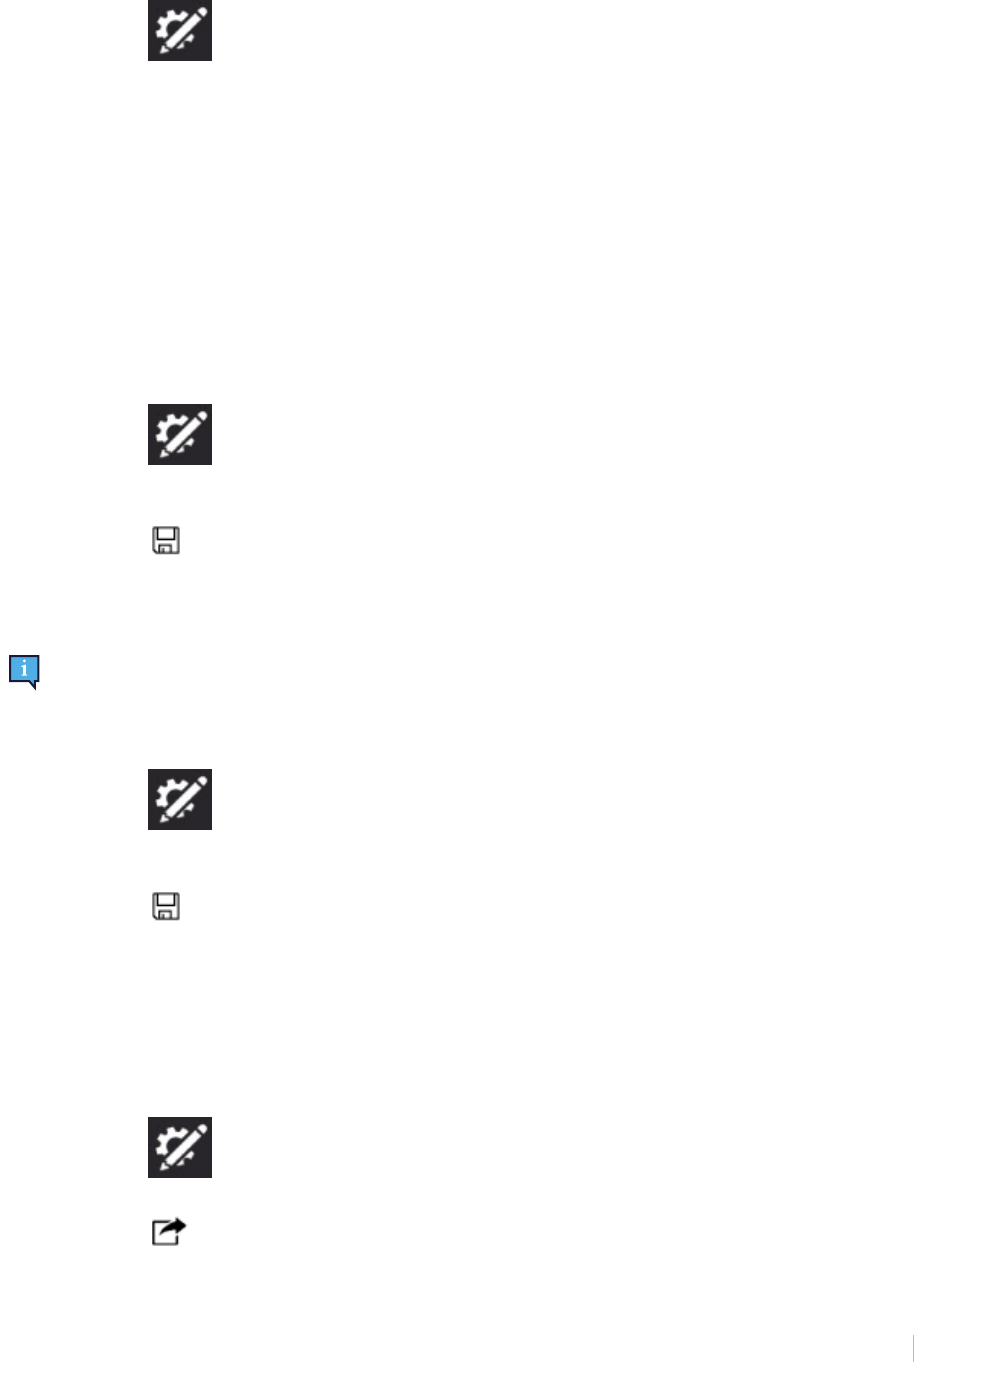
TD Snap® Users Manual v.1.33-en-US 13 Sharing and Saving
91
1. Select the Edit button.
2. Select the Page Set tab.
3. Select the current Page Set.
4. Select Create Page Set.
5. Select the Local Files tab.
6. Select Browse.
7. Navigate to the desired .sps file, select it, then select Open.
8. Select Next.
9. Enter a unique name for the Page Set, then select Create.
13.2.2 Save a Copy of a Page Set
13.2.2.1 Save Page Set to myTobiiDynavox
Page Set files saved to myTobiiDynavox can be found on myTobiiDynavox.com in My Stuff > Snap > Pagesets
1. Select the Edit button.
2. Select the Page Set tab.
3. Select the current Page Set.
4. Select the Save icon beside the Page Set that you would like to save.
5. Select Save a copy to myTobiiDynavox.
6. Enter a unique name for the Page Set and (optionally) a description, then select Save.
7. A status bar shows the saving progress. When complete, select Done.
You may be prompted to log in to myTobiiDynavox.
13.2.2.2 Save Page Set Locally
1. Select the Edit button.
2. Select the Page Set tab.
3. Select the current Page Set.
4. Select the Save icon beside the Page Set that you would like to save.
5. Select Save a copy to a local file.
6. Enter a unique name for the Page Set and (optionally) a description, then select Next.
7. Select Browse. Navigate to the directory where you would like to save your Page Set file, then select Save.
8. Select Save.
9. A status bar shows the saving progress. When complete, select Done.
13.2.3 Share a Copy of a Page Set (Through myTobiiDynavox)
1. Select the Edit button.
2. Select the Page Set tab.
3. Select the Share Page Set icon beside the Page Set that you would like to share.
4. Select Share a copy.

92
13 Sharing and Saving TD Snap® Users Manual v.1.33-en-US
5. Enter a unique name for the Page Set and (optionally) a description, then select Next.
6. Enter the myTobiiDynavox username or email account of the person to whom you are sending the Page Set, then
select the + to add them to the list of recipients. Repeat this process to add additional recipients. When you have
added all recipients, select Share.
7. A status bar shows the sharing progress. When complete, select Done.
If you would like to save a copy of a Page Set locally (to share through USB drive, email, etc.), see section 13.2.2.2
Save Page Set Locally, page91.
13.2.4 Sync Page Set
Sync is an easy way to maintain the same version of a Page Set across multiple devices. Sync stores an up-to-date
version of your Page Set in the cloud. When you press the Sync button, you send the changes you made to the Page Set
on your local device and also receive any changes that were made on other (Synced) devices*. When all devices have
Synced, they all have the same version of the Page Set.
The Sync button in the top bar lets you know when there is an updated version of the Page Set available or when you
have local changes to push to the cloud.
*Sync does not support merging changes from multiple devices to the same page in the same Sync. If changes are
made to the same page at the same time from multiple devices, the last device to Sync will overwrite with its version of
the page. The people involved in editing a Synced Page Set should communicate about which pages they are editing
and Sync frequently to avoid Syncing changes to the same page at the same time.
When Syncing across multiple devices or users, the navigation type setting must match for all Syncing devices/
users. See section 14.13 Access Method, page105.
Sync works with page sets up to 1 GB. Page sets that are over 1 GB will not Sync.
13.2.4.1 Sync Page Set to myTobiiDynavox
When you Sync a Page Set to myTobiiDynavox, you will have a copy of your Page Set stored on the myTobiiDynavox
server. You can use this as a quick and easy Page Set backup system and, if you have other devices running TD
Snap®, you can sync the Page Set on those devices as well.
Setting up the Page Set to Sync
1. Select the Sync button in the Top Bar. You may be prompted to enter your myTobiiDynavox
username and password.
2. Select Sync.
3. That’s it! Your Page Set is now Synced to your myTobiiDynavox account.
Each time you edit your Page Set, you must select the Sync button in the Top Bar to send those changes to the
cloud.
Sync the Page Set on Additional Devices
If a Page Set is already set up to Sync on one of your devices, you can Sync additional devices by following the steps
below on each device.
1. Select the Sync button in the Top Bar. You may be prompted to enter your myTobiiDynavox
username and password.
2. Select the Download Page Set icon.
3. Select the Page Set you would like to download and Sync, then select Download.
4. When the download is complete, select Done.
The downloaded Synced Page Set is automatically set to be the active Page Set.

TD Snap® Users Manual v.1.33-en-US 13 Sharing and Saving
93
Each time you edit your Page Set, you must select the Sync button in the Top Bar to send those changes to the
cloud and make the updated Page Set available for the other devices to Sync. It is best practice to Sync before
you make changes to the Page Set, then Sync again as soon as you are done editing.
13.2.4.2 Invite Someone to Sync with your Page Set
When other myTobiiDynavox users Sync with your Page Set, they are able to make changes to the Page Set on their
device(s) and Sync those changes to the cloud. The next time you Sync on your device, you will receive their changes.
Likewise, when you make changes to the Page Set and then Sync, those changes will be available to the other users
you have allowed to Sync with your Page Set.
Sync cannot merge changes from multiple users who have edited the same page at the same time. In this circumstance,
the last user to Sync will overwrite the page with their version. You should Sync immediately before and after making
changes to the Page Set and communicate with other users who Sync with your Page Set to avoid editing the same
page at the same time.
You should only Sync with people you trust to make appropriate changes to your Page Set.
Each time you edit your Page Set, you must select the Sync button in the Top Bar to send those changes to the
cloud and make the updated Page Set available for the other devices or users to Sync.
It is best practice to Sync before you make changes to the Page Set, then Sync again as soon as you are finished
editing.
1. Select the Sync button in the Top Bar. You may be prompted to enter your myTobiiDynavox
username and password.
2. Select the Share Page Set icon.
3. Enter the myTobiiDynavox username or email address of the person to whom you are sharing the Page Set, then
select the + to add them to the list of recipients. Repeat this process to add additional recipients. When you have
added all recipients, select Share.
4. When the share process is complete, select Done. The recipient(s) will receive share alerts via email and in the TD
Snap® app.
Sync alerts may take up to an hour to appear after the invitation has been sent. You can check for alerts at any
time by selecting the Sync icon.
13.2.4.2.1 Revoke Sync Permissions
You can remove users from Synced Page Sets (that you own) at any time.
1. Select the Sync button in the Top Bar.
2. Select the Share Page Set icon.
3. Users with Sync permission for the current Page Set are listed in the blue box. To remove a user, select the X
beside their name/email address, then select Update.
4. Select Done.
13.2.4.3 Sync with Page Sets Owned by Others
When someone shares a Page Set for syncing with you, the Sync icon in the Top Bar will show an alert icon
. Follow the steps below to accept or decline the invitation.

94
13 Sharing and Saving TD Snap® Users Manual v.1.33-en-US
Sync alerts may take up to an hour to appear after the invitation has been sent.
Accept the Sync Invitation
1. Select the Sync button in the Top Bar.
2. Select the Download Page Set icon.
3. Select Browse Page Sets available on your myTobiiDynavox account.
4. Select the Page Set you would like to download and Sync, then select Download.
5. When the download is complete, select Done.
Decline the Sync Invitation
1. Select the Sync button in the Top Bar.
2. Select the Download Page Set icon.
3. Select Browse Page Sets available on your myTobiiDynavox account.
4. Select the Page Set you would like to decline, then select the Delete icon.
5. Select Decline.
13.2.4.4 Revert Synced Page Set to a Previously Saved Version
You can go back to a previous version of a Synced Page Set. This feature is useful if you have made changes to the
Page Set that you want to discard or undo.
1. Select the Sync button in the Top Bar.
2. Select Saved Versions.
3. Find the Sync date in the list that you would like to restore, then select Restore.
13.2.4.5 Overwrite Synced Page Set
Use Overwrite to guarantee that your current version of the Page Set is the version of the Page Set that is also stored in
the cloud (regardless of changes that may have been Synced by other users).
1. Select the Sync button in the Top Bar.
2. Select Advanced.
3. Select Overwrite.
13.2.4.6 Pull-only Sync
When you Sync in Pull-only Mode, you will receive Page Set changes (made on other devices) but will not send any
Page Set changes made on the current device. To use Pull-only Mode, access to Edit Mode must be restricted with a
Passcode. To set up a Passcode and Pull-only Mode, see section 15.1.1 Passcode, page119.
13.3 Page Bundles
You can share a subset of your Page Set (one or more pages of your choosing) as a Page Bundle. Page Bundles
contain only the specified pages. If the pages contain buttons with links to pages that do not exist on the recipient device,
the links will do nothing.

TD Snap® Users Manual v.1.33-en-US 13 Sharing and Saving
95
13.3.1 Export Page Bundle
Export Page Bundle to myTobiiDynavox
1. Select the Edit button.
2. Select the Page tab.
3. Select Import/Export Pages.
4. Select Export Page Bundle.
5. Select To myTobiiDynavox.
6. Select the pages you would like to include in the Page Bundle. Selected pages display a check mark in the list and
appear in the blue box.
The current page is included in the Page Bundle automatically. To remove it or any other page from the Page
Bundle, select the X beside the page name in the blue box.
7. When you have added the desired pages to the Page Bundle, select Next. The Name the Page Bundle dialog will
open.
8. Enter a name for the Page Bundle in the Name field and (optionally) describe the pages in the Description field.
9. Select Export to save the Page Bundle to myTobiiDynavox.
10. When the export is complete, select Done.
Export Page Bundle to a Local File
1. Select the Edit button.
2. Select the Page tab.
3. Select Import/Export Pages.
4. Select Export Page Bundle.
5. Select To a Local File.
6. Select the pages you would like to include in the Page Bundle. Selected pages display a check mark in the list and
appear in the blue box.
The current page is included in the Page Bundle automatically. To remove it or any other page from the Page
Bundle, select the X beside the page name in the blue box.
7. When you have added the desired pages to the Page Bundle, select Next. The Name the Page Bundle dialog will
open.
8. Enter a name for the Page Bundle in the Name field and (optionally) describe the pages in the Description field.
9. (Windows only) Select Next.
10. (Windows only) Select Browse. Navigate to the directory where you would like to save your Page Set file, then
select Save.
11. Select Export.
12. When the export is complete, select Done.
Export Page Bundle for Sharing (through myTobiiDynavox)
1. Select the Edit button.
2. Select the Page tab.
3. Select Import/Export Pages.
4. Select Export Page Bundle.
5. Select For Sharing.
6. Select the pages you would like to include in the Page Bundle. Selected pages display a check mark in the list and
appear in the blue box.
The current page is included in the Page Bundle automatically. To remove it or any other page from the Page
Bundle, select the X beside the page name in the blue box.
7. When you have added the desired pages to the Page Bundle, select Next. The Name the Page Bundle dialog will
open.
8. Enter a name for the Page Bundle in the Name field and (optionally) describe the pages in the Description field.

96
13 Sharing and Saving TD Snap® Users Manual v.1.33-en-US
9. Select Next. The Share Page Bundle dialog will open.
10. Enter the myTobiiDynavox username or email account of the person to whom you are sending the Page Set, then
select the + to add them to the list of recipients. Repeat this process to add additional recipients. When you have
added all recipients, select Share.
11. When the export is complete, select Done.
13.3.2 Import Page Bundle
Import Page Bundle from myTobiiDynavox
Use this option to import a Page Bundle that you have saved to your own myTobiiDynavox account or a Page Bundle
that another myTobiiDynavox user has shared with you.
1. Select the Edit button.
2. Select the Page tab.
3. Select Import/Export Pages.
4. Select Import Page Bundle.
5. Select from myTobiiDynavox. The Select Page Bundle from myTobiiDynavox dialog will open.
6. Select a Page Bundle from the list.
7. To download the selected Page Bundle, select Next.
8. Review the list of pages contained within the Page Bundle. To proceed with the Page Bundle import, select Import.
To abort Page Bundle import, select Cancel.
Page conflicts occur when the page bundle contains one or more pages that already exist on your device, but are
not identical. Select each page conflict icon, then choose whether to keep the existing page or
overwrite with the imported page from the page bundle. You must resolve all page conflicts in this manner before
you can proceed with the Page Bundle import.
Import Page Bundle from a Local File
1. Select the Edit button.
2. Select the Page tab.
3. Select Import/Export Pages.
4. Select Import Page Bundle.
5. Select from a local file.
6. Select Browse. Navigate to the Page Bundle file (.spb) you would like to import and select it, then select Open.
7. Select Next. The Review Page Bundle dialog will open.
8. Review the list of pages contained within the Page Bundle. To proceed with the Page Bundle import, select Import.
To abort Page Bundle import, select Cancel.
Page conflicts occur when the page bundle contains one or more pages that already exist on your device, but are
not identical. Select each page conflict icon, then choose whether to keep the existing page or
overwrite with the imported page from the page bundle. You must resolve all page conflicts in this manner before
you can proceed with the Page Bundle import.
Import Page Bundle and Link
You can import a Page Bundle and create a link all at once using Import and Link!
See section 9.9.6 Import and Link to Page, page61.

TD Snap® Users Manual v.1.33-en-US 14 User Settings
97
14 User Settings
User Settings help customize the user experience in the TD Snap® software. Each user can have his or her own custom
settings that are applied when you load the user in the software.
14.1 Change User
1. Select the Edit button.
2. Select the User tab.
3. Select the current user.
4. Select a user from the Choose a User list.
The user with the check mark is the currently active user.
14.2 Create a New User
1. Select the Edit button.
2. Select the User tab.
3. Select New User.
4. Follow the steps in the User Setup Wizard to create a new user. Select the X to cancel new user creation.
14.3 Backup a User
Backup to myTobiiDynavox
1. Select the Edit button.
2. Select the User tab.
3. Select the arrow to the right of the current user.
4. Select the Backup button beside the name of the user you would like to back up.
5. Select Backup to myTobiiDynavox.
If you are not currently logged in to your myTobiiDynavox account you will prompted to do so now.
6. Enter a name for your user backup file, then select Next.
It may be helpful to include the backup date in the file name.
7. Select Done.
Local user backup files can also be moved to myTobiiDynavox manually. Use your web browser to go to
myTobiiDynavox.com and log in, then go to Snap > Backups and select Upload Backup.

98
14 User Settings TD Snap® Users Manual v.1.33-en-US
Backup to a Local File
1. Select the Edit button.
2. Select the User tab.
3. Select the arrow to the right of the current user.
4. Select the Backup button beside the name of the user you would like to back up.
5. Select Back up to a local file.
6. (Windows) Browse to the directory where you will save the backup file, then choose Save.
(iPadOS) Enter a name for the backup file.
7. Select Backup.
14.4 Restore a User
Restore a user from myTobiiDynavox
1. Select the Edit button.
2. Select the User tab.
3. Select the arrow to the right of the current user.
4. Select New User.
5. Select Restore Existing User.
6. If you are not currently logged in to myTobiiDynavox, enter your email and password then select Next.
7. Choose a user backup file from the list, then select Next.
Restore a user from a local file

TD Snap® Users Manual v.1.33-en-US 14 User Settings
99
On iPadOS, local user backup files that were created on a different device must first be moved into the TD Snap®
app through iTunes:
● Open iTunes on your Mac or PC.
● Connect your iPad to your computer using the USB cable that came with your device.
● Select your device in iTunes.
● In the left sidebar, select Apps. Then, scrollto the File Sharing section at thebottom of the page.
● Select TD Snap®.
● Drag the user backup file(s) into the TD Snap® Documents area.
● Follow the steps below to restore the user on your iPad.
1. Select the Edit button.
2. Select the User tab.
3. Select the arrow to the right of the current user.
4. Select New User.
5. Select Restore Existing User.
6. Select Restore from a local file.
7. (Windows) Browse to the user backup file and select it, then select Open.
(iPadOS) Select a user backup file from the list, then select Restore User.
14.5 Edit/Rename a User
1. Select the Edit button.
2. Select the User tab.

100
14 User Settings TD Snap® Users Manual v.1.33-en-US
3. Select the Edit button beside the name of the user you want to edit.
4. Type in the Name field.
5. Select Save to save the changes or Cancel to discard the changes.
14.6 Delete a User
Deleting a user from the device is a permanent operation. If you think you may need the user later, create a user
backup 14.3 Backup a User, page97 before performing the delete operation.
1. Select the Edit button.
2. Select the User tab.
3. Select the Delete button beside the name of the user you want to delete.
4. Select the red Delete button.
5. Select Delete to permanently delete the user. Select Cancel to return to the settings menu without deleting the user.
You cannot delete the currently active user.
14.7 myTobiiDynavox Account Log In
myTobiiDynavox account log in requires an active internet connection.
Some services in TD Snap®, such as Sync, require you to log in with your myTobiiDynavox account. Select Log in to
enter your myTobiiDynavox credentials or to create a new myTobiiDynavox account. If you are currently logged in, your
myTobiiDynavox user name or email will display in the myTobiiDynavox Account section.
14.8 Voice
14.8.1 Speaking Voice
The Speaking Voice is the voice that reads the contents of the message window and button messages.
The Speaking Voice is the default voice; it is not tied to a specific language. If language-specific voices have been
assigned, the language-specific voices will be used instead for those languages. To assign language-specific voices, see
14.10 Language-specific Voices, page103.
Illustration43: User Tab — Speaking Voice
1. Select the Edit button.
2. Select the User tab.
3. Select Speaking Voice.

TD Snap® Users Manual v.1.33-en-US 14 User Settings
101
14.8.1.1 Installed Voices
These are the voices currently available for immediate use on the device. They include both pre-installed voices and
voices downloaded to the device.
You may delete voices in the Installed list, but you cannot delete the currently active voice.
14.8.1.2 Additional Voices
See the speech engines and custom voice services that are supported in TD Snap®.
● Custom voices — TD Snap® (full) supports some custom synthetic voice services. Select Log in to start using your
custom synthetic voice service with TD Snap®.
● Speech engines — TD Snap® (full) includes one voice engine and access to all of the voices for that voice engine.
14.8.1.3 Personal Voices
TD Snap® supports iOS Personal Voice. The iPadOS setting Allow Apps to Request to Use must be enabled and
permission granted to TD Snap®.
To create a Personal Voice, follow the instructions provided by Apple: https://support.apple.com/en-us/104993. Note
that if you create the personal voice using another Apple device, you must enable the setting Share Across Devices to
use the voice on other devices signed in with the same Apple ID. iOS Settings > Accessibility > Personal Voice > Share
Across Devices
Enable Allow Apps to Request to Use Personal Voice
1. Quit TD Snap®.
2. Go to iPadOS Settings > Accessibility > Personal Voice.
3. Enable Allow Apps to Request to Use.
4. Close the iPadOS Settings app.
Allow TD Snap to use Personal Voice
1. Launch TD Snap®.
2. When prompted to Allow TD Snap® to use Personal Voice, select OK.
3. Select the Edit button.
4. Select the User tab.
5. Select Speaking Voice.
6. In the Personal Voices section of the voice list, select your Personal Voice.
14.8.1.4 Downloadable Voices
Download new voices.
You must have an active internet connection to download voices.
1. Select the Edit button.
2. Select the User tab.
3. Select Speaking Voice.
4. In the list of Downloadable voices, select Download next to the desired voice.
On iPadOS, voice download pauses when the TD Snap® app is minimized.
14.8.1.5 Platform Voices
These are the voices provided by your operating system and SAPI5 voices.

102
14 User Settings TD Snap® Users Manual v.1.33-en-US
Some voices may appear twice if they have both a native platform version and a SAPI5 version.
SAPI5 is Windows only
14.8.2 Voice Rate
The Voice rate is the speed at which words are spoken.
1. Select the Edit button.
2. Select the User tab.
3. Move the Voice rate slider to the left to speak more slowly, or to the right to speak more rapidly.
14.8.3 Voice Pitch
Pitch refers to how high or low the voice sounds.
1. Select the Edit button.
2. Select the User tab.
3. Move the Voice pitch slider to the left to set the pitch lower, or to the right to set the pitch higher.
14.8.4 Pronunciation Exceptions
Pronunciation Exceptions are words or acronyms that you teach the voice to pronounce in a specific way. Pronunciation
Exceptions are attached to the voice that is active when the Pronunciation Exceptions are created. If you switch to a
different voice and want to use the same pronunciation exceptions, you must import the Pronunciation Exceptions from
the previous voice.
Pronunciation Exceptions are also available for language-specific voices. See section 14.10 Language-specific Voices,
page103.
Pronunciation Exceptions cannot be imported across platforms (Windows ⇔ iPadOS).
Create a New Pronunciation Exception
1. Select the Edit button.
2. Select the User tab.
3. Select Pronunciation exceptions.
4. Select Add Pronunciation Exception.
The Add Pronunciation Exception dialog will open.
5. In the Word field, type the word as it is written.
6. In the Pronunciation field, type the word phonetically as you would like it to be pronounced.
To test the pronunciation, select the Preview button.

TD Snap® Users Manual v.1.33-en-US 14 User Settings
103
7. Select Done to save the Pronunciation Exception. Select Cancel to discard your changes and return to User
settings.
Acapela voices also accept pronunciation exceptions using the SAMPA phonetic alphabet. In the Pronunciation
field, enter \prn=phonetic codes go here\" but replace “phonetic codes go here” with the SAMPA codes for your
word. You must include the quote (“) at the end.
To see the phonetic codes and other details about using SAMPA for pronunciation exceptions, select the language
of your Acapela voice: Arabic, Czech, Danish, German, Australian English, Scottish English, British English,
American English, Catalan, Latin American Spanish, North American Spanish, Finnish, Canadian French, French,
Italian, Japanese, Norwegian, Belgian Dutch, Dutch, Brazilian Portuguese, Portuguese, Swedish, Finland Swedish,
North Sami, Turkish, Simplified Chinese.
Import a Pronunciation Exception
1. Select the Edit button.
2. Select the User tab.
3. Select Pronunciation exceptions.
4. Select Import from another voice.
5. Select the voice that has Pronunciation Exceptions that you would like to import.
Only voices that have Pronunciation Exceptions associated with them will appear in the list.
6. Select Import to import all Pronunciation Exceptions associated with the selected voice. Select Cancel to return to
User settings without importing.
When you have imported Pronunciation Exceptions from another voice, it is recommended that you test them with
the current voice. Select the Preview button on a Pronunciation Exception to hear it spoken with the
current voice.
14.9 Speech Output Device
1. Select the Edit button.
2. Select the User tab.
3. Select Speech Output Device.
4. Set Use default device to on to use the Windows default output device. Set Use default device to off to see the list of
available output devices.
– Select an output device from the list to use that device for speech output. To preview a device, select the play
button for the device.
14.10 Language-specific Voices
You can assign a voice to a language, so that content that is in that language is spoken with correct pronunciation.
104
14 User Settings TD Snap® Users Manual v.1.33-en-US
1. Select the Edit button.
2. Select the User tab.
3. Select Language-specific voices.
4. Select Add a voice for another language.
5. Select Language, then select a language from the Voice Language list. Select New Voice after you have chosen
your language.
6. Select Voice, then choose a voice from the Installed section of the Voice list. Select New Voice after you have
chosen your voice.
7. (Optional) Adjust the Voice rate for the selected language/voice.
8. (Optional) Add Pronunciation exceptions for the voice. See section 14.8.4 Pronunciation Exceptions, page102.
Some voices are available as a free download (internet connection required). Select Download beside the desired
voice. When the download is complete, find and select the voice in the Installed section of the Voice list.
14.11 Google Account
Connect your Google account to use Google Assistant, smart speakers, and smart appliances with TD Snap®.
1. Select the Edit button.
2. Select the User tab.
3. Scroll down and select Connect to Google. Your default web browser will open.
4. Sign in to your Google account.
5. When prompted, select Allow to grant permission to TD Snap® to communicate with Google Assistant on your
behalf.
6. Return to TD Snap®.
To log out of your Google account in TD Snap®, select Disconnect.
14.12 User Preferences
14.12.1 Speech Settings
1. Select the Edit button.
2. Select the User tab.
3. Select the Preferences category.
4. Set Always interrupt speech for new speech to On (ongoing speech will stop to speak a new command) or Off
(speech commands will queue so that the current speech will finish, then speak the newer speech command).
14.12.2 Message Window Settings
Illustration44: Use Symbols in Message Window enabled
1. Select the Edit button.
2. Select the User tab.

TD Snap® Users Manual v.1.33-en-US 14 User Settings
105
3. Select the Preferences category.
4. Set the following preferences to either On (enabled) or Off (disabled):
– Use Symbols in Message Window — When enabled, words and phrases in the Message Window will
symbolate.
– Always show cursor in the Message Window — When enabled, the cursor is always visible in the Message
Window. When disabled, the cursor is only visible when moved from the default position at the end of the
Message Window text.
– Speak when inserting into Message Window — When enabled, each word or phrase will speak as it is
entered into the Message Window.
– Speak characters — When enabled, each character will speak as it is entered into the Message Window.
To enable “Speak characters,” the setting “Speak when inserting into Message Window” must be enabled.
– Clear after speech — After the Message Window text has been spoken, the text is cleared on the next text
insert.
– Automatically capitalize — When enabled, the first letter of the first word of each sentence is capitalized
automatically. When disabled, capitalization must be entered manually by the user.
14.12.3 Prediction Settings
1. Select the Edit button.
2. Select the User tab.
3. Select the Preferences category.
4. Set Show symbols on Predictor buttons to On (Predictor buttons show a symbol for the currently predicted word) or
Off (Predictor buttons show only text).
14.12.4 Reset Word Prediction
Word prediction in TD Snap® learns from the messages spoken to make personalized word predictions. Resetting word
prediction restores the default word prediction in all languages for the current user.
1. Select the Edit button.
2. Select the User tab.
3. Select the Preferences category.
4. Select Reset Word Prediction.
5. Select Reset.
6. Select Reset in the confirmation window.
14.12.5 Sync Settings
1. Select the Edit button.
2. Select the User tab.
3. Select the Preferences category.
4. Set Enable Sync in Use Mode to On (Sync button is visible in the Top Bar in both Use Mode and Edit Mode) or Off
(Sync button is hidden in the Top Bar in Use Mode, but visible in Edit Mode).
14.13 Access Method
Touch
Objects are activated by touching the object on the screen with a finger or, when using a mouse, by clicking on the object
with the mouse cursor. This access method is suitable for users who are able to touch the screen quickly and accurately
or control and left click with a traditional computer mouse. Objects are activated as soon as they are touched or clicked.
Touch Enter

106
14 User Settings TD Snap® Users Manual v.1.33-en-US
Objects are activated by physically touching and holding on the object on the screen for a minimum amount of time or,
when using a mouse, by clicking and holding on the object for a minimum amount of time. The hold time is set by the
user. This access method is useful for users who may touch or click unintended objects accidentally.
Touch Exit
This method is similar to Touch Enter, but a selected object is activated when the selection is released. This method
allows the user to maintain contact with the touch screen without accidentally making a selection. This means that the
user may slide a finger or a pointer across the touch screen, or hold down on a mouse button while moving the cursor. A
selection will not be made until the finger or pointer lifts off the touch screen, or when the mouse button is released. This
makes the Touch Exit selection method ideal for a person who may find it easier to drag a finger or a pointer across the
touch screen while moving from selection to selection.
Auditory Touch
The user touches the screen to activate button audio cues that help them identify each button so that they can
confidently make selections. The access method settings can be configured to either use touch and drag to hear audio
cues, then lift the finger from the screen to select or touch once to hear the audio cue then touch again to select. This
access method is useful for users who have low vision or those who benefit from hearing audio cues.
Mouse Dwell
The Mouse Dwell access method requires that a computer mouse, track ball, or head mouse control the cursor on the
screen. An object is selected when the cursor pauses on an object for a specified amount of time or when the user
activates a switch. This access method is a good option for a person who has the physical ability to maneuver a mouse,
but who lacks the ability to press down on the mouse button to make selections.
Eye Gaze
This method allows the user to control TD Snap® using only their eyes. Selections are made either by fixating the gaze
on an object for a specified amount of time (dwell) or activating a switch. Gaze Interaction requires an eye gaze device
from Tobii Dynavox.
Scanning
When Scanning is the active selection method, objects on the screen highlight in a specific pattern. Scanning requires a
switch or keyboard key to make a selection when the desired item is highlighted. This access method is intended for
individuals whose motor skills may prevent them from effectively using direct selection methods.
To learn more about access methods, watch the Access Methods video found in System — Help & Tutorials.
14.13.1 Set the Access Method
1. Select the Edit button.
2. Select the User tab.
3. Select the Access Method category.
4. Select the current Access Method.
5. Select an Access Method from the list.
14.13.2 Touch Options
Touch is the default Access Method.
When using the Touch Access Method, objects are activated by touching the object on the screen with a finger or, when
using a mouse, by clicking on the object with the mouse cursor. This access method is suitable for users who are able to
touch the screen quickly and accurately or control and left click with a traditional computer mouse. Objects are activated
as soon as they are touched or clicked.
Navigation Type
The Navigation Type is the manner in which the user can scroll in the page and the toolbar. You can choose to scroll by
swiping your finger on the screen, selecting navigation buttons, or both.

TD Snap® Users Manual v.1.33-en-US 14 User Settings
107
Swiping
● Scroll the page and toolbar up and down by swiping your finger on the touch screen. (Touch Access Method only.)
Navigation Buttons
● Arrow buttons appear on the page and toolbar when there is additional content above or below. The arrow
navigation buttons are accessible to all Access Methods.
Swiping and Navigation Buttons
● Both swiping and navigation buttons are enabled, so that either navigation type can be used to move up and down
through the content. (Touch Access Method only.)
Selection Feedback Sound
Play a sound when a non-speaking button is selected.
14.13.3 Touch Enter Options
When Touch Enter is the chosen Access Method, objects are activated by physically touching and holding on the object
on the screen for a minimum amount of time or, when using a mouse, by clicking and holding on the object for a
minimum amount of time. The hold time is set by the user. This access method is useful for users who may touch or click
unintended objects accidentally.
Hold Time
The Hold Time is the minimum amount of time needed to select and hold on an object in order to activate it.
Connect Multiple Taps
This setting senses multiple taps that occur within a specified time frame and connects them so that they register as one
long tap and hold. This setting is useful if the user has difficulty holding a selection consistently.
When Connect Multiple Taps is enabled, you may choose the time frame in which taps are connected. For example,
when set to Medium, all taps that occur within a 0.3 second interval (starting with the first tap) will register as a single
long tap and hold.
Delay Between Selections
This setting allows you to set a period of time where TD Snap® ignores selection attempts after a selection has been
made. Enabling Delay Between Selections can help prevent unintended repeat selections in the software.
When Delay Between Selections is enabled, you may choose the time frame in which selection attempts are ignored
after a selection has been made. For example, when set to Medium, TD Snap® will ignore all selection attempts that
occur within 2 seconds after a selection.
Highlighting
Choose your preferred highlight type and color. Highlight is a visual cue that shows when an object is selected. The
highlight stops when the object has been activated.

108
14 User Settings TD Snap® Users Manual v.1.33-en-US
1. No highlight
2. Outline
Options: Color, Highlight Thickness
3. Overlay
Option: Color
4. Invert
Selection feedback sound
Play a sound when a non-speaking button is selected.
Accessible top bar navigation buttons
When enabled, the Back, Home, and Dashboard buttons in the Top Bar are accessible using the touch enter or touch
access methods. When disabled, these buttons are only accessible using the touch access method.
14.13.4 Touch Exit Options
When using Touch Exit, a selected object is activated when the selection is released. This method allows the user to
maintain contact with the touch screen without accidentally making a selection. This means that the user may slide a
finger or a pointer across the touch screen, or hold down on a mouse button while moving the cursor. As the cursor
moves across the buttons, the currently selected button will highlight. A button is not activated until the finger or pointer
lifts off the touch screen, or when the mouse button is released. This makes the Touch Exit selection method ideal for a
person who may find it easier to drag a finger or a pointer across the touch screen while moving from selection to
selection. It is also useful for people who benefit from visual feedback to make accurate selections.
Hold Time
The Hold Time is the minimum amount of time needed to select and hold on an object in order to activate it on release.
Connect Multiple Taps
This setting senses multiple taps that occur within a specified time frame and connects them so that they register as one
long tap and hold. This setting is useful if the user has difficulty holding a selection consistently.
When Connect Multiple Taps is enabled, you may choose the time frame in which taps are connected. For example,
when set to Medium, any and all taps that occur within a 0.3 second interval (starting with the first tap) will register as a
single long tap and hold.
Delay Between Selections
This setting allows you to set a period of time where TD Snap® ignores selection attempts after a selection has been
made. Enabling Delay Between Selections can help prevent unintended repeat selections in the software.
When Delay Between Selections is enabled, you may choose the time frame in which selection attempts are ignored
after a selection has been made. For example, when set to Medium, TD Snap® will ignore all selection attempts that
occur within 2 seconds after a selection.
Highlighting
Choose your preferred highlight type and color. Highlight is a visual cue that shows when an object is selected. The
highlight stops when the object has been activated.
1. No highlight
2. Outline

TD Snap® Users Manual v.1.33-en-US 14 User Settings
109
Options: Color, Highlight Thickness
3. Overlay
Option: Color
4. Invert
Audio Feedback
When Audio Feedback is enabled, the user will hear an object’s audio cue when it is highlighted. An audio cue is a word
or short message that helps identify an object. You can select a different voice for Audio Feedback, as well as a custom
voice rate, and pronunciation exceptions.
Selection Feedback Sound
Play a sound when a non-speaking button is selected.
Accessible Top Bar Navigation Buttons
When enabled, the Back, Home, and Dashboard buttons in the Top Bar are accessible using the touch exit or touch
access methods. When disabled, these buttons are only accessible using the touch access method.
14.13.5 Auditory Touch Options
With Auditory touch, the user touches the screen to activate button audio cues that help them identify each button so that
they can confidently make selections. The access method settings can be configured to either use touch and drag to
hear audio cues, then lift the finger from the screen to select or touch once to hear the audio cue then touch again to
select. This access method is useful for users who have low vision or those who benefit from hearing audio cues.
Hold Time
The Hold Time is the minimum amount of time needed to select and hold on an object in order to activate it.
Connect Multiple Taps
This setting senses multiple taps that occur within a specified time frame and connects them so that they register as one
long tap and hold. This setting is useful if the user has difficulty holding a selection consistently.
When Connect Multiple Taps is enabled, you may choose the time frame in which taps are connected. For example,
when set to Medium, all taps that occur within a 0.3 second interval (starting with the first tap) will register as a single
long tap and hold.
Delay Between Selections
This setting allows you to set a period of time where TD Snap® ignores selection attempts after a selection has been
made. Enabling Delay Between Selections can help prevent unintended repeat selections in the software.
When Delay Between Selections is enabled, you may choose the time frame in which selection attempts are ignored
after a selection has been made. For example, when set to Medium, TD Snap® will ignore all selection attempts that
occur within 2 seconds after a selection.
Highlighting
Choose your preferred highlight type and color. Highlight is a visual cue that shows when an object is selected. The
highlight stops when the object has been activated.
1. No highlight
2. Outline
Options: Color, Highlight Thickness
3. Overlay

110
14 User Settings TD Snap® Users Manual v.1.33-en-US
Option: Color
4. Invert
Audio Feedback
Configure the voice used to speak audio cues. An audio cue is a word or short message that helps identify an object.
You can select the voice for Audio Feedback, language-specific feedback voices, as well as custom voice rate, pitch, and
pronunciation exceptions.
Selection Feedback Sound
Play a sound when a non-speaking button is selected.
Play audio cue on first selection
When enabled, the first selection highlights the button and plays the audio cue; the second selection activates the button.
When disabled, tap and hold (or tap and drag) plays the audio cue; releasing the tap (lifting the finger from the screen)
activates the button.
Accessible Top Bar Navigation Buttons
When enabled, the Back, Home, and Dashboard buttons in the Top Bar are accessible using the auditory touch our
touch access methods. When disabled, these buttons are only accessible using the touch access method.
14.13.6 Mouse Dwell Options
The Mouse Dwell access method requires that a computer mouse, track ball, or head mouse control the cursor on the
screen. An object is selected when the cursor pauses on an object for a specified amount of time or when a switch is
activated.
Selection Type
Dwell
● Selections are made by holding the cursor on an object for a specified length of time (dwell time).
– Dwell time — set the amount of time that the cursor must remain on an object in order to select it.
Switch
● Selections are made by activating a switch while the cursor is on the desired object.
– Switch input — set the keyboard key that acts as the switch input.
Highlighting
Choose your preferred highlight type and color. Highlight is a visual cue that shows when an object is selected. The
highlight stops when the object has been activated.
For this access method, “No highlight” is not an option.
1. No highlight
2. Outline
Options: Color, Highlight Thickness
3. Overlay
Option: Color
4. Invert

TD Snap® Users Manual v.1.33-en-US 14 User Settings
111
Audio Feedback
When Audio Feedback is enabled, the user will hear an object’s audio cue when it is highlighted. An audio cue is a word
or short message that helps identify an object. You can select a different voice for Audio Feedback, language-specific
feedback voices, as well as a custom voice rate, and pronunciation exceptions.
Show Pause Access Method Button in Use Mode
When enabled, a Pause/Resume Access Method button appears in the Top Bar in Use Mode. When disabled, the button
is hidden.
Selection Feedback Sound
Play a sound when a non-speaking button is selected.
Accessible Top Bar Navigation Buttons
When enabled, the Back, Home, and Dashboard buttons in the Top Bar are accessible using the mouse dwell or touch
access methods. When disabled, these buttons are only accessible using the touch access method.
14.13.7 Eye Gaze Options
This access method allows the user to control TD Snap® using only their eyes. Selections are made either by fixating the
gaze on an object for a specified amount of time (dwell) or by activating a switch. The eye gaze access method requires
an eye gaze device from Tobii Dynavox.
Selection Type
Dwell
● Allows the user to select by fixating the gaze on an object for a set amount of time (dwell time).
– Dwell time — set the amount of time that the gaze must remain on an object in order to select it.
– Look away before reselecting — when enabled, the user is unable to make multiple selections on the same
target unless they look away from the last selected region between selections. This setting is helpful for users
who accidentally select targets repeatedly.
Switch
● The user directs the highlight on the screen using their gaze, then make selections using a switch.
– Switch input — set the keyboard key that acts as the switch input.
Switch selection with a keyboard key or Bluetooth switch may not work outside the TD Snap® software.
– Switch press duration — the amount of time that the switch must be activated to select the currently highlighted
object.
– Switch repeat duration — the amount of time the user must wait between switch activations.Before this time is
met, any additional switch activations are ignored.
Gaze Feedback
Gaze Feedback is a visual cue that shows the user where their gaze is registering on the screen, how consistently, and
for how long.
Set the style, color, and size of your Gaze Feedback.
Delay After Page Change
After going to a new page, selection cannot occur for the set period of time. This setting helps prevent accidental
selections when a page first opens.
Windows Control Type
Set the mode of desktop access for navigation outside of the TD Snap® software. Not available on all devices.
● Gaze Selection — this is a two-step selection method, which reduces the risk of unwanted clicks.
● Mouse Emulation — emulate and control a standard PC mouse pointer on the screen.

112
14 User Settings TD Snap® Users Manual v.1.33-en-US
Audio Feedback
When Audio Feedback is enabled, the user will hear an object’s audio cue when it is highlighted. An audio cue is a word
or short message that helps identify an object. You can select a different voice for Audio Feedback, as well as a custom
voice rate, and pronunciation exceptions.
Show Pause Access Method Button in Use Mode
When enabled, a Pause/Resume Access Method button appears in the Top Bar in Use Mode. When disabled, the button
is hidden.
Selection Feedback Sound
Play a sound when a non-speaking button is selected.
Accessible Top Bar Navigation Buttons
When enabled, the Back, Home, and Dashboard buttons in the Top Bar are accessible using the eye gaze or touch
access methods. When disabled, these buttons are only accessible using the touch access method.
Offscreen Pause
When enabled, eye tracking users can look below the screen to open a menu containing a Pause/Resume Eye Gaze
button.
14.13.8 Scanning Options
When Scanning is the active selection method, objects on the screen highlight in a specific pattern. The user will activate
a switch or keyboard key to make a selection when the desired item is highlighted. This access method is intended for
individuals whose motor skills may prevent them from effectively using direct selection methods.
Scan Type
The Scan Type setting determines how the scan highlight advances (automatically or through switch input) and how
selections are made.
1 Switch Autoscan
● When using 1 Switch Autoscan, the software will scan the items on the page using the designated scan behavior.
The user makes selections using a switch.
– Switch input — choose either a screen tap or keyboard key.
– Speed — set how quickly the autoscan progresses.
– Transition time — set the length of time between making a selection and autoscan continuing.
– Scan after — select when autoscan should restart: Selection, Page Change, Speaking.
– Scan After Speaking Begins has three options: Wait for switch activation (resume scanning after speaking
begins only when the switch has been activated), Immediately (continue scanning regardless of speech),
Wait for speech to finish (resume scanning after speech has finished).
If Audio Feedback is enabled, audio feedback is not heard if scanning occurs while other speech is playing.
– Speak full audio cue before advancing — when enabled, long audio cues delay the scanning highlight
advancement until the full audio cue has been spoken.
2 Switch Step Scan
● When using 2 Switch Step Scan, the user will trigger one switch to progress the scan highlight and a second switch
to make selections.
– Switch 1 Input — choose either a screen tap or keyboard key to progress the scan highlight.
– Switch 2 Input — choose either a screen tap or keyboard key to make selections.
Switch 1 Input and Switch 2 Input must be different.
1 Switch Scan
● When the 1 Switch scanning option is active, the user will trigger the switch to advance the highlight (each selection
advances the highlight by one interval). To select the highlighted object, the user will select the switch and maintain
the selection for the specified Pause Time.

TD Snap® Users Manual v.1.33-en-US 14 User Settings
113
– Switch 1 Input — choose either a screen tap or keyboard key to progress the scan highlight.
– Pause Time — the minimum amount of time needed to select and hold on an object in order to activate it.
1 Switch Dwell Scan
● When the 1 Switch Dwell scanning option is active, the user will trigger the switch to advance the highlight (each
selection advances the highlight by one interval). To select the highlighted object, the user will pause (do nothing) for
the specified Pause Time.
– Switch 1 Input — choose either a screen tap or keyboard key to progress the scan highlight.
– Pause Time — the minimum amount of time needed to dwell on an object in order to activate it.
Inverse Scan
● An individual using Inverse scanning will hold down the switch to advance the scanning highlight (highlight continues
to advance as long as the switch is held down). When the individual releases the switch, the highlighted object will
be selected.
– Switch 1 Input — choose either a screen tap or keyboard key to progress the scan highlight.
– Speed — how fast the scanning highlight advances (while the switch is held).
– Speak full audio cue before advancing — when enabled, long audio cues delay the scanning highlight
advancement until the full audio cue has been spoken.
Scan Behaviors
The scan behavior is the sequence in which screen objects are highlighted for selection. This section also contains
settings related to what kinds of objects are scanned.
Pattern
● Row/Column — Scan rows from the top down. When a row is selected, the items in the row are scanned from left to
right.
● Column/Row — Scan columns from left to right. When a column is selected, the items in the column are scanned
from top to bottom.
● Linear — Objects are scanned individually from left to right, top to bottom.
Number of Passes
● Passes — Set how many times the scan will scan a row or column without a selection being made.
● After Final Pass — Choose what happens when autoscan has completed the designated number of passes (not
available for infinite passes).
Group Scan
● When enabled, the page buttons are scanned in groups.
Scan groups must be pre-defined. See section 9.16 Scan Groups, page70.
Scan from Last Selection
● When enabled, scanning will resume on the page where the last selection was made. When disabled, after a
selection is made, scan resumes at the top of the page.
Scan Top Bar
● When enabled, the scan-accessible items in the Top Bar (Back, Home, and Dashboard) are scanned. When
disabled, the top bar items are not scanned.
The Search, Sync, Pause Access Method, and Edit buttons in the Top Bar are not scanned. They are accessible
by touch at any time.
Scan Blank Buttons
● When enabled, buttons that do not have any content are scanned. When disabled, blank buttons do not scan.
Highlighting
Choose your preferred highlight type and color. Highlight is a visual cue that shows when an object is scanned. The
highlight stops when the object has been activated.
For this access method, “No highlight” is not an option.

114
14 User Settings TD Snap® Users Manual v.1.33-en-US
1. No highlight
2. Outline
Options: Color, Highlight Thickness
3. Overlay
Option: Color
4. Invert
Hold Time
The Hold Time is the minimum amount of time needed to select and hold on an object in order to activate it.
Delay Between Selections
Delay Between Selections helps prevent accidental repeat switch selections. When a switch selection is made, the next
switch selection cannot occur until the time set in Delay Between Selections has passed. If the switch is triggered while
the delay time is in effect, the countdown is reset.
Audio Feedback
When Audio Feedback is enabled, the user will hear an object’s audio cue when it is highlighted. An audio cue is a word
or short message that helps identify an object. You can select a different voice for Audio Feedback, language-specific
feedback voices, as well as a custom voice rate, pitch, and pronunciation exceptions.
Zoom
When enabled, screen objects zoom as they are scanned. When scanning multiple objects (rows or columns), the object
that is first in the pattern is zoomed and the other objects are highlighted as specified by the Highlight Style setting.
Show Pause Access Method Button in Use Mode
When enabled, a Pause/Resume Access Method button appears in the Top Bar in Use Mode. When disabled, the button
is hidden.
Selection Feedback Sound
Play a sound when a non-speaking button is selected.
14.14 Data Tracking
14.14.1 Track Button Usage
When Track button usage is enabled, information about button use in TD Snap® is recorded. This information includes
the time of the button use event, message, language, Page Set, page, grid position, Access Method (e.g. gaze
interaction), modeling mode, and whether the button spoke or inserted into the Message Window.
Button usage information is not recorded when in Edit Mode.

TD Snap® Users Manual v.1.33-en-US 14 User Settings
115
Enable Track button Usage
1. Select the Edit button.
2. Select the User tab.
3. Select the Data Tracking category.
4. Set Track button usage to On.
5. Read the data privacy warning and select Yes to enable Track button usage. If you do not want to enable Track
button usage, select No.
You can view button use counts right in the TD Snap® software by enabling Show button usage counts and/or
Show modeling counts. For more information see sections 14.14.3 Show Button Usage Counts, page116 and
14.14.4 Show Modeling Counts, page117. Further data visualizations are available in the Usage Reports section of
your myTobiiDynavox.com account.
Button usage tracking, when enabled, happens whenever the TD Snap® software is used. For accurate usage data, it is
important to differentiate between button selections made by the user and modeling selections made by a caregiver or
communication partner. If the user interacts with TD Snap® through a non-touch access method (Mouse Dwell, Gaze
Interaction, or Scanning), any button selections made using touch are automatically recorded as modeling. If the user
interacts with TD Snap® through a touch—based Access Method, then the caregiver must enable Modeling mode before
making any modeling selections, then disable it again before the user makes their next selection.
If Track button usage is enabled and the user has a touch-based Access Method, make sure that Show top bar
button is also enabled. See section 14.14.2 Show Top Bar Button, page116.
When you share a Page Set that has usage data, you will have the option to include or not include the usage
information.
Enable Modeling Mode (only necessary if Access Method is set to Touch, Touch Enter, Touch Exit, or when
using Screen as a switch)
If your current Access Method includes the Pause Access Method button in the top bar, pause the Access Method
prior to beginning the steps below. Unpause the Access Method when you exit
Modeling mode.
1. Select the Data Tracking button in the Top Bar.
To enable the Data Tracking button in the Top Bar, see section 14.14.2 Show Top Bar Button, page116.
2. Enable Modeling mode.
When you are finished modeling, remember to disable Modeling mode.
You can also toggle Modeling mode on and off by doing a long tap (tap and hold) on the Data Tracking button in
the top bar. When Modeling mode is enabled, the Data Tracking button looks like this . When
Modeling mode is disabled, the Data Tracking button looks like this .

116
14 User Settings TD Snap® Users Manual v.1.33-en-US
14.14.2 Show Top Bar Button
When enabled, the Data Tracking button appears in the Top Bar. The Top Bar Data Tracking button
gives quick access to the following settings: Modeling mode, Show button usage counts, Show modeling counts, and
Manage data.
14.14.3 Show Button Usage Counts
When enabled, buttons show a white badge with the number of times the button was selected by the user (while Track
button usage was enabled) in the specified time frame. The default time range is All.
Enable Show Button Usage Counts (via User Settings)
1. Select the Edit button.
2. Select the User tab.
3. Select the Data Tracking category.
4. Set Show button usage counts to On.
To change the usage count time range, select Time Range, then use the drop down menu or beginning and end
date/time fields.
Enable Show Button Usage Counts (via Data Tracking Top Bar Button)
To enable the Data Tracking button in the Top Bar, see section 14.14.2 Show Top Bar Button, page116.
1. Select the Data Tracking button in the Top Bar.
2. Enable Show button usage counts.
To enable the Data Tracking button in the Top Bar, see section 14.14.2 Show Top Bar Button, page116.
To change the usage count time range, select Time Range, then use the drop down menu or beginning and end
date/time fields.

TD Snap® Users Manual v.1.33-en-US 14 User Settings
117
Illustration45: Button showing usage count (white) and modeling count (orange).
14.14.4 Show Modeling Counts
When enabled, buttons show an orange badge with the number of times the button was selected in modeling mode
(while Track button usage was enabled) in the specified time frame. The default time range is All.
Enable Show Modeling Counts (via User Settings)
1. Select the Edit button.
2. Select the User tab.
3. Select the Data Tracking category.
4. Set Show modeling counts to On.
To change the modeling count time range, select Time Range, then use the drop down menu or beginning and
end date/time fields.
Enable Show Modeling Counts (via Data Tracking Top Bar button)
To enable the Data Tracking button in the Top Bar, see section 14.14.2 Show Top Bar Button, page116.
1. Select the Data Tracking button in the Top Bar.
2. Enable Show modeling counts.
To change the modeling count time range, select Time Range, then use the drop down menu or beginning and
end date/time fields.
14.14.5 Manage Data
Reset button usage counts and modeling counts to zero for the current page, the Message Bar buttons, Toolbar buttons,
or the entire Page Set.
Resetting button usage counts does not delete past usage data. If you would like to permanently delete all usage
data that has been stored on your mytobiidynavox account, use a web browser to go to mytobiidynavox.com >
Snap > Usage Reports.
Reset Usage Counts (via User Settings)
1. Select the Edit button.
2. Select the User tab.
3. Select the Data Tracking category.
4. Select Manage data.
5. Select the area in which you would like to reset button usage counts and modeling counts to zero.
6. Select Reset to reset usage and modeling counts for the chosen area. To cancel the reset operation, select Cancel.
Reset Usage Counts (via Data Tracking Top Bar button)

118
14 User Settings TD Snap® Users Manual v.1.33-en-US
To enable the Data Tracking button in the Top Bar, see section 14.14.2 Show Top Bar Button, page116.
1. Select the Data Tracking button in the Top Bar.
2. Select Manage data.
3. Select the area in which you would like to reset button usage counts and modeling counts to zero.
4. Select Reset to reset usage and modeling counts for the chosen area. To cancel the reset operation, select Cancel.

TD Snap® Users Manual v.1.33-en-US 15 System Settings
119
15 System Settings
15.1 Preferences
15.1.1 Passcode
When enabled, a four-digit passcode is required to access in-app purchases and the specified features in the Top Bar.
Enabling the passcode can help prevent unauthorized changes to the Page Set and settings.
Enable Passcode
1. Select the Edit button.
2. Select the System tab.
3. Select Passcode.
4. Set the Use Passcode toggle switch to On.
5. Enter a four-digit passcode that only you know and is not easy to guess.
6. Enter the passcode again to verify it.
7. When you enable Use Passcode, passcode is enabled for in-app purchases, Edit Mode, Sync, Data Tracking,
Search Mode, Lightbulb, and the Top Bar navigation buttons (Back, Home, and Dashboard) by default. Toggle the
setting to Off for any of these features if you would like them to be accessible without a passcode.
If Passcode is enabled and the Sync feature passcode is disabled, then Sync will operate in Pull-only mode. When
you Sync in Pull-only Mode, you will receive Page Set changes (made on other devices) but will not send any Page
Set changes made on the current device.
8. When you exit Edit mode, the passcode will be required to access in-app purchase and any of the features toggled
on in the passcode preferences menu.
If you already have passcode enabled, you can reset the passcode by selecting the Edit button.
If you forget your passcode, use the master passcode (0520) to access Edit Mode and immediately reset your
passcode.

120
15 System Settings TD Snap® Users Manual v.1.33-en-US
15.1.2 Screen Setting (Windows only)
When Full Screen Mode is enabled, the TD Snap® software will fill the entire screen on your device. When Full Screen
Mode is disabled, the TD Snap® software will run inside a resizable window.
15.1.3 Edit Mode Language
Choose a language for the Edit Mode interface.
15.2 Device
The Device section features are present on Tobii Dynavox I-13, I-16, and TD Pilot devices only.
15.2.1 Partner Window Settings
The Partner Window is a screen on the back of the Tobii Dynavox I-13, I-16, and TD Pilot devices. The Partner Window
informs the conversation partner that the user is preparing to speak and displays text for the partner to read.
1. Select the Edit button.
2. Select the System tab.
3. Select Device.
4. Make a selection in Partner Window Options:
– Show Message Window text — display the Message Window text in the Partner Window in real time.
– Show text being spoken — display text in the Partner Window only when it is spoken. While composing in the
Message Window, the Partner Window will display a series of dots to indicate that the user is preparing their
message. When the Message Window is spoken, the Partner Window scrolls the text as it is spoken.
The Partner Window displays only text. It does not display symbols.
5. Make a selection in Partner Window Indicator Style:
– Mirror — display a miniature version of the Partner Window in the Top Bar.
– Icon — display an icon when the Partner Window is powered on. Hide the icon when the Partner Window is
powered off.
6. Set the Partner Window Power toggle to On or Off. When the Partner Window Power is set to Off, it does not display
any text.
You can also use button Actions to control the Partner Window screen brightness and toggle the Partner Window
on and off. See sections 9.6.2 Active Content, page39 and 9.7 Button Actions, page47.
15.3 Store
Purchase items (iPadOS only) and manage your Activation Key.
Note: If you are using a Windows device, you can make purchases by calling Tobii Dynavox support. https://
www.tobiidynavox.com/pages/locations
15.3.1 Make a Purchase (iPadOS only)
1. Select the Edit button.
2. Select the System tab.
3. Select Store.
4. Select Buy on the item you would like to purchase.
5. Complete your secure transaction.

TD Snap® Users Manual v.1.33-en-US 15 System Settings
121
An internet connection is required to make purchases in the store.
15.3.2 Restore Purchases (Windows only)
If your purchased items are not showing up in the Windows version of the TD Snap® app, restore your purchases with
your Activation Key.
An internet connection is required to restore purchases.
1. Select the Edit button.
2. Select the System tab.
3. Select Store.
4. Select Restore Purchases.
5. Enter your Activation Key.
6. Select Done.
15.3.3 Deactivate Key (Windows only)
Remove your Activation Key from the current Windows device so that it can be used on another device.
1. Select the Edit button.
2. Select the System tab.
3. Select Store.
4. Select Deactivate Key. A confirmation dialog will open.
5. Confirm that you would like to deactivate your key on this device.
15.4 Symbol Sets
15.4.1 Search Settings
When Safe Symbol Search is enabled, explicit symbols will not appear in symbol searches, the (symbolated) message
window, or Search Mode. When Safe Symbol Search is disabled, symbol searches, message window symbols, and
Search Mode will use all available symbols.
15.4.2 Installed and Downloadable Symbols
The Symbol Sets listed in the Installed Symbols section are the Symbol Sets currently installed and available on your
device.
To delete an installed Symbol Set, select the Delete button, then choose Delete to confirm.
The Snap Core Symbols cannot be deleted.
The Symbol Sets listed in the Downloadable Symbols section are the free Symbol Sets that are not currently installed on
your device. To download and install a free Symbol Set, select Download beside the desired Symbol Set.
You must have an active internet connection to download Symbol Sets.
Some third-party Symbol Sets are only available for purchase through the Store. See section 15.3 Store, page120.

122
15 System Settings TD Snap® Users Manual v.1.33-en-US
15.4.3 Reorder Symbol Sets
The order of symbol search results is determined by the order of symbol sets in the Installed Symbols list. If, for example,
you mostly use high contrast symbols in your Page Set, you could move the High Contrast symbol set to the top of the
list of Installed Symbols list to prioritize high contrast symbols (when available) in symbol searches.
1. Select the Edit button.
2. Select the System tab.
3. Select the Symbol Sets category.
4. Select and hold on the handle of a symbol set in the Installed Symbols list.
5. Drag the symbol set to a new position in the list.
15.5 Help & Tutorials
15.5.1 Videos
Watch videos to learn more about using TD Snap®.
15.5.2 Pathways for Core First
Pathways for Core First is the free app that teaches you the most powerful methods for using
TD Snap® Core First for communication, literacy, behavior supports, and more! Follow the links
in this section to learn more.
15.5.3 Quick Tour
Restart the quick tour to learn your way around the TD Snap® software.
15.5.4 External Help
Access the User’s Manual, Training Cards, additional videos, the online Knowledge Base, and the End User License
Agreement.
15.6 About
TD Snap® version information.
15.6.1 Send Feedback
Use the Send Feedback button to report a problem with TD Snap® or submit a feature request to the development team.
This is not a live chat or technical support line.

TD Snap® Users Manual v.1.33-en-US 15 System Settings
123
15.6.2 Software Updates
Only valid for Windows
The TD Snap® app updates automatically at regular intervals.
To manually check for a new version and download the update:
1. Select the Edit button.
2. Select the System tab.
3. Select the About category.
4. If an update is available, it will appear below the EAN number. To get the updated version, select Install Update.

#12005874 TD Snap® Users Manual v.1.33-en-US
Copyright © Dynavox Group AB (Publ). Not all products and services offered in each local market. Specifications are subject to change without prior notice. All trademarks are the property of their respective owners.
Support for Your Tobii Dynavox Device
Get Help Online
See the product-specific Support page for your Tobii Dynavox device. It contains up-to-date information about issues and tips & tricks related to the product.
Find our Support pages online at: https://www.tobiidynavox.com/pages/product-support
Contact Your Solution Consultant or Reseller
For questions or problems with your product, contact your Tobii Dynavox solution consultant or authorized reseller for assistance. They are most familiar with your personal setup and can best help you
with tips and product training. For contact details, visit https://www.tobiidynavox.com/pages/contact-us.
