Archiving Emails in Groupwise
From time to time your mailbox may have too many messages. This will cause problems
sending mail, receiving mail, viewing attachments, etc. The GroupWise archiving feature is a
way to save old email data but remove it from your mailbox. Archiving messages will give you
access to your old messages without cluttering up your master mailbox. Also, you can archive
various types of data in your mailbox, not just messages.
Note: You will not be able to archive items using the GroupWise online webmail (GroupWise
WebAccess.)
PREFERRED METHOD OF CREATING ARCHIVING MAIL
It is recommended to use Google Drive when setting up your archive. This will ensure your
backup is not only on your computer, but also in the “cloud” in the event your computer hard
drive should fail. Follow the instructions to install the Google Backup and Sync program on
your computer.
HOW TO INSTALL GOOGLE BACK UP AND SYNC
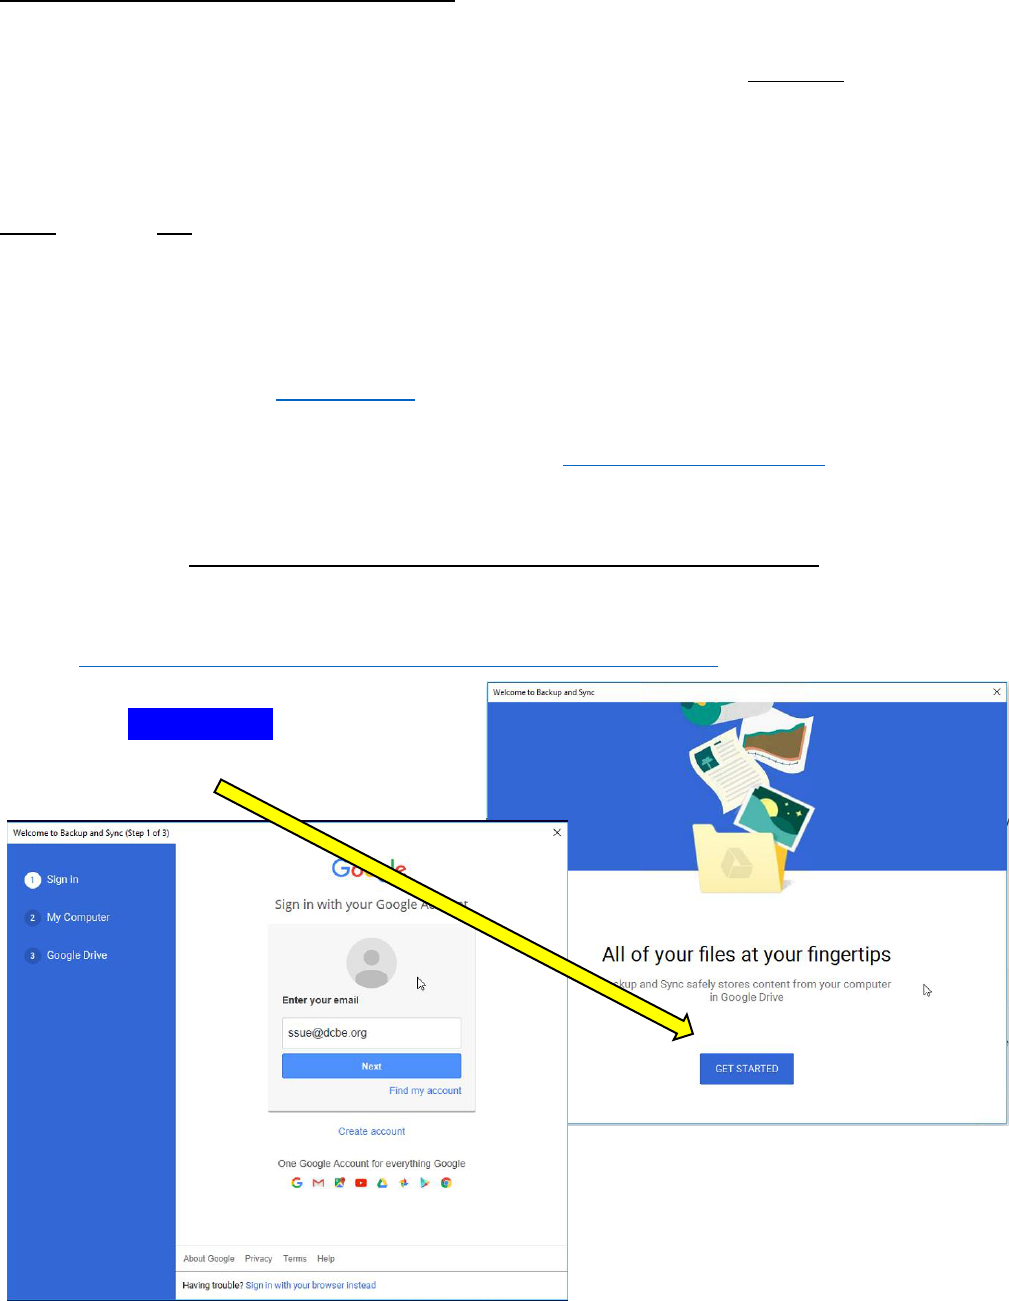
1. Download and run the install for Google Backup and Sync.
(https://www.google.com/drive/download/backup-and-sync/)
2. Click GET STARTED. Then login using
your DCBE google account.

3. Accept the user agreement and click GOT IT on the next screen.
4. On the next screen you will have the
option to choose different folders
to sync to your Google account.
Remember, you have 1 TB of
storage with your DCBE Google
account which is usually more than
enough to back up various folders.
Also, you can access these files and
folders from any computer or smart
device with an internet connection.
Click NEXT once you have made
your selections. Click GOT IT if
prompted again.

5. It’s better to NOT to change the
folder location. Again, make any
tweaks you feel you need and click
START when finished.
6. Back up and Sync will
begin setting up your
folder. A message
should pop up in the
bottom right corner
when it is finished. Click
GOT IT if prompted.

TO COMPLETE EMAIL ARCHIVE SETUP ON YOUR COMPUTER
7. Once you have successfully installed Google Backup and Sync, launch
the Groupwise program on your computer and log into your email
account.
8. Once logged in, Click on Tools then Options.
9. Click Environment on the pop-up Options box.
10. Click on the File Location tab
then click the folder to set the
Archive directory path.
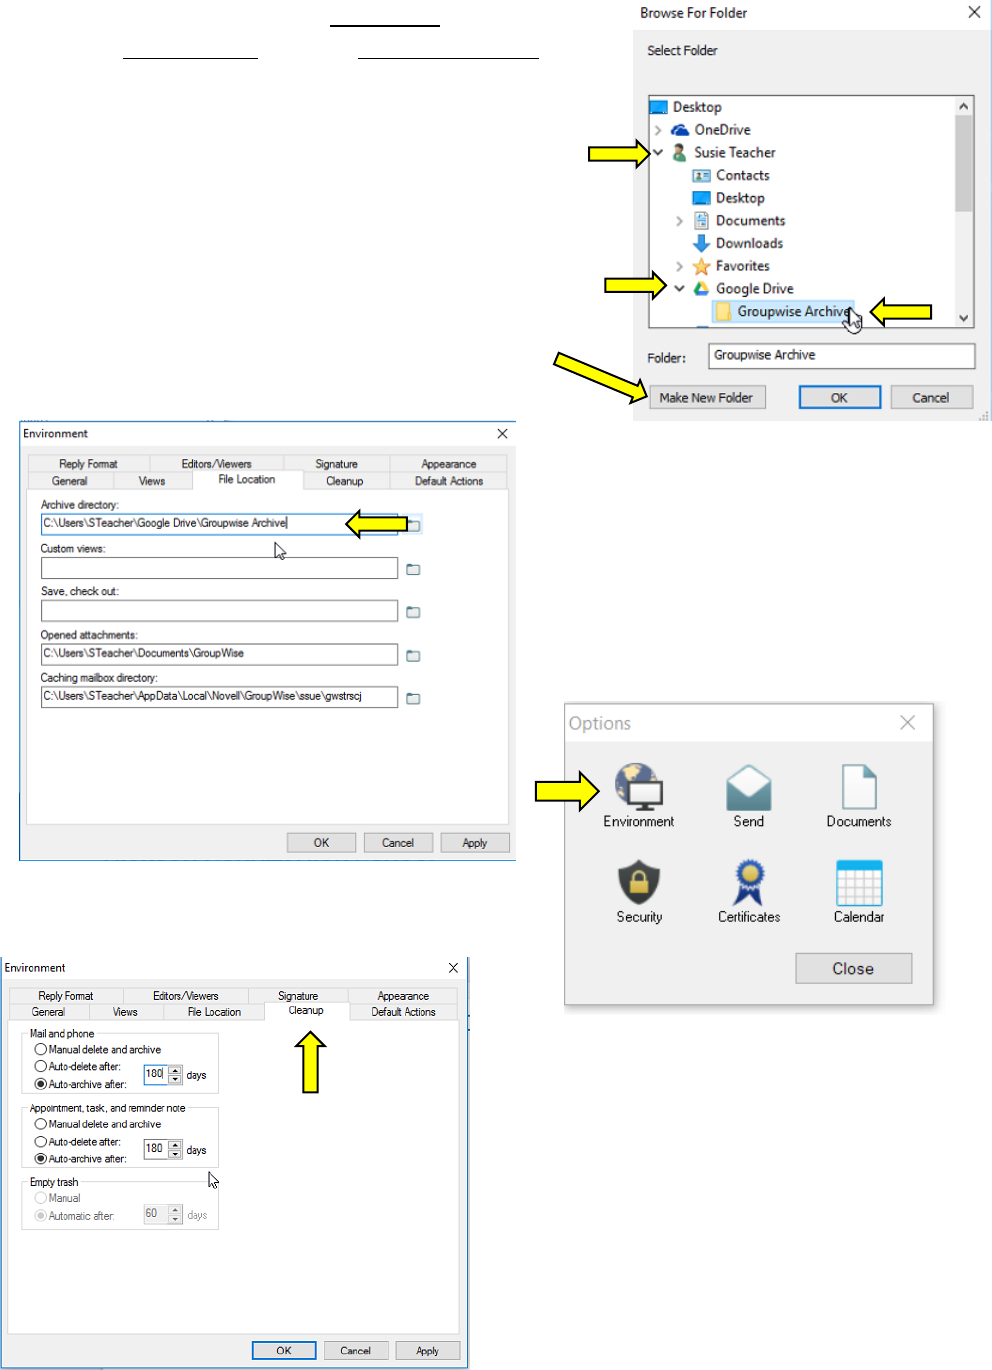
11. In the pop-up window, look for your name and click on it.
Then click Google Drive. Click on Make New Folder and
give the folder a descriptive name such as
Groupwise
Archive
. Click OK.
This folder will contain your email archive files.
***Archived email is accessed most easily on the
computer you install Backup and Sync on. In the event
you need to access your archive from another district-
managed computer, you will need to submit a ticket for
assistance as this is a lengthy process.
12. Now you should see the path to
your Archive folder.
You can also set automatic actions to move
email messages to your archive based on
date criteria. Click on Environment again.
Click on Cleanup. Note the options availabe. If
you’d like to auto-archive email messages older
than say, 6 months, simply select the auto-
archive option and type 180 in the days field.
***This will apply to all email in your mailbox
and will move all READ messages into the
archive directory. Do NOT do this if you do
not want all your email messages to be
affected.

13. To move
messages to your
email archive,
simply right-click
on the message
and select Archive.
If you’d like to
archive multiple
messages at once,
hold Ctrl-key and
click on each
message, or if the
messages are all
together in a
group, you can
single-click on the
top most message and hold the SHIFT key and click the last message – this will select all the
messages in between. You can also select entire folders in your Cabinet by right-clicking on the
folder and choosing Archive.

