
Writer 6.0 Guide
Chapter 5
Formatting Pages: Basics
Page styles and related features

Copyright
This document is Copyright © 2018 by the LibreOffice Documentation Team. Contributors are listed
below. You may distribute it and/or modify it under the terms of either the GNU General Public
License (http://www.gnu.org/licenses/gpl.html), version 3 or later, or the Creative Commons
Attribution License (http://creativecommons.org/licenses/by/4.0/), version 4.0 or later.
All trademarks within this guide belong to their legitimate owners.
Contributors
Jean Hollis Weber Bruce Byfield Gillian Pollack
Acknowledgments
This chapter is updated from previous versions of the LibreOffice Writer Guide. Contributors to
earlier versions are:
Jean Hollis Weber John A Smith Ron Faile Jr.
Jamie Eby
This chapter is adapted from Chapter 4 of the OpenOffice.org 3.3 Writer Guide. The contributors to
that chapter are:
Agnes Belzunce Ken Byars Daniel Carrera
Peter Hillier-Brook Lou Iorio Sigrid Kronenberger
Peter Kupfer Ian Laurenson Iain Roberts
Gary Schnabl Janet Swisher Jean Hollis Weber
Claire Wood Michele Zarri
Feedback
Please direct any comments or suggestions about this document to the Documentation Team’s
mailing list: [email protected]
Note
Everything you send to a mailing list, including your email address and any other
personal information that is written in the message, is publicly archived and cannot be
deleted.
Publication date and software version
Published July 2018. Based on LibreOffice 6.0.
Note for macOS users
Some keystrokes and menu items are different on macOS from those used in Windows and Linux.
The table below gives some common substitutions for the instructions in this book. For a more
detailed list, see the application Help.
Windows or Linux macOS equivalent Effect
Tools > Options
menu selection
LibreOffice > Preferences Access setup options
Right-click Control+click and/or right-click
depending on computer setup
Open a context menu
Ctrl (Control) ( Command) Used with other keys
F5 Shift+ + F5 Open the Navigator
F11 + T Open the sidebar Styles and Formatting deck
Documentation for LibreOffice is available at http://documentation.libreoffice.org/en/

Contents
Copyright..............................................................................................................................2
Contributors.................................................................................................................................2
Acknowledgments........................................................................................................................ 2
Feedback.....................................................................................................................................2
Publication date and software version.........................................................................................2
Note for macOS users................................................................................................................. 2
Introduction..........................................................................................................................4
Setting up basic page layout using styles........................................................................4
Inserting a page break without changing the page style..............................................................5
Inserting a page break and changing to a new page style...........................................................5
Changing page margins......................................................................................................6
Creating headers and footers.............................................................................................7
Using fields in headers and footers..............................................................................................8
Formatting headers and footers...................................................................................................8
Numbering pages.................................................................................................................9
Simple page numbering.............................................................................................................10
Combining header text and page number..................................................................................10
Changing the number format...................................................................................................... 11
Numbering pages by chapter.....................................................................................................11
Numbering the first page something other than 1......................................................................12
Defining a different first page for a document................................................................13
Adding title pages...................................................................................................................... 13
Restarting page numbering........................................................................................................14
Example: Restart page numbering: a preface.......................................................................15
Formatting footnotes and endnotes................................................................................16
Defining footnote location and separator line.............................................................................16
Defining borders and backgrounds.................................................................................17
Adding a border......................................................................................................................... 17
Adding a color to the background..............................................................................................18
Adding a gradient to the background.........................................................................................19
Adding a bitmap (i,age) to the background................................................................................19
Adding a pattern or hatching to the background........................................................................20
Deleting a color, gradient, bitmap, or other background.............................................................21
Adjusting the transparency of the background...........................................................................21
Chapter 5 Formatting Pages: Basics | 3

Introduction
Writer provides several ways for you to control page layouts.
This chapter describes the use of page styles and some associated functions:
• Headers and footers
• Page numbering
• Title pages
• Footnotes and endnotes
• Borders and backgrounds
Chapter 6 covers the use of columns, frames, tables, and sections, as well as changing page
orientation within a document.
Note
All pages in a Writer document are based on page styles. The other layout
methods (described in Chapter 6) build upon the underlying page style.
Tip
Page layout is usually easier if you select the options to show text, object, table, and
section boundaries in Tools > Options > LibreOffice > Application Colors and the
options for paragraph ends, tabs, breaks, and other items in Tools > Options >
LibreOffice Writer > Formatting Aids.
Setting up basic page layout using styles
In Writer, page styles define the basic layout of all pages, including page size, margins, the
placement of headers and footers, borders and backgrounds, number of columns, page numbers,
and so on.
Writer comes with several page styles, which you can build on or modify, and you can define new
(custom) page styles. You can have one or many page styles in a single document. If you do not
specify a page style, Writer uses the Default Style.
To change the layout of individual pages, either define a new page style or use one of the
techniques (sections, frames, or tables) described later in this chapter.
Note
For some documents, all layout changes (such as the position of page numbers and
other elements in a header or footer on facing pages) can be defined in a single page
style.
This chapter describes some uses of page styles. Some other uses are discussed in Chapter 8,
Introduction to Styles. The Page Style dialog is covered in detail in Chapter 9, Working with Styles.
Tip
Any modifications of page styles, including the Default page style, apply only to the
document you are working on. If you want the changes to be the default for all
documents, you need to put the changes into a template and make that template the
default template. See Chapter 10, Working with Templates, for details.
4 | Chapter 5 Formatting Pages: Basics

Inserting a page break without changing the page style
In many documents (for example, a multi-page report), you want the text to flow from one page to
the next as you add or delete information. Writer does this automatically, unless you override the
text flow using one of the techniques described in this chapter.
If you want a page break in a particular place—for example, to put a heading at the top of a new
page—you can position the cursor at the point where you want to start the new page and select
Insert > Page Break from the Menu bar.
However, there are other methods to put a heading at the top of a page. For example, you can
define the paragraph style for a heading to include a page break; see “Text flow options for
paragraph styles” in Chapter 9, Working with Styles, for more information.
Inserting a page break and changing to a new page style
If you want the new page to have a different page style—for example, to change from a Default
page style to a First Page style—use either of these methods.
Caution
Do not try to change a page style for a single page without inserting a page break. If
you do, the page style of some or all of the other pages may also change.
Method 1
1) Position the cursor at the point you want to start the next page. Select Insert > Manual
Break.
2) In the Type section of the Insert Break dialog (Figure 1), Page break is preselected, and
Style is set at [None]. From the Style drop-down list, select the page style for the next
page. Click OK.
Method 2
1) Position the cursor in the paragraph you want to be at the start of the next page. Right-click
and choose Paragraph in the context menu.
2) On the Text Flow page of the Paragraph dialog (Figure 2), in the Breaks section, select
Insert and With page style. From the Style drop-down list, select the page style for the next
page. Click OK.
Figure 1: Inserting a manual page break and changing the page style
Setting up basic page layout using styles | 5
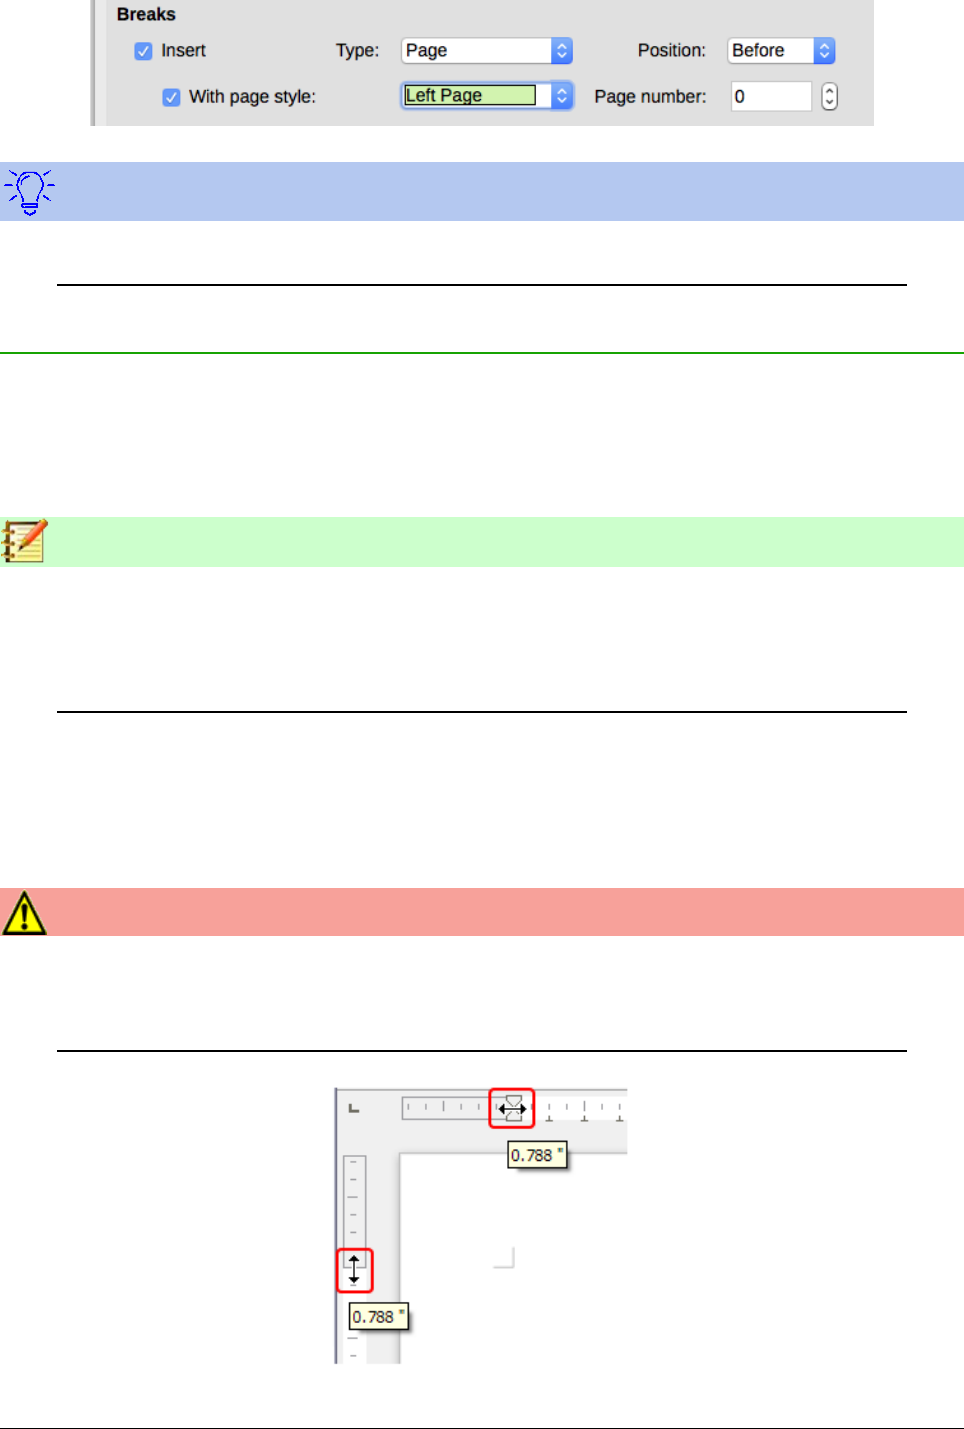
Figure 2: Inserting a manual page break using the Paragraph dialog
Tip
See “Restarting page numbering“ on page 14 for information on the use of the page
number fields in these dialogs.
Changing page margins
You can change page margins in these ways:
• Using the page rulers—quick and easy, but does not have fine control.
• Using the Page Style dialog—can specify margins to two (fractional) decimal places.
• Using the Page panel of the Properties deck in the Sidebar.
Note
If you change the margins using the rulers or the Sidebar, the new margins affect the
page style and all pages that use that style. The new margins will be shown in the
Page Style dialog the next time you open it.
If you want to change the margins on some pages, but not others, you must use
different page styles.
To change margins using the rulers:
1) The shaded sections of the rulers are the margins (see Figure 3). Put the mouse cursor
over the line between the gray and white sections. The pointer turns into a double-headed
arrow and displays the current setting in a tooltip.
2) Hold down the left mouse button and drag the mouse to move the margin.
Caution
The small arrows on the ruler are used for indenting paragraphs. They are often in the
same place as the page margins, so you need to be careful to move the margin
marker, not the arrows. The double-headed arrows shown in Figure 3 are actual
mouse cursors placed in the correct position.
Figure 3: Moving the margins
6 | Chapter 5 Formatting Pages: Basics

Tip
After making a change, passing the mouse over the new margin will show its new
measurement.
To change margins using the Page Style dialog (Figure 15):
1) Right-click anywhere on the page and select Page from the context menu.
2) On the Page page of the dialog, type the required distances in the Margins boxes.
To change margins using the Page panel of the Properties deck of the Sidebar:
1) On the open Sidebar (View > Sidebar) select the Properties tab.
2) Open the Page panel if is not open by clicking the plus (+) symbol in the panel title.
3) Click the Margin icon to open the sub-panel and enter the required dimensions in the
Custom size boxes (clicking the More Options button will open the Page Style dialog).
Creating headers and footers
Headers are portions of a document that appear at the top of every page; footers appear at the
bottom of a page. They typically include a page number and sometimes document information
such as the title. In Writer, headers and footers are specified in page styles; therefore, all the pages
with the same page style will display the same header and footer, although the contents of the
header/footer may vary. For example, the header/footer on the first page of a section, chapter, or
document may contain different information, even though the page style is the same.
Chapter 9 describes how to format a header as part of the page style formatting. This example
shows how to insert a header in the Default pages using manual formatting.
Terminology
A heading is a paragraph that introduces a chapter or section of a document, for
example “Creating headers and footers” above. A header (also known as a running
header) appears on each page and typically displays information about the document.
There are two ways to insert a header. The simplest method is to click above the top of the text
area, then when the Header marker appears, click the +. (To insert a footer, click below the bottom
of the text area to display the Footer marker, and then click the +.)
Figure 4: Header marker at top of text area
Headers can also be inserted from the Menu bar by selecting Insert > Header and Footer >
Header > [Page Style]. The submenu lists the page styles used in your document. In addition, the
submenu includes the entry All, which activates headers on all the pages of the document
regardless of their page style. Similarly, to insert a footer, choose Insert > Header and Footer >
Footer > [Page Style].
For our example, select the Default menu item to activate the headers only on the pages that use
the Default page style. An area will appear at the top or bottom of the page (Figure 5).
Creating headers and footers | 7

Figure 5: A page with a page header
Using fields in headers and footers
You can type information into headers and footers, but some items such as document titles and
chapter titles are best added as fields. That way, if something changes, the headers and footers
are all updated automatically.
Fields are covered in Chapter 17, Fields, but one example here may be useful. To insert the
document title into the header on a Default page style:
1) Select File > Properties > Description, enter a title for your document in the Title area,
and click OK to close the dialog.
2) Add a header (Insert > Header > Default).
3) Place the cursor in the header part of the page.
4) Select Insert > Fields > Title. The title should appear on a gray background (which does
not show when printed and can be turned off).
5) To change the title of the document, reselect File > Properties > Description and edit.
Also, you must use a field for the page number so it changes from one page to the next. See
“Numbering pages” on page 9.
Formatting headers and footers
In Writer, headers and footers are paragraphs; therefore, you can format the header or footer text
using the same techniques you use for formatting text in the main body of the document. See
Chapter 4, Formatting Text.
You can also add images to headers and footers using any of the techniques described in Chapter
11, Images and Graphics, and you can line up information using tables as described in Chapter 6.
Tip
Writer provides paragraph styles for headers and footers, which you can modify and
use in the same way as other paragraph styles. See Chapters 8 and 9.
To format the layout of headers and footers manually:
1) Use any of these methods to open the relevant page style dialog:
– Click anywhere on the page and choose Format > Page from the Menu bar.
– Right-click anywhere on the page and choose Page from the context menu.
– Click the top of the page. When the Header marker appears, click the plus sign or down
arrow and select Format Header.
2) On the Header or Footer tab of the page style dialog (Figure 6), you can change the
margins, spacing, and height.
8 | Chapter 5 Formatting Pages: Basics

3) Click More to open the Border/Background dialog (Figure 7), where you can add borders,
background colors, and background images to the header or footer.
Caution
Do not attempt to use the Area or Borders tabs on the Page Style dialog itself to format
headers or footers. Style choices selected from those tabs apply to the entire page.
Figure 6: Footer tab of Page Style dialog
Figure 7: Border / Background page for header or footer
Numbering pages
This section describes techniques to insert page numbers and related information in headers or
footers of a document.
If you place a page number field in a header or footer, the number appears on every page and
changes from one page to the next. The page number appears with a gray background. This gray
background denotes a field; although it is visible on screen, it is not printed.
Numbering pages | 9
Tips
If you wish to turn off the gray background, choose View > Field Shadings (or press
Ctrl+F8).
If you see the words “Page number” instead of a number, press Ctrl+F9. This shortcut
key toggles Writer between displaying the Field Name and the actual page number.
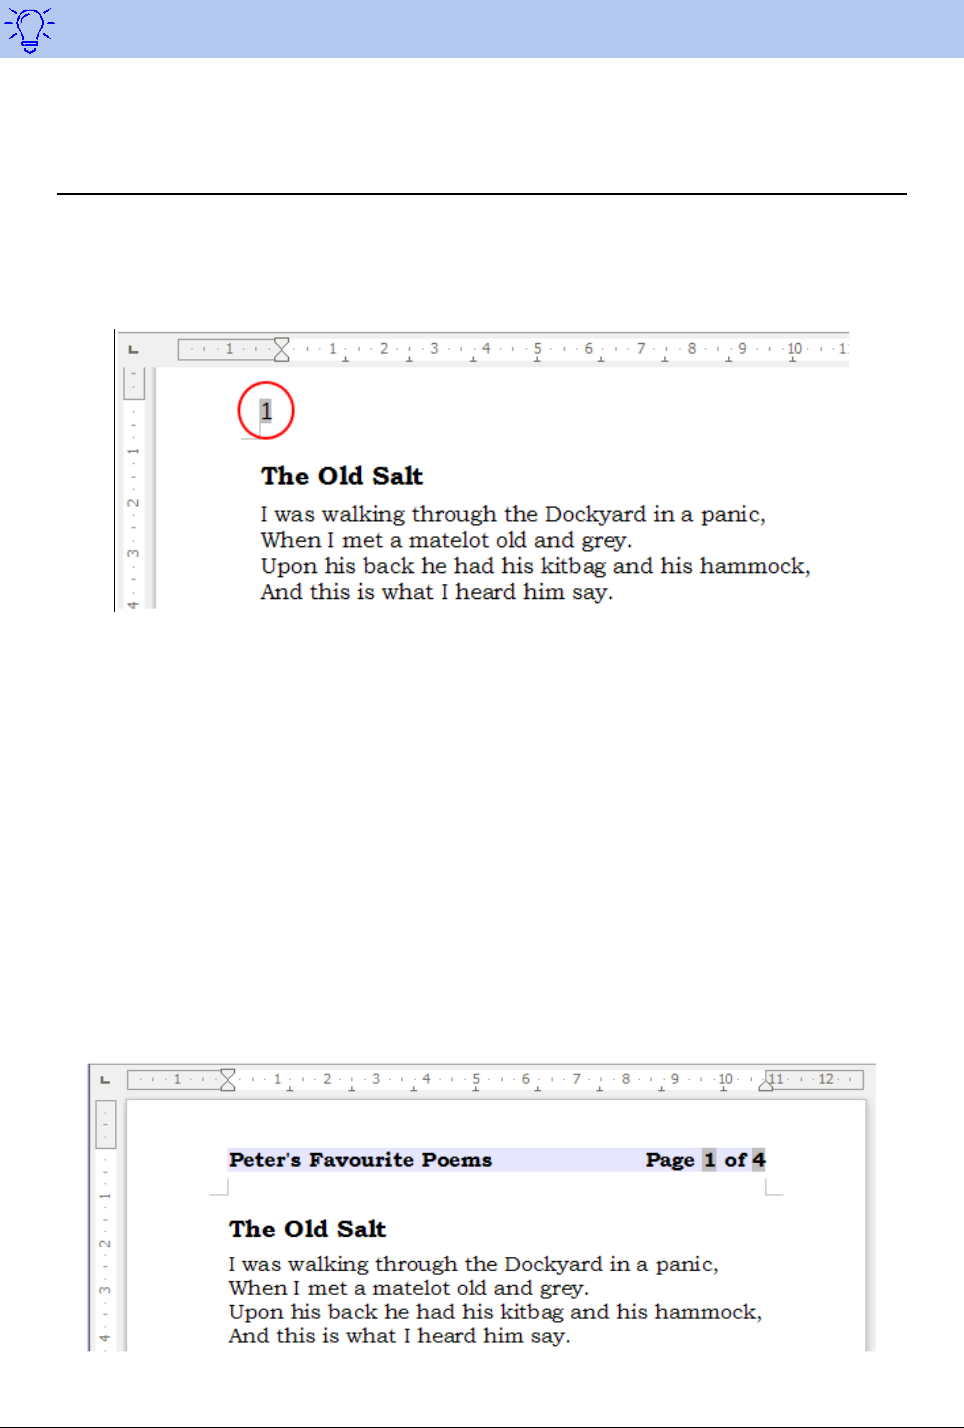
Simple page numbering
The simplest case is to have the page number at the top of every page and nothing more. To do
this, put the cursor on the header and choose Insert > Page Number.
Figure 8: Page number inserted in the header
Combining header text and page number
You can apply a lot of interesting variations without further knowledge of page styles. Here are
some suggestions:
• Right-align the header to make the page number appear on the top-right.
• Type the word page before the page number field so the header reads page 1, page 2, and
so on.
• Add the document title so the header reads, for example: Peter’s Favourite Poems, left
justified, and page x with right justification, where x is the value of the Page Number field.
Consider using a (right-aligned) tab to separate the title from the page number.
• LibreOffice also has a Page Count field (Insert > Fields > Page Count). Using it and the
page number field, you could, for example, have a header that reads page 2 of 12.
These variations are all illustrated in Figure 9.
Figure 9: Variations on the simple page numbering method
10 | Chapter 5 Formatting Pages: Basics

Changing the number format
Many more variations are possible. For example, you can set the page number to display in
Roman numerals. One way to do that is to double-click the page number and select the desired
format; a better choice is to specify the format of numbers in the page style as explained here.
Right-click in the text area of the page and select Page from the context menu.
On the Page page of the Page Style dialog, in the Layout settings section, select i, ii, iii, …. from
the Format drop-down list to use lowercase numerals.
Figure 10: Changing format of page numbers
Any change in the number format affects the page numbers on all pages using that page style,
regardless of the method used to change the format.
Numbering pages by chapter
Technical documents often include the chapter number with the page number in the header or
footer. For example, 1-1, 1-2, 1-3, ...; 2-1, 2-2, 2-3, ... To set up this type of page numbering in
Writer, you need to do three things:
1) Ensure that your chapter titles are all identified by the same paragraph style, for example,
the Heading 1 style.
2) Use Tools > Outline Numbering to tell Writer what paragraph style you are using for Level
1 in your outline, and specify “1,2,3” in the Number box.
Figure 11: Specifying paragraph style and numbering for chapter titles
3) Insert the chapter number in the document. To do this:
a) Place the cursor in the header or footer just before the page number you inserted
earlier, and choose Insert > Field > More Fields from the Menu bar.
Numbering pages | 11

b) On the Fields dialog (Figure 12), go to the Document page. Select Chapter in the Type
list, Chapter number in the Format list, and 1 in the Level box. Click Insert.
c) Type a hyphen or other punctuation between the chapter number and the page number.
Figure 12: Inserting a chapter number field
Numbering the first page something other than 1
Sometimes you may want to start a document with a page number greater than 1. Follow these
instructions to do that. (These instructions are for a page number in a footer, but you could use a
header instead.)
1) Click in the footer. To insert the page number, choose Insert > Fields > Page Number. The
page number will be 1.
2) Click in the first paragraph in the text area. Choose Format > Paragraph (or right-click and
choose Paragraph from the context menu), to display the Paragraph dialog.
3) On the Text Flow page, in the Breaks section (Figure 13), select Insert and select Page in
the Type drop-down list. Select With Page Style and the page style you are using for the
first page of the document.
4) Select Page number to make the field active. Type the page number you want to start with.
Click OK to close the Paragraph dialog.
Figure 13: The Breaks section of the Text Flow page of the Page Style dialog
Tip
If you set a starting page number that is an even number, you will end up with a blank
page before the first page. However, you can suppress this blank page when you print
the file or export it as a PDF. See Chapter 7, Printing, Exporting, E-mailing, for more
information.
12 | Chapter 5 Formatting Pages: Basics
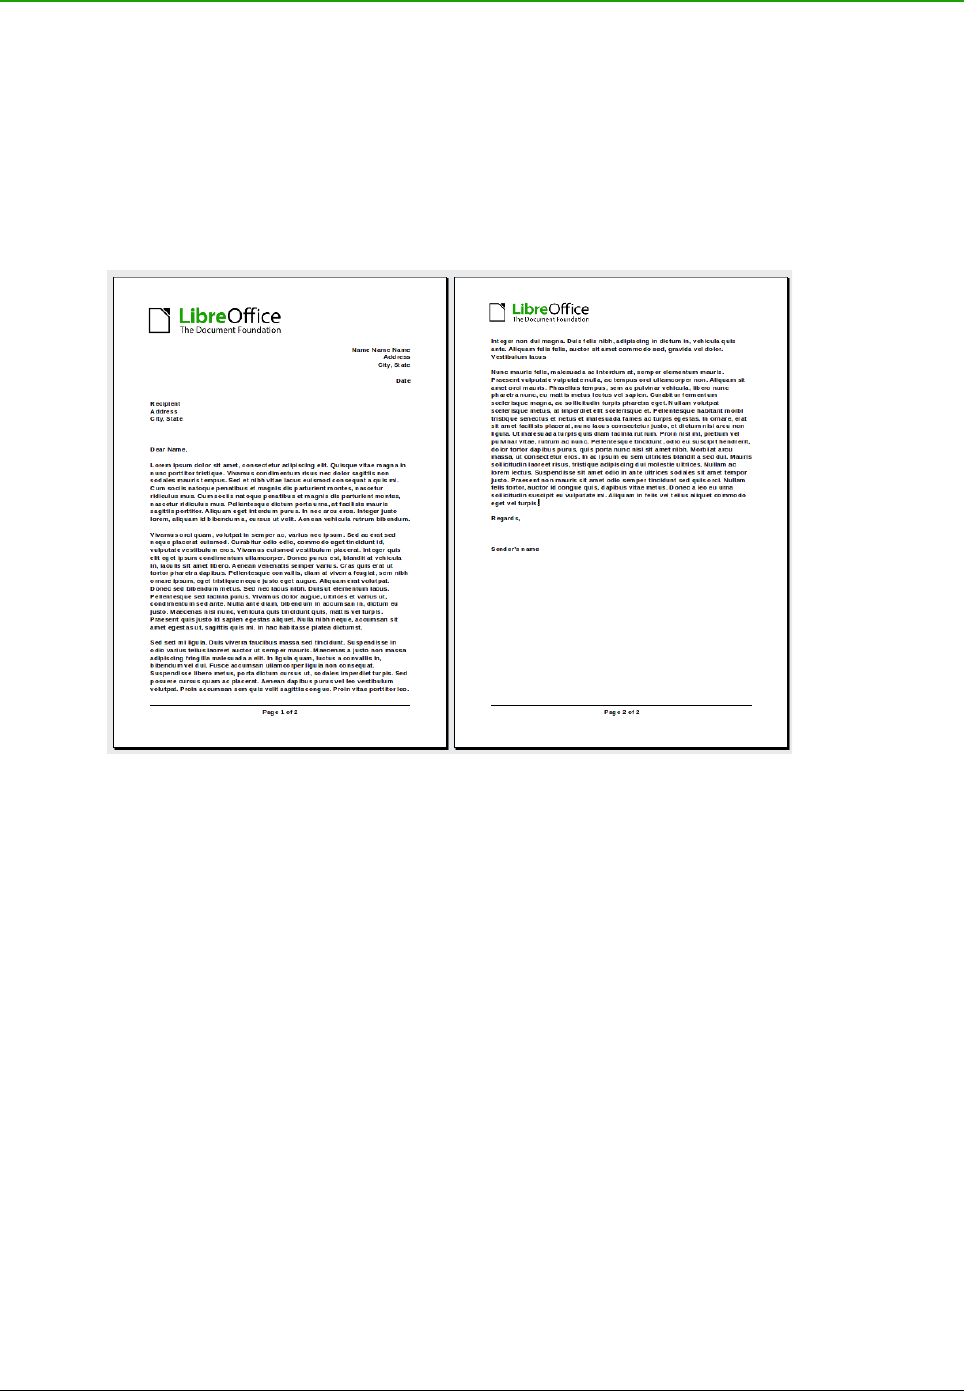
Defining a different first page for a document
Many documents, such as letters and memos, have a first page that is different from the other
pages in the document. For example, the first page of a letterhead typically has a different header,
as shown in Figure 14, or the first page of a report might have no header or footer, while the other
pages do.
Using the Default (or any other) page style for your document, you can add a header/footer as you
wish to the first page by deselecting the Same content on first page option on the header/footer
pages in the Page Style dialog, and then adding the header/footer. You can then add a different
header/footer to the other pages of the document. See “Creating headers and footers” on page 7
for more information.
Figure 14: Letterhead with different headers for first and following pages
Adding title pages
Writer provides a fast and convenient way to add one or more title pages to a document and
optionally to restart the page number at 1 for the body of the document.
To begin, choose Format > Title Page from the Menu bar. On the Title Page dialog (Figure 15),
you can make the following choices:
• Convert existing pages to title pages, or insert new title pages.
• How many pages to convert or insert.
• Where those pages are located.
• If and where to restart page numbering, and what number to start with.
• What page style to use for the title page.
Using this technique, you can insert several “title pages” at different points in your document, for
example to add decorative pages between chapters as well as title, copyright, and other pages at
the beginning of a book.
Defining a different first page for a document | 13

Figure 15: Adding title pages to a document
Restarting page numbering
Often you will want to restart the page numbering at 1, for example, on the page following a title
page or a table of contents. In addition, many documents have the front matter (such as the table
of contents) numbered with Roman numerals and the main body of the document numbered in
Arabic numerals, starting with 1.
If you chose not to add title pages as described above, you can restart page numbering in two
ways.
Method 1:
1) Place the cursor in the first paragraph of the new page (a heading is a paragraph).
2) Choose Format > Paragraph.
3) On the Text Flow page of the Paragraph dialog, select Insert in the Breaks area (Figure 13
on page 12).
4) In the Type drop-down list, select Page.
5) In the Position drop-down list, select Before or After to position where you want to insert
the page numbering break.
6) Select With Page Style and specify the page style to use.
7) Specify the page number to start from and then click OK. This does not insert a new page.
Method 2:
1) Place the cursor in the first paragraph of the new page.
2) Choose Insert > Manual break.
3) Page break is the default selected on the Insert Break dialog (Figure 16).
4) Choose the required page in the Style drop-down list.
5) Select Change page number.
14 | Chapter 5 Formatting Pages: Basics
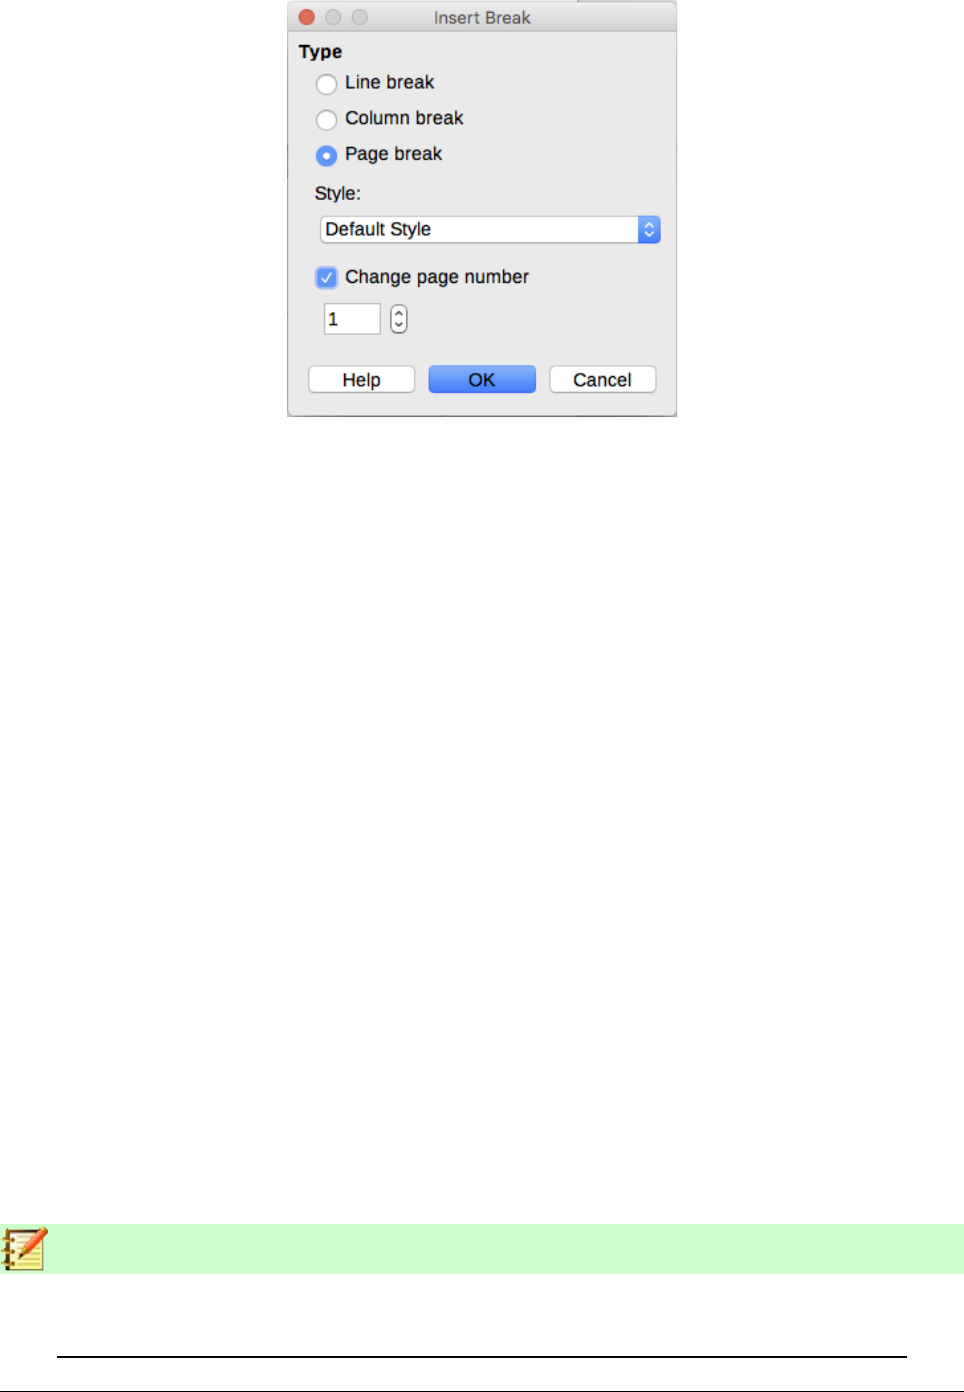
6) Specify the page number to start from and then click OK. This does insert a new page.
Figure 16: Restarting page numbering after a manual page break
Example: Restart page numbering: a preface
A standard book preface has the following properties:
• Page numbers are displayed in Roman numerals (i, ii, iii, iv, …).
• After the preface, the page number resets to 1, and the number format becomes Arabic (1,
2, 3, 4, …).
Resetting the page number requires page breaks.
First, do the preliminary work for the Preface style:
1) Create a new page style and name it Preface.
2) Set its Next Style to Preface because a preface could span multiple pages.
3) Add a header to Preface and insert the Page Number field. Make the page numbers display
as Roman numerals (i, ii, iii, iv, …):
4) Open the page style window for Preface (if not already open) and click the Header tab.
Select Header on under Header.
5) Click the Page tab (Figure 17). Under Layout settings, in the Format drop-down list, set the
format to i, ii, iii, …. Click OK to close the dialog.
After the preface is written, we are ready to restart the page numbering in the main body of the
document to Arabic numerals. Follow these steps:
1) Make an empty paragraph at the very end of the preface.
2) Put the cursor on the blank line.
3) Choose Insert > Manual Break.
4) Select Page break and choose the Default Style.
5) Select the Change page number option and set the new value to 1. Click OK to close the
dialog.
These settings are shown in Figure 16.
Note
You cannot assign an odd page number to a left page or an even page number to a
right page. LibreOffice strongly adheres to the convention that odd page numbers go
on right-hand pages and even page numbers on left-hand pages.
Defining a different first page for a document | 15

Figure 17: Set page number format to Roman numerals
Formatting footnotes and endnotes
Footnotes appear at the bottom of the page on which they are referenced. Endnotes are collected
at the end of a document.
To work effectively with footnotes and endnotes, you need to:
• Insert footnotes and define their format, if the default does not meet your needs (see
Chapter 3, Working with Text: Advanced).
• Define the location of footnotes on the page, and the color and line styles for separator
lines, if the defaults do not meet your needs.
Defining footnote location and separator line
The location of footnotes on the page, and the color and style of the line that separates the
footnotes from the text, are defined in the page style. If you are using several page styles, and may
have footnotes on any of them, you need to define the footnote location and separator line on each
of the page styles.
Choose Format > Page from the Menu bar or right-click a page and choose Page from the context
menu, to display the Page Style dialog. Go to the Footnote tab (Figure 18) and make your
selections, then click OK to save the changes.
Keeping the default setting Not larger than page area, the footnotes area is calculated
automatically on the basis of the number of footnotes. If you prefer to control manually the
maximum space that footnotes can take, select the Maximum footnote height option and enter
the value in the preferred unit of measurement. A footnote higher than the maximum height will spill
over on to the next page. Use the second section of the page to customize the separator between
the footnotes and the main text area.
16 | Chapter 5 Formatting Pages: Basics

Figure 18: Defining footnote location and separator line
Defining borders and backgrounds
You can apply borders and backgrounds to many elements in Writer. Paragraphs, pages, frames,
sections, page styles, paragraph styles, character styles, and frame styles can include both
borders and backgrounds; tables of contents and indexes can include backgrounds only. Text can
have a border applied, either to individual characters or to selected text.
The dialog pages for borders and backgrounds are similar in each case. To illustrate their use, we
will define a border and background for a frame.
Tip
Page backgrounds fill only the area within the margins, including the header or footer
(if any). To extend the background color or graphic into the margins, define a frame of
appropriate size and position, anchor it to the page or to a paragraph, and send it to
the background. For more about frames, see Chapter 6.
Adding a border
To begin, select the frame, right-click, and choose Object from the context menu. Select the
Borders tab (Figure 19).
Borders have three components: where they go, what they look like, and how much space is left
around them.
• Line Arrangement specifies where the borders go. Writer provides five default
arrangements but you can click the line you want to customize in the User-defined area to
get exactly what you want. Each line can be individually formatted.
• Line specifies what the border looks like: the style, width, and color. Each parameter has a
number of attributes to choose from. The attributes selected will apply to those borders
highlighted by a pair of black arrows in the User-defined thumbnail on the left side of the
dialog.
Defining borders and backgrounds | 17

• Spacing to Contents specifies how much space to leave between the border and the
contents of the element. Spaces can be specified to the left, right, above, and below. Select
Synchronize to have the same spacing for all four sides.
• Shadow Style properties always apply to the whole element. A shadow has three
components: where it is (Position), how far from the element it is cast (Distance), and what
color it is.
Figure 19: Frame dialog: Borders page
Adding a color to the background
To begin, select the frame, right-click, and choose Object from the context menu. In the Frame
dialog, select the Area tab (Figure 20), then choose Color. Select from the color grid or create a
new color to use for this frame, and then click OK to apply it to the background.
Figure 20: Frame dialog: Area page showing color choices
18 | Chapter 5 Formatting Pages: Basics
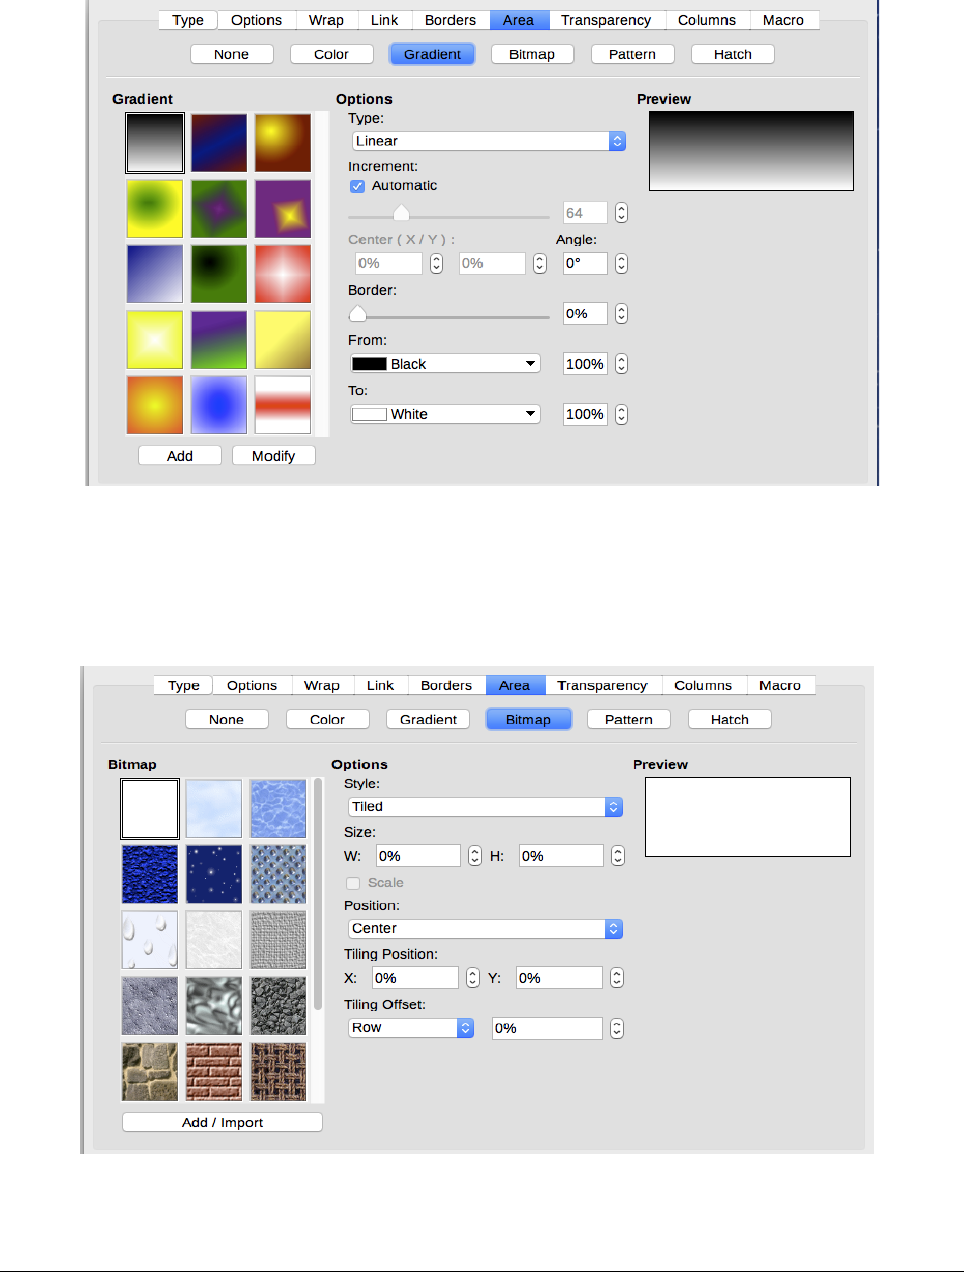
Adding a gradient to the background
To add a gradient to the background, choose the Area page, then choose Gradient. The page now
displays the gradient options (Figure 21), with an example in the preview pane to the right. Select
the required gradient from the list or create a new gradient to use for this frame. Click OK to apply
it to the background.
Figure 21: Frame dialog: Area page showing gradient choices
Adding a bitmap (i,age) to the background
“Bitmap” is a term that covers photos and other images that are made up of dots of color; the
image may be in several formats. To add a bitmap to the background, choose the Area page, then
choose Bitmap. The page now displays the bitmap options, as shown in Figure 22.
Figure 22: Frame dialog: Area page showing bitmap choices
You can choose one of the supplied bitmaps from the list on the left, or you can add your own.
Defining borders and backgrounds | 19

To add a bitmap:
1) Click the Add/Import button. The Import dialog opens.
2) Find the file you want and then click the Open button. The Import dialog closes, and the
selected bitmap appears in the list of thumbnails on the left and in the preview box on the
right of the Area page.
3) Choose the new bitmap in the list on the left.
In the Options area, choose how you want the bitmap to appear, then click OK to apply it to the
background.
Adding a pattern or hatching to the background
Adding a pattern or hatching is similar to adding a gradient.
Figure 23: Frame dialog: Area page showing pattern choices
Figure 24: Frame dialog: Area page showing pattern choices
20 | Chapter 5 Formatting Pages: Basics

Deleting a color, gradient, bitmap, or other background
To delete a color, gradient, bitmap, or other background, select None near the top of the Area page
of the Frame dialog.
Adjusting the transparency of the background
Transparency is useful for creating watermarks (a logo or text in the background of a page,
typically showing the company name or a statement such as Draft) and making colors or
images more pale (for more contrast with the text). The available choices are covered in detail in
the Draw Guide.
Figure 25: Transparency options
Defining borders and backgrounds | 21
